SSD Showing RAW File System: How to Fix it
To fix this issue, simply repair raw SSD with Command Prompt
2 min. read
Updated on
Read our disclosure page to find out how can you help Windows Report sustain the editorial team Read more
Key notes
- Running the disk part command has proven to be quite effective in handling this issue.
- You can repair raw SSD without formatting using chkdsk in Command Prompt.
Have you ever encountered an error message on your SSD showing RAW file system? In this article, we will explore why SSD drives become RAW and provide solutions for resolving this issue.
The issue at hand is similar to the problem discussed in our previous guide with detection error on SSD M.2.
We must delve into its fundamental origin to effectively tackle the matter at hand.
What Is SSD showing RAW file system?
There are many reasons why an SSD may become RAW, whether it occurs gradually over time due to modifications in the file systems. Let’s delve into some of these potential factors.
- Inappropriate use – Neglecting your hard drive maintenance can result in errors. Factors such as physical impact, high temperatures, unexpected power fluctuations, and more can all cause damage to your drives.
- Bad sector – When it comes to computing, a bad sector on a hard disk denotes a damaged storage unit area. Any data stored in that flawed sector will be lost, and the operating system will disregard it while accessing or examining that section.
- File system errors – Have you ever come across a RAW drive? This type of drive lacks any file system and cannot be detected or read by Windows.
How to fix SSD showing RAW file system?
1. Diskpart command
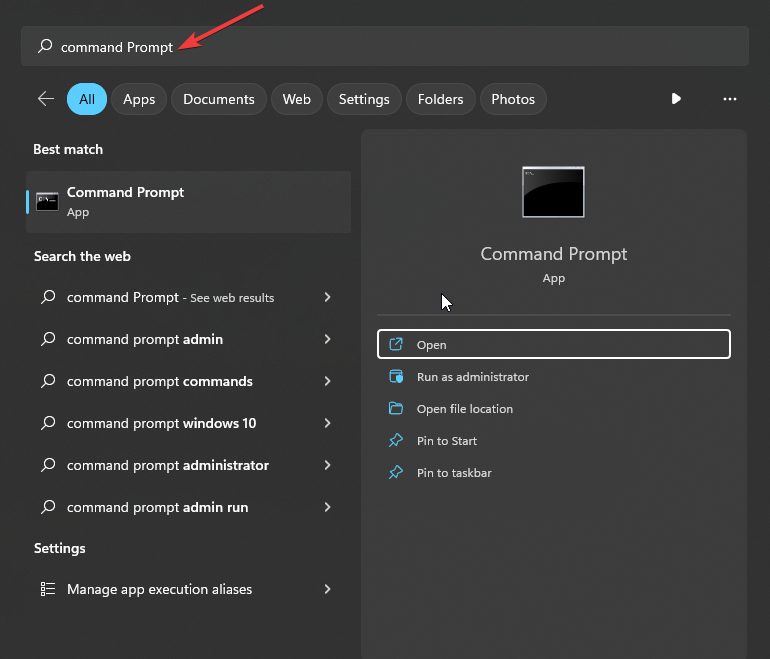
- On your home screen type cmd.
- Now click and open the Command Prompt.
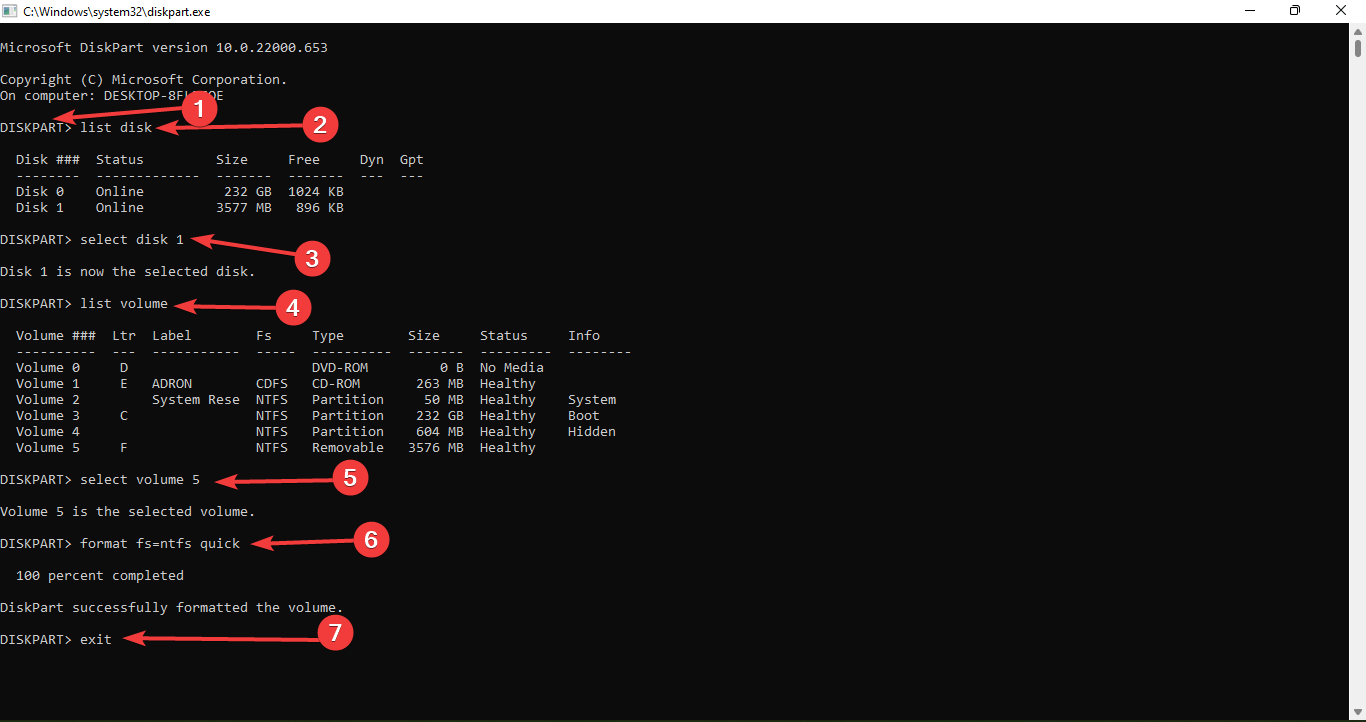
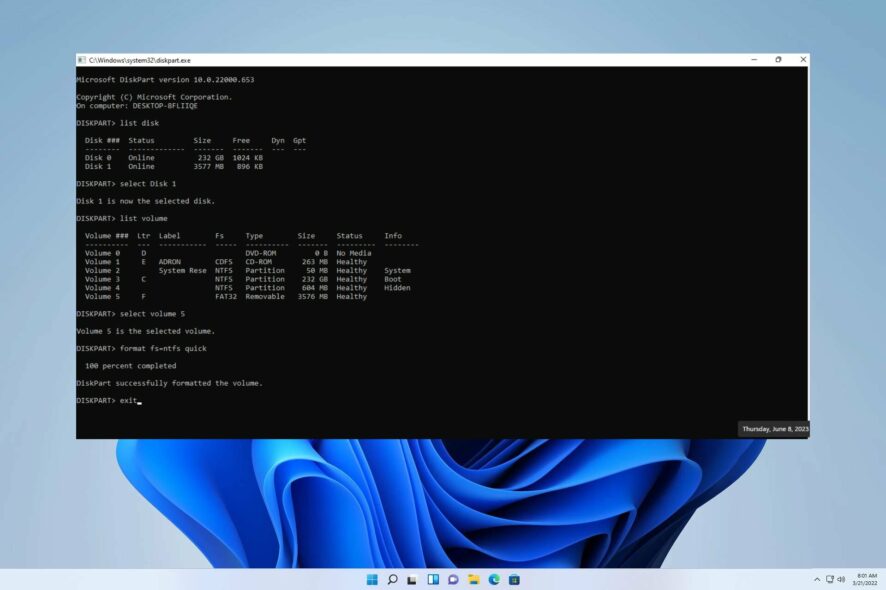
- Enter and Run the Diskpart Commands below to see all the partitions on your system. This will also exhibit the RAW hard drive too.
diskpart
list disk
select disk 1
list volume
select volume 5
format fs=ntfs quick
exit
2. Use chkdsk
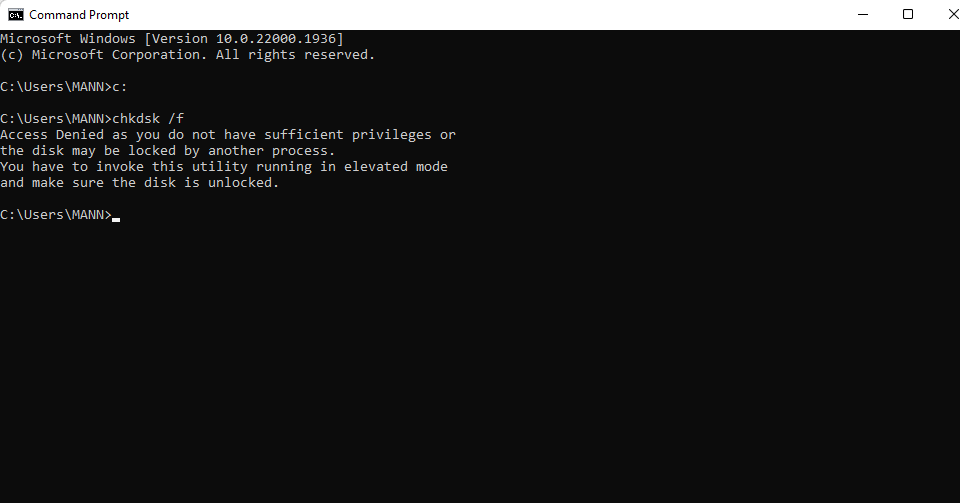
- Start CMD from Run.
- Type h: and press Enter. Be sure to use the letter that matches your SSD.
- Type the following and press Enter:
chkdsk /f
We hope that this guide has helped resolve your issue. Tackling this problem is simpler than you may have first imagined.
If you encounter any additional obstacles, we suggest delving into our guide on SSD error 2100. This will provide you with similar solutions to your issue.
We highly value your input on the efficacy of the solution you have found. Please take a moment to leave a comment below and share your thoughts with us. Your feedback is greatly appreciated.

