Solved: Account Picture Error This Picture Couldn't be Saved
Out with the old pictures, in with the new

An Account picture error. This picture couldn’t be saved error message on your screen when you’re trying to set up a profile picture for your user account on Windows can happen to anyone.
Setting up a profile picture, aside from basic identification also helps you differentiate between the various local accounts on a PC.
If you’ve previously been able to do it but all of a sudden you get this error, it could be a corrupt Windows update, corrupt user account or system files.
How do I fix the Account picture error This picture couldn’t be saved error?
1. Delete the old pictures from your account
- Press the Windows + R keys to open the Run dialog box.
- Copy and paste the following directory into the text bar:
C:\Users\yourname\AppData\Roaming\Microsoft\Windows\AccountPictures
- Note that the Yourname entry above should be changed to your username.

- Select and delete all the pictures in this account.
- Restart your PC and try changing your Windows profile picture to check if it updates.
2. Uninstall recent Windows update
- Press the Windows + I keys simultaneously to open Settings.

- Navigate to Windows Update, then go to Update history.
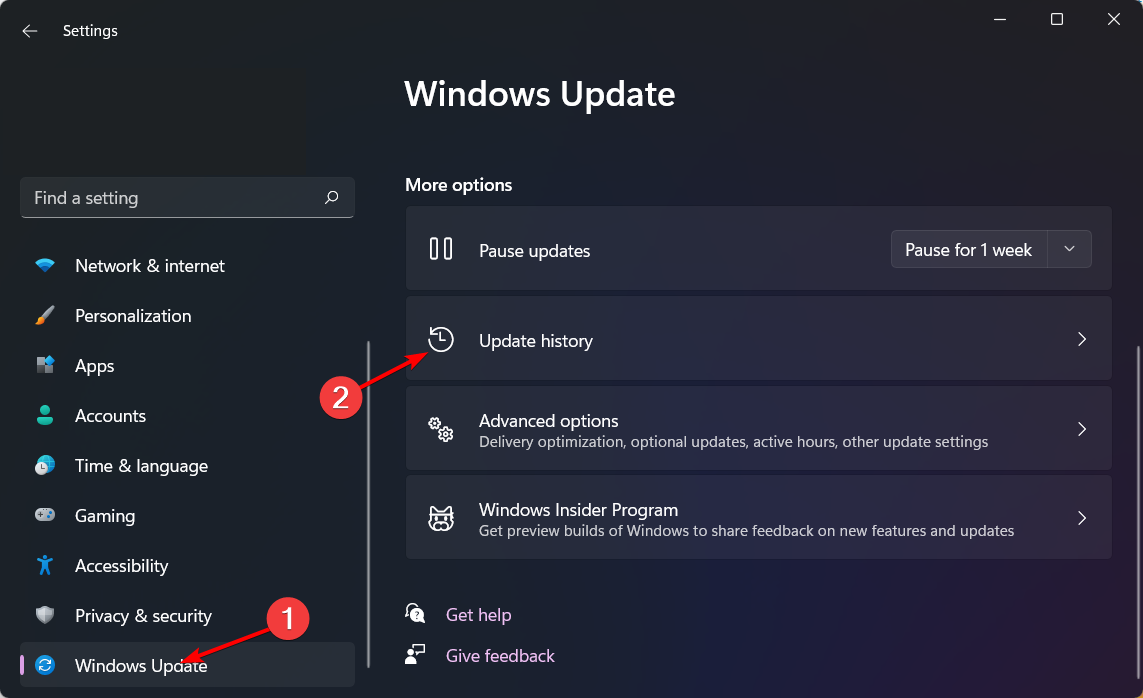
- Click on Uninstall updates.
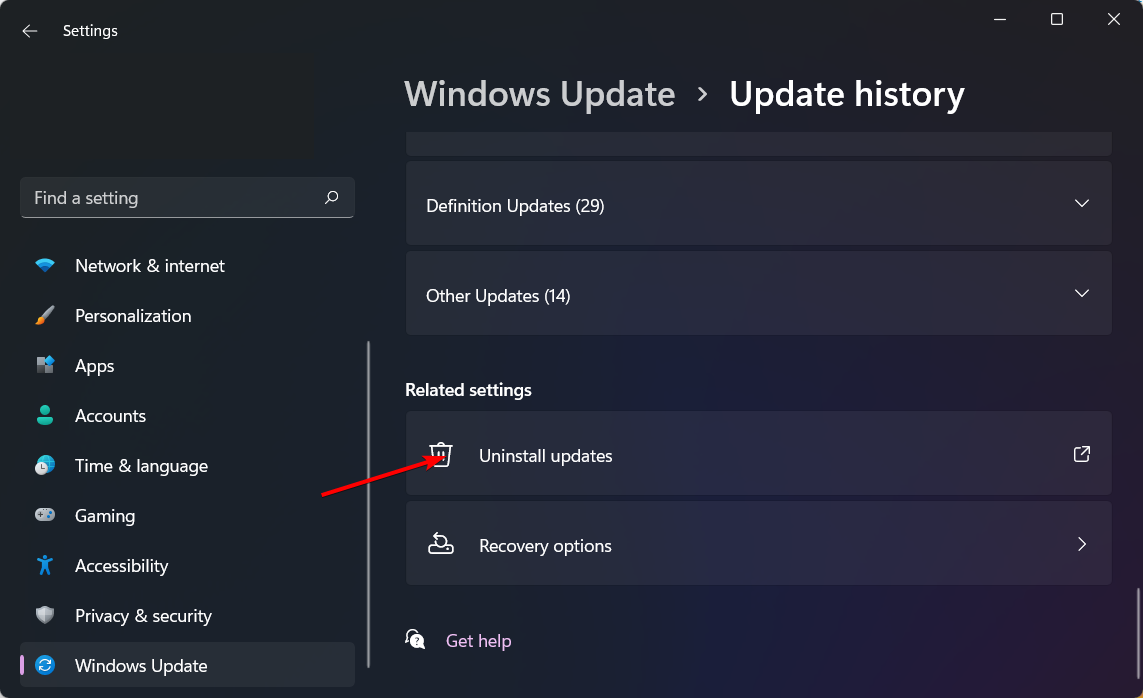
- Select the most recent update, then click Uninstall.
If after uninstalling the Account picture error. This picture couldn’t be saved message disappears, it is possible the latest patch updates were corrupts.
It’s risky to operate an out-of-date OS so keep an eye on Microsoft updates and see if they’ve released bug fixes and install the update once it’s available again.
3. Perform a DISM and System File Checker scan
- Hit the Start Menu icon, type cmd in the search bar, and click Run as administrator.

- Type the following commands and press Enter after each one:
DISM.exe /Online /Cleanup-Image /Restorehealthsfc /scannow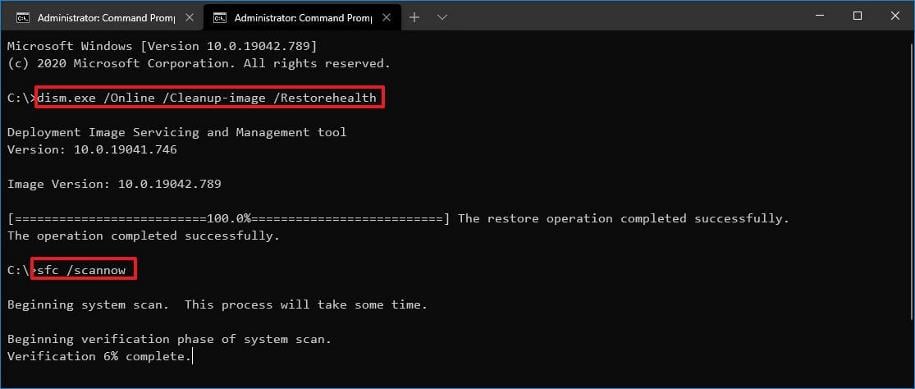
4. Repair the user profile
- Before you start making any changes, ensure you back up your Registry or create a restore point as some changes can make your PC unstable.
- Press Windows + R to open the Run dialog box.

- Type Regedit and click OK to open Registry Editor.
- Navigate to this path:
Computer\HKEY_LOCAL_MACHINE\Software\Microsoft\Windows NT\CurrentVersion\ProfileList - Check the entries under ProfileList for duplicates. The entries will have similar names, and one will have a .bak file. Rename the .bak extension to .ba. If you can’t find your user profile in the Registry, check out our article.
- For the next duplicate entry, rename it but add the .bak extension. Remove all the other extensions if duplicate entries are present.

- Now delete the .Ba extension from the entry that you renamed
- Select the entry and double-click the State key from the left pane. Change the Value data from 1 to 0 and click OK.

- Now double-click RefCount and modify the Value data from 0 to 1. Click OK.
- Close the Registry and restart your computer in normal mode.
Repairing your user profile involves recreating your profile cache. if it was corrupt, rebuilding it could help reset specific settings and allow the system to recognize the changes being made the next time you try to change and save your profile picture.
However, if a repair doesn’t work, you can always copy your user profile to another and delete your old user profile or create another one altogether.
5. Create a new user profile
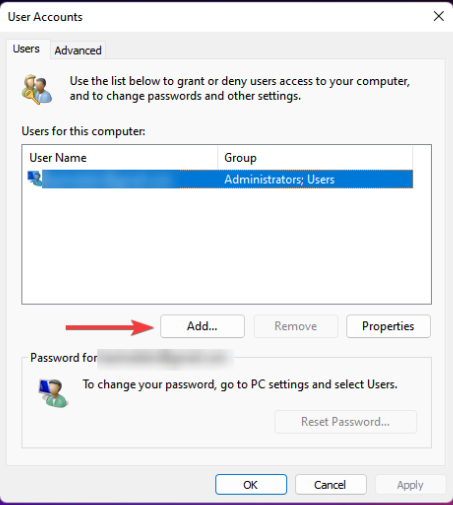
- Press Windows + R to launch the Run console, enter netplwiz in the text field, and click OK.
- Click Add in the User Accounts window.
- Select Sign in without a Microsoft account (not recommended).
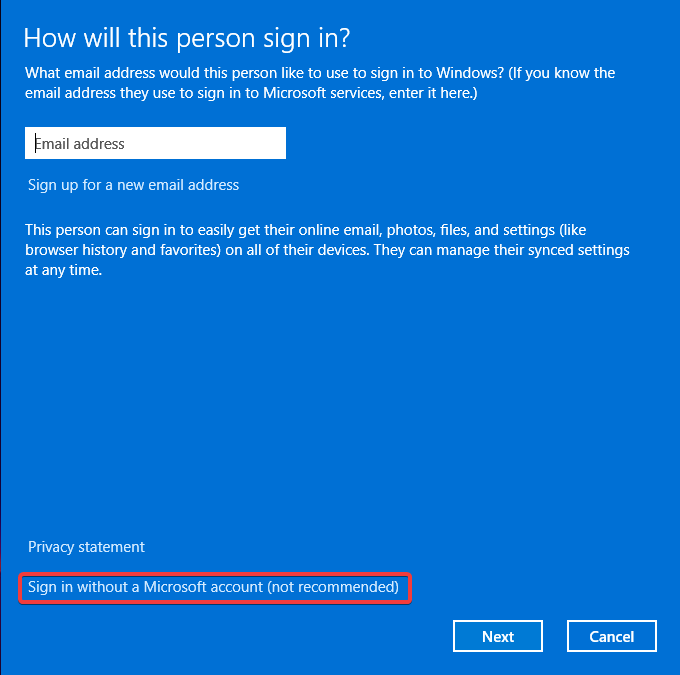
- Click on Local account button.

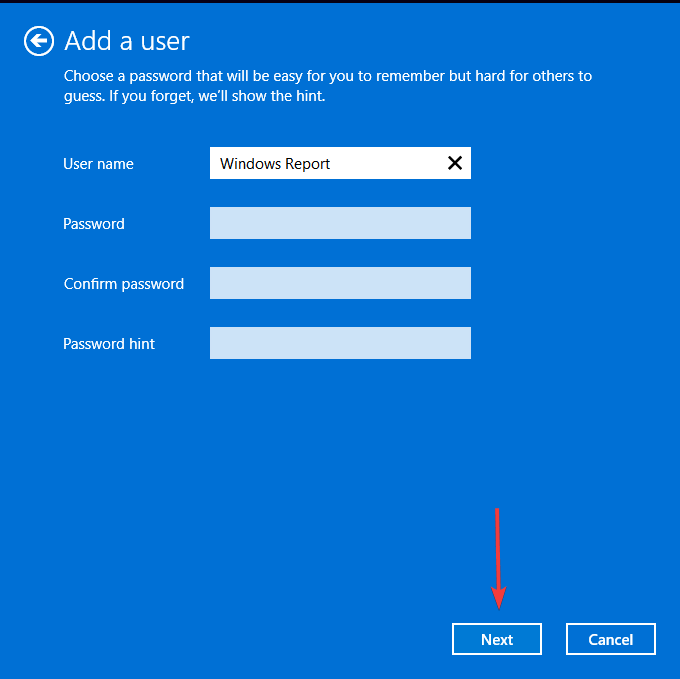
- Enter a username and password (optional) for the new user account, and a hint, in case you set a password. Once done, click on Next.
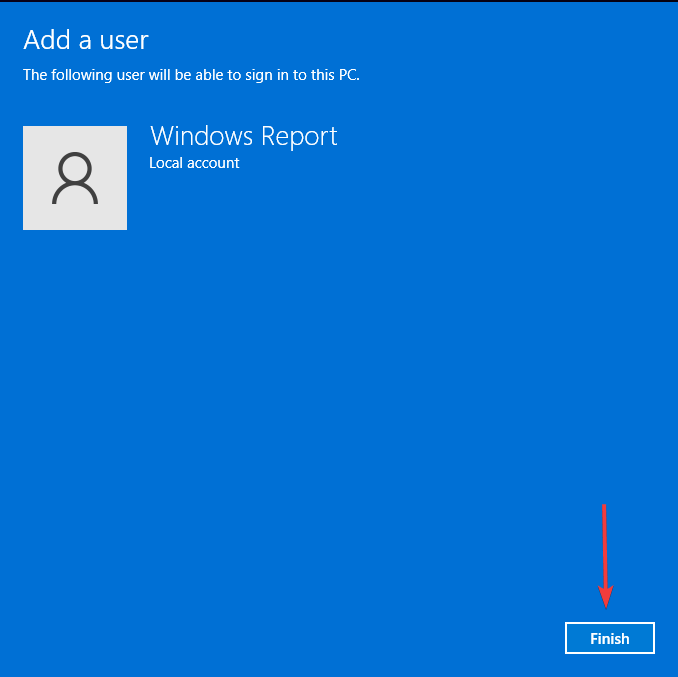
- Click on Finish to create the Local account.
The purpose of creating a local account is to isolate the Account picture error. This picture couldn’t be saved message. It could be a Microsoft-related issue preventing your profile picture from updating.
If a local account profile picture goes through, you can wait it out and try it later with the Microsoft account.
6. Perform a System Restore
- Press the Windows key, type Control Panel, and click Open.

- Select Large icons for View as and click Recovery.

- Click Open System Restore.

- Select Choose a different restore point in the System Restore window and click Next.

- Choose the restore point and click Next.

- Click Finish, and the computer will restart. It will revert all system settings and changes in Registry values.

Aside from your user account profile picture, you can also change your Microsoft 365 profile picture to reflect across all apps to maintain a uniform image.
That’s all we had for this article but if you have any other solutions that you think we should check out, feel free to leave a comment down below.
Read our disclosure page to find out how can you help Windows Report sustain the editorial team. Read more


Improve this guide


User forum
0 messages