FIX: System Thread exception not handled in Windows 10/11
Key notes
- The system thread exception not handled in Windows 10 is a very common BSoD error.
- It has many variations, such as the system thread exception not handled loop error.
- Fixing it is fairly easy, as it can be done via a driver update, or by using recovery media.
- Disabling your antivirus can also be a good system thread exception not handled Windows 10 fix.
One of the problems that bothered users of Windows 7 and Windows 8.x is still present in Windows 10. That problem is annoying BSOD caused when the system thread exception is not handled.
So, in this article, I’m going to give you a couple of solutions for fixing this problem. The most common cause of the ‘system thread exception not handled’ problem in Windows operating systems is an outdated graphics card driver.
This is especially the case in Windows 10 because we already know that some manufacturers still don’t have all necessary the drivers for their hardware so as to make them compatible with Windows 10.
So if you faced this issue only after the upgrade to Windows 10, it’s probably driver-related.
Another, less-common thing that could cause the BSOD because system thread exception is not handled is a conflict between two programs (probably an antivirus) or features. So we’re going to cover this case, as well.
This particular BSoD error has many variations, including:
- system thread exception not handled installing windows 10 system
- system_thread_exception_not_handled ffffffff`c0000005 stop code
- system_thread_exception_not_handled msdn bugcheck
How do I fix system thread exception BSoDs?
- Install the latest graphics drivers
- Use Windows 10 Recovery Media
- Disable third-party antivirus
- Use SFC Command Line
1. Install the latest graphics drivers
- Go to Search, type devicemngr and open Device Manager.
- In Device Manager, find your graphic card, under Display Adapters
- Right-click on it and go to Uninstall.
- Now go to your graphics card or laptop manufacturer’s website and download the latest driver compatible with your graphics card.
- Restart your computer and see if the BSOD still appears.
Let’s talk about the most common cause of this problem, first, an outdated graphics driver. There are two possible scenarios for your computer.
- First: BSOD appears, but you’re able to restart your computer and work for some time.
- Second: BSOD appears, and even after you restart your computer, it’s still here.
- If you’re facing the first scenario, things are lot simpler, you just need to uninstall your current driver and then install the latest version.
On the other hand, there’s always the option of using third-party tools that can help you with any driver issue, especially if you want things to be done fast.
2. Use Windows 10 Recovery Media
- Restart your computer and insert Windows 10 recovery media.
- f you upgraded your system through Windows Update, and don’t have a recovery USB or CD, you’ll have to download the ISO file, and create it from another computer .
- On Windows Setup window, click Next.
- After that, go to Repair your computer.
- On Choose an option screen, click Troubleshoot.
- On Troubleshoot screen, go to Advanced options.
- On Advanced options screen, click Command Prompt.
- In the Command Prompt enter the following line and press Enter:
BCDEDIT /SET {DEFAULT} BOOTMENUPOLICY LEGACY - After the command is successfully executed, type EXIT to close the Command Prompt.
- You’ll get back to the Choose an option screen, click Continue to restart the computer.
- On the boot, press F8 continuously to enter the Advanced Boot Options.
- Now select Safe Mode with Networking and press Enter.
- Log in to your Windows 10 with the account that has admin rights.
- When you get to your Desktop, just follow the steps from the case above, and you should be able to reset your graphics driver.
Okay, this should solve your problem in the first scenario, but if you can’t get rid of the blue screen even after you restart your computer, things will be a little more complicated.
If an outdated driver is a cause, one of these solutions will probably solve the problem. On the other hand, if the third-party software causes the problem, disabling it will probably solve the problem.
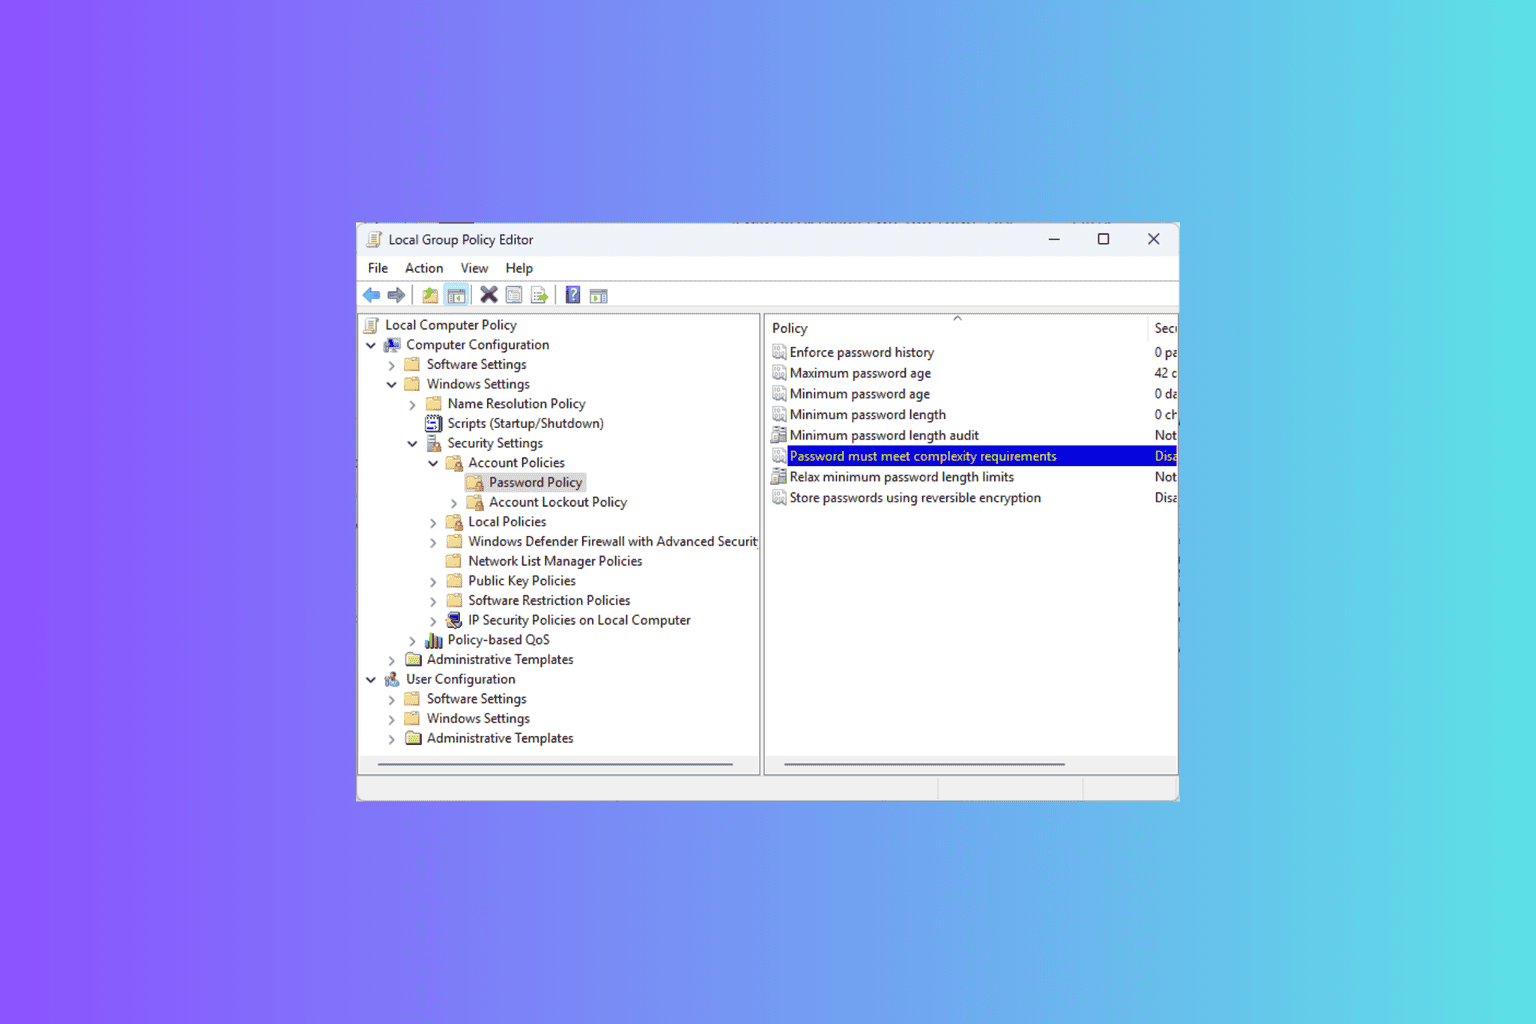
3. Disable third-party antivirus
As I said, a third-party program, most commonly an antivirus could have some sort of conflict with some other program or system feature.
So, just in case, disable your antivirus first, and replace it with Microsoft’s built-in Windows Defender.
Don’t worry, because Windows Defender is almost as powerful as some expensive, third-party antivirus. In my opinion, it is enough to keep your system safe.
Also, your antivirus may not be compatible with Windows 10, so before you decide to install the new antivirus on your computer, you should check the list of all antivirus programs that are compatible with Windows 10.
4. Use SFC Command Line
- Hit Windows Key + X on your keyboard, select RUN and type in the dialog box CMD to open Command Prompt
- In the box type in sfc /scannow and hit Enter key
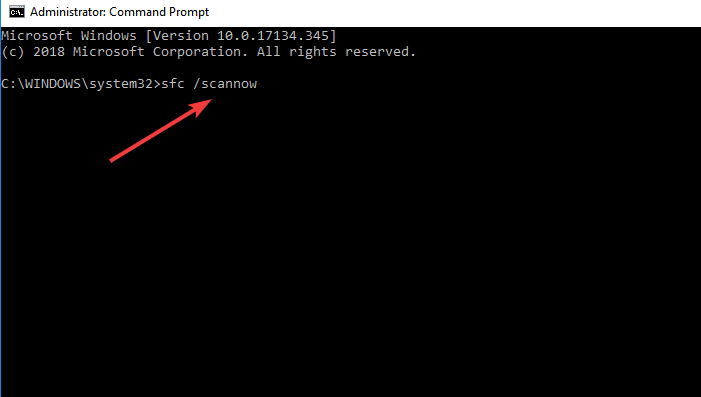
- Wait until the scan is complete
- Restart your Windows 10 computer.
This command will scan your computer and if there are some errors, Windows 10 will automatically solve them.
By following these methods, you should be able to fix your Windows 10 PC and no longer encounter the Exception Thread BSoD error.
If you have any other Windows 10-related issues you can check for the solution in our Windows 10 Fix section.
Read our disclosure page to find out how can you help Windows Report sustain the editorial team. Read more


Improve this guide


User forum
1 messages