FIX: The disc image file is corrupted error in Windows 10/11
4 min. read
Updated on
Read our disclosure page to find out how can you help Windows Report sustain the editorial team. Read more
If you are using Windows Explorer to mount the file or a third-party application, read this troubleshooting guide to learn how you can fix your Windows 10 .ISO file.
One of the main reasons for which you’re getting the file has been corrupted error is the fact that you previously installed a third-party ISO application on your Windows 10 computer.
Another possible explanation is that certain system files have been corrupted since your last used Windows Explorer.
How can I fix The disc image file has been corrupted error?
- Uninstall your ISO app and install a proper one
- Repair your third-party app
- Launch System File Checker
- Download the ISO file again
- Use DISM with RestoreHealth
1. Uninstall your ISO app and install a proper one
- Go to Search.
- In the search box, type Control Panel.
- Select the Control Panel icon after the search has finished.
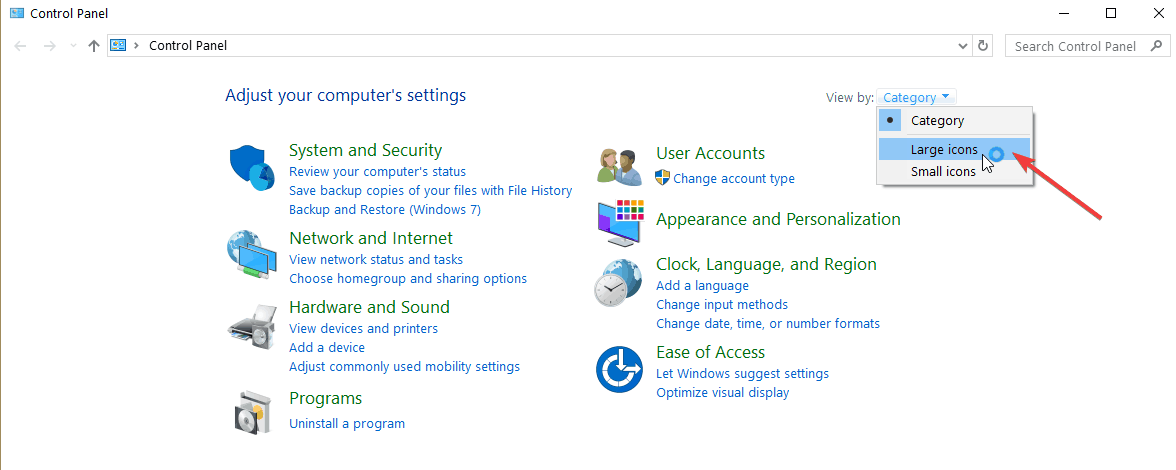
- Select the View by drop-down menu and left-click on Large icons.
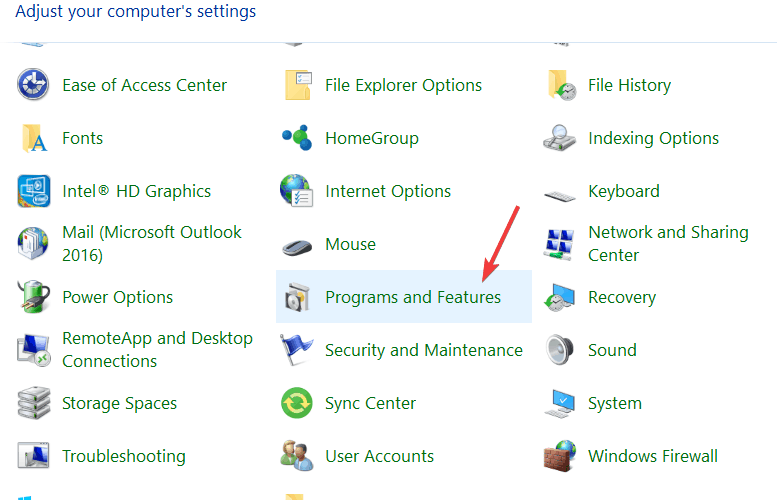
- Open the Programs and features.
- Left-click on the third party ISO application.
- Select the Uninstall button now.
- Follow the on-screen instructions to finish the uninstall process.
If you need additional info on how to uninstall programs and apps on Windows 10, we’ve written a dedicated guide on this subject.

Now that you uninstalled the ISO app, did you know that you can also extract the image by using WinZip ISO files are basically archives so here’s how you can extract them in just 4 easy steps:
- Launch WinZip and open the compressed file by clicking File > Open and select the ISO file.
- Select all the files inside the ISO file (you can select multiple files by keeping the CTRL key pressed and left-clicking on them).
- Click on 1-click Unzip and select Unzip to PC or Cloud in the WinZip toolbar from the Unzip/Share tab.
- Choose a destination folder where you want to extract the files and click on the Unzip button.
”WinZip”
”Forget2. Repair your third-party app
- Go to Search > in the Search dialog box, and type Control Panel without the quotes.
- Select the Control Panel icon after the search process has finished.
- Click on View by in the Control Panel window.
- Select the Large Icons option.
- Find Programs and Features and open it.
- Select the application you are trying to use for the ISO file or any third-party ISO application and click on the Repair or Change button.
- Follow the on-screen instructions to finish the process and reboot your Windows 10 computer.
3. Launch System File Checker
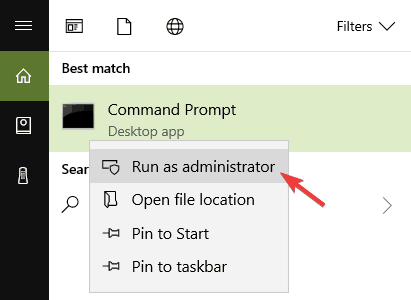
- Go to Start, type cmd, and right-click on the first result to launch Command Prompt as administrator.
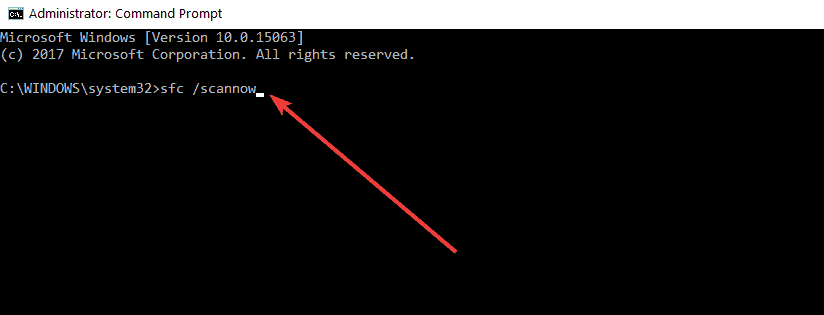
- Enter the sfc /scannow command.
- Press the Enter key on the keyboard.
- Let the System File Checker do its job and repair any errors it may find in the system.
- Reboot the Windows 10 operating system after the process has finished.
- Check again to see if your .ISO file can be mounted correctly in your operating system.
If you’re having trouble accessing Command Prompt as an admin, then you better take a closer look on this guide to fix this problem.
4. Download the ISO file again
Go again to Microsoft’s website where you downloaded the .ISO file and redo the process. Sometimes the download process can get interrupted at one point or another resulting in an unfinished download.
Yes, as simple as this solution may seem, quite a few users confirmed they managed to fix the problem by relaunching the ISO download process.
5. Use DISM with RestoreHealth
- Go to Start > type cmd > right-click on Command Prompt and launch the tool as Administrator
- Now, you’re going to run three different commands to repair Windows image corruption issues:
DISM /Online /Cleanup-Image /CheckHealthDISM /Online /Cleanup-Image /ScanHealthDISM /Online /Cleanup-Image /RestoreHealth
Hit Enter after each command. Wait until the current command has completed the scanning process before entering the next one.
Keep in mind that the whole process might sometimes take up to 30 minutes.
If you followed the steps above, your .ISO file mounting issues should be history now.
We also have a great guide on Bound Image Unsupported error, so don’t miss it since it might give you additional insight.
If you do have other questions or you ran into any issues while following the steps listed in this tutorial, let us know in the comments below.




User forum
0 messages