Too many posts were made to a semaphore [FIX]
6 min. read
Updated on
Read our disclosure page to find out how can you help Windows Report sustain the editorial team. Read more
Key notes
- The ERROR_TOO_MANY_POSTS error can be recognized by its Too many posts were made to a semaphore message.
- There might be many causes of this but most of them point to your antivirus.
- For any other Windows 10 errors, check out our dedicated Troubleshooting section.
- Visit our Windows 10 Hub for the most comprehensive information about this OS.

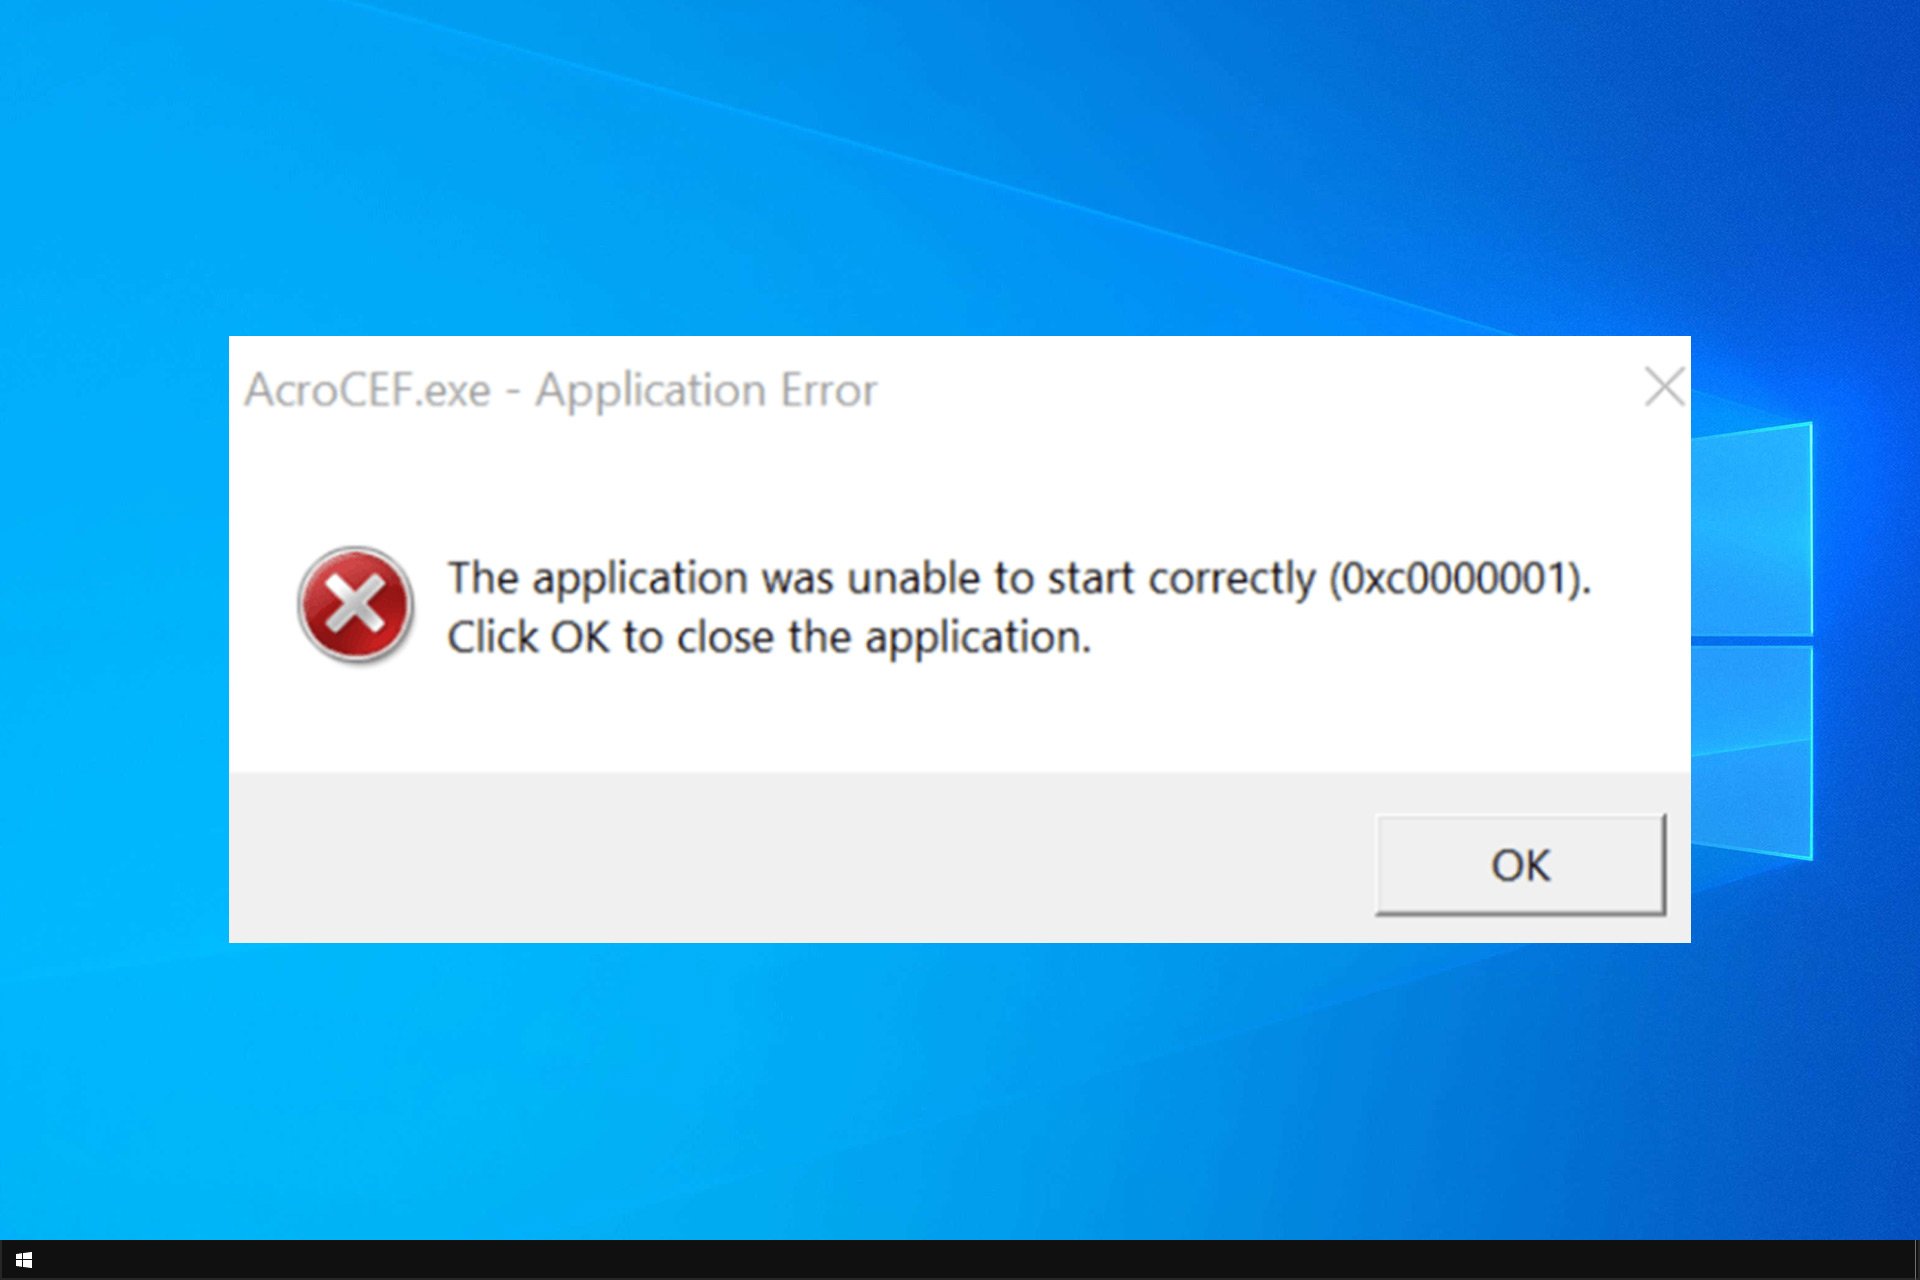
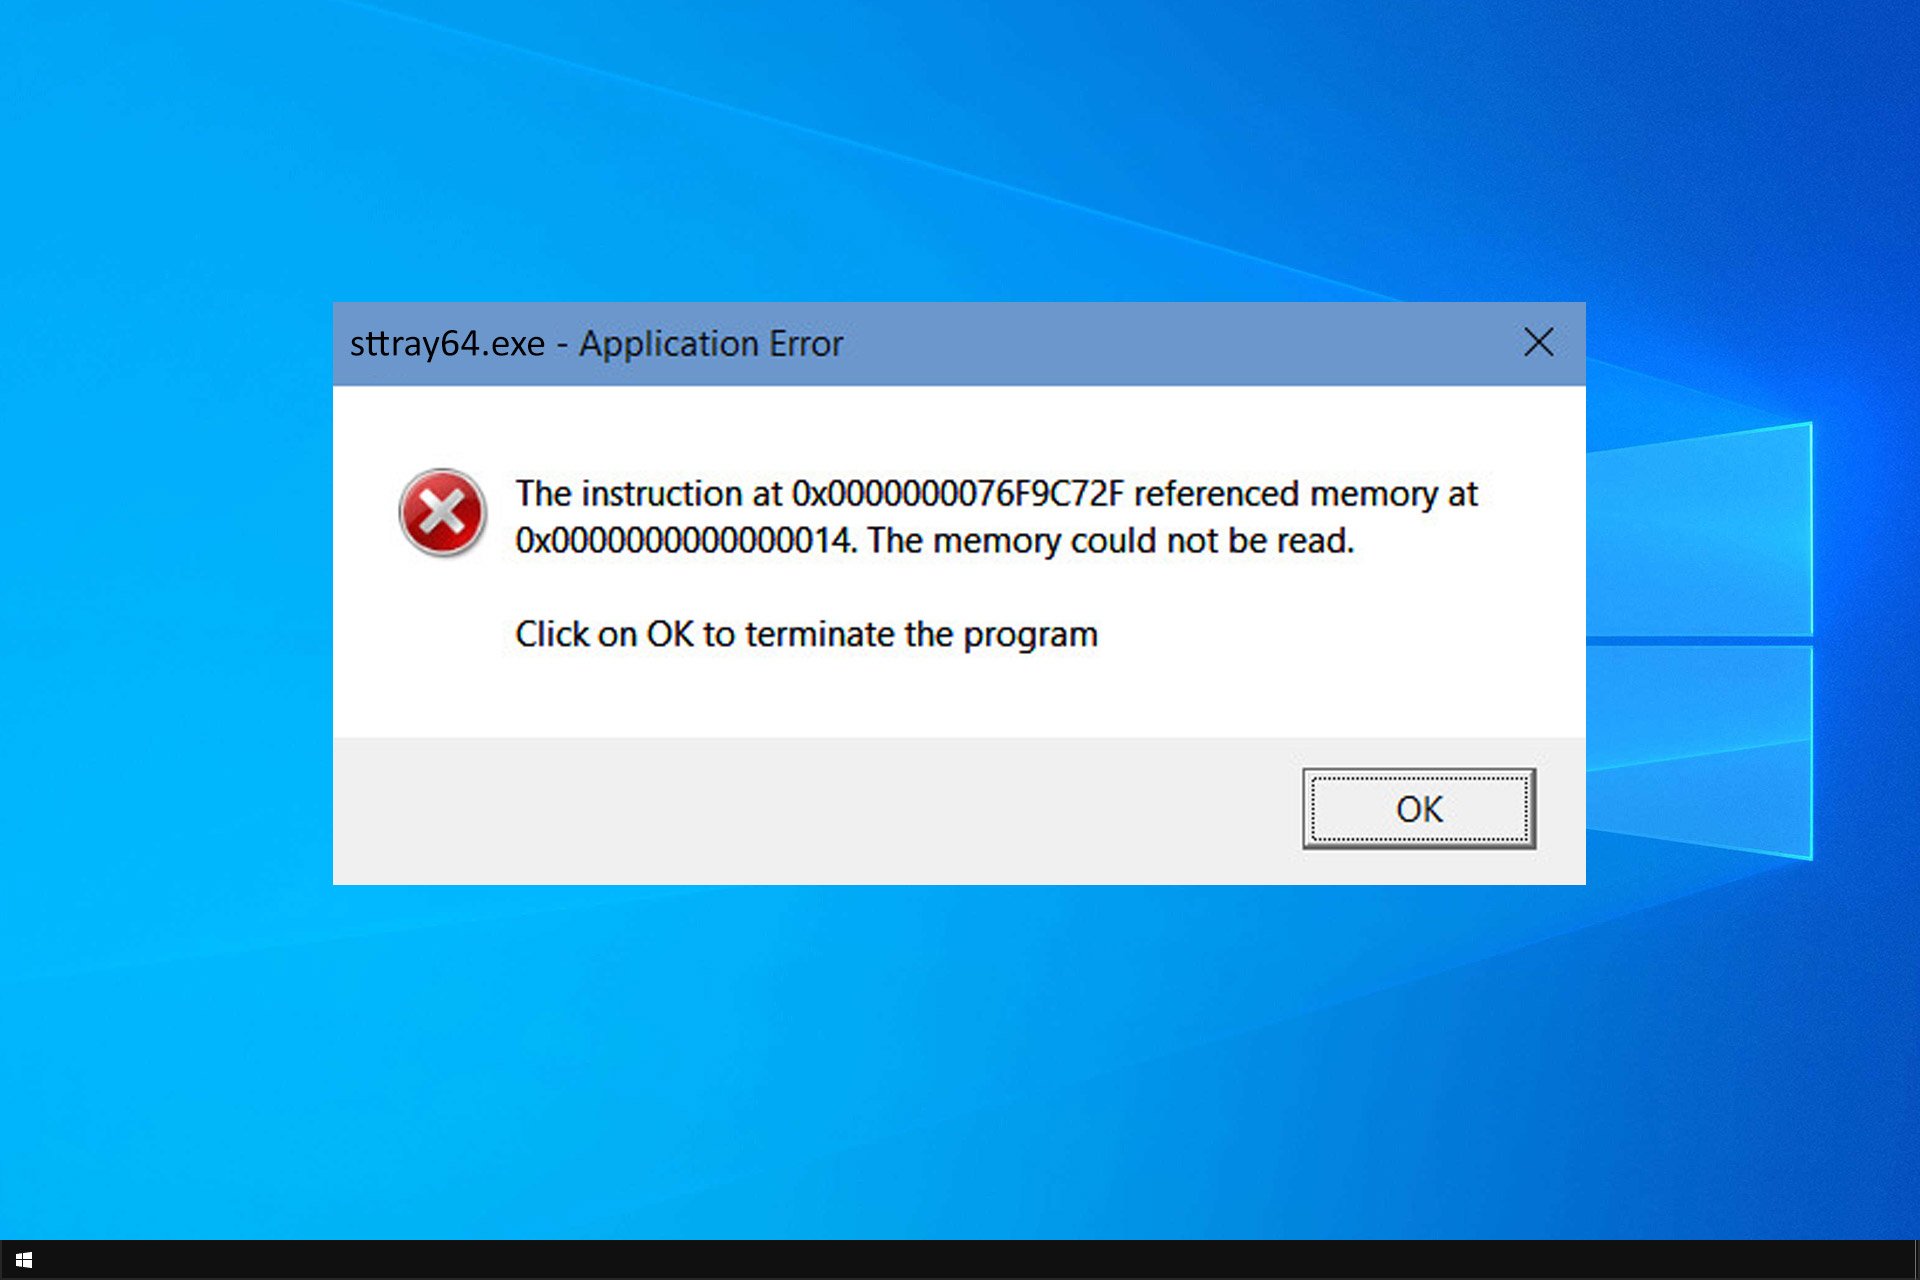
System errors can affect almost any operating system, and one of those errors is ERROR_TOO_MANY_POSTS.
You can easily recognize this error by its Too many posts were made to a semaphore message, and in this guide, we’re going to show you how to fix it.
How can I fix the ERROR_TOO_MANY_POSTS error?
1. Disable or remove your antivirus
Your antivirus can cause these types of problems to appear. If you can’t find the security feature that is causing the problem, you might want to try disabling your antivirus entirely.
Keep in mind that disabling your antivirus won’t leave your system vulnerable because Windows 10 comes with Windows Defender which works as a default antivirus.
If disabling the antivirus doesn’t solve the issue, you should consider removing your antivirus software. Keep in mind that antivirus tools tend to leave certain files and registry entries behind even after you uninstall them.
These files can also interfere with your system, therefore we recommend using a dedicated removal tool.
Uninstaller software is easy to work with. They are able to get rid of your old antivirus within seconds without leaving any traces behind. We recommend trying the CCleaner because it’s easy to work with and it will get rid of the old antivirus in seconds without leaving any leftovers behind.
If removing the antivirus fixes the problem, try switching to a different antivirus tool and check if the problem appears again.
Modern-day antiviruses are configured to protect your system without affecting its functionality or performance. It may be a good idea to get an antivirus with low CPU usage.
Additionally, make sure that the security software of your choice has a strong firewall and multi-layered protection. Online security features are also very important.
2. Install the latest Windows updates
- Press Windows Key + I to open the Settings app.
- Navigate to the Update & security section and click on Check for updates button.
Windows will now check if your system is up to date. If any update is available, Windows will download it automatically in the background. After updating the system to the latest version, check if the error message still appears.
Note: Windows 10 is a great operating system, but it has few bugs and compatibility issues. Sometimes system bugs can cause this error to appear while trying to run specific apps.
To make sure that your PC is bug-free, it’s always a good idea to keep your Windows up to date. The updating process is streamlined in Windows 10 and all important updates are downloaded automatically in the background.
3. Perform a Clean boot
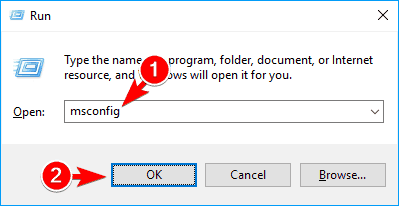
- Press Windows Key + R, type msconfig and press Enter or click OK.
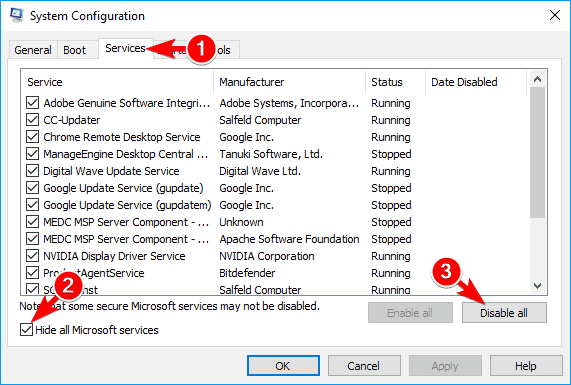
- Go to the Services tab and check the Hide all Microsoft services box. Now click on Disable all button.
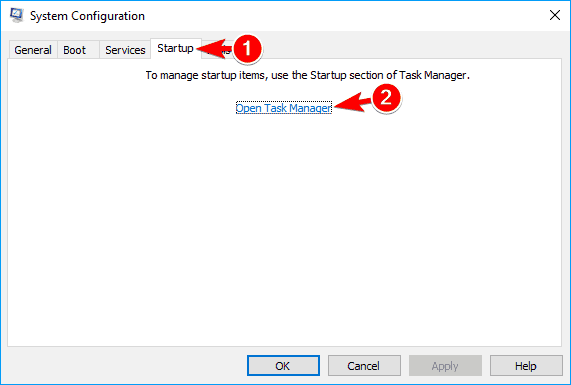
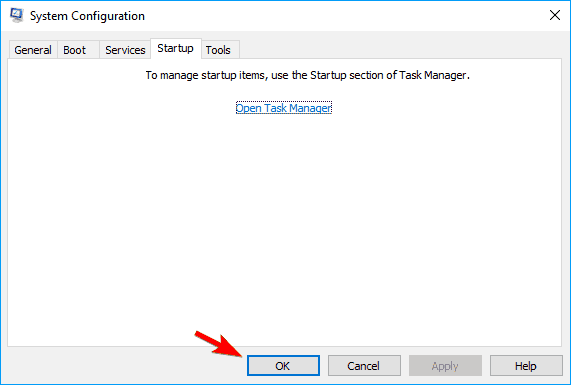
- Navigate to the Startup tab and click on Open Task Manager.
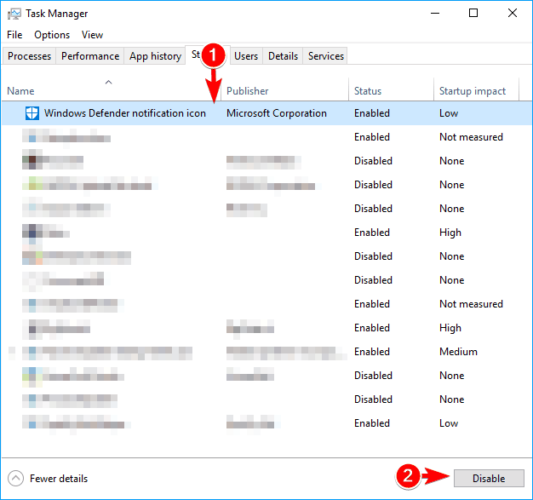
- Select the first item on the list and click on the Disable button. Repeat this step for all entries on the list to disable them.
- After disabling all startup applications, close the Task Manager. Now navigate back to System Configuration window and click on Apply and OK to save the changes.
- Restart your PC to apply the changes.
 NOTE
NOTE
To find the problematic application you need to enable applications and services one by one or in groups. Keep in mind that you need to restart your PC after enabling each set of applications in order to apply changes.
After you find the problematic application, you can keep it disabled, update it , or remove it from your PC.
4. Keep your apps updated
We already mentioned that you need to keep Windows up to date if you want to be sure that your system is bug-free.
Since third-party apps can cause this problem to appear, it’s important to keep them all up to date in order to reduce the chance of any bugs.
If the problem appears while trying to run a specific application, you can try updating that app to the latest version and check if that solves the problem.
In addition to updating your apps, you can also try to reinstall the problematic application as a potential solution.
5. Remove any recently installed applications
5.1 Use the Apps section
- Open the Settings app.
- Go to Apps section.
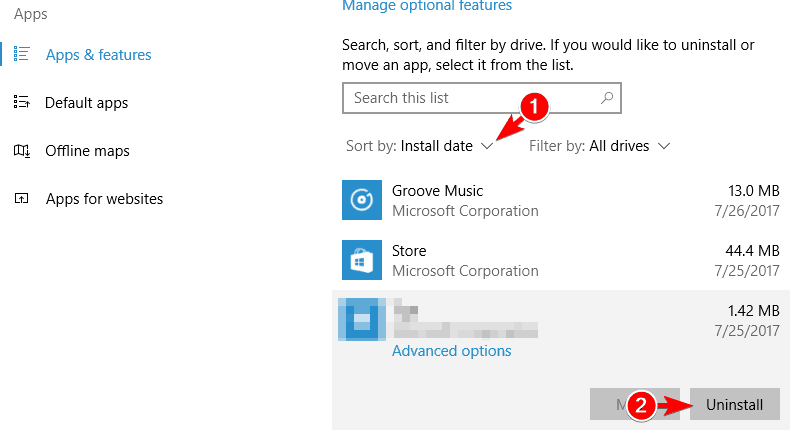
- Set Sort by to Install date. Select the application you want to remove and click the Uninstall button. Follow the instructions on the screen to remove the application.
- Repeat this step for several recently installed apps.
5.2 Use Control Panel to remove the application
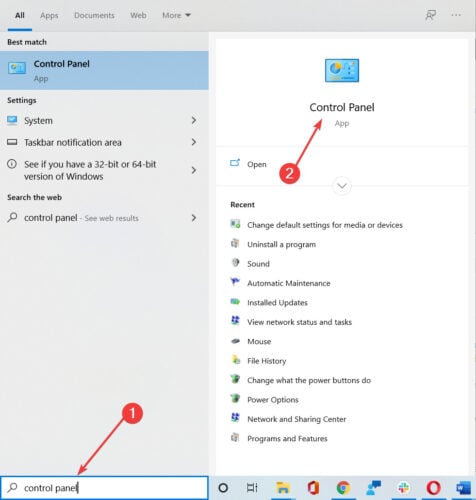
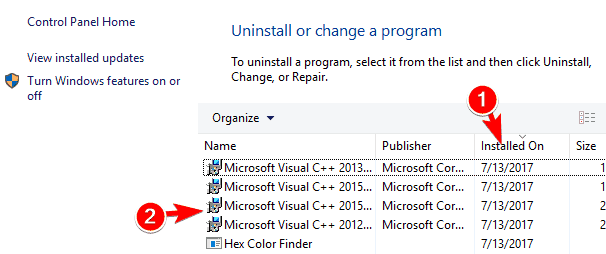
- Search for control panel and select it from the results.
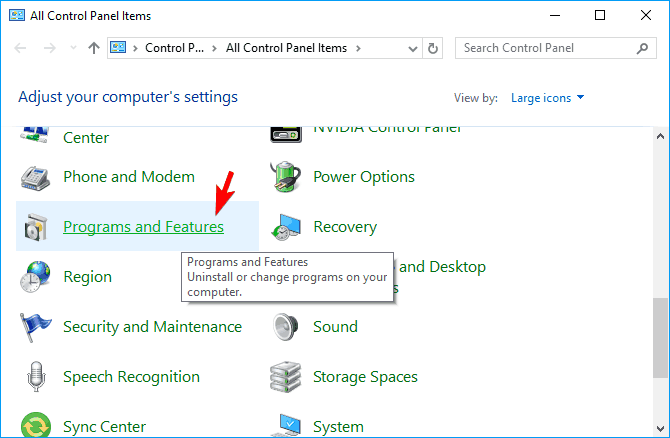
- Select Programs and Features.
- Click on Installed On.
- To remove an application, simply double click it and follow the instructions on the screen. Repeat this step for several recently installed applications.
 NOTE
NOTE
Universal apps aren’t related to this issue, so there’s no need to remove them in order to fix the problem.
6. Perform a System Restore
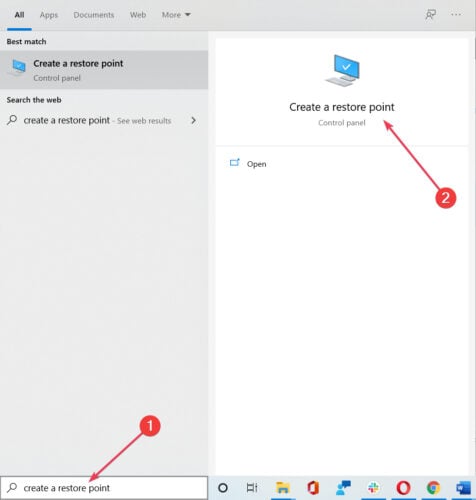
- Search for create a restore point and select the feature from the results.
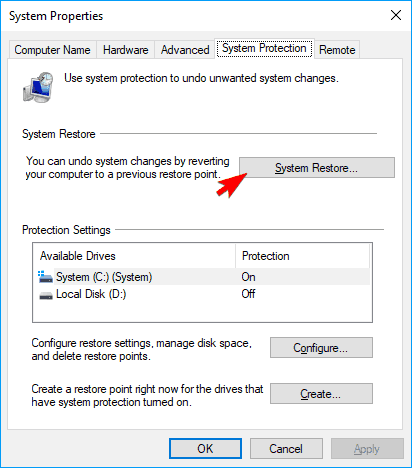
- Click on the System Restore button.
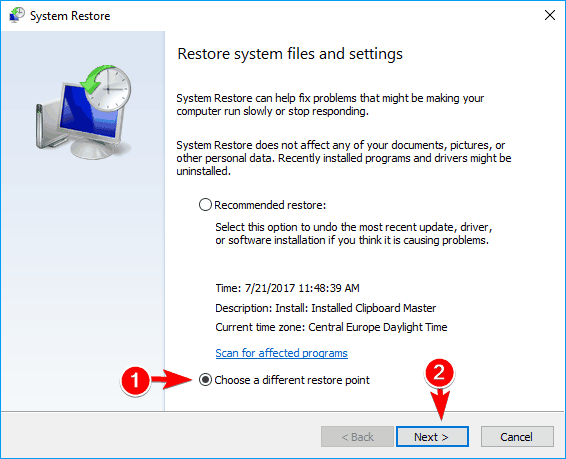
- Select Choose a different restore point and click on Next.
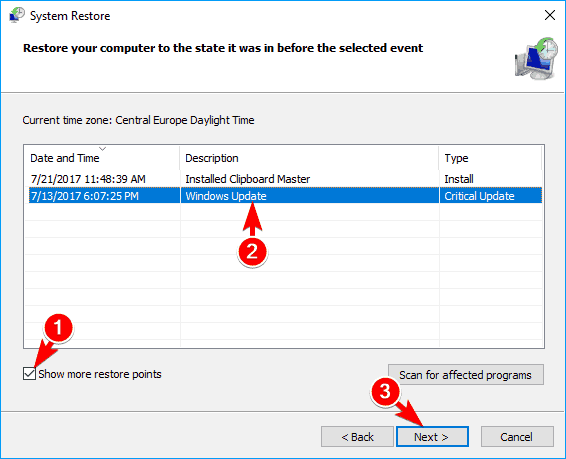
- Check Show more restore points option and select the desired restore point. Click the Next button to proceed.
- Follow the instructions on the screen to complete the restoration.
Once your PC is restored, the problem should be fixed and everything should work normally.
 NOTE
NOTE
Keep in mind that this process can remove any recently saved files, so if you have any important files be sure to back them up in advance.
7. Reset Windows 10
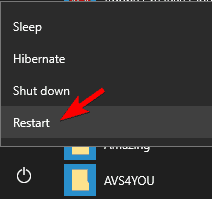
- Open the Start Menu and click on Power button. Press and hold Shift on your keyboard and choose Restart from the menu.
- You’ll see a list of options. Select Troubleshoot, then Reset this PC and click on Remove everything. You might be asked to insert your installation media, so be sure to have it ready.
- Select your version of Windows and choose Only the drive where Windows is installed and select Just remove my files.
- You’ll now see a list of changes that the reset will make. Click on Reset to continue.
- Follow the instructions on the screen to complete the process.
 NOTE
NOTE
After you reset Windows 10, you’ll have to install all your applications and move files from the backup. This solution will remove all files from your system drive, so you should use it only if other solutions can’t fix the problem.
Too many posts were made to a semaphore message and the ERROR_TOO_MANY_POSTS error can cause some problems on your PC and prevent you from running certain apps. However, we hope that you managed to solve these problems by using one of our solutions.





User forum
0 messages