UNetbootin Windows Failed to Start: How to Fix + Video
Fixing UNnetbootin is as easy as reconfiguring your BIOS setup

UNetbootin is a popular Windows utility to create bootable USB flash drives for Ubuntu and other Linux distributions. At times UNnetbootin is not working on Windows 10, and this is usually followed by the Failed to start error.
The full error reads Windows failed to start A recent hardware or software change might be the cause. This error is usually triggered if the Live USB was not created properly, and in this guide, we’ll show you how to fix this issue.
How do I fix UNetbootin error?
1. Change BIOS Setup
1. Press the Windows key + I to open Settings.
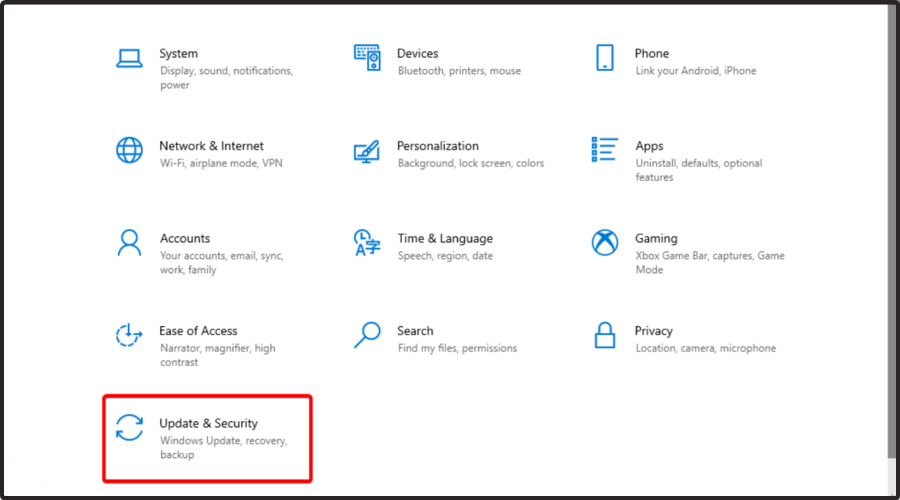
2. Go to Update & Security.
3. Open the Recovery tab from the left pane.

4. Scroll down to Advanced startup and click the Restart Now button.
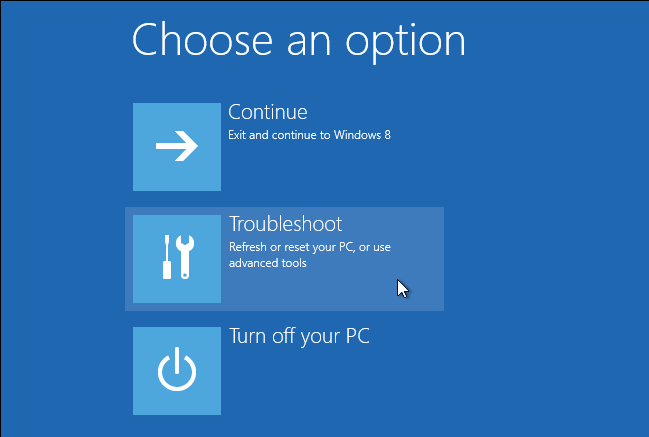
5. After the Restart, select the Troubleshoot option.
7. Under Advanced options, choose UEFI firmware settings.

8. Confirm the restart. This will allow you to enter BIOS on your Windows 10 PC.
9. After entering the BIOS, open the Boot tab.
10. Set UEFI/BIOS Boot Mode to Legacy.
11. Save the changes and exit BIOS.
The reliable workaround for the UNetbootin Windows failed to start error is to modify your BIOS setup as shown below.
Restart your PC and try to boot with the live USB. Check if the UNetbootin not working in Windows 10 error is resolved.
2. Disable Secure Boot
- Power off your PC. Restart and then start pressing F2 to access the BIOS.
- In the BIOS, open the Security tab.

- Highlight and choose Default Secure boot on and set it as Disabled.
- Save the changes and exit BIOS.
- Reboot the computer with live USB connected and check if the failed to start UNetbootin error is resolved.
If the error persists, disable Fast startup in Windows 10. Fast Startup is a feature designed to reduce boot time. However, it prevents the computer from completely shutting down, which can lead to compatibility issues.
3. Disable Fast Startup
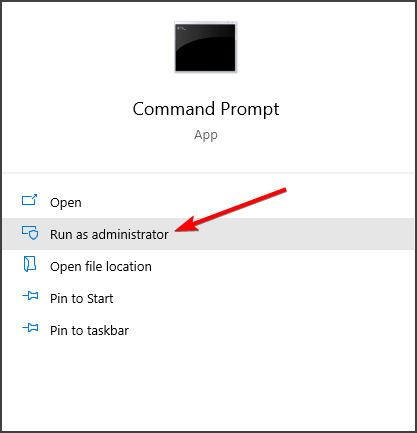
- Press the Windows key and type cmd.
- Now select Run as administrator.
- In the Command Prompt window, type the following command and hit Enter:
Powercfg -h off
- This will turn off Fast Startup. Reboot the computer and check for any improvements.
4. Create a new Live USB
One of the common reasons for Windows failing to start – A recent hardware or software change might be the cause is a corrupted Live USB drive created using UNetbootin.
To make sure the Live USB was created properly, create a new bootable drive using the existing ISO file. This would eliminate any chances of error that may have triggered due to missing or corrupt files in the drive.
5. Check ISO files for error
If the UNetbootin is still not working after creating a new live USB, check your ISO image for errors. Incomplete download or corrupted files may cause the installation to file.
Download the latest version of the ISO image available from the official source. Then create a new bootable drive and check for any improvements.
Alternatively, try using boot repair software. If you are experiencing an error on an existing installation, boot repair tools can fix computer booting issues and repair corrupted files.
6. Create bootable drive with Rufus
- Download Rufus from the official website.
- Make sure you have the latest ISO installed, and the USB is connected to your PC.
- Launch the Rufus application.

- Select your flash drive under the device.
- Next, choose your ISO, partition scheme, and target system as BIOS or UEFI.
- Choose the Format option and leave the other options as default.
- Click Start to create a bootable drive.
Rufus is a popular utility to create bootable USB flash drives. If UNetbootin is not working, Rufus is an excellent alternative with a uncomplicated interface.
7. Fix Windows bootloader using Windows 10 USB
- Make sure you have the Windows 10 installation media-ready. If not, create a Windows 10 bootable flash drive and then proceed.
- Boot from the media.
- Choose Repair Your Computer.
- Choose the Troubleshoot option.

- Next, select Advanced Option and choose Command Prompt.

- In the Command Prompt, type the following command one by one and hit enter:
diskpart
sel disk 0
list vol - Make sure the EFI System Partition is using the FAT32 file system.
- Run the following command to assign a drive letter to the partition that is not in use.
sel vol <number of volume>
assign letter <drive letter>:
Exit - To repair the boot record, run the following command:
Cd /d <drive letter>: \EFI\Microsoft\Boot\
Bootrec /fixBoot - Wait for the command to find and fix issues with the bootloader. Restart the PC once the repair is complete.
The UNetbootin not working in Windows 10 Failed to start error is triggered due to faulty bootable drive or corrupted ISO image. Try changing the BIOS setup to fix the error. If not, use an alternative flash drive creator utility like Rufus.
Did you find a solution to this problem on your own? Don’t be shy and share it with us in the comments section.
Read our disclosure page to find out how can you help Windows Report sustain the editorial team. Read more


Improve this guide


User forum
0 messages