USBXHCI.sys Blue Screen Errors: Causes & How to Fix
Hardware issues are often attributed to this error
![]() 5 min. read
5 min. read
![]() Updated on
Updated on
Share this article

Improve this guide
Read our disclosure page to find out how can you help Windows Report sustain the editorial team Read more
Key notes
- The usbxhci.sys blue screen error is mostly caused by a corrupted USB driver.
- Updating or reinstalling your USB drivers should fix the BSOD issue.
- If that doesn’t work, perform a system restore to revert your PC to a time before the usbxhci.sys error.
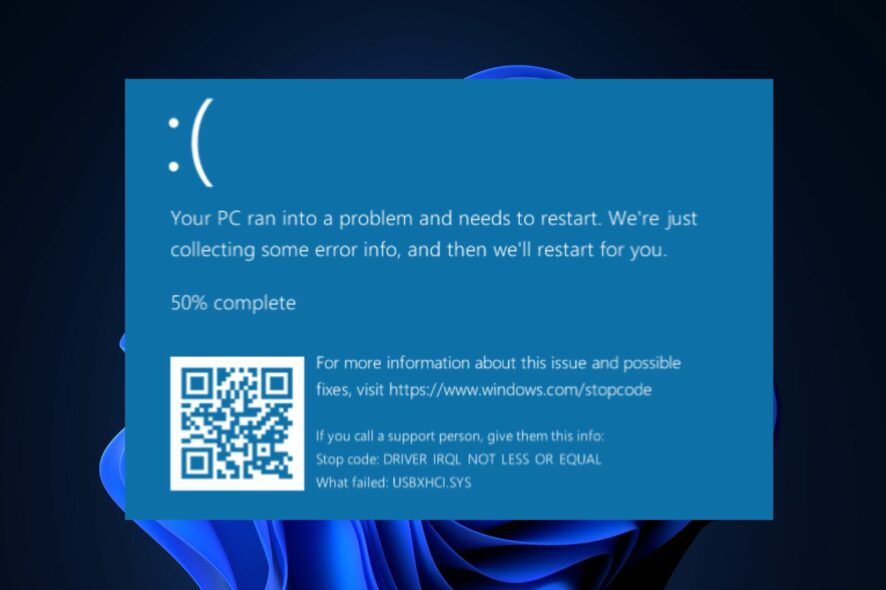
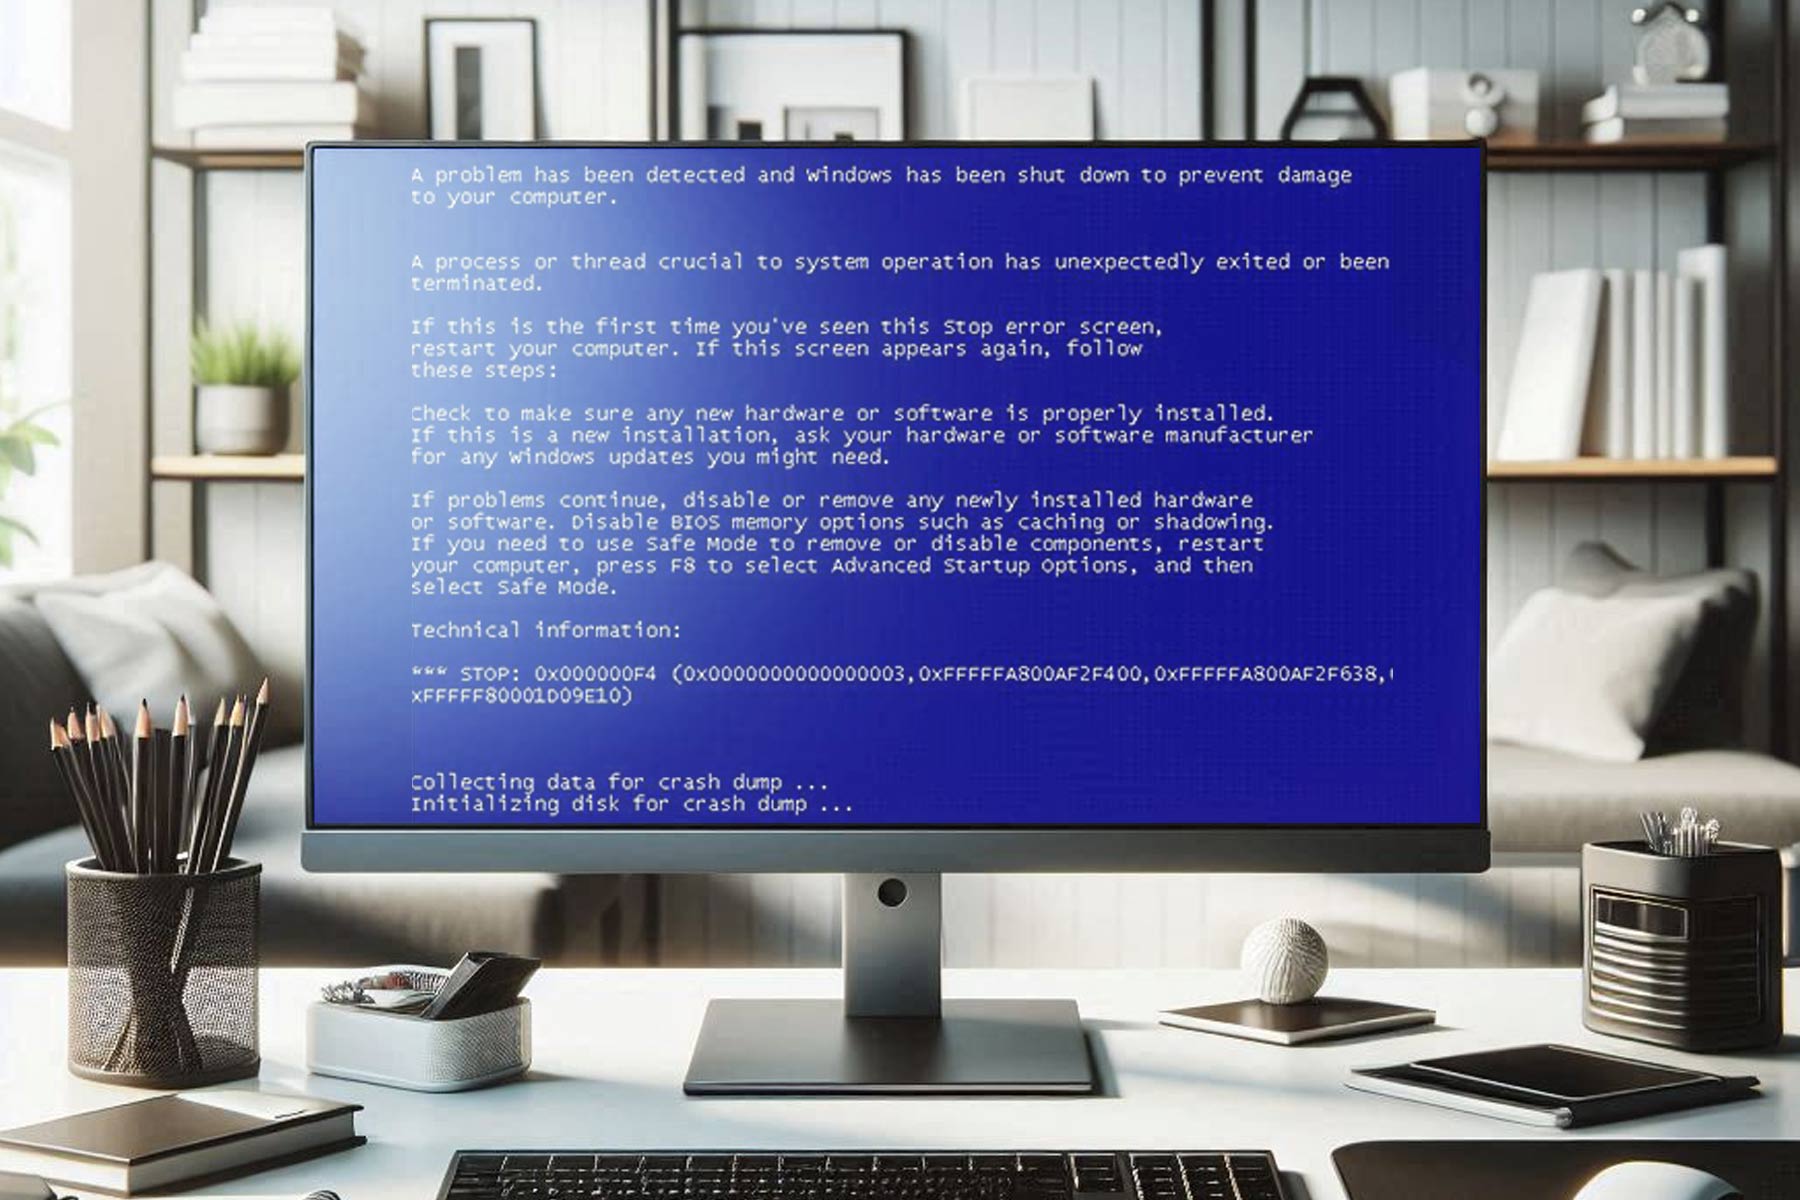
Some of our readers have recently complained that they encounter a usbxhci.sys Blue screen of death (BSOD) error whenever one or more external devices are connected to their computer.
If you have been wondering about what could be the cause or what fix to apply, worry less as we have compiled some potential fixes to troubleshoot the issue in this article.
What causes the Blue Screen error usbxhci.sys?
There can be several reasons behind the usbxhci.sys Blue screen errors. Before diving into the solutions, let us consider some of the most known triggers for this error:
- Corrupt USB drivers – The most common factor that triggers this particular issue is the corrupt USB driver on the system. You can try to update or reinstall your USB drivers and see if that fixes the issue.
- Hardware problems – Several users also encountered this issue as a result of a hardware malfunction caused by components that were not properly connected to the motherboard. The usbxhci.sys Blue screen issue can also be triggered by a sudden disconnect due to a power outage or by a damaged system component.
- Outdated firmware – Software developers create programs called firmware that power hardware devices. The usbxhci.sys error may appear if the firmware is out-of-date. To upgrade your firmware, carefully follow the manufacturer’s instructions.
Now that you know some of the potential reasons behind the usbxhci.sys blue screen errors, let’s proceed to how you can fix this problem.
How can I fix the usbxhci.sys error?
Before seeking advanced solutions regarding the usbxhci.sys Blue screen errors, consider observing the following preliminary checks.
- Check your computer for malware and virus with the best antivirus software.
- Update your Windows by installing all updates.
- Update all your drivers.
- Disconnect external drivers and reboot your computer.
Having confirmed the above checks if you still require further assistance, you can work your way through any of the advanced solutions below.
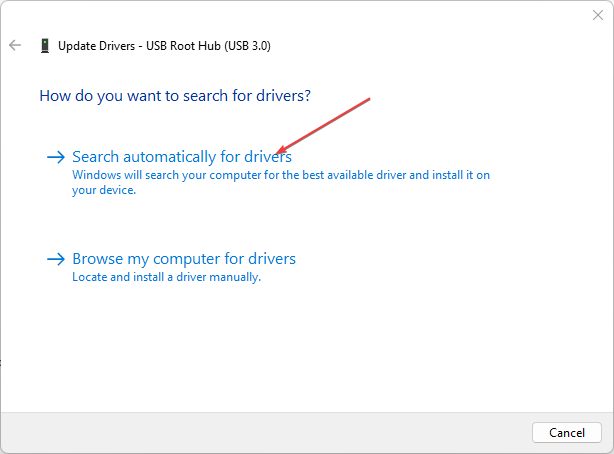
1. Update your USB Driver
- Press the Windows + R keys to open the Run window, type devmgmt.msc and press Enter.
- Expand the Universal Serial Bus Controller section, right-click on USB Root Hub, and click on Update driver.

- Now, click on Search automatically for drivers and wait for the system to look for an updated version of the driver.

- Follow the on-screen instructions to complete the process.

Once the USB driver is updated, check if you still face the usbxhci.sys blue screen problem. If you do, you should consider reinstalling the driver.
Moreover, you can try dedicated software to update your drivers without effort, as it will automatically find the latest versions for all your outdated or missing drivers.
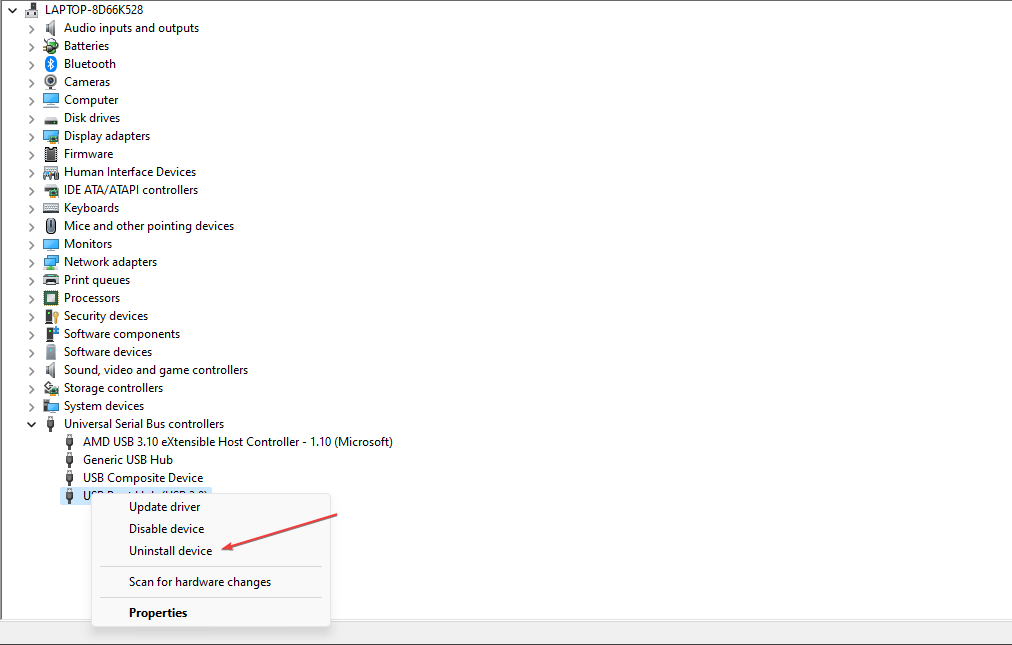
2. Reinstall your USB driver
- Press the Windows + R keys to open the Run window, type devmgmt.msc and press Enter.
- Expand the Universal Serial Bus Controller. Right-click on the USB Root Hub and click on Uninstall.

- Now, check the box next to Delete the driver software for this device and click on Uninstall.
- Restart your PC.
After restarting your PC, the driver will install back automatically. If the problem persists, you can run the System File Checker scanner to know and fix corrupted files.
3. Run the SFC scan
- Press the Windows key and type cmd in the Search box, and launch Command Prompt as admin.
- Type the following command in the text field and press Enter:
sfc /scannow
- Close the Command Prompt and restart your PC.
The SFC scanner will thoroughly check your computer for potentially damaged files which may be triggering several errors. In case you encounter problems with the command prompt, you can explore our dedicated guide to fix it.
4. Perform a System Restore
- Press the Windows + R keys to open the Run window, type rstrui in the text field and press Enter.
- Select the desired restore point (preferably the most recent one) and click on Next.

- Click on Finish.
- Wait while your PC restores your system and check if the problem is fixed.

The System Restore will help to revert your PC to when it worked properly without the usbxhci.sys blue screen.
Since this is more like a lifesaver, you can explore our article to know how to create Windows 11 restore points manually.
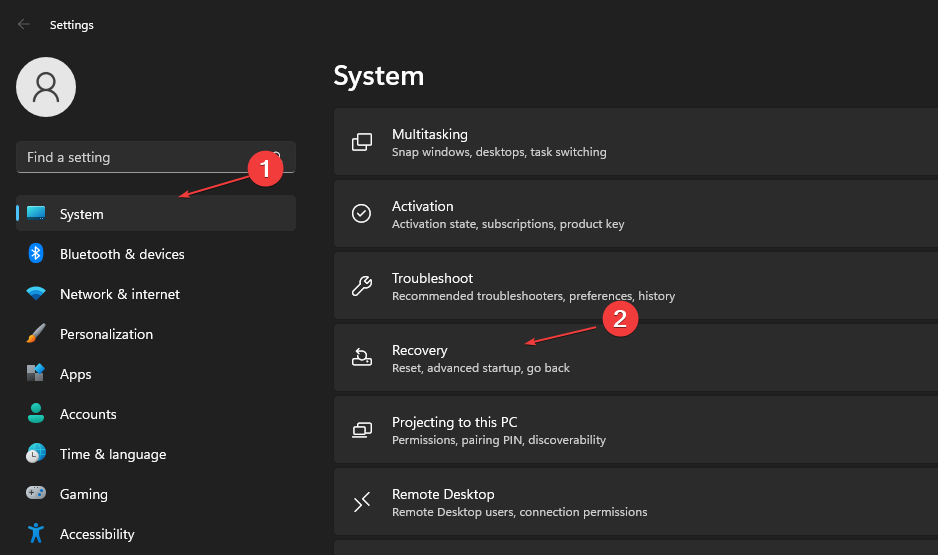
5. Perform a System Reset
- Press the Windows + I keys to open the Settings app.
- Click on System and click on Recovery.

- Navigate to the Recovery options section and click on the Reset PC button.

- Follow the on-screen instructions to complete the process.

If all other steps do not work, hopefully, performing a system reset will fix the usbxhci.sys blue screen problem.
Alternatively, before proceeding with a system reset, you should consider getting further assistance from Microsoft Support.
Additionally, you can explore our detailed article to make use of any of the best BSOD fixers to get rid of BSOD issues for good. And that’s it on how to fix the usbxhci.sys blue screen error.
However, if you have any questions or suggestions regarding the blue screen of death errors, do not hesitate to use the comments section below.