VGA Only Mode is Not Enabled: How to Quickly Turn it On
VGA mode is used if Windows can't load due to video cards issues
4 min. read
Updated on
Read our disclosure page to find out how can you help Windows Report sustain the editorial team. Read more
Key notes
- The VGA mode is used essentially when you are sure the video cards caused the error.
- Booting the computer to VGA mode offers limited computer view and activities.
- You can enable the VGA mode just like the Safe mode in the system's BiOS settings.
The VGA-only mode is a unique way to access Windows if it locks or can’t function normally. However, it can be annoying if you encounter the VGA-only is not enabled problem.
Hence, this article will cover the basics of the VGA mode and how to enable it on your PC without hassles quickly.
What is the VGA-only mode?
The VGA mode is similar to launching the PC in safe mode. It offers a basic Windows view with a 640 x 480 pixels resolution.
In this mode, you can diagnose the PC’s or video card problems while having access to a minute functionality of the computer. Only the most basic video drivers will load during the VGA mode, and directional keys are used to navigate.
The VGA mode is often used when video cards or display issues, such as the PC not detecting GPU on Windows 11.
How can I enable VGA-only mode on my PC?
Before trying these steps, there are a few checks you need to perform:
- Make sure that the graphics drivers are updated. Do not hesitate to check our guide on easy ways to update graphics drivers if you encounter difficulties.
- Try rebooting in Safe mode, but if your Safe mode is not working, our guide will help you.
- Restart your computer to check if the problem persists.
If none of these restores your video card performance, apply the steps below to enable VGA mode.
1. Adjust BIOS settings
- Power on the computer and click F8, F2, F10, or F12 continuously on the Windows display, depending on your PC.
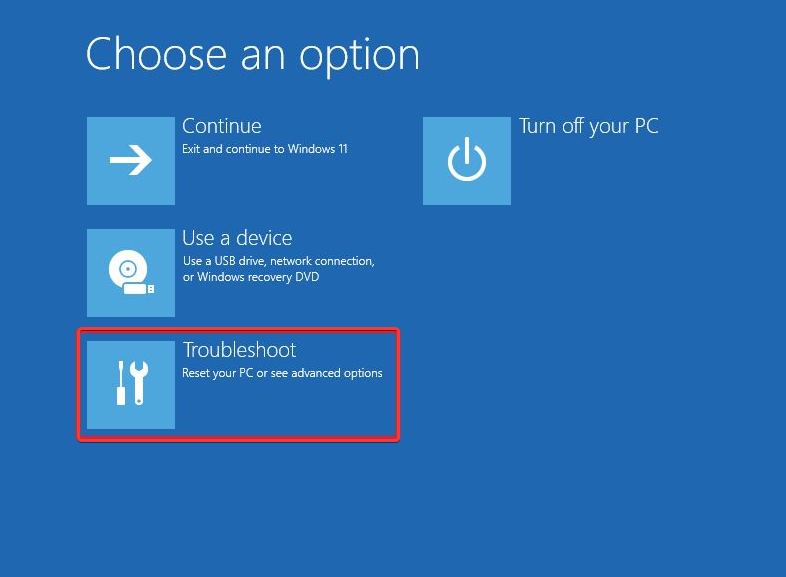
- Choose Troubleshoot to open the Advanced options tab.
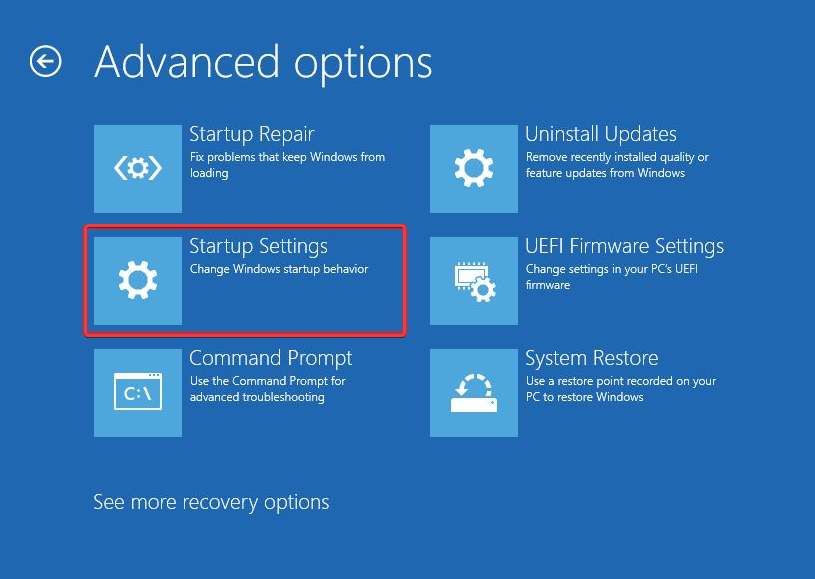
- Click Startup Settings.
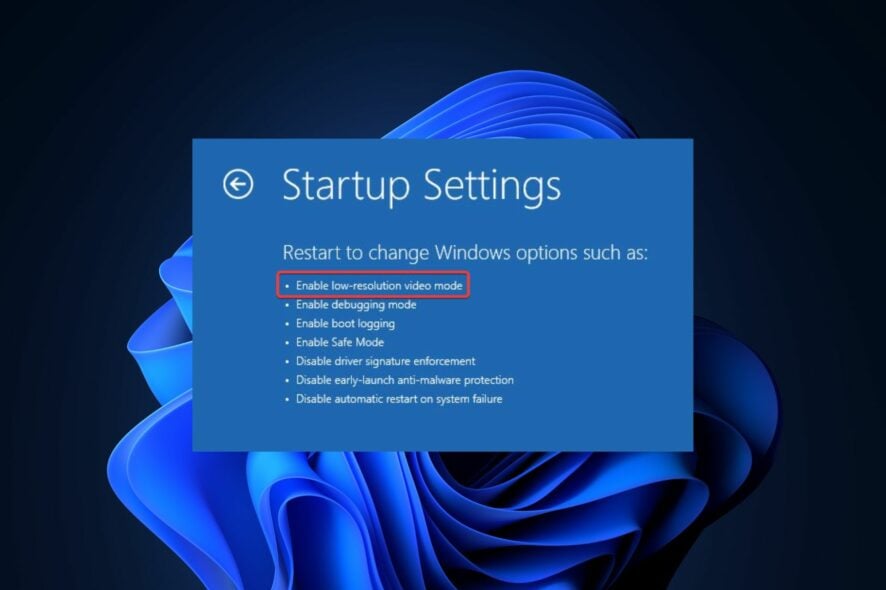
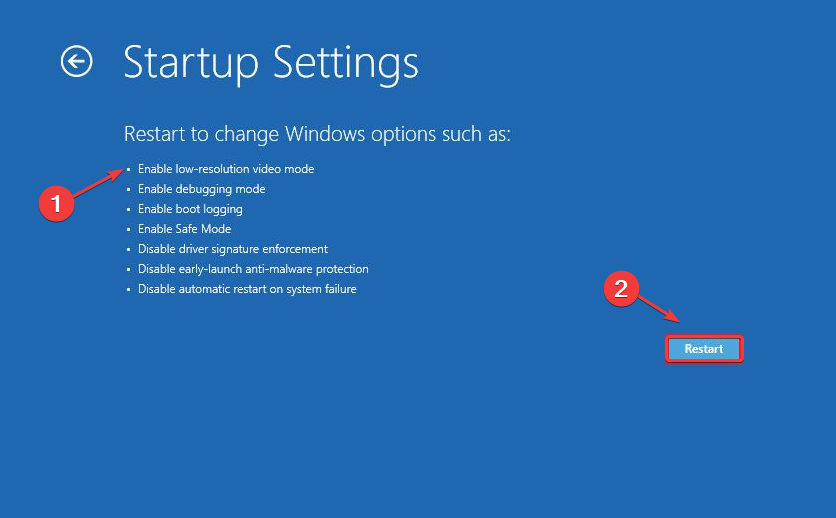
- Select Enable low-resolution video mode by pressing F1 and click Restart.
This will start Windows in VGA mode, using minimum drivers input similar to the Safe Mode. If you encounter difficulties accessing BIOS settings in Windows 11, our guide can help you solve it.
2. Force Windows to use standard VGA mode drivers
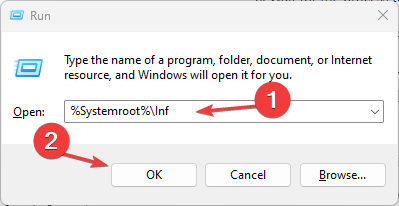
- Press the Windows + R keys to launch the Run windows box, input %Systemroot%\Inf folder, and click OK.
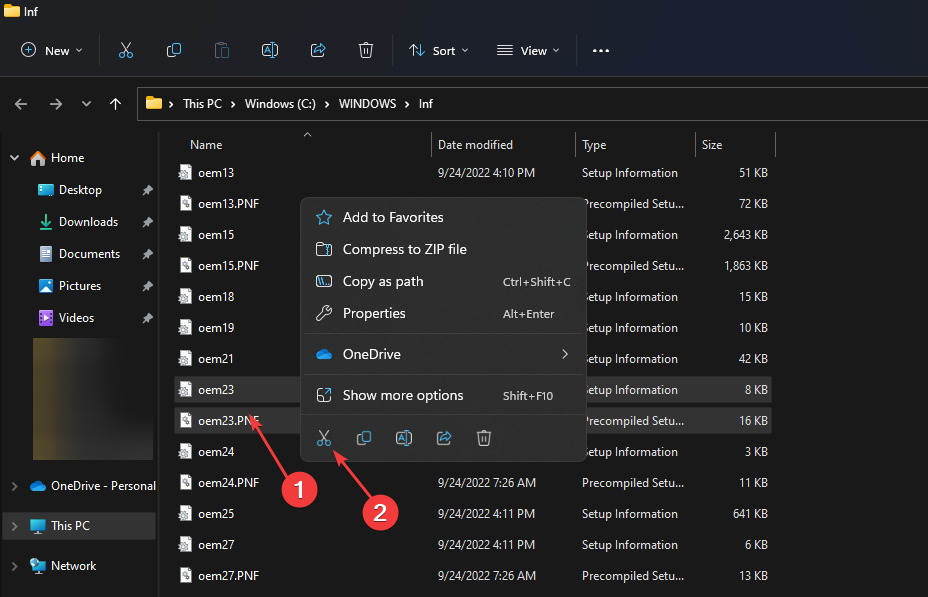
- Locate the Oemn.inf and Oemn.pnf files that correlate with the original Oemsetup.inf file for the OEM video driver.
- Move the two files into a different folder.
- Click the Start button, input Device Manager, and launch it.
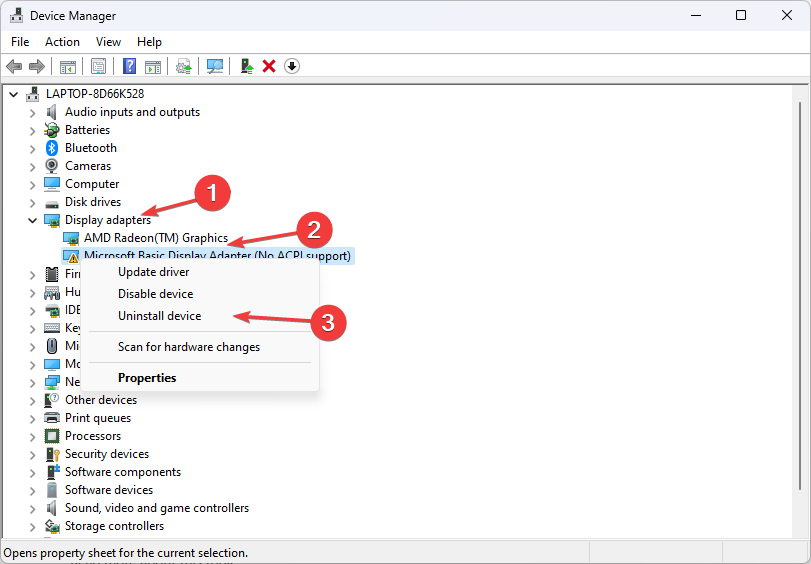
- Expand Display adapters, right-click the Video adapter and select Uninstall device.
- Then restart your PC.
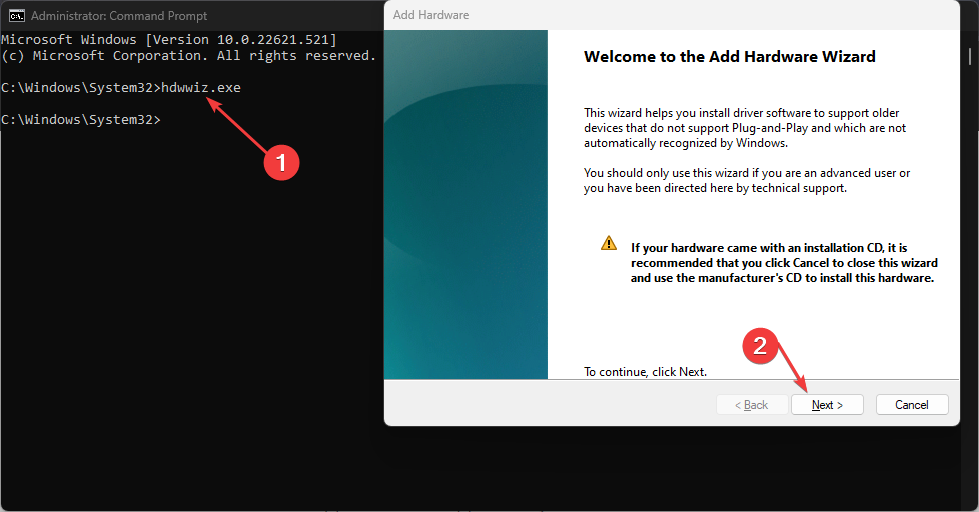
- Click the Starts button, input Command Prompt and launch it.
- Input the following and press Enter to launch the Add Hardware Wizard and click Next:
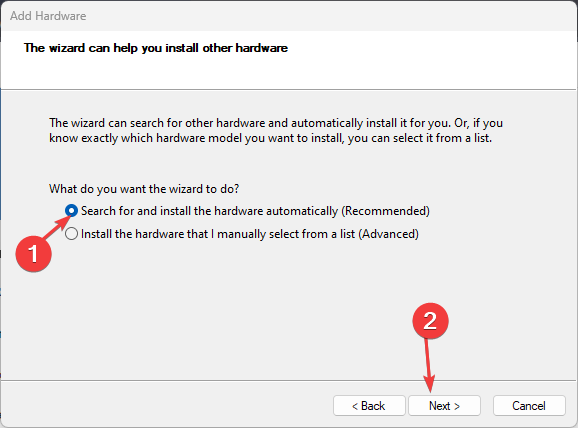
hdwwiz.exe - Select Search for and install the hardware automatically and click Next.
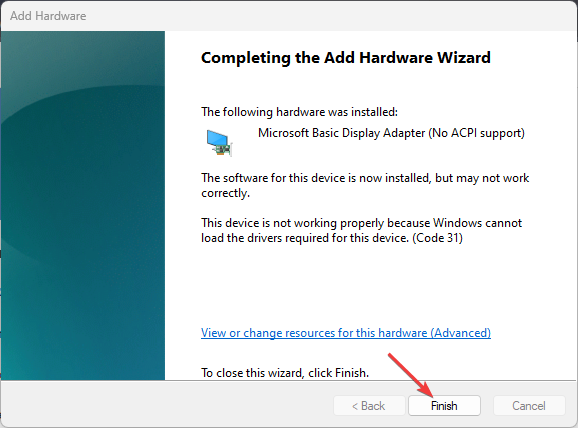
- Wait for the process to complete and click Finish.
Having completed this, Windows will use the Vga.sys generic video driver and doesn’t require starting in Safe Mode.
Further, our guide on installing drivers without EXE files has detailed information on using INF files for driver installation.
Follow the steps above for optimal results when trying to combat VGA only mode is not enabled problem.
However, if you encounter VGA issues on Windows, do not hesitate to check out our guide for the best ways to fix them.
Sometimes, your VGA card may not be supported by the UEFI driver. Although not rampant, if this is your problem, consider our article.
In case people tell you to ensure BIOS BBS is disabled, it’s valid advice since BBS can lead to vulnerabilities. And it’s for the same reason you should ensure Request Disk Topology is disabled. Only do that if you don’t need the features.
Conclusively, if this guide has been helpful, you can leave your comments and suggestions in the section below. We’d like a response from you.





User forum
0 messages