What is Vulscan.exe & How to Fix Its High CPU Usage?
Learn what is causing vulscan.exe high CPU usage issue
5 min. read
Updated on
Read our disclosure page to find out how can you help Windows Report sustain the editorial team. Read more
Key notes
- The vulscan.exe file has been troubling several users with high CPU usage issues.
- Since many do not know to which software it belongs, they are confused about whether it should be removed.
- Learn the steps to fix the vuslcan.exe high CPU usage issue and free your CPU resources.

Multiple users have reported seeing the vulscan.exe file resulting in high CPU usage. This is problematic as the file is running in the background hampering the other important tasks.
In this guide, we will give you some solutions that will help you to resolve the vulscan.exe high CPU usage issue on your PC. Let us get right into it.
What is vulscan.exe?
After researching the internet, we found out that the vulscan.exe file belongs to software called LANDESK Management Suite.
The vulscan.exe file runs in the background because it can scan internal and external networks and produce alerts whenever it discovers a vulnerability.
This file can be found inside the folder where you have installed the LANDESK Management Suite. Do note that this is not a system process and if you are facing issues because of it, then it can be removed from your PC.
Is vulscan.exe harmful?
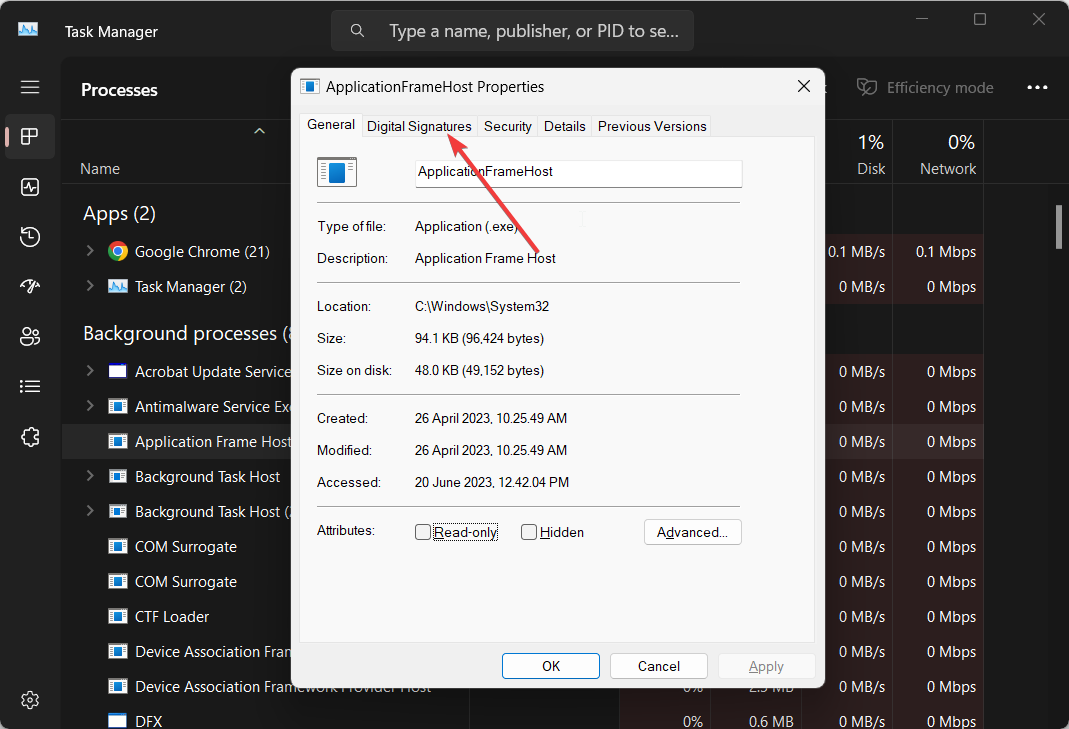
- Press the Ctrl + Shift + Esc buttons to launch the Task Manager.
- Locate the vulscan.exe file, right-click on it, and select Properties.
- Click on the Digital Signatures tab.
- Check what is written below the Name of signer section.
- If it says Unable to verify then it is a threat.
Since the file belongs to the LANDESK Management Suite, the name of the signer should be either LANDESK or Ivanti. In case it is not, then it is a virus.
Moreover, if the file is inside the LANDESK Management Suite folder, then there are fewer chances of it being malware or a virus as it is a part of that particular software.
However, if you find the file in any other location or multiple locations, then malware or virus has masked this file and caused issues on your PC.
How can I resolve the vulscan.exe high CPU usage issue?
1. Reinstall the LANDESK program
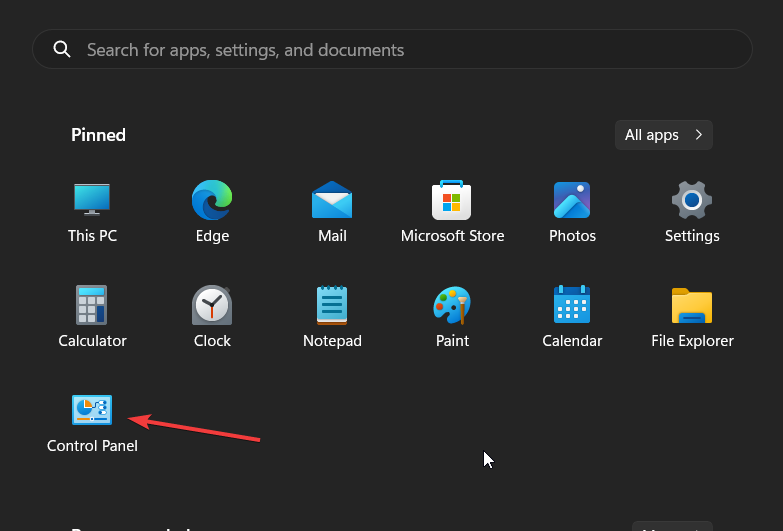
- Press the Win key to open the Start menu.
- Click on Control Panel.
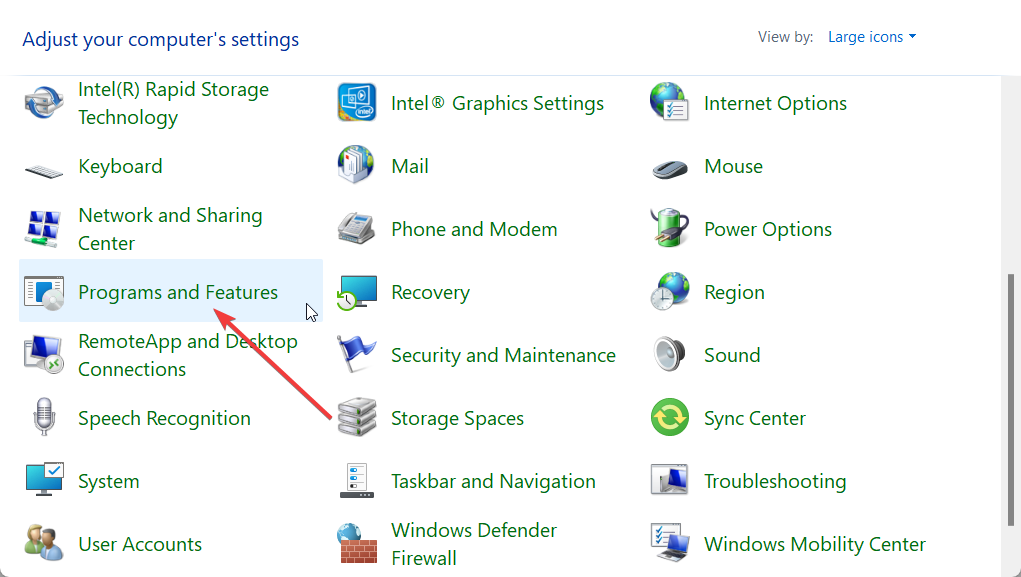
- Choose Programs and Features.
- Select the program and hit the Uninstall button at the top.
- Follow the on-screen prompts to remove the program from your PC.
- Reboot your computer.
- Visit the official website and download the program.
- Install it on your PC and check if this resolves the issue or not.
You should try reinstalling the program on your PC as there are chances some important files are missing from your PC related to the program which is ultimately causing the vulscan.exe high CPU usage issue.
2. Run an antivirus scan
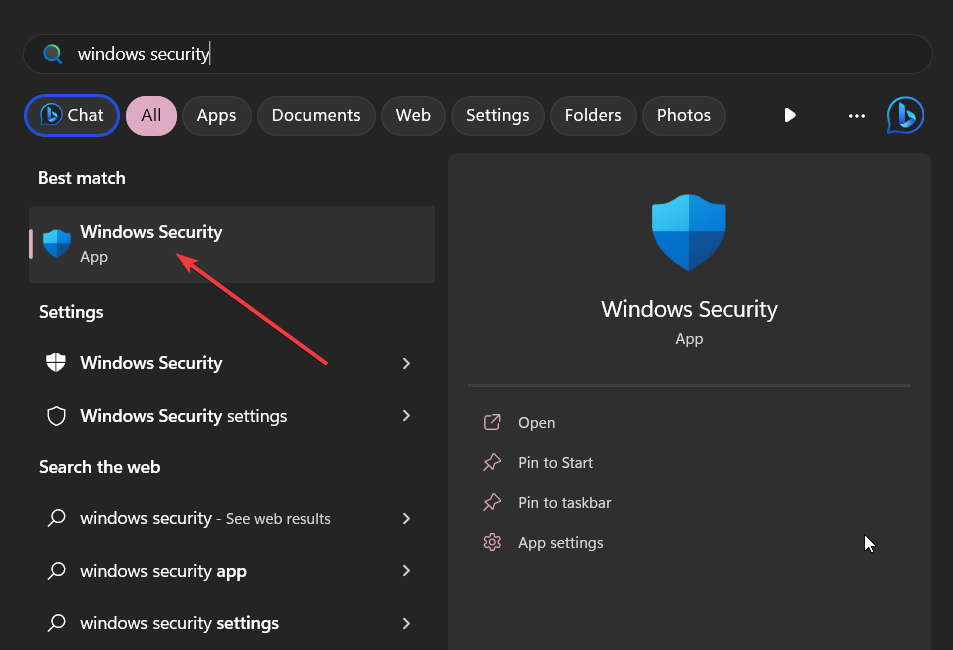
- To open the Start menu press the Win key.
- Type Windows Security and open the top result.
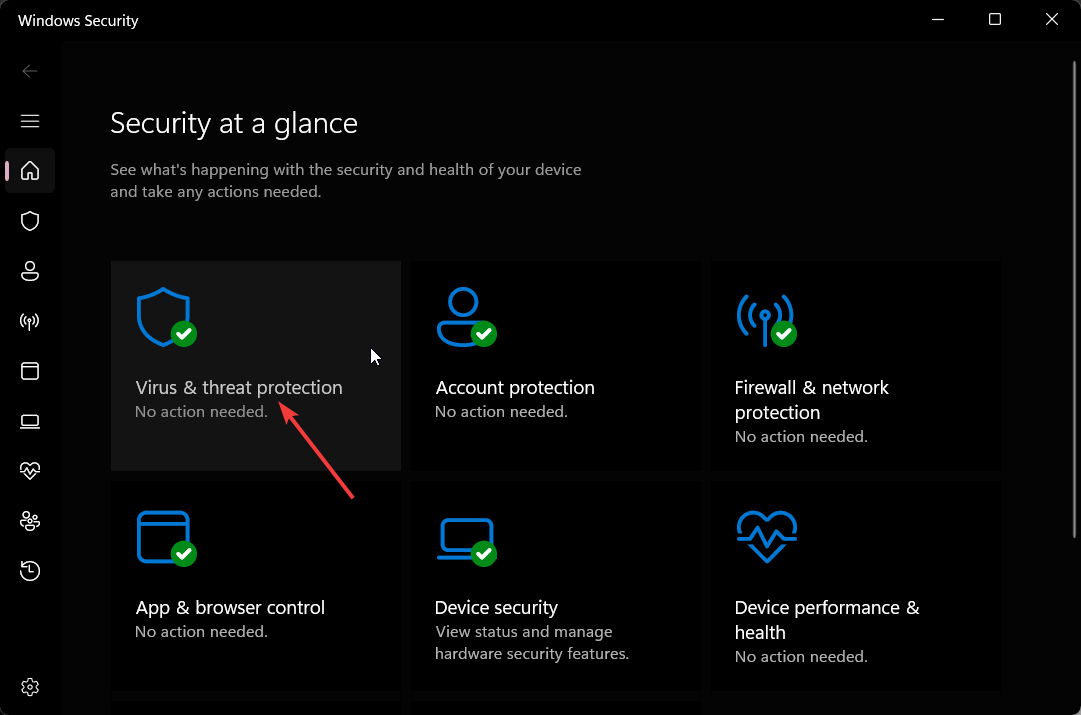
- Click on Virus & threat protection.
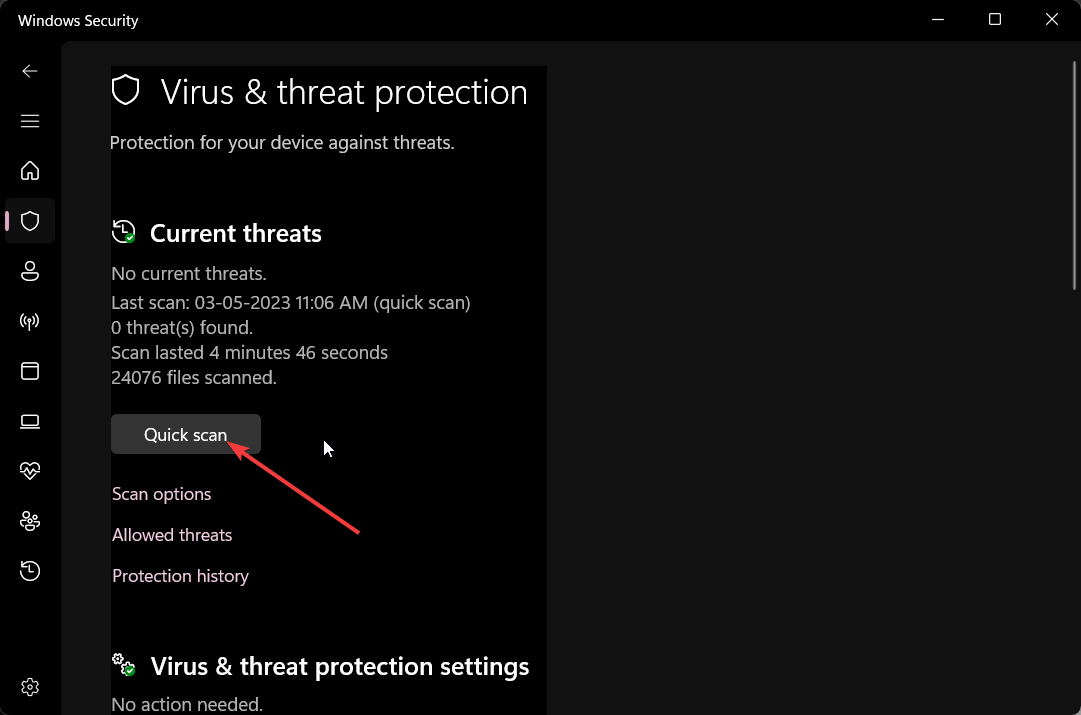
- Select Quick Scan.
- Let the process complete and apply the fixes.
- You can also choose Scan options and choose Full scan for in-depth scanning, and after that, restart your PC.
If you located the vulscan.exe file outside of the LANDESK Management Suit’s folder or somewhere else on your PC, then you should immediately run a virus scan of your PC as there are high chances of it being malware.
Since the Windows Security tool isn’t that effective in tackling viruses or malware, you can check out our guide which gives you a list of antivirus tools that you should use.
3. Perform a system restore
- Open the Start menu by pressing the Win key.
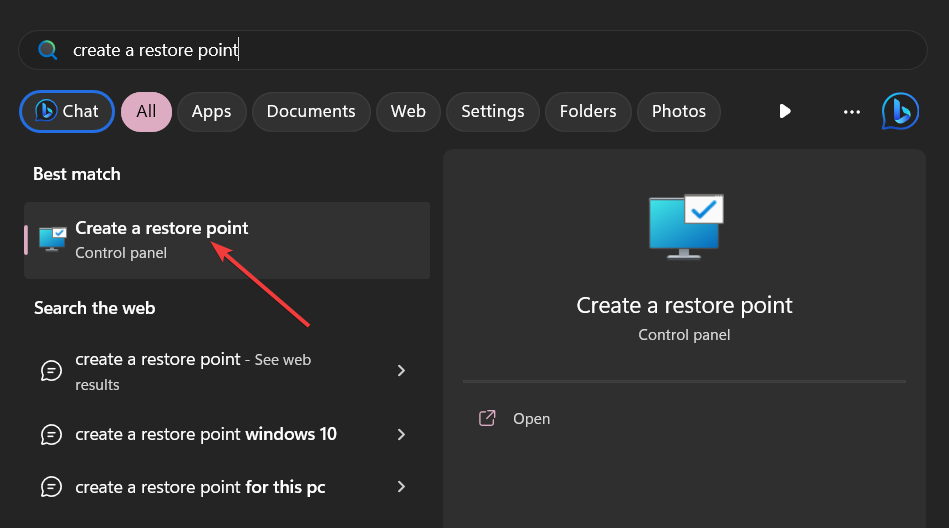
- Type Create a restore point and open the top result.
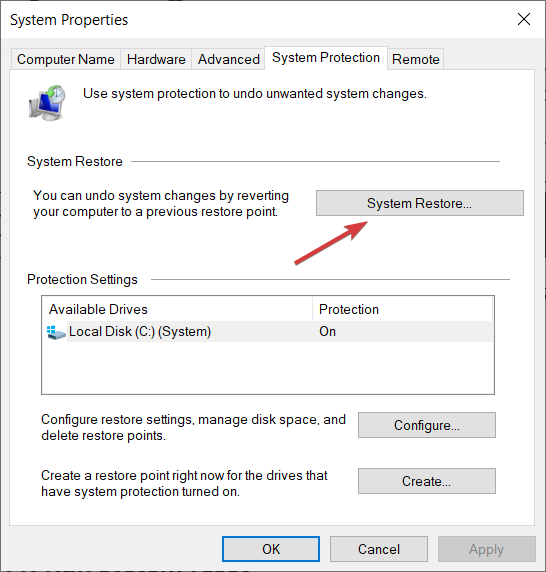
- Click on the drive where you have installed the OS and select System Restore.
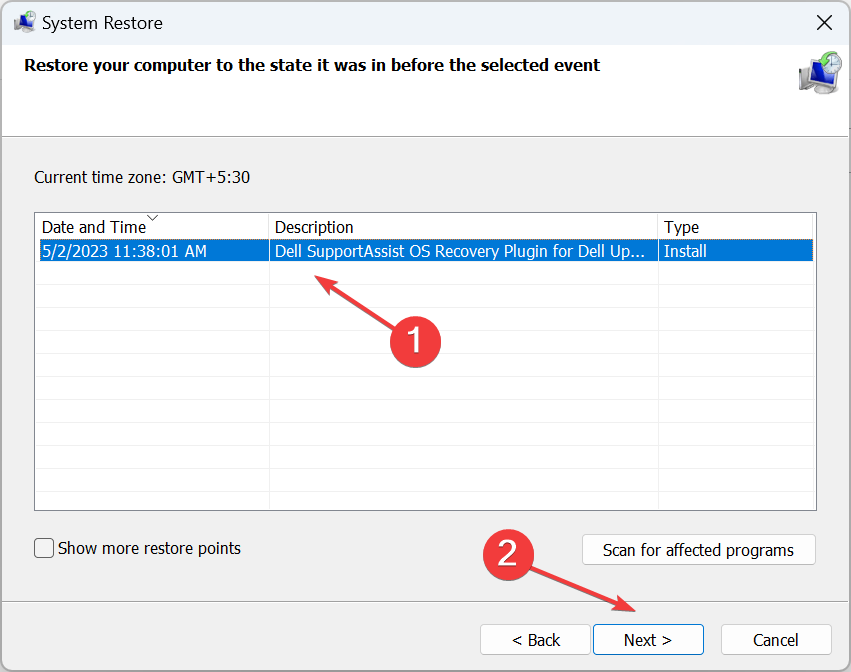
- Choose the restore point and select Next.
- Click Finish to begin the restore process.
If the vulscan.exe high CPU usage issue occurred recently, then you should simply restore your system back to a state where everything was working normally.
However, the process will work only if you have a system restore point already created on your PC. For that, we would suggest you read the guide on how you can create a system restore point.
If none of the above solutions fixed your vuslcan.exe high CPU usage issue, then you should try reinstalling the Windows OS. We have a guide that explains how you can reinstall Windows 11 in 2 easy steps.
That is it from us in this guide. We have also covered in detail what is view.exe file and whether or not you should remove it from your computer.
Several users were also getting troubled with what is write.exe and what it does. You can read our guide and understand what it it.
Let us know in the comments below, which one of the above details helped you understand about vulscan.exe and fixed the high CPU usage problem.






User forum
0 messages