What is Wbload.dll & How to Fix It When It's Missing?
Run a full scan with Windows Security to troubleshoot
5 min. read
Updated on
Read our disclosure page to find out how can you help Windows Report sustain the editorial team Read more
Key notes
- Scan your PC for viruses using your security tool to identify and remove harmful files and applications from your PC.
- Avoid downloading DLL files from unknown websites to protect your PC from malicious files disguised as DLLs.
- Apply a DLL fixer to quickly fix missing DLL errors in Windows without troubleshooting the error.
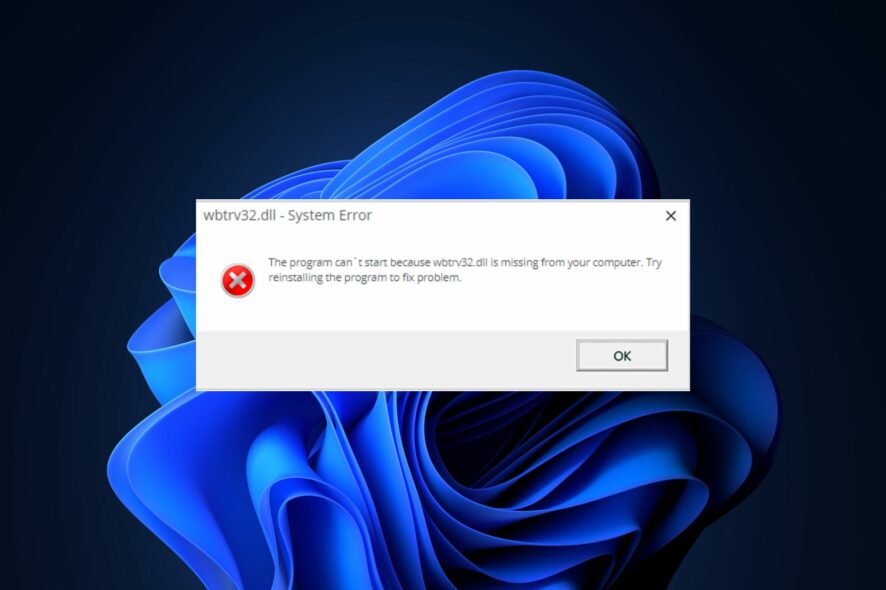
DLL files contain specific codes and instructions that enable Windows computers to function properly; wbload.dll is one such file. If such a file is missing, your PC is bound to experience a series of errors.
If the wbload.dll file is missing on your PC, this article will provide you with a brief description of the DLL file and steps to fix it when it’s missing.
What is wbload.dll?
wbload.dll is a system DLL file developed by Stardock Corporation. The file isn’t as common as DLLs like the msvcr100.dll or msvcp120.dll, but it’s one of the many hidden system files of a Windows computer.
The wbload.dll is not a Windows essential file, but if it’s missing, it can still trigger a couple of errors while attempting to launch specific applications. The file is located in the C:\Windows\System32 folder.
How can I fix a missing wbload.dll error?
The following are some of the ways you can fix a missing wbload.dll error in Windows:
1. Apply a DLL Fixer
The best DLL fixers scan your PC for broken system files, DLLs, viruses, and malware. Due to the fact that the wbload.dll file is a system DLL, you’re guaranteed a 100% success rate if you attempt to fix the wbload.dll missing error using a third-party fixer.
This is because DLL fixers utilize a database that stores every Windows DLL released by Microsoft. All the software has to do is scan and identify the missing DLL in your PC, download it from its database, and install it on your PC.
2. Update Drivers
- Press the Windows key, type in Device Manager, and hit Enter.
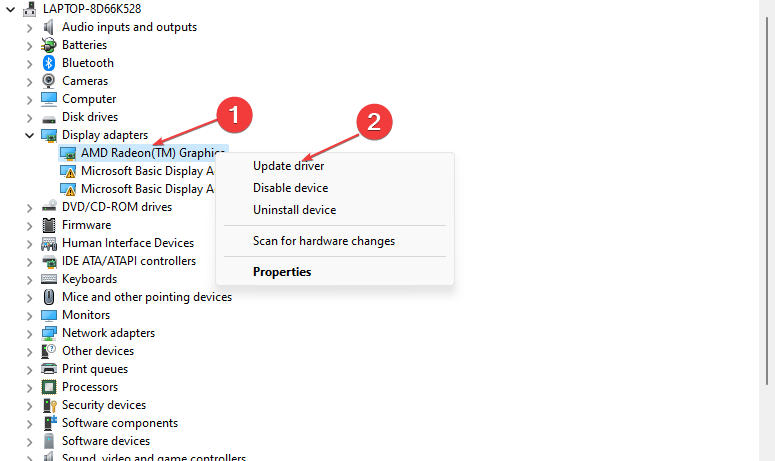
- In the Device Manager window, scroll through the list of Drivers, and check to see if there is a yellow alert symbol next to the option. Right-click on the Driver, and select Update Driver.
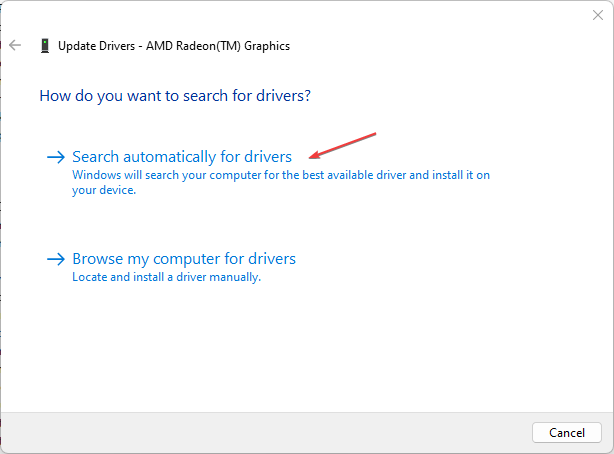
- In the next window, click Search automatically for updated driver software, and follow the prompts to complete the update.
- Once you’ve updated all the Drivers, restart your PC and check if the error is resolved.
3. Scan for Malware
- Press the Windows key, type in Windows Security, and hit Enter.
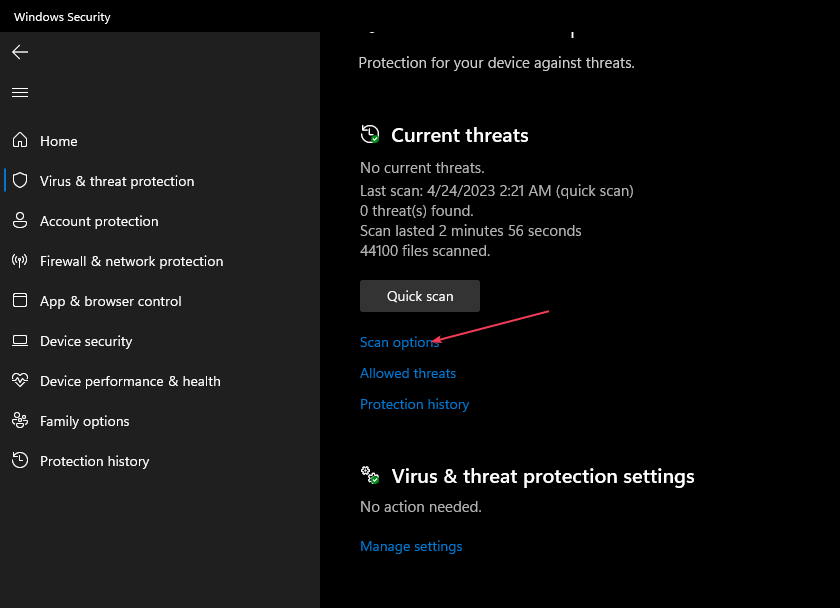
- In the next window, click on Virus & Threat Protection, and click Scan Options under the Current Threats option.
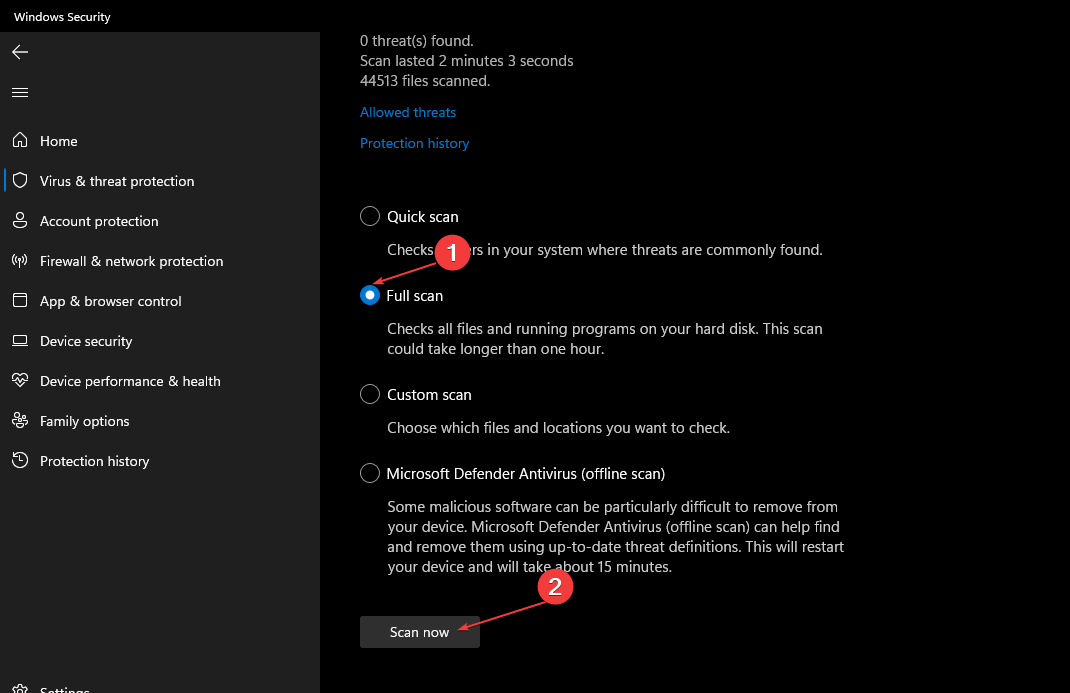
- Select Full Scan from the Scan Options menu and click the Scan Now button to initiate the virus scan.
- Wait for the scan to complete, restart your PC and check if the error is fixed.
4. Run the System File Checker Utility/ DISM scans
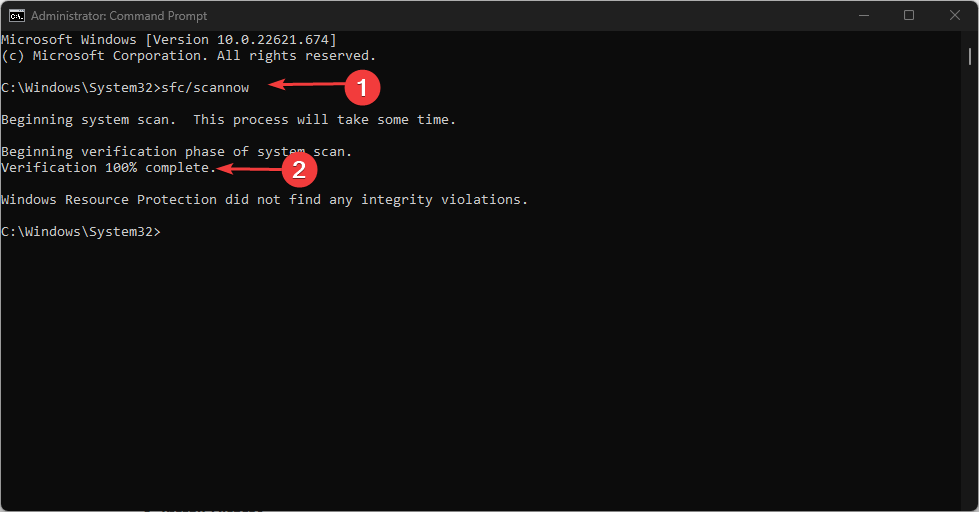
- Press the Windows key, type in CMD, and select Run as Administrator.
- Click Yes to grant the app administrative access in the User Account Control window.
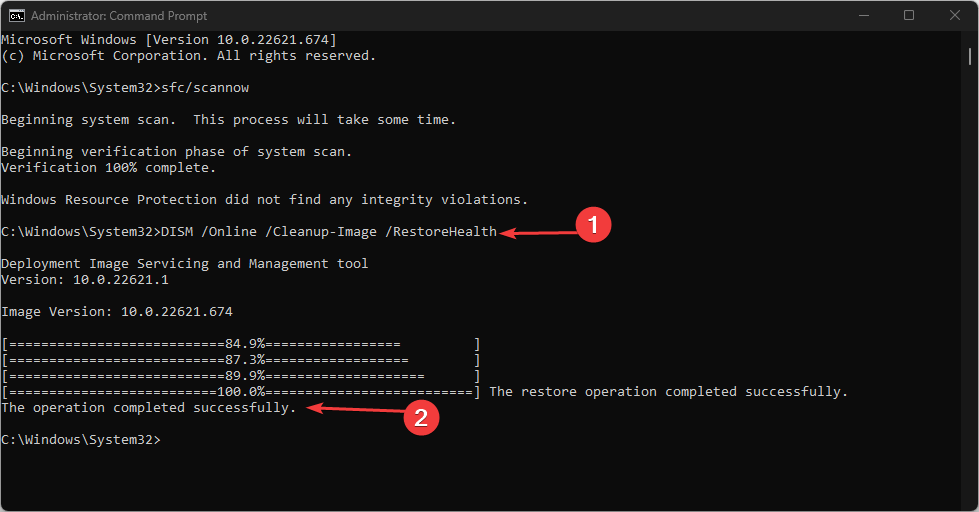
- Once the command prompt opens, type the following and hit Enter:
sfc /scannow - Then, Enter the last command:
DISM /Online /Cleanup-Image /RestoreHealth - Wait till the scan is complete, and restart your PC to check if the error persists.
The presence of corrupt DLL files often triggers missing DLL errors. Running a DISM scan will help repair corrupted Windows update files and resolve errors caused by missing DLL files.
5. Perform a System Restore
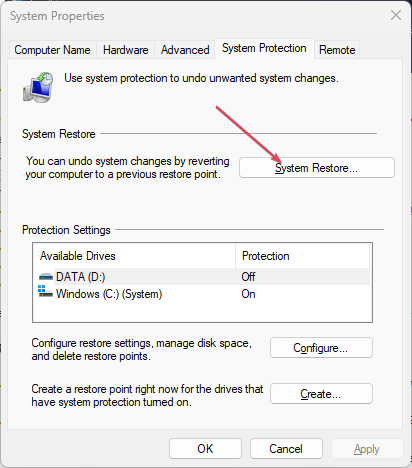
- Left-click the Start menu, type restore and click Create a restore point.
- Select System Properties and choose System Restore button.
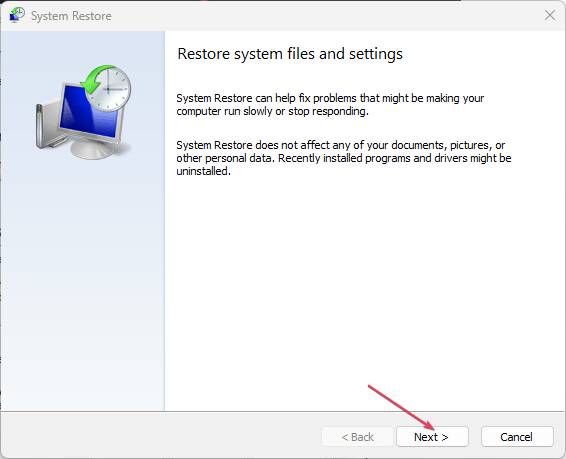
- In the Restore Files and Settings box, click Next.
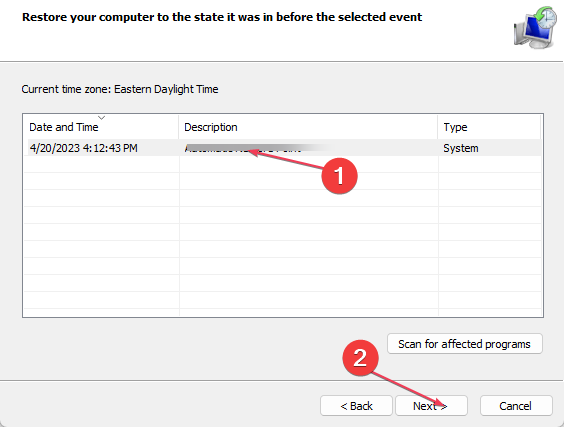
- In the next window, select the Restore Point that you wish to restore your PC to, and click Next.
- Then, click Finish to complete the system restore.
A system restore is one of the most efficient ways to resolve a Windows error. This is because after creating a restore point, you can later restore your OS to that exact state when you created the restore point.
If the error was triggered after a recent change in settings or configuration, you could perform a system restore to fix the wbload.dll not found error.
6. Reinstall the Program
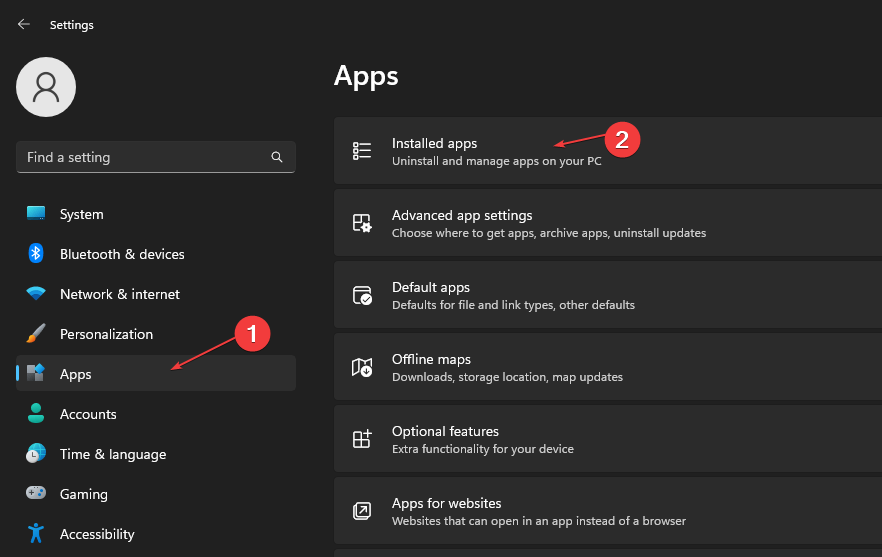
- Press the Windows key + I to open the Settings app.
- In the Settings app, select Apps, and click on Installed Apps.
- Click on the options button beside the Program or App triggering the wbload.dll error. Then, click the Uninstall button.
- After uninstalling the app, you’ll need to install the program or game cleanly.
If you’ve attempted all troubleshooting techniques and the error remains unfixed, the last thing you can try to help fix the error is to uninstall the program or application.
A clean installation of the program currently triggering the missing wbload.dll error would delete all the corrupt or missing game/app files and install them with default settings and configurations.
Resolving missing DLL errors in Windows is a pretty straightforward task that is only made easier by employing the help of a DLL repair tool. If you’ve been searching for a way to resolve the wbload.dll missing error, we hope this article has provided you with the necessary steps to help you fix the error.

