Solved: Which Device Did You Plug in Windows 11
Disable pop-ups to improve your focus
![]() 4 min. read
4 min. read
![]() Published on
Published on
Share this article
Improve this guide
Read our disclosure page to find out how can you help Windows Report sustain the editorial team. Read more

Whenever you plug in an audio device on Windows 11 and get which device did you plug in message, your device may be struggling to identify the type of input correctly.
This miscommunication can be a case of outdated drivers, a faulty sound device or audio jack, or compatibility issues with your OS and audio input. The worst-case scenario would be your Bluetooth headphones not recognized as an audio device.
Note that this is not a built-in Windows setting and happens to users using Realtek audio drivers and have installed the Realtek audio manager.
How do I disable which device did you plug in prompt?
1. Disable notifications via Settings
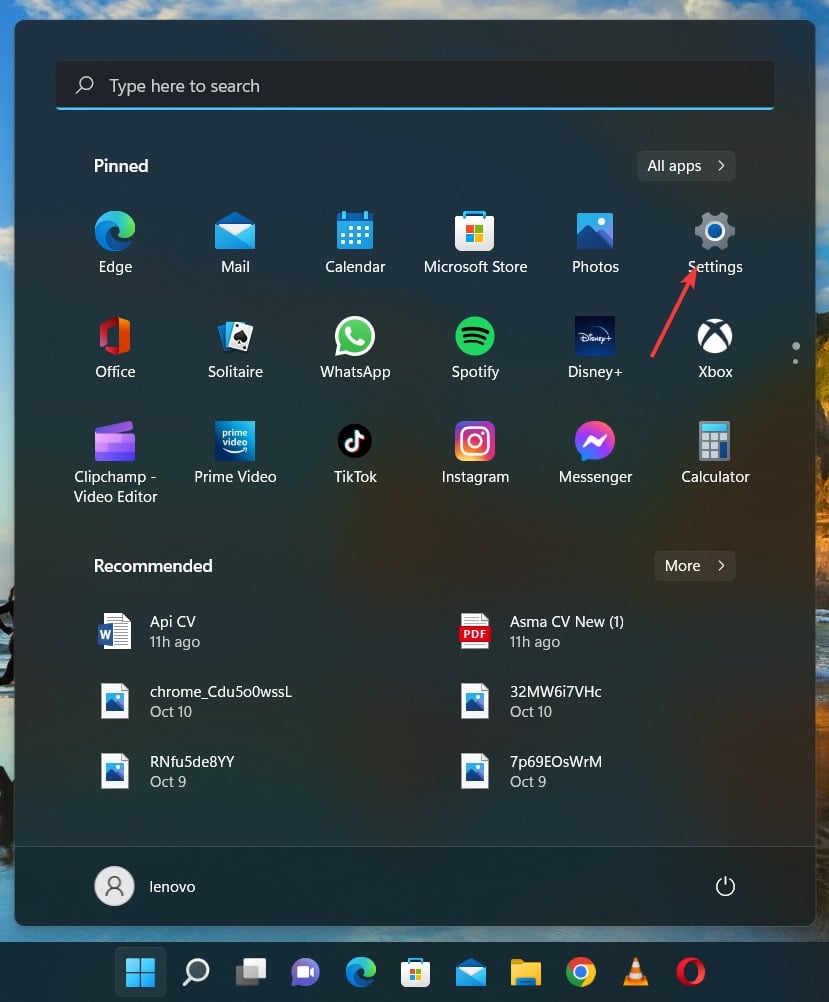
- Click on the Start button at the bottom of your screen and select the Settings option.

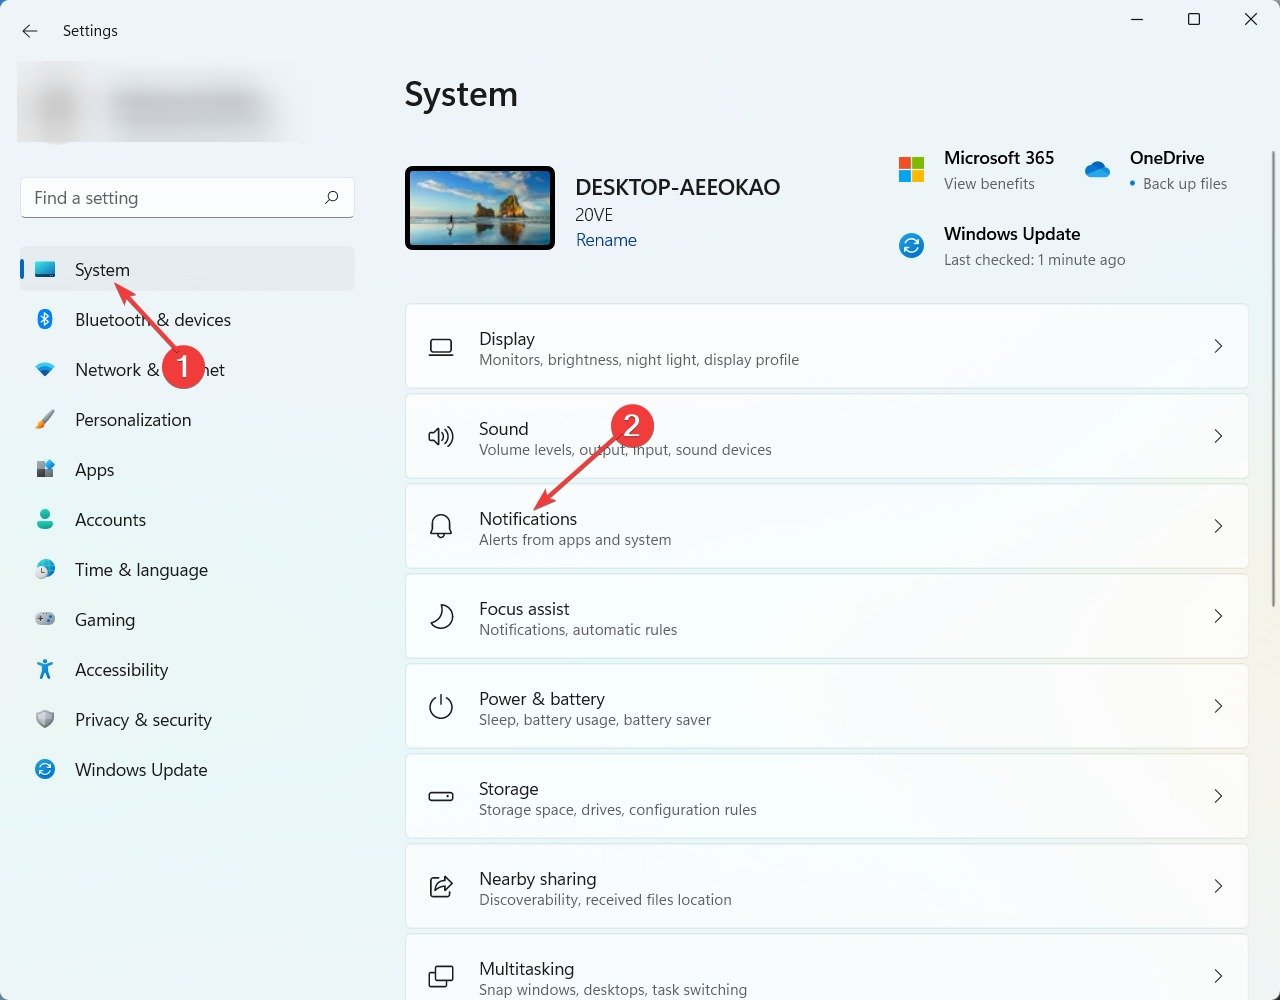
- Click on System in the side panel and then click on Notifications.

- Turn the Notifications toggle button of Realtek Audio Manager to Off.
- When you disable notification for Realtek Audio Manager, when you pug in an audio input, the which device did you plug in message will be blocked from popping up.
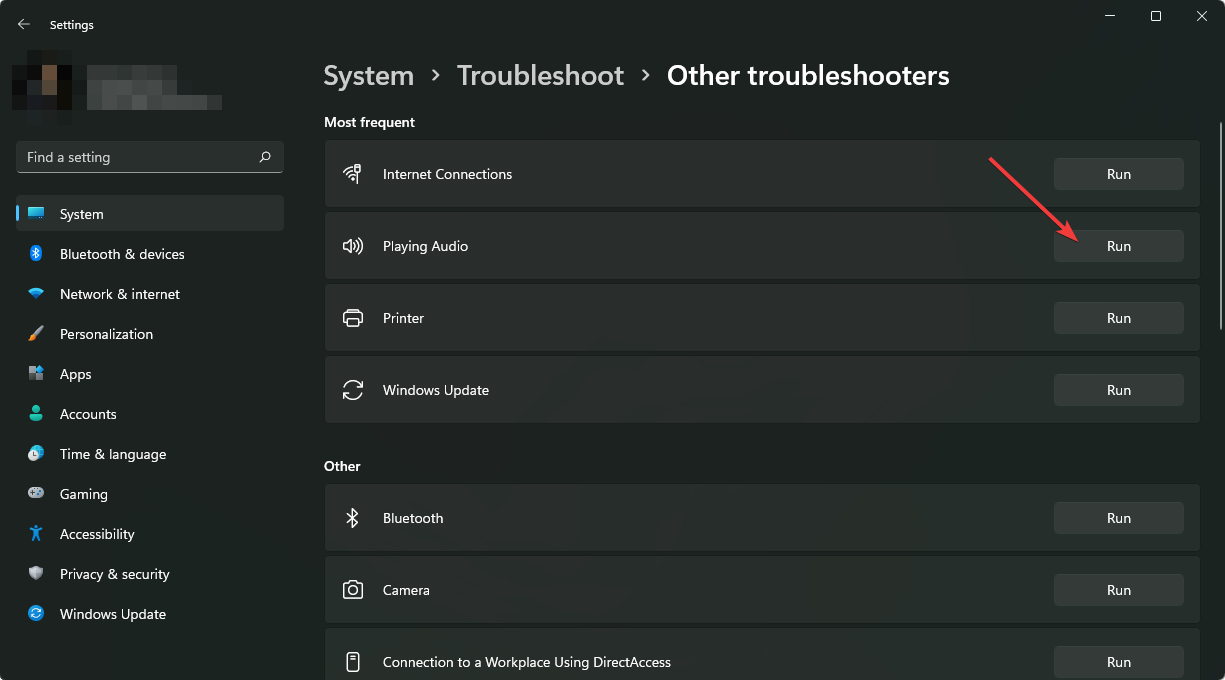
2. Run the audio troubleshooter
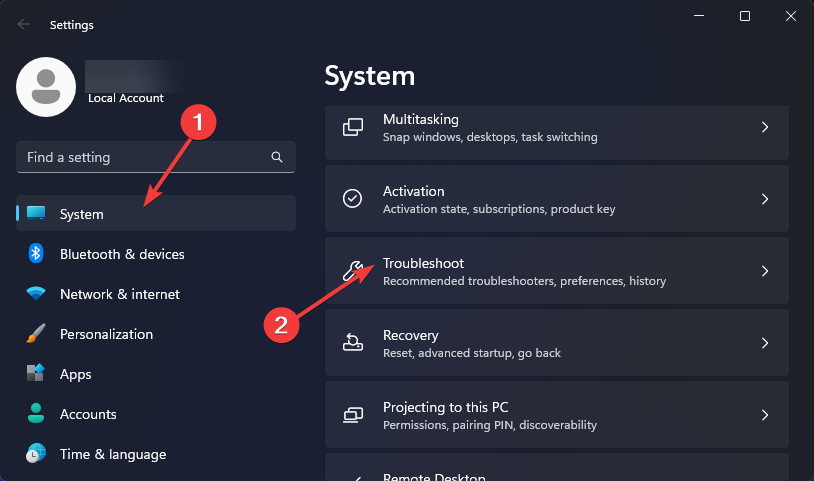
- Press the Start Menu key and select Settings.

- Click on System on the left pane, then Troubleshoot on the right pane.

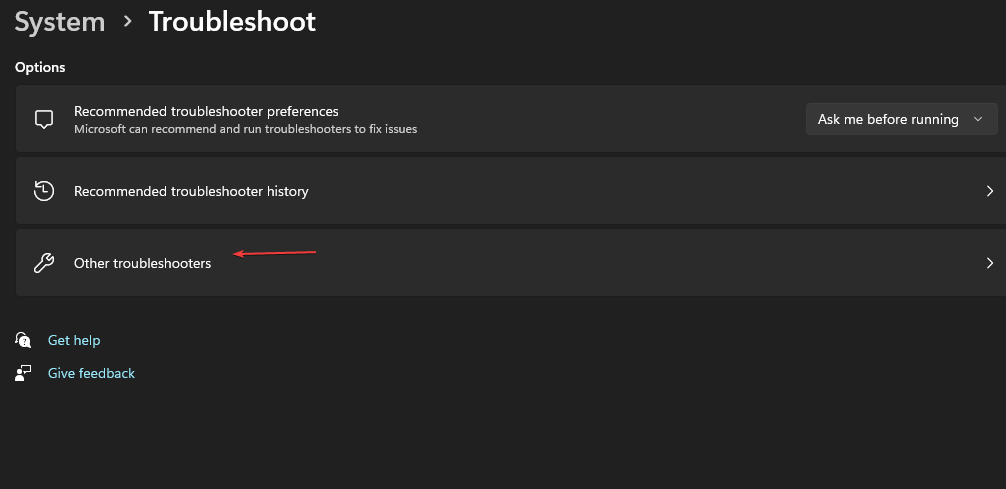
- Select Other troubleshooters.

- Locate the Playing Audio troubleshooter, and click on the Run button next to it.


3. Uninstall and reinstall the audio drivers
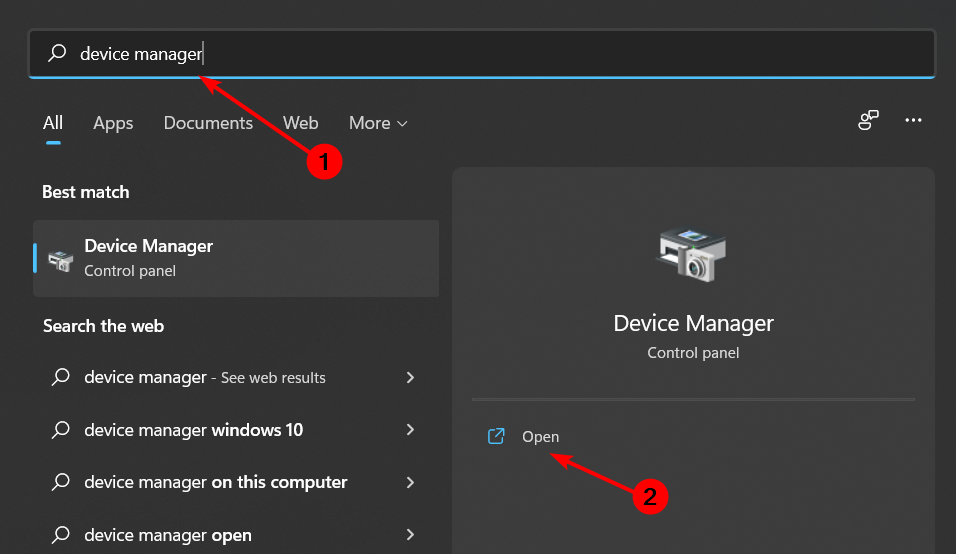
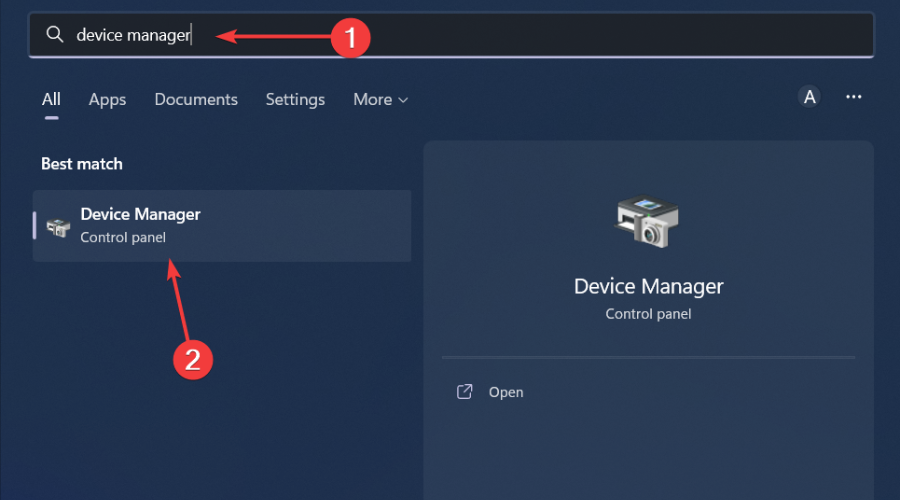
- Hit the Windows key, type Device Manager in the search bar, and click Open.

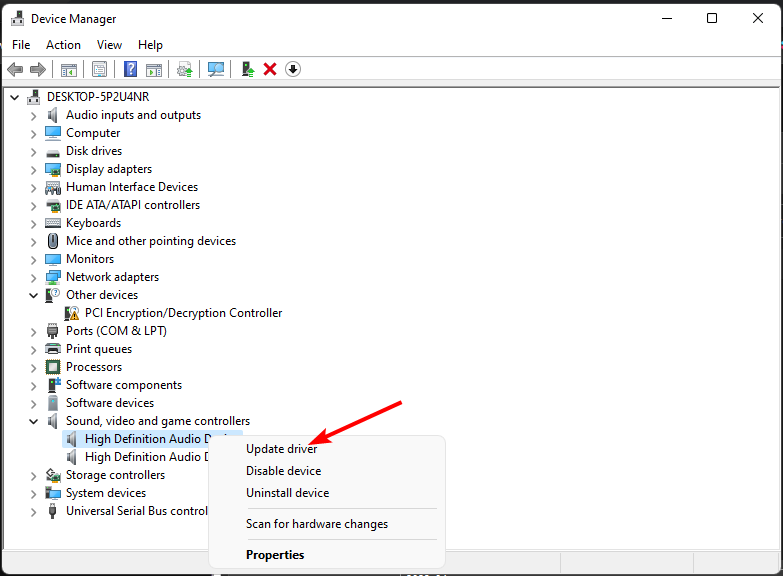
- Navigate to Sound, video, and game controllers to expand, right-click Realtek High Definition Audio and select Uninstall device.

- Restart your device and the drivers will automatically reinstall themselves.

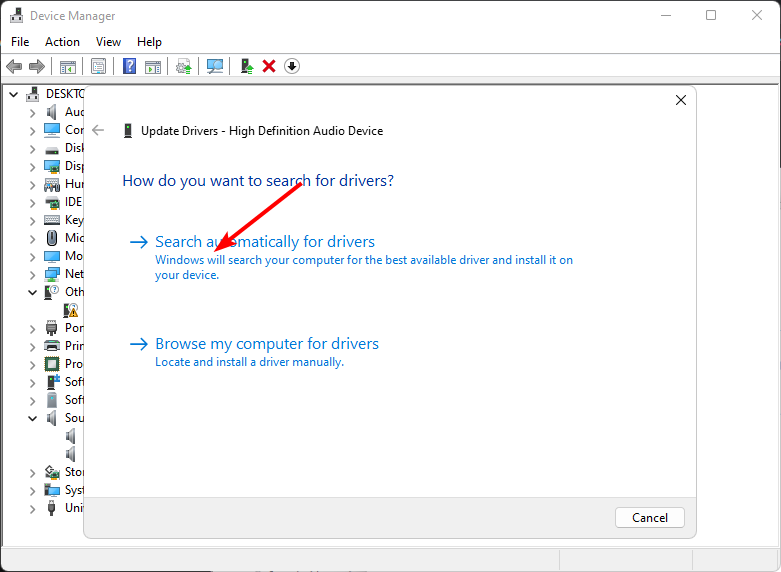
4. Update audio drivers
- Hit the Windows key, type Device Manager in the search bar, and click Open.
- Navigate to Sound, video, and game controllers to expand, right-click Realtek High Definition Audio and select Update driver.

- Select Search automatically for drivers.

- Restart your PC and try reconnecting.
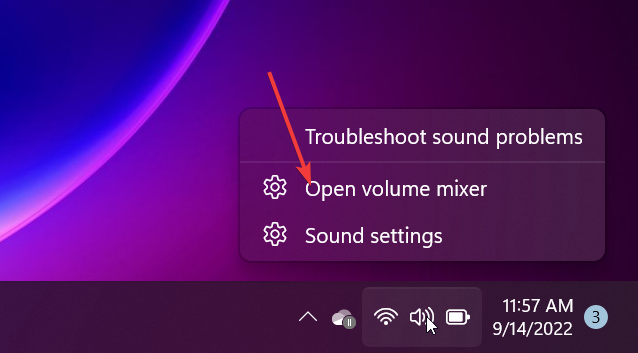
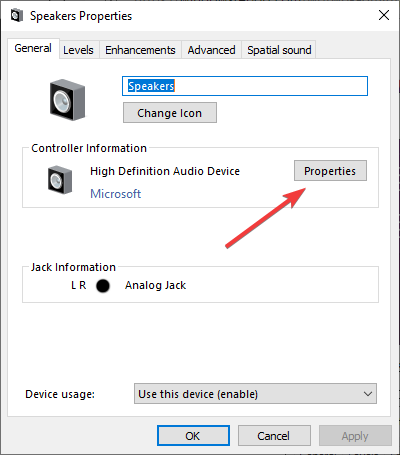
5. Disable exclusive mode for other apps
- Right-click on the sound icon at the bottom right corner and select Open volume mixer.

- Click on your playback device and select Properties.

- Navigate to the Advanced tab, uncheck Allow applications to take exclusive control of this device option, and click OK.
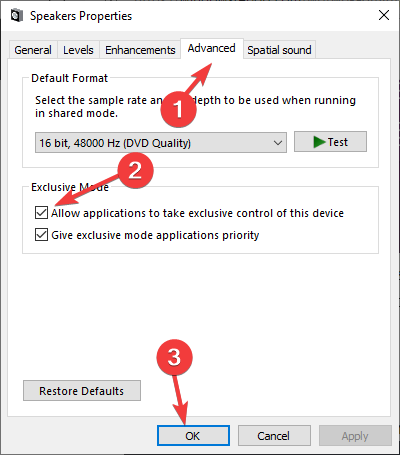
Disabling exclusive mode allows the different apps using sound on your device to share the audio device without interfering with others.
6. Disable Realtek audio on Startup
- Right-click the Start menu and select Task Manager.
- Next, select the Startup tab.
- Then right-click Realtek HD Audio Manager and select Disable if it’s enabled.

- Close the Task Manager, and restart Windows.
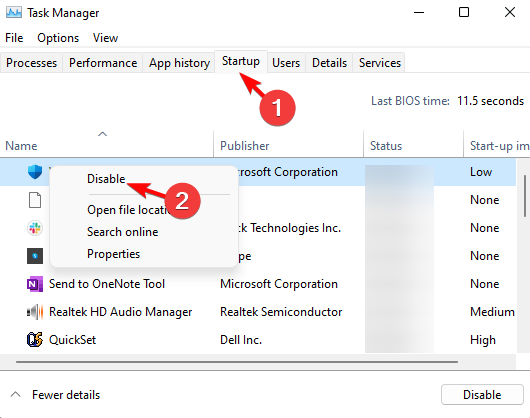
If the Realtek Audio Manager is set to launch on startup, it will ask which device did you plug in everytime so disabling it will get rid of this pop up.
7. Deselect the Enable auto popup dialog
- Press the Windows + E keys at the same time to open the File Explorer window.
- Next, open this folder in File Explorer:
C:Program FilesRealtekAudioHDA
- Click the RtkNGUI64.exe file to open an audio manager app.
- Then click the Advanced tab.
- Select Jack Information to open the options in the snapshot directly below.

- Uncheck the checkbox for the Enable auto popup dialog, when device has been plugged in option.


Unchecking this option will stop the which device did you plug in pop-up from appearing every time you connect an audio device.
Another issue you may experience is the you just unplugged a device from the audio jack error message which also appears whether you have plugged in or not an audio device.
Should the issue persist, there are other Realtek audio console alternatives. Try them out and weigh your options.
That’s all from us but do let us know if you have any additional thoughts in the comment section below.


User forum
0 messages