Fix: Wi-Fi Won't Work But Says Connected in Windows 10/11
Key notes
- You can't open websites in any of your browsers even though the Wi-Fi connection looks OK. When that happens, read the article below for plenty of solutions.
- Do you know how to perform a System Restore? Read our guide on how to do a System Restore like a pro.

Have you ever encountered an issue whereby you can’t open websites in any of your browsers even when your Wi-Fi connection is seemingly fine?
All the Wi-Fi indicators on your router and in Windows might highlight the connection is ok, but websites still aren’t opening.
When that happens, it will usually have something to do with a laptop’s or desktop’s connection settings. These are a few potential resolutions that will fix the issue.
Wi-Fi is connected but still won’t work?
1. Open the Internet Connections Troubleshooter
Firstly, check out the Internet Connections troubleshooter in Windows 10. That can shed light on, and perhaps fix, numerous connection errors. You can open that troubleshooter as follows.
- Open the Cortana app by pressing its taskbar button.
- Enter the keyword ‘troubleshoot’ in the search box and select Troubleshoot to open a list of troubleshooters.

- Click Internet Connections and press the Run the troubleshooter button to open the window shown directly below.

- Then you can select Troubleshoot my connection to Internet option in the troubleshooter.
2. Reset the DNS Settings
This issue can often be due to the DNS server settings. Thus, resetting DNS settings is among the best resolutions. This is how you can reset the DNS settings in Windows 10.
- Right-click the connection icon on the system tray and select Open Network Internet settings to open the window in the shot directly below.

- Click Change adapter options and then right-click your Wi-Fi adapter network to select Properties. The Properties option opens the window shown below.

- Select Internet Protocol Version 4 and press the Properties button to open the window in the screenshot below.

- Now select the Obtain an IP address automatically option, and press the OK button.
- If the Wi-Fi still isn’t working, select Use the following DNS server addresses option on the Internet Protocol Version 4 window.
- The enter 8.8.8.8 in the Preferred DNS server box and ‘8.8.4.4’ in the Alternative DNS server box. Press the OK button to apply the new settings.
3. Erase Temp Files
- Some persons have confirmed that erasing temporary files is another resolution for this issue. To clear the temp folder in Windows, press the File Explorer button on the Win 10 taskbar.
- Then enter ‘C:\Windows\temp’ in File Explorer’s path box, and press the Return key.
- A dialog box window might open requesting admin permissions. Press Continue on that dialog box window to open the temp folder in File Explorer as in the shot below.

- Then press the Ctrl + A hotkey to select all the files in that folder.
- Press the Delete button to erase the selected files.
4. Check the Proxy Server Settings
Recent changes to proxy server settings can generate connection issues. As such, it might be worth checking your proxy server settings. You can check those settings as follows.
- Open Run by pressing the Win key + R keyboard shortcut.
- Enter ‘Control Panel’ in Run, and press the OK button.
- Select Internet Options to open the window directly below.

- Click the Connections tab, which includes a LAN settings button.

- Press the LAN settings button to open the proxy settings shown directly below.

- Uncheck all check box options selected there.
- Then press the OK button to close the window.
5. Reset the TCP/IP Stack With NetShell
It might be the case that the TCP/IP stack is corrupted. Resetting the TCP/IP will repair the stack and your connection. You can utilize the NetShell command-line tool to reset the protocol.
Follow the guidelines below to reset the TCP/IP.
- First, open Run by pressing the Win key and R.
- Open the Command Prompt by entering CMD in Run’s text box and pressing the OK button.
- Enter netsh int ip reset c:\resetlog.txt in the Prompt’s window, and press the Return key.

- Alternatively, you can input netsh int ip reset without a directory path.
6. Utilize the System Restore Tool
Windows’ System Restore utility reverts the platform back to a selected restore point. As such, you can restore Windows to a date when the Wi-Fi was working and websites opened in your browsers.
The System Restore utility might restore your connection settings to what they were at the selected restore point and fix this internet issue.
This is how you can utilize System Restore in Windows 10.
- Enter rstrui in Run and click OK to open System Restore.
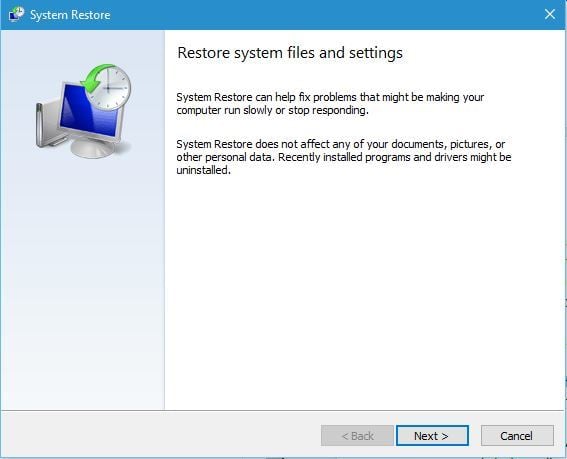
- Click the Next button, and then select a restore point date.
- You can also select the Scan for affected programs option to check what software you’ll lose after the restore point. You’ll need to reinstall software installed after the selected restore point.

- Click the Next and Finish buttons to confirm your selected restore point and restart Windows.
So that’s how you can kick-start your Wi-Fi to get browsing again.
Resetting your router or even Windows 10 might also fix this issue. This net article also provides some handy tips for fixing internet connectivity.
For more tips and tricks, take a closer look at our article on fixing WiFi connectivity problems on HP laptops running Windows 11.
Read our disclosure page to find out how can you help Windows Report sustain the editorial team. Read more


Improve this guide


User forum
0 messages