How to boot from USB in Windows 10
Disable Fast Boot prior to booting from USB
2 min. read
Updated on
Read our disclosure page to find out how can you help Windows Report sustain the editorial team. Read more
Key notes
- Your PC boots from your hard drive by default.
- Through manual configuration, you can set up your PC to boot from a USB flash drive.
- We will show you how to do this in our article.

Every time you boot your Windows PC, the default boot location is usually your hard drive where the operation system is installed. However, there are times when you may want to boot your PC from a USB drive.
However, this isn’t something that is very well-known but, even if users do know how to do it, they surely don’t know all the methods to do it.
That is precisely why we’ve compiled this step-by-step guide, to show you how to boot your Windows 10 PC from a USB drive.
How can I boot from a USB flash drive in Windows 10?
Note: If you have fast boot or ultra fast boot enabled in your UEFI firmware settings, then you will need to temporarily disable them to be able to boot from a USB.
1. Boot from a USB from within Windows 10
1. Connect your USB drive into one of the PC’s ports.
2. Press the key that allows you to enter Advanced Startup Options. On some PCs, for example, this key is F11.
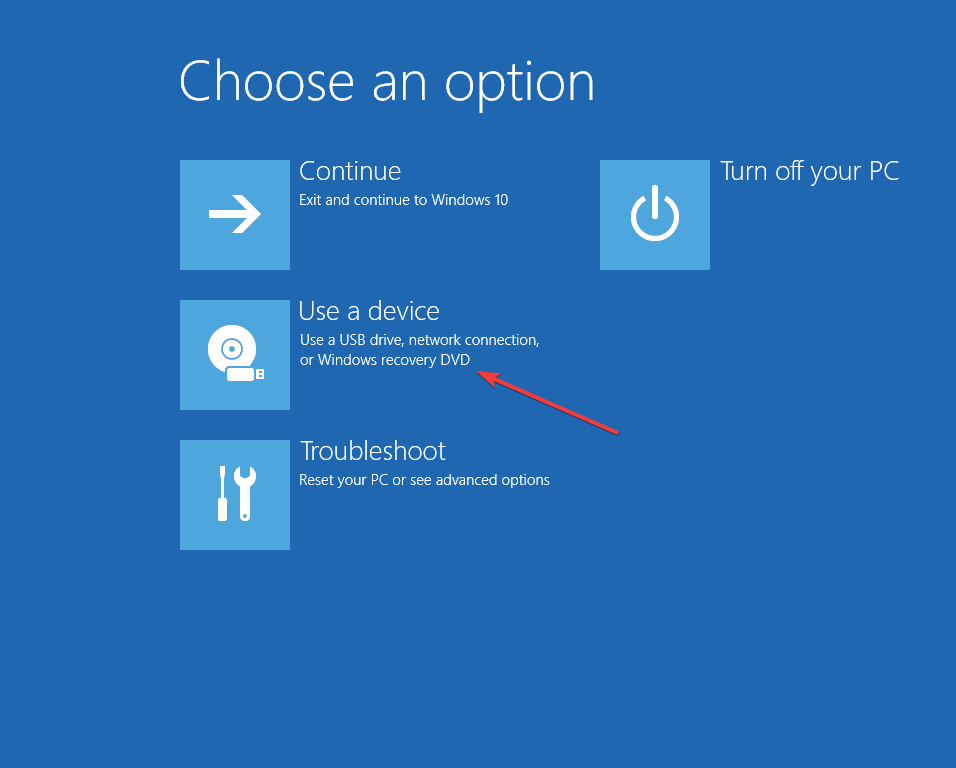
3. You are now in the Advanced Startup menu.
4. Select Use a device.
5. Choose the USB drive you want to boot from.
6. The PC will now restart and boot from that particular USB drive.
The Advanced Startup menu allow users to choose from which drive to boot their PCs. All you need to do is enter this menu upon booting, then manually configure the PC to boot from your USB drive.
Having problems accessing the Advanced Startup menu? Check out our guide that will show you how to make accessing it easier.
2. Boot from a USB drive at boot in a Windows 10 PC
- Connect a USB drive into one of the PC’s ports
- During a computer boot, enter the Boot Menu
- This process varies from PC to PC, so check out your PC manufacturer’s specifications based on your needs
- In the Boot Menu, select the USB drive you want to boot from
- This process depends on the PC that you have
- You can either move the USB drive up the priority list using the F4 or F5 keys
- You can also select to boot from it straight from the menu
- This process depends on the PC that you have
3. Boot from a USB drive on a Surface device
- While the surface device is turned off, connect a USB device
- Hold the volume-up button
- Press and release the power button
- Hold the volume-up button pressed until the Surface or Windows logo disappears
- The Surface Boot UEFI should appear
- Select Configure Alternate System Boot Order
- Rearrange the order so that the USB drive is the top pick
- Disable Secure Boot Control
- Restart the Surface device
By following any of the steps below, you should be able to easily boot both a Windows 10 PC and a Surface device from a USB drive.
Keep note that this will not affect the device’s ability to boot normally. If it boots without any bootable USB drive connected, it will switch back to booting from the system drive.
Let us know if you want to read about more boot options by commenting in the section below.


User forum
0 messages