Windows 10 network adapter is missing [Fixed]
3 min. read
Updated on
Read our disclosure page to find out how can you help Windows Report sustain the editorial team. Read more

If you have upgraded your PC to Windows 10, network problems may occur from time to time. If your PC fails to recognize the adapter, you won’t be able to see it in the Device Manager.
In the event of Internet failures or network problems, a quick check of the network adapter often helps.
This way you can rule out that this is the cause of the problem. In the following lines you will find sure ways to fix your problems with network adapters.
How do I fix the Windows 10 network adapter missing error?
1. Change the adapter settings
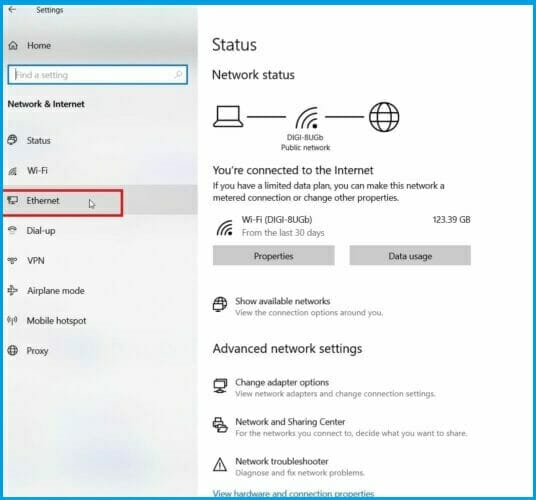
- Open the Windows Settings app.
- Select Network and Internet, and click on Ethernet.
- Look for a wireless adapter that is currently running.
- Right-click on it and select Properties.
- Search for the Internet Protocol Version 6 (TCP/IPv6).
- Uncheck IPv6 to disable it, and click on OK.
- Restart your PC.
A network adapter is an interface between the Windows operating system and a network connection.
2. Update your drivers
The error is often caused by outdated or missing drivers. In this case, you may not appear in the Device Manager panel which is why we recommend you use dedicated software to update it.
The software uses its own comprehensive database to find the newest driver version for your hardware. It is light and simple. Just let it run a scan and it will find and fix all driver-related issues on your whole PC.
3. Activate and deactivate network adapter
- Open the Windows Settings app.
- Select Network and Internet, and click on Status.
- Under Advanced network settings on the right, you will find the Change adapter options.
- Click on Network adapters.
- Choose the network adapter or Ethernet port of your Windows PC.
- Right-click on it and select Deactivate.
- For activation, right-click on the network adapter or Ethernet port, and select Activate.
Activation and deactivation is done via the context menu. If you want to disable the network adapter or Ethernet port of your Windows PC, this is possible, by following the above-mentioned steps.
4. Reset the network adapter

- Open the Windows Settings app, and go to Network & Internet.
- Click on Status.
- Under the Advanced network settings, click on the Network reset.
- Select Reset now, and click Yes.
After you complete the steps, the computer will restart automatically, and on reboot, you should now be able to connect to the internet.
5. Uninstall the network adapter

- Open the Windows Settings app.
- Select Network and Internet.
- Click on Status on the left.
- Under Advanced network settings on the right, you will find Change adapter options.
- Click on Network adapters.
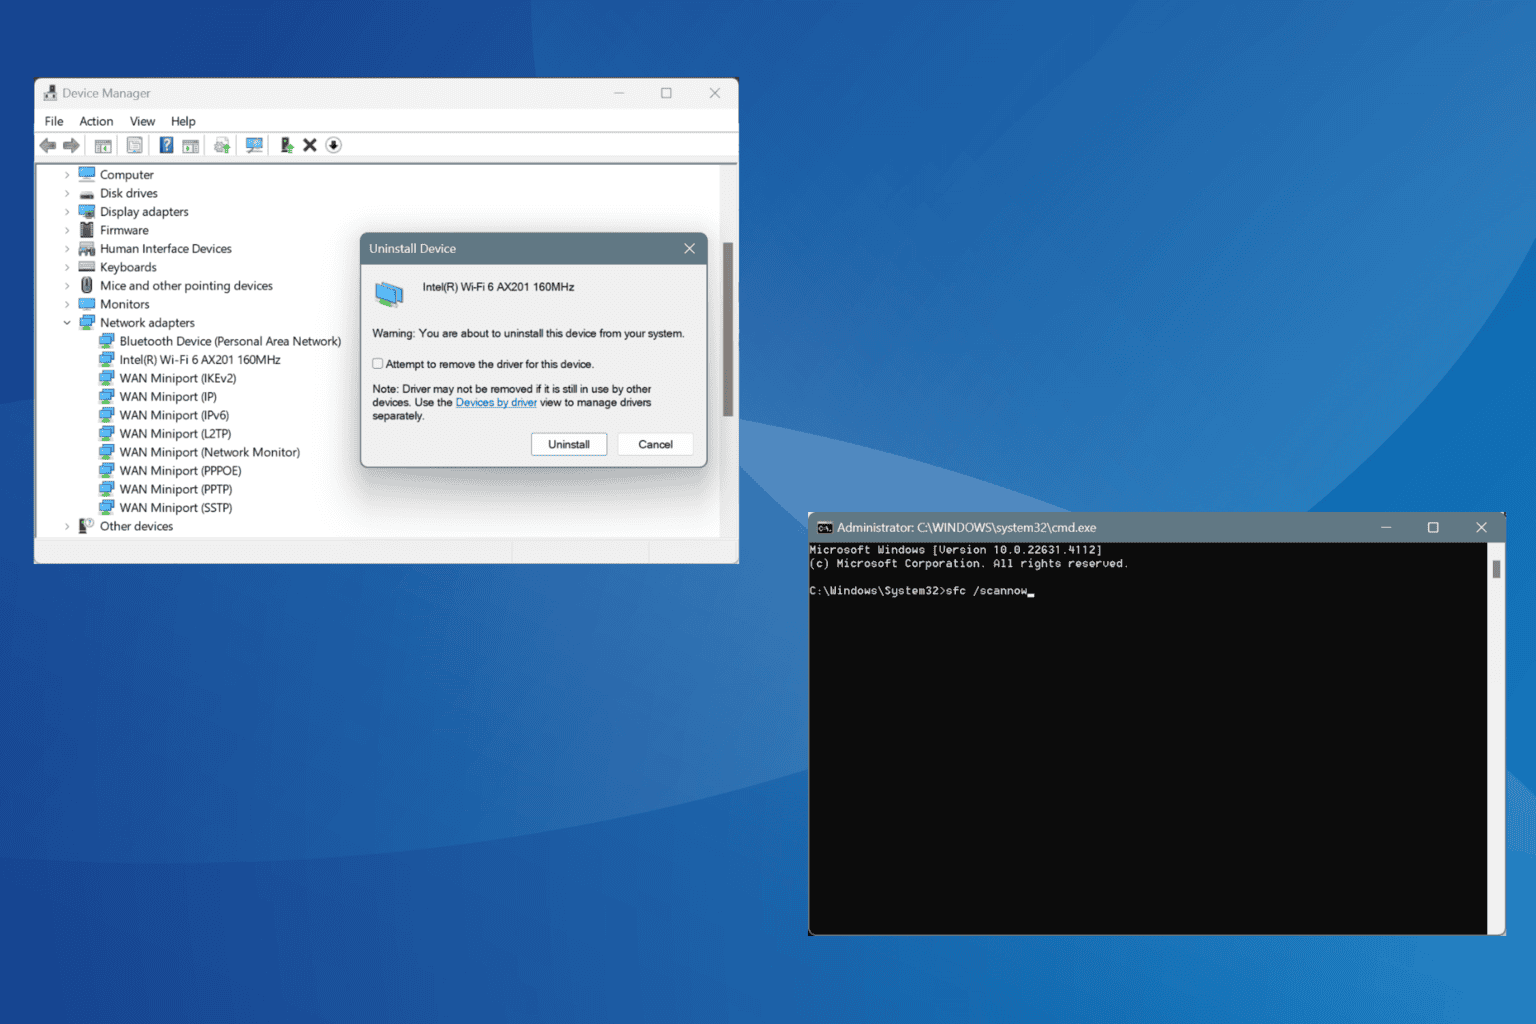
- Right-click the problematic network adapter and select the Uninstall device option.
- Click the Uninstall button.
- Restart your PC.
After you complete the steps, Windows 10 should automatically detect and reinstall the driver again, fixing the network problem.
6. Use the Network troubleshooter

- Open the Windows Settings app.
- Go to Update & Security, and select Troubleshoot.
- Click on Internet Connections.
- Go to Run the Troubleshooter.
- Follow further on-screen instructions and let the process finish.
- Restart your PC.
The first thing you are going to do is also the easiest one. You are simply going to run the network troubleshooter and let it do the job for you.
In the above lines it’s shown how to run the network troubleshooter in Windows 10.


User forum
0 messages