Full Fix: Update error 0x8024a10a on Windows 10/11, 7
Key notes
- Many users reported that the Windows 10 0x8024a10a update error completely shuts down the update process.
- You should check your antivirus, as it can interfere with the system and cause this error to occur.
- Create a Windows Update reset script that will reset all necessary services for you.
- Manually download the desired update by following our step-by-step guide below.
Microsoft is constantly trying to supply users with a more stable and secure system by performing more frequent updates for Windows 10.
On the other hand, those users listed over 30 errors related to Windows 10’s system update. And some of those are a tough nut to crack.
One of those annoying errors is linked with the code 0x8024a10a. According to numerous users, this error occurs both on PCs and Windows-powered smartphones. It completely shuts down the update process.
On the other side, Microsoft is not addressing it as it should. So, we’ll try and clear things up with this article.
How to fix Windows 10 Update error 0x8024a10a
Windows update error 0x8024a10a can prevent you from installing the latest updates, and that can be a security concern. Speaking of this error, here are some similar issues users reported:
- Windows 10 not updating, cannot update – The main problem with this error is that it will prevent you from updating your PC, but you should be able to fix it by using one of our solutions.
- Update error 0x8024a10a laptop – This issue affects both laptop and desktop PC, and if you encounter it, you might be able to fix it by temporarily disabling your antivirus.
- 0x8024a10a Windows 10 update – According to users, this error occurs mostly while trying to download new updates. To fix the problem, reset Windows Update components and check if that helps.
Solution 1 – Disable Your Antivirus
Some users reported that, on some occasions, third-party antimalware software slowed down or even stops the Windows update process.
Using an antivirus tool is important if you want to protect your PC from online threats, but sometimes your antivirus can interfere with your system and cause this error to occur.
To fix the problem, it’s advised to disable certain antivirus features and check if that helps. If that doesn’t work, your next step would be to disable your antivirus altogether.
Even if you decide to do that, you’ll still be protected by Windows Defender, so you don’t have to worry about your safety.
If the error code still appears, you might have to remove your antivirus to solve this problem. If removing the antivirus fixes the issue, it might be a good time to consider switching to a different antivirus solution with maximum protection that won’t interfere with your system.
Additionally, it is a good idea to disable your VPN while updating.
Solution 2 – Perform the System File Checker
System File Checker (SFC) is the built-in tool that helps you scan and repair various system files. Mostly due to virus infections, your files may get corrupted or incomplete.
If the update worked well before, and then stopped for no apparent reason, SFC may be just the tool for the job. You can use System File Checker this way:
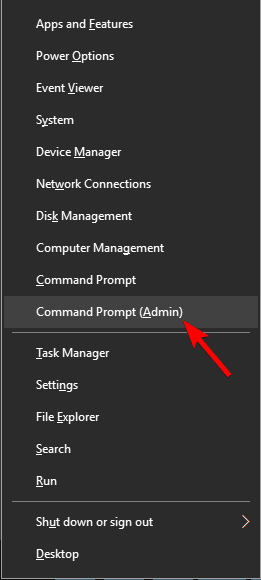
- Press Windows key + X and run Command Prompt (Admin).
- In the command line, type sfc/scannow
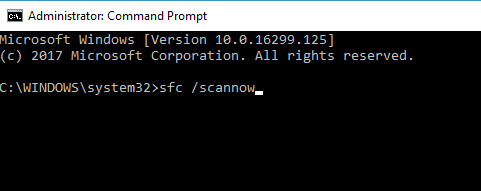
- The process should last for approximately 5 minutes.
- After it’s done, restart your PC and try updating again.
If the SFC scan was unsuccessful, you might want to try using a DISM scan instead. DISM is an acronym for Deployment Image Servicing and Management.
The main task of the DISM is to scan and fix corrupted files related to Windows Update. To use DISM, just follow these steps:
- Press Windows key + X and start Command Prompt (Admin).
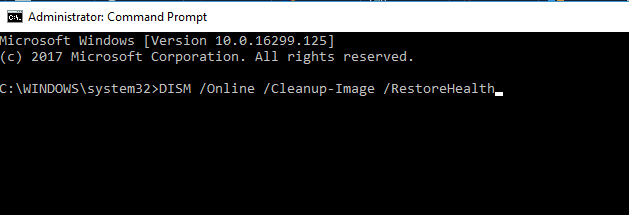
- In the command line type following command: DISM.exe /Online /Cleanup-image /Restorehealth
- In case the DISM can’t obtain files online, try using your installation USB or DVD. Insert media and type following command:
- DISM.exe /Online /Cleanup-Image /RestoreHealth /Source:C:RepairSourceWindows /LimitAccess
- Be sure to replace ”C:RepairSourceWindows” path of your DVD or USB.
- The operation should last no more than 5 minutes.
Once the DISM scan is finished, check if the problem is still there. If the issue persists, or if you were unable to run SFC scan before, repeat the SFC scan and check if that helps.
Solution 3 – Try starting PC in the Clean Boot mode
Sometimes third-party applications can interfere with your system and cause update error 0x8024a10a to appear.
Certain applications and services can start automatically with your PC and cause this issue to appear, and in order to fix the problem, you need to perform Clean boot.
This is rather simple, and you can do it by following these steps:
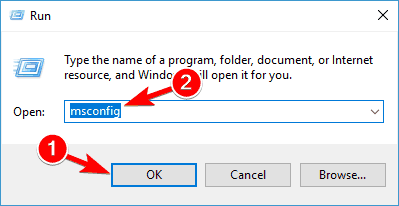
- Press Windows Key + R and enter msconfig. Press Enter or click OK.
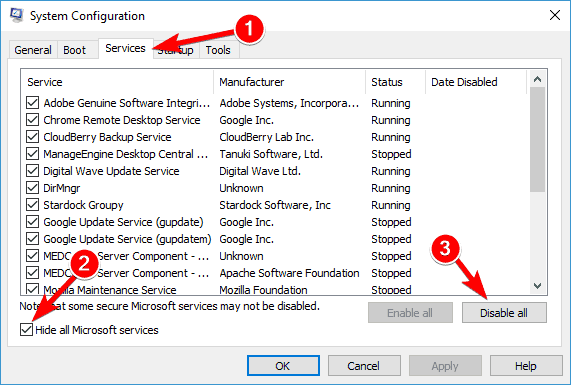
- Go to Services tab and check Hide all Microsoft services box. Then click Disable All and press Apply.
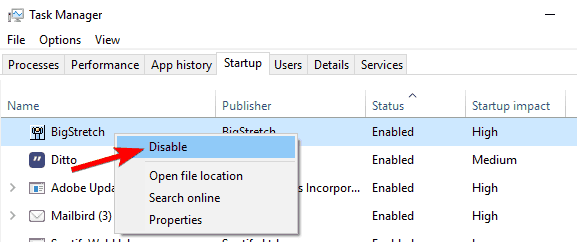
- Go to Startup tab and click Open Task Manager.

- Disable all Startup programs individually and press OK.
- Restart your PC and try updating.
If the problem is persistent, you can move to the final step. Additionally, If you are keen to retrieve past configuration, you can do it easily by returning to System Configuration and Task Manager respectively.
Just enable disabled processes and you are good to go.
Solution 4 – Reset Windows Update components
If you have issues with update error 0x8024a10a, the problem might be related to Windows Update services.
Sometimes issues with services can be resolved simply by restarting them, but there are multiple services related to Windows Update, so restarting them all by hand can be a time-consuming task.
However, you can always create a Windows Update reset script that will reset all necessary services for you.
This process is quite simple, and you’ll have your script ready in a matter of minutes. Once you create a script, just run it and the problem will be resolved.
Solution 5 – Run Windows Update troubleshooter
Windows comes with various tools called troubleshooters that can fix common PC problems. Several users reported that they fixed error 0x8024a10a simply by using Windows Update troubleshooter.
To use Windows Update troubleshooter, you just need to do the following:
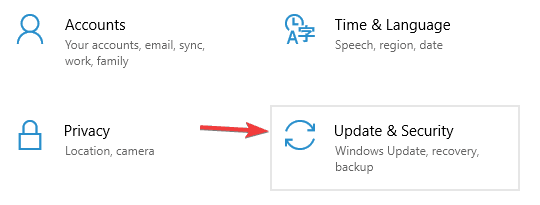
- Press Windows Key + I to open the Settings app.
- Now go to Update & Security section.
- In the left pane, select Troubleshoot. Select Windows Update from the right pane and click Run the troubleshooter button.
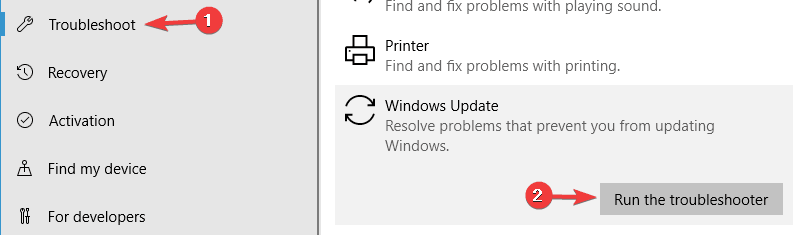
- The troubleshooter will now start. Follow the instructions on the screen to complete it.
Once the troubleshooter is finished, check if the problem is still there.
Solution 6 – Download the desired update manually
According to users, if you can’t download Windows updates due to error 0x8024a10a, you might be able to circumvent the problem simply by downloading and installing the desired update manually.
To do that, you just need to follow these steps:
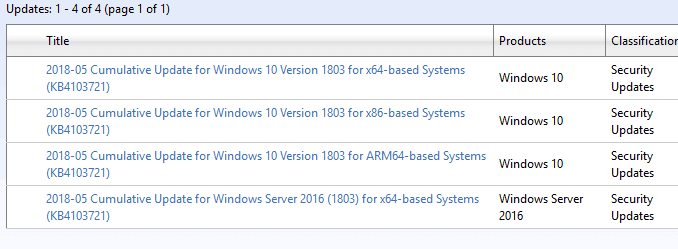
- First, you need to find out the code of the update you’re trying to download. To do that, simply go to Windows Update and check the code of the update you’re trying to install. The code will consist of an array of numbers and KB letters at the beginning. Once you find the code, copy it or write it down.
- Go to Microsoft’s Update Catalog website. Now enter the update code in the search bar. List of results will now appear. Select the update that matches your system architecture and click Download.
After downloading the update, run the setup file and you should be able to update your system.
Solution 7 – Perform an in-place upgrade
If you’re having problems with update error 0x8024a10a, you might be able to solve it by performing an in-place upgrade.
In case you’re not familiar, this process will install the latest version of Windows while keeping all your personal files and applications intact.
To perform an in-place upgrade, you need to do the following:
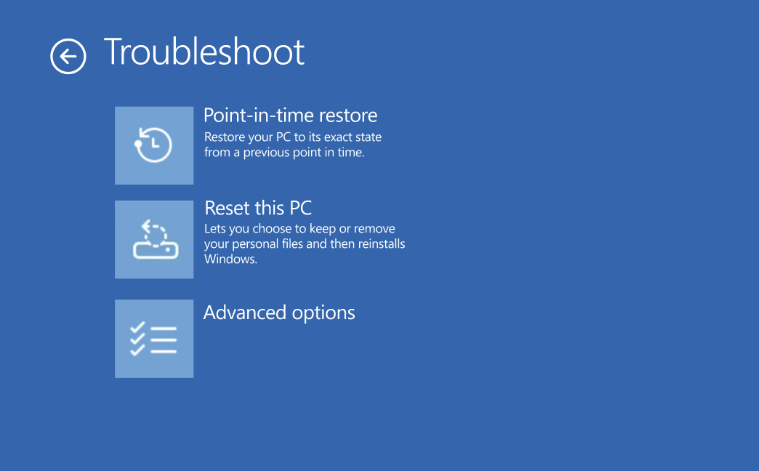
- Download Media Creation Tool and run it.
- Select Upgrade this PC now.
- Wait while the application prepares your PC. Now choose Download and install updates and click Next.
- Wait while the updates are downloaded and follow the instructions on the screen until you get to the Ready to install screen.
- On Ready to install screen, click Change what to keep. Now select Keep personal files and apps and click Next.
- Follow the instructions on the screen to complete the installation.
Once the installation is finished, you’ll have the latest version of Windows 10 installed and the issue should be resolved.
Solution 8 – Perform a clean install of Windows 10
In case all of the above steps proved futile, you may consider reinstallation is your easiest solution. We are aware that can take some time, but the installation process for Windows 10 is not lengthy nor hard to perform.
We hope you managed to fix your update issue with these workarounds. If you have any questions or doubts, be sure to address them in the comments section below.
Read our disclosure page to find out how can you help Windows Report sustain the editorial team. Read more


Improve this guide


User forum
0 messages