Games Keep Crashing in Windows 11: How to Stop it
Explore tested solutions that will get you back to gaming ASAP
Key notes
- When a Windows 11 game is crashing, freezing, or not loading, the usual suspect is the graphics driver.
- Many of our readers also reported the 0x80000003 error, while for some, all games were crashing on Windows 11.
- Before starting to tweak your system, make sure you have the right PC specifications to run the game.
Windows 11 was touted as an excellent system for playing games, and although most users enjoy their titles, some of our readers complained about their games crashing.
There are numerous representations for this issue, and a few of them even reported the 0x80000003 error when trying to play a game. In this guide, we will explain some solutions that will help you resolve the problem.
Why my games keep crashing on Windows 11?
If your game is freezing or just not loading at all, the first thing you need to check is if your PC has the correct configuration to play the game.
- Ensure you have the required programs: Many games require additional software to run. For instance, DirectX is a must for the huge majority of games.
- Check the required configuration: You will be able to check the game requirements on the developer’s website or even on the ones from the resellers.
- Cross-check connected hardware: A game can crash after adding more RAM to your PC so you should also check this particular problem.
- Verify if you have the latest drivers: If you don’t have the correct drivers or if you didn’t update them in a while, that can cause a lot of problems, and the game might not even run at all.
What can I do if games keep crashing on Windows 11?
1. Update the graphics card driver
1.1 Use Windows Update
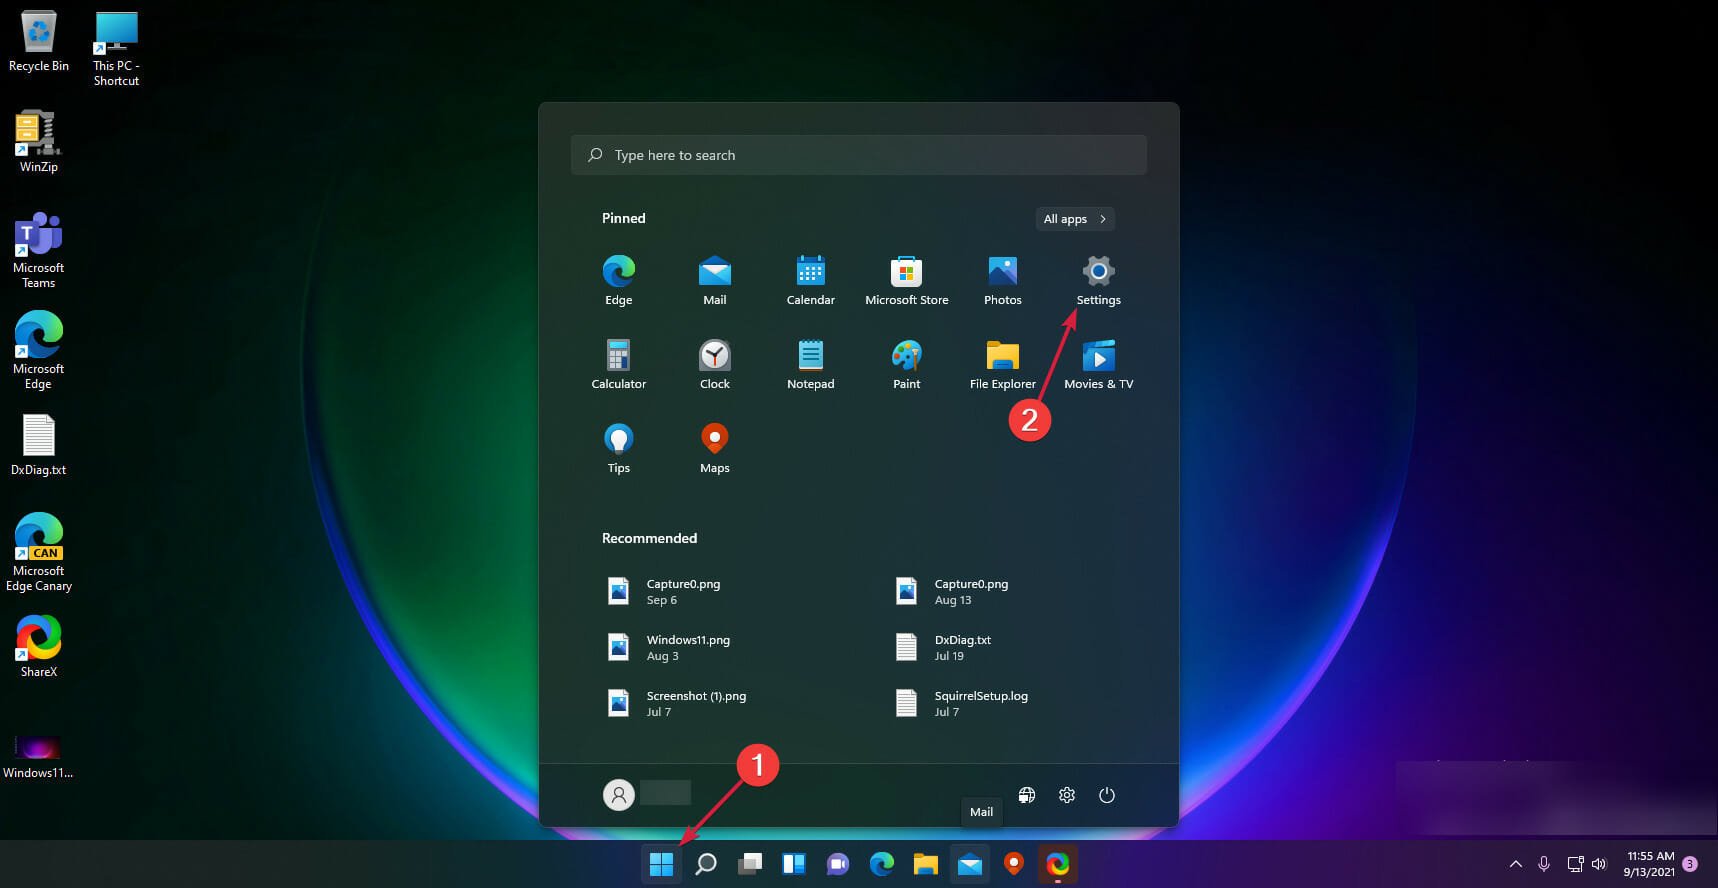
- Click the Start button and choose Settings.

- Select the Windows Update option from the left.
- Click on the Check for updates button.

- If there are any new updates, the system will download and install them.
- Restart your PC.
- Click on the Advanced options to get to the optional updates.
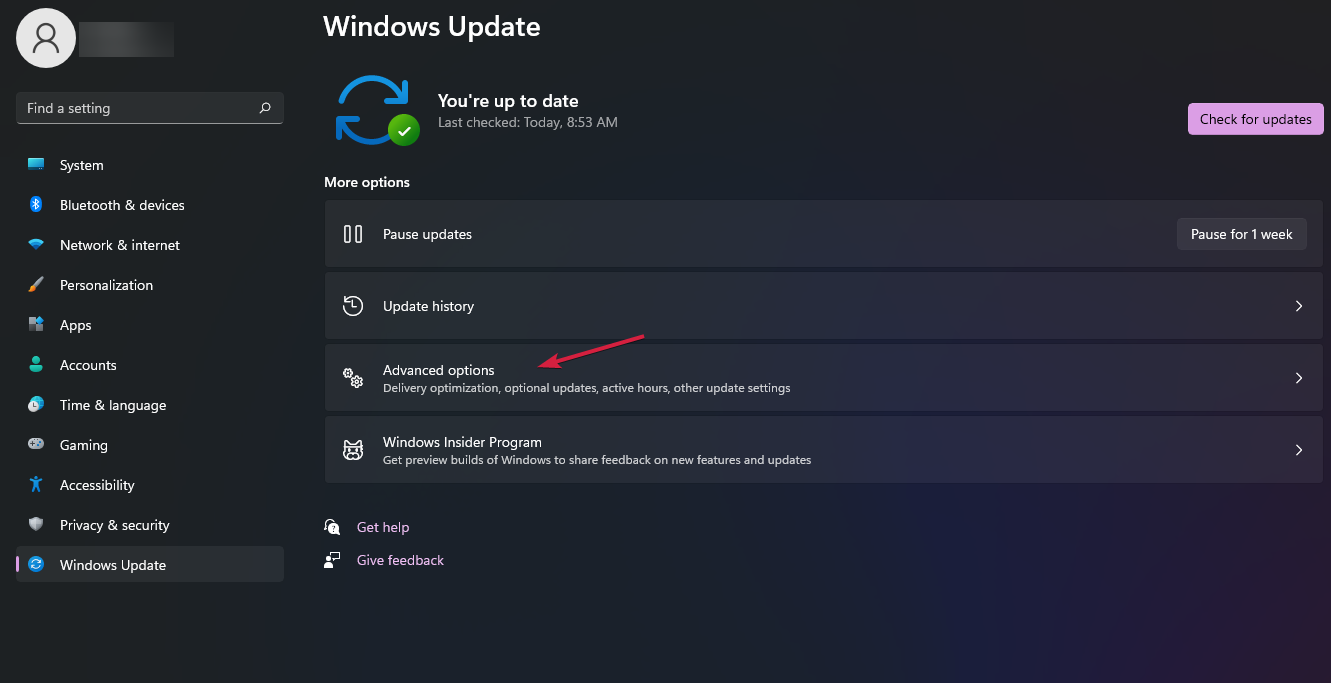
- Select the Optional updates section.
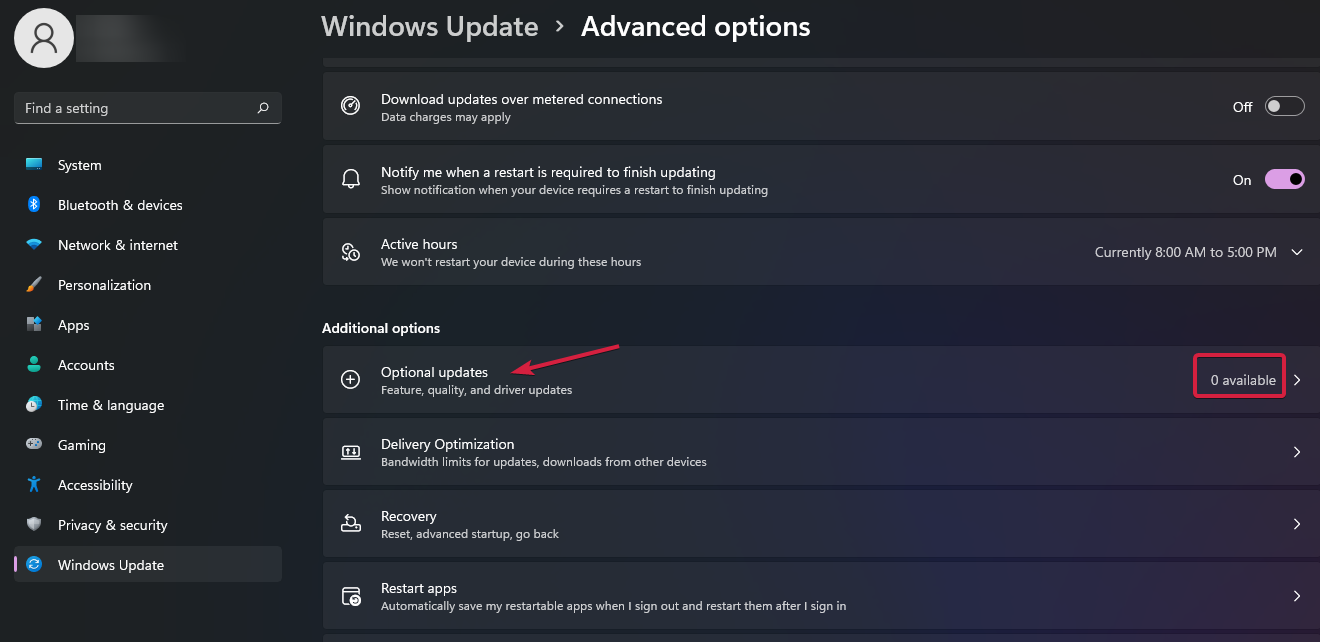
- Select the available update and install it.
That’s the easiest method to update the drivers and especially the one for the graphics card, because usually, the manufacturers provide them for a system update.
However, it can be the case that it’s not published yet for your system, so you will need to navigate to the manufacturer’s website and get it yourself.
We also have plenty of solutions if the Settings app crashes on Windows 11 and you can’t perform this procedure.
1.2 Install the driver manually from the manufacturer’s website
- Go to the dedicated driver’s download page of the graphics card manufacturer. In our example, we went to NVIDIA’s webpage.

- Enter all the data about your graphics card and specify the Windows 11 OS in the list.
- Hit the Search button.
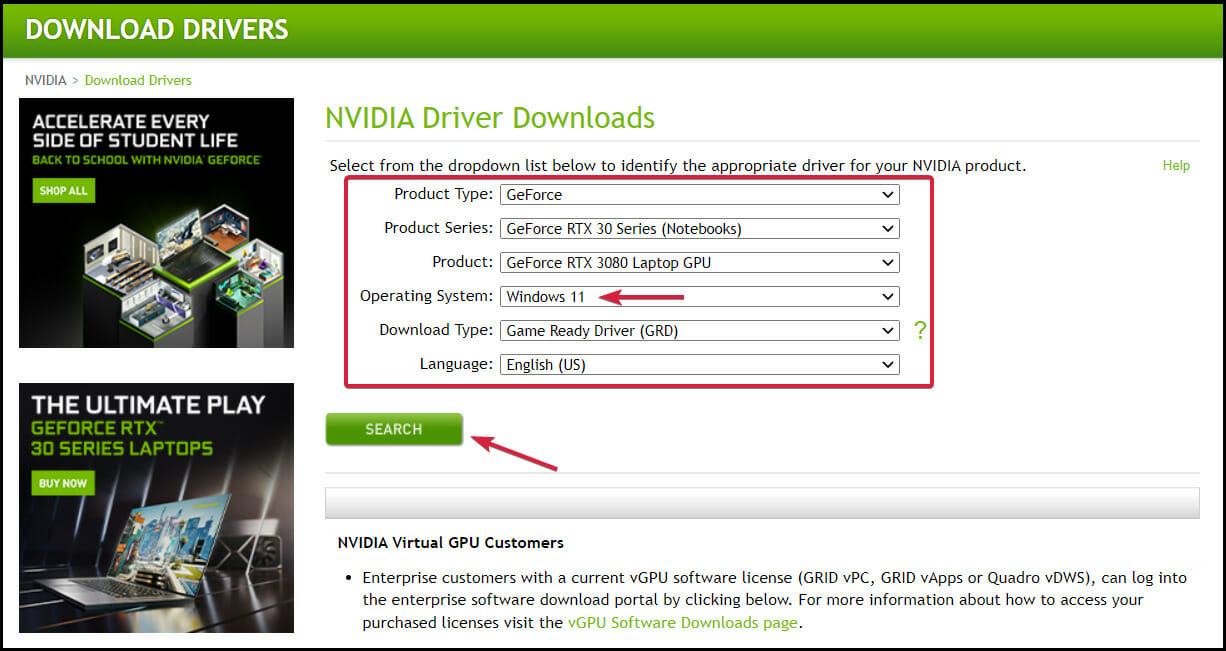
- Click the Download button.
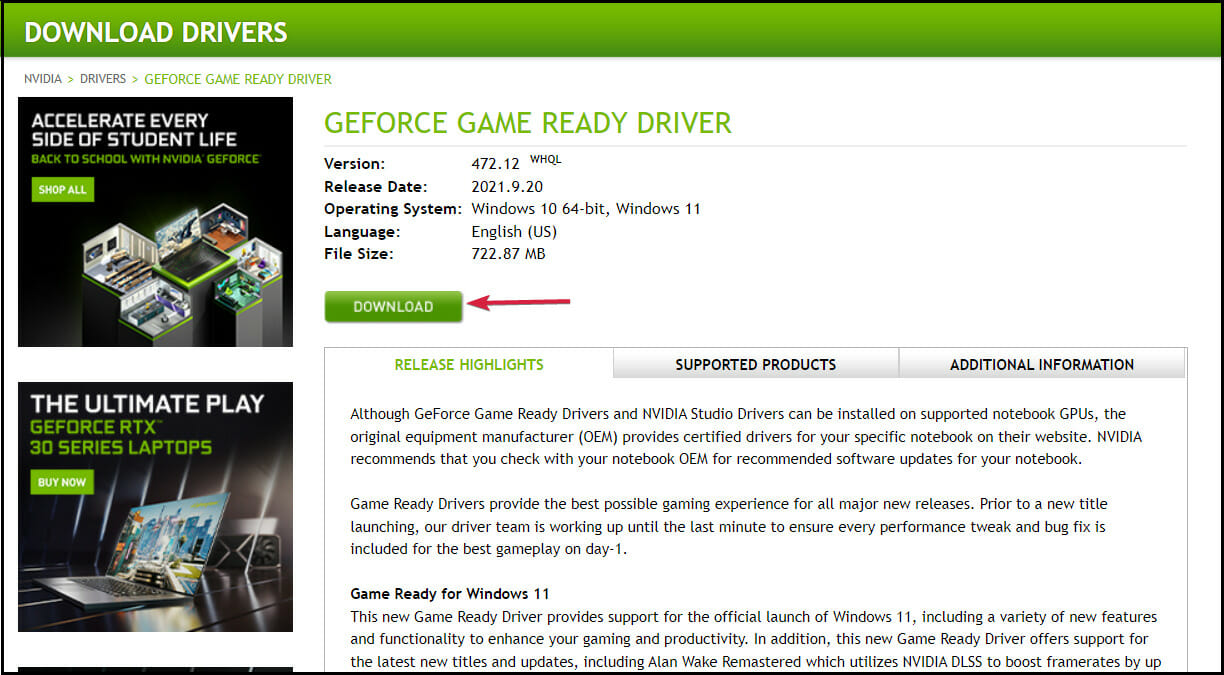
- Select the Download button again.
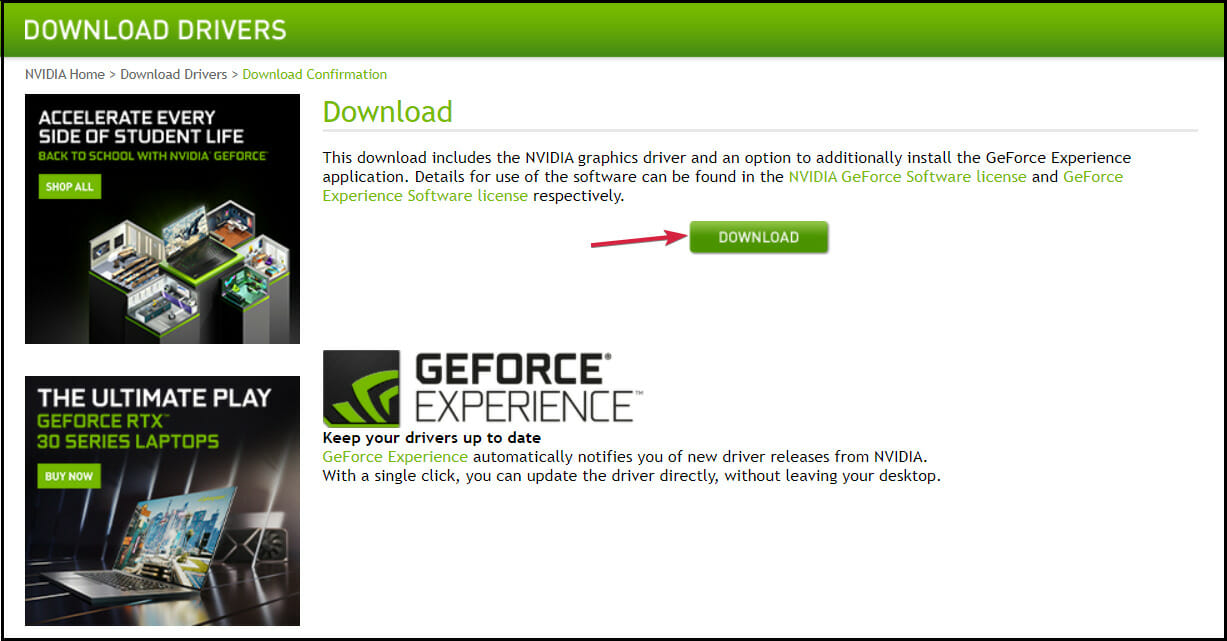
- Run the EXE file you just downloaded.
1.3 Install the driver with a specialized tool
Sometimes, updating your drivers using Windows Update or installing them from the manufacturer’s website can be tedious.
You can opt for the quickest alternative which is dedicated software such as PC HelpSoft Driver Updater which is created to provide you with a complete list of outdated or missing drivers and then locate the latest updates from its database.
⇒ Get PC HelpSoft Driver Updater
2. Run an SFC Scan
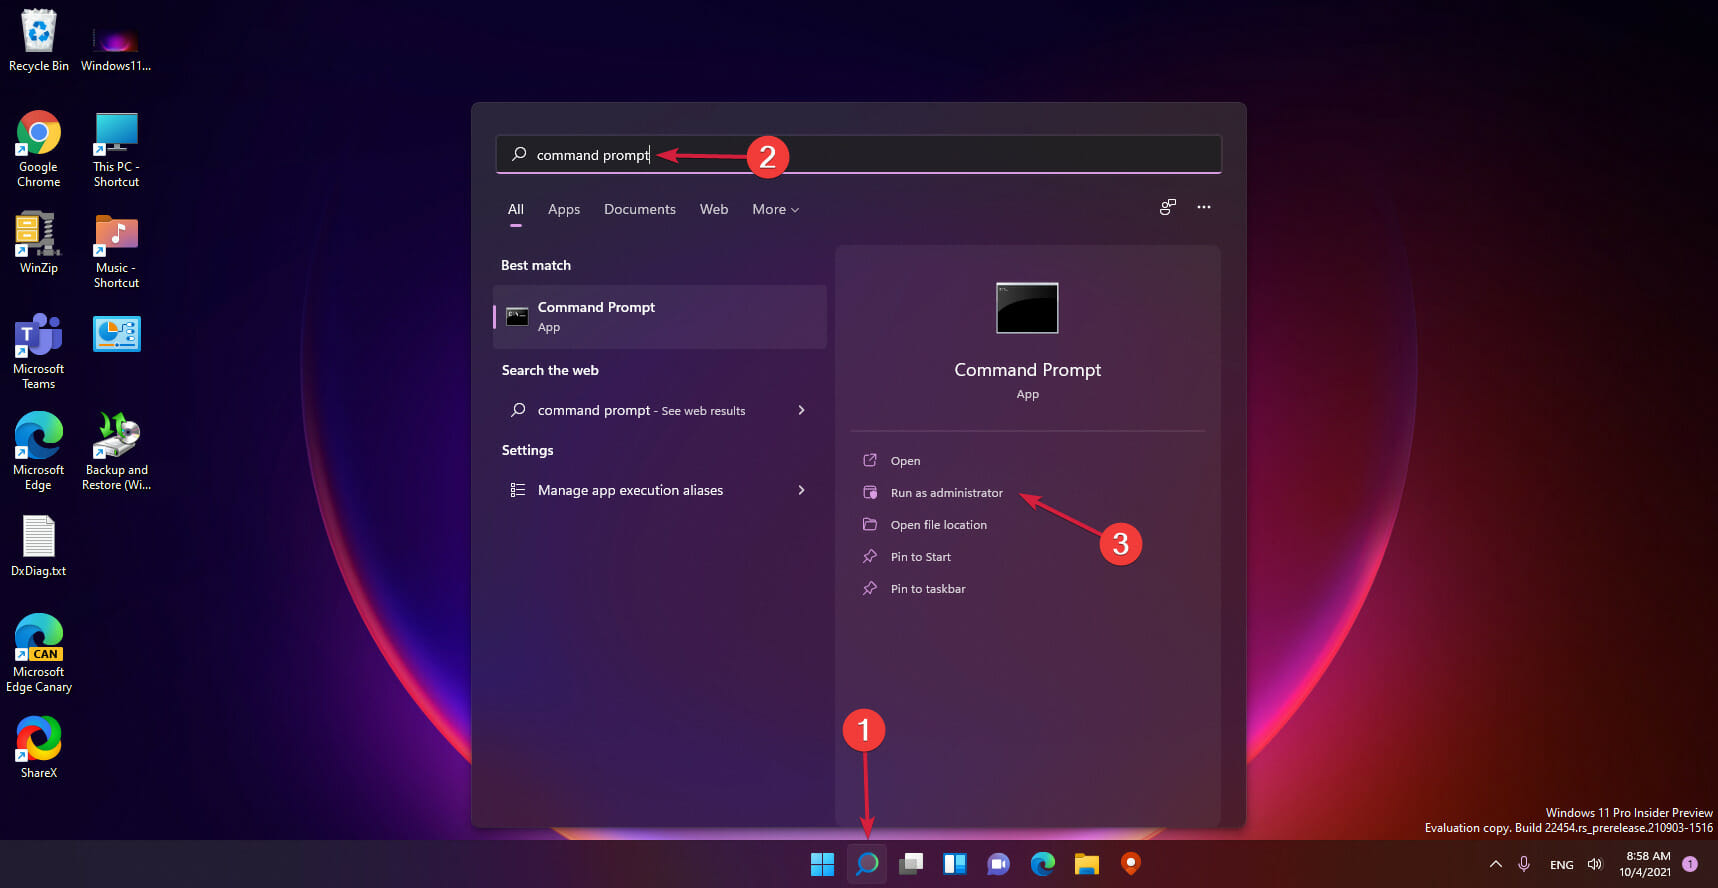
- Open the Start menu by pressing the Win button.
- Type the command prompt.
- Run CMD as an administrator.
- Type the following command and press Enter to run it:
sfc /scannow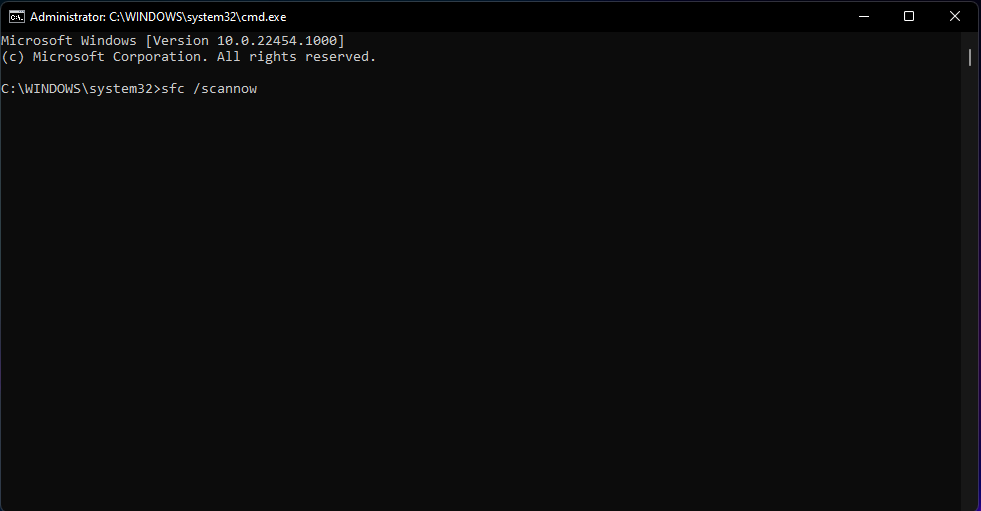
- Wait until the scan is completed.
- Restart your PC.
3. Change video performance settings
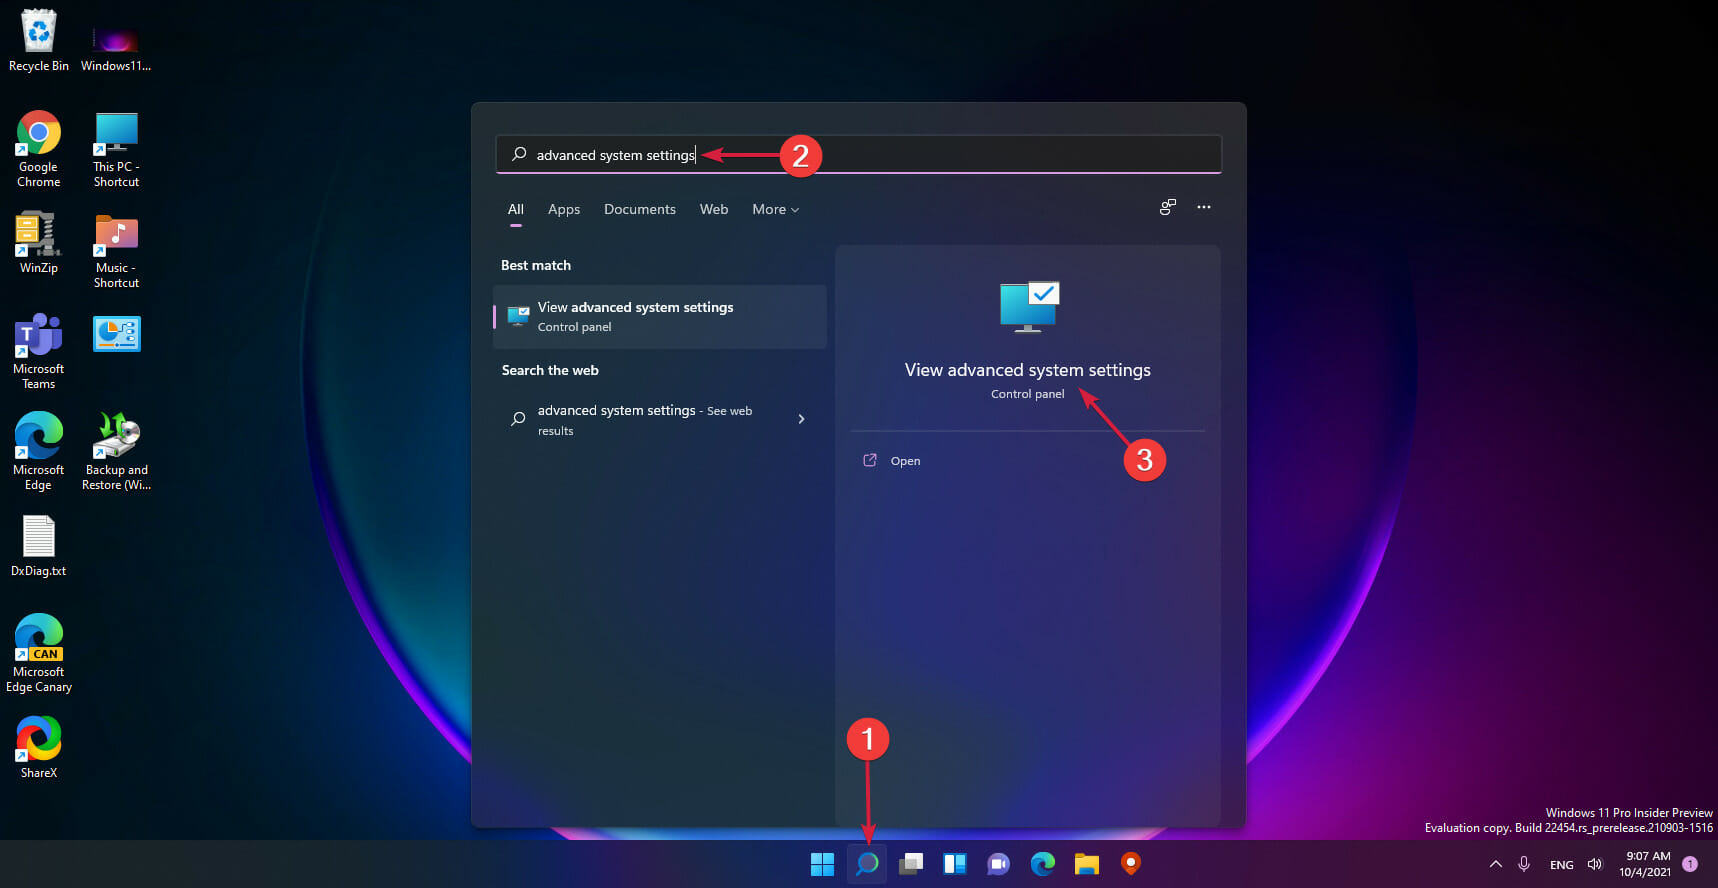
- Open the Start menu by pressing the Win button.
- Type advanced system settings and open it.
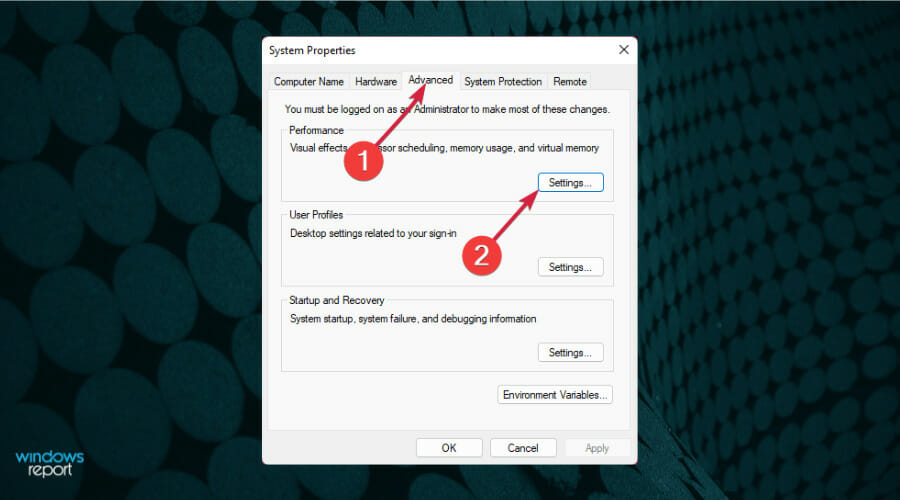
- Select the Advanced tab.
- Click on Settings under the Performance section.
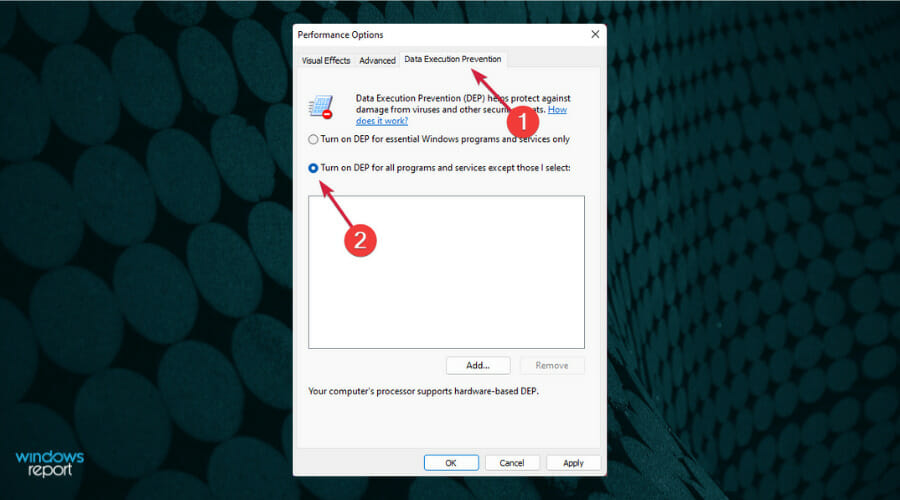
- Choose the Data Execution Prevention tab.
- Check the Turn on DEP for all programs except those I select option.
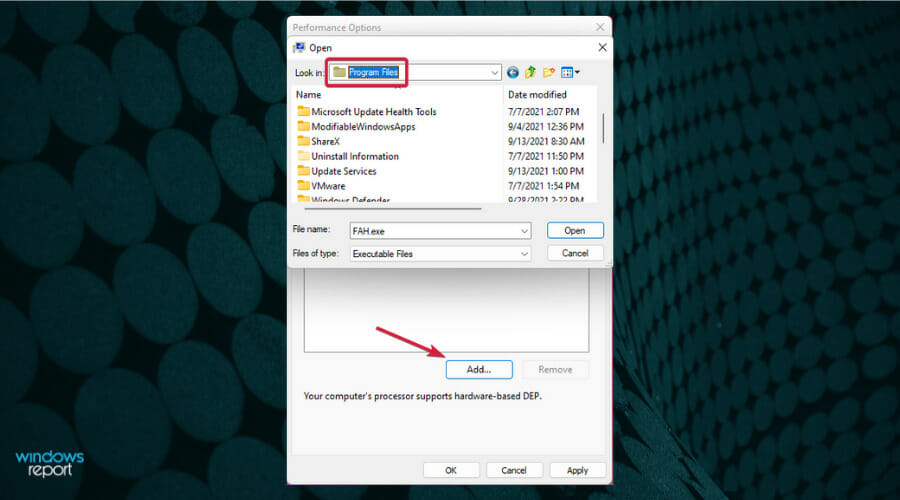
- Click the Add button and select the game EXE file that you have problems running.
This procedure will prevent the system from applying Data Execution Prevention to your game, and this basically adds an exclusion for it.
4. Uninstall Sonic Studio 3
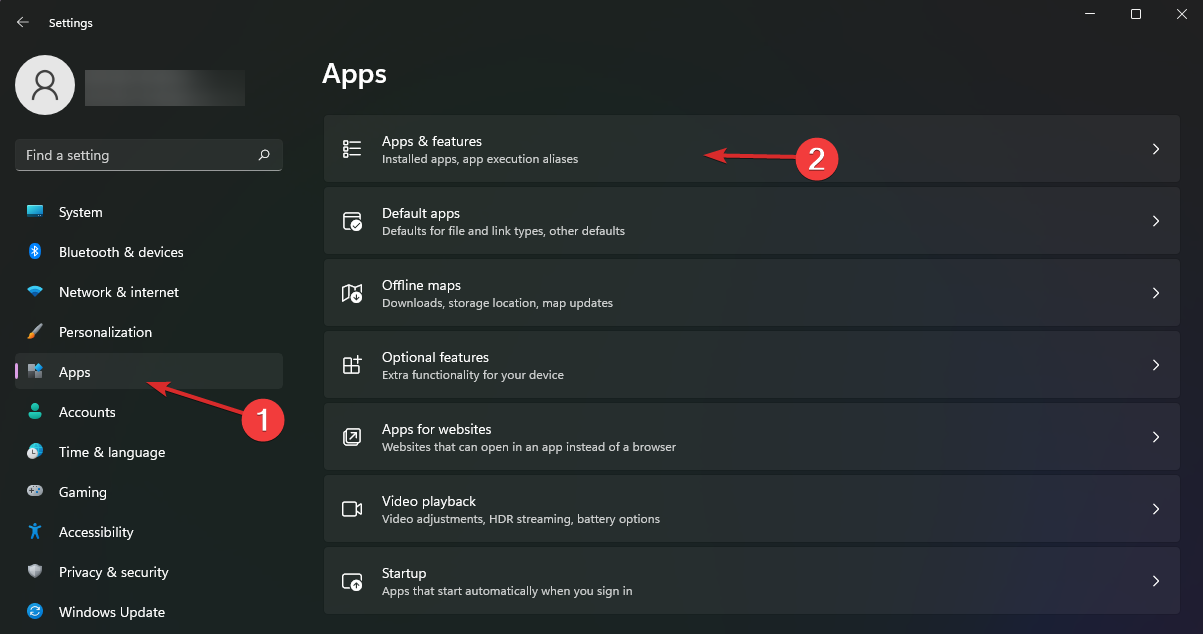
- Click the Start button and select Settings.
- Choose Apps from the left pane, then click on Apps & features.

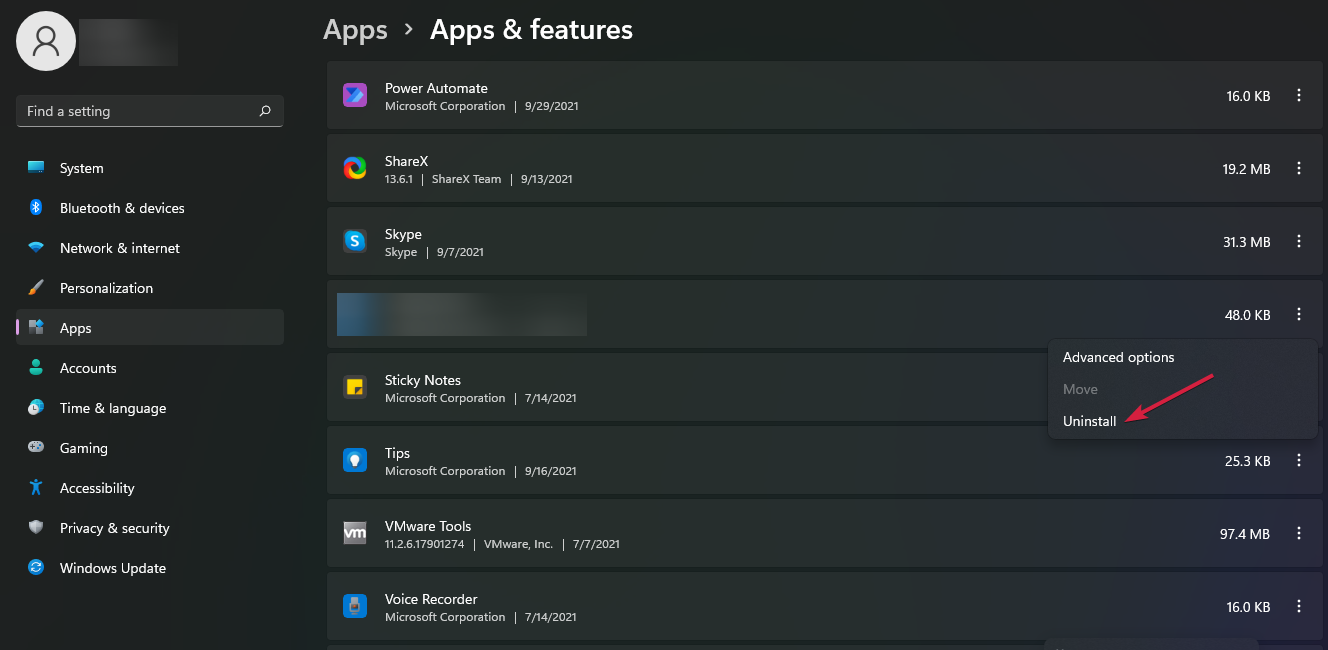
- Look for Sonic Studio 3 in the list of apps.
- Click the vertical dots and select Uninstall.

Some of our readers fixed this problem by uninstalling the Sonic Studio 3 app, so if you have that software installed, try removing it at least temporarily and see if the game runs well.
Also, if the game was working fine until you installed third-party software, try uninstalling it and try running the game again to see if it crashes again.
5. Uninstall and reinstall your game
- Select the Start button and choose Settings.

- Click on Apps from the left pane.
- Select Apps & features.
- Click on three vertical dots from the right and select Uninstall.
- Press Windows + E to open File Explorer.
- Delete the game’s installation folder.
- Install the game using the setup file you have stored on your drive.
Repeated game crashes and freezes may be caused by a problem with the initial installation or if you reinstalled it on top of an older version. You’ll likely get a libvorbisfile.dll error so, make sure you completely uninstall the game this time and delete its folders before installing it again.
If you have problems with Windows Explorer, see what to do if Explorer keeps crashing on Windows 11.
6. Turn off Hardware Acceleration
- Press Win + I keys to open Settings.
- Click on Display on the right side.
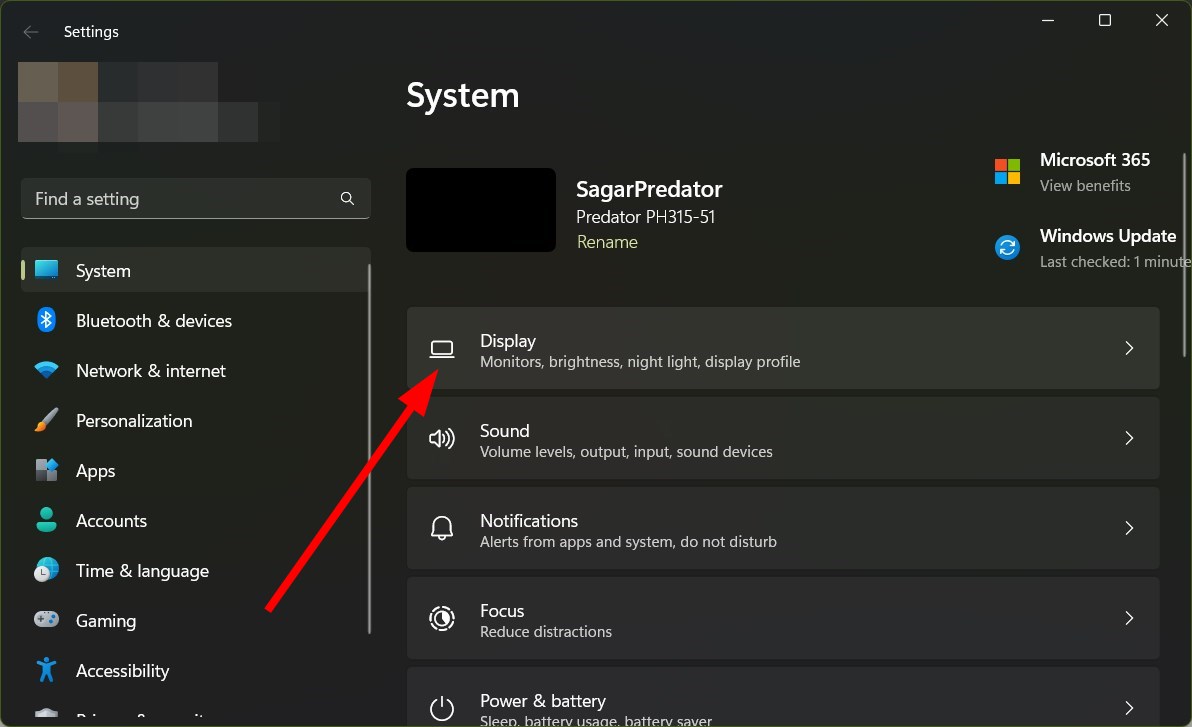
- Select Graphics under the Related settings section.
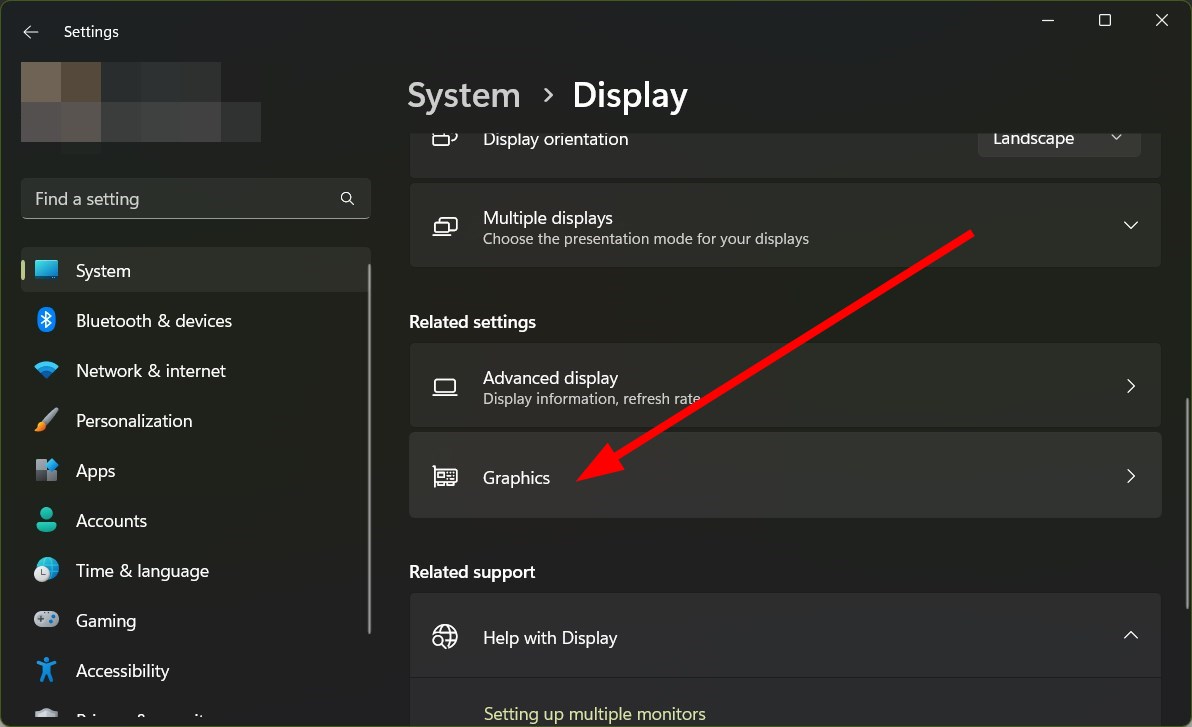
- Click on Change default graphics settings.
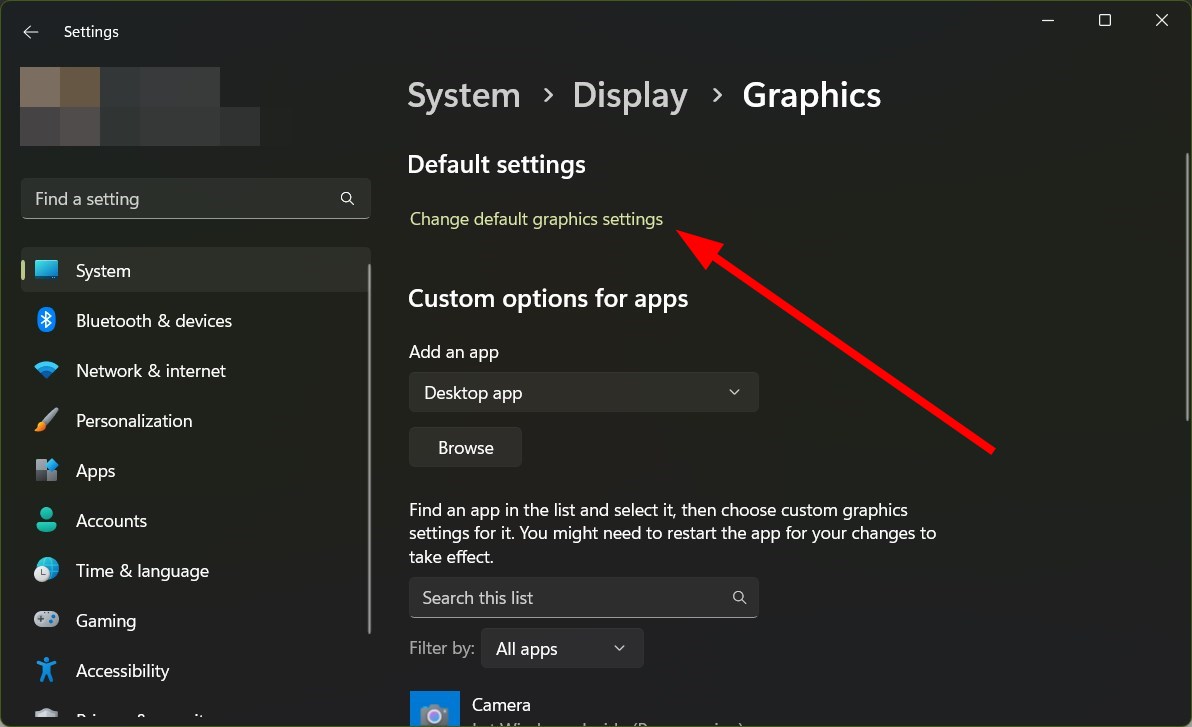
- Toggle off Hardware-acceleration GPU scheduling.
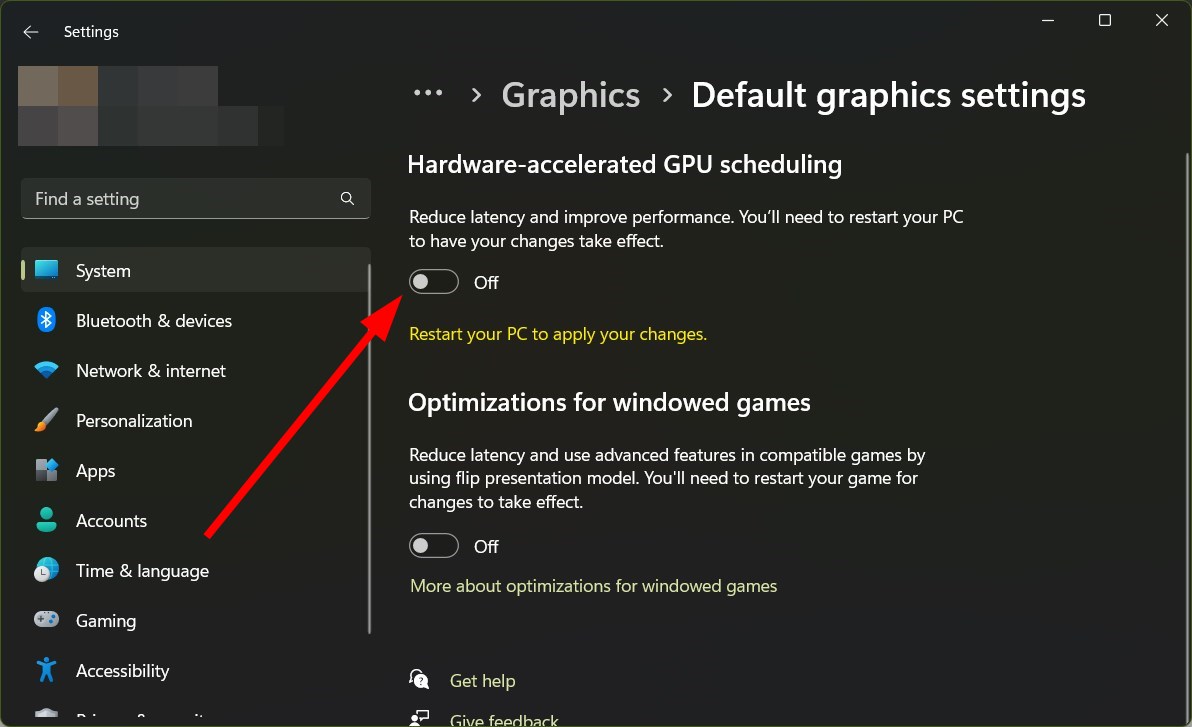
- Restart your PC to apply the changes.
This solution was suggested by one of our readers, and it’s confirmed to work.
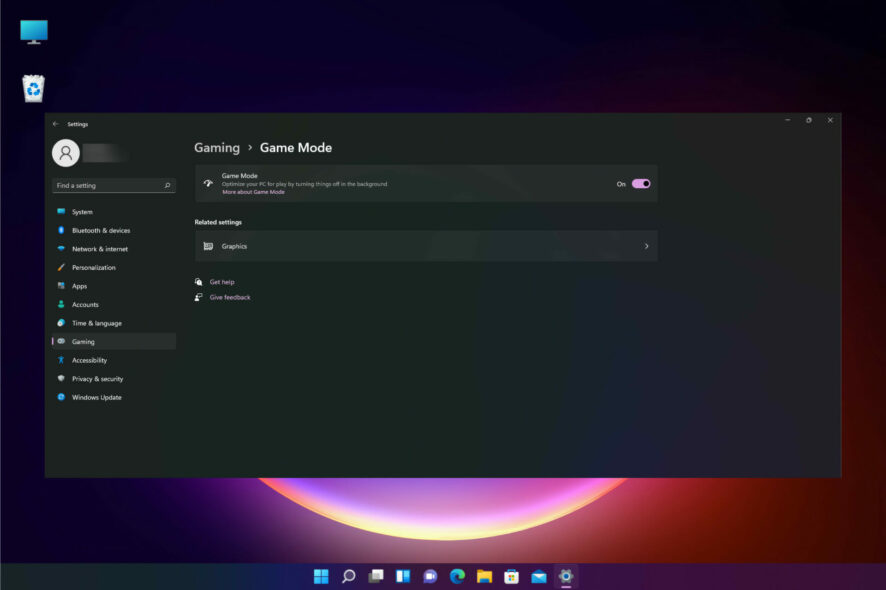
7. Turn off the Game Mode
- Click the Start button and select Settings.

- Choose Gaming from the left pane.
- Click the Game Mode option.
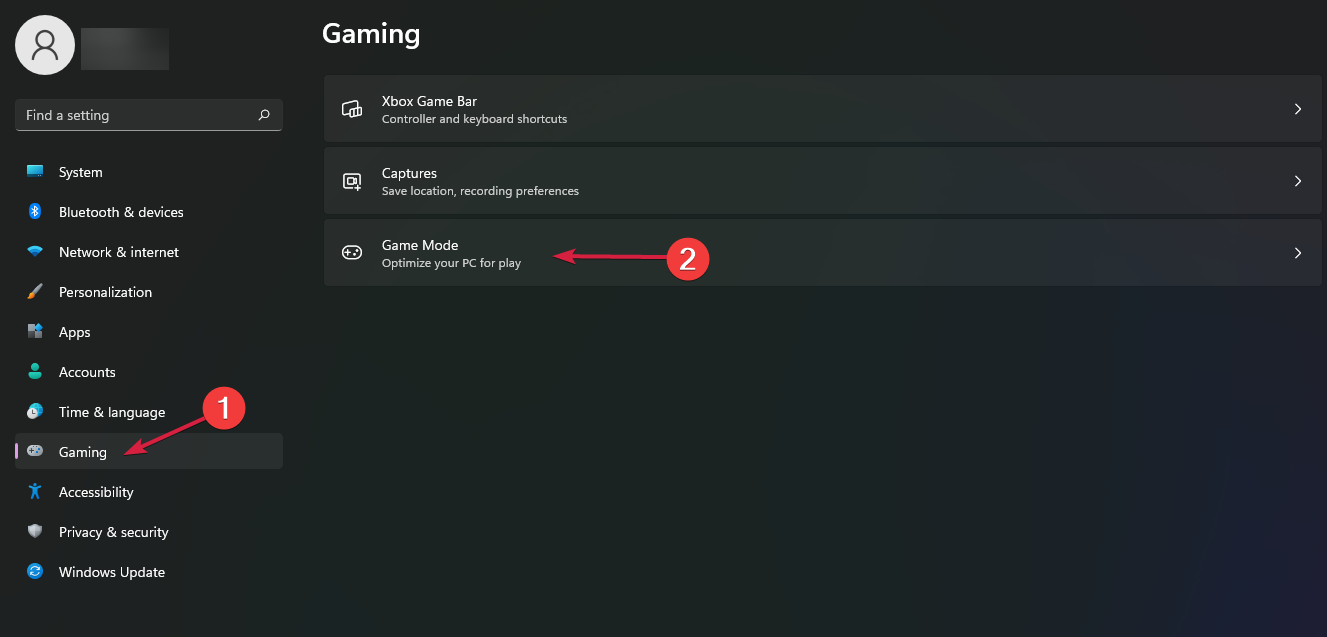
- Toggle off Game Mode.
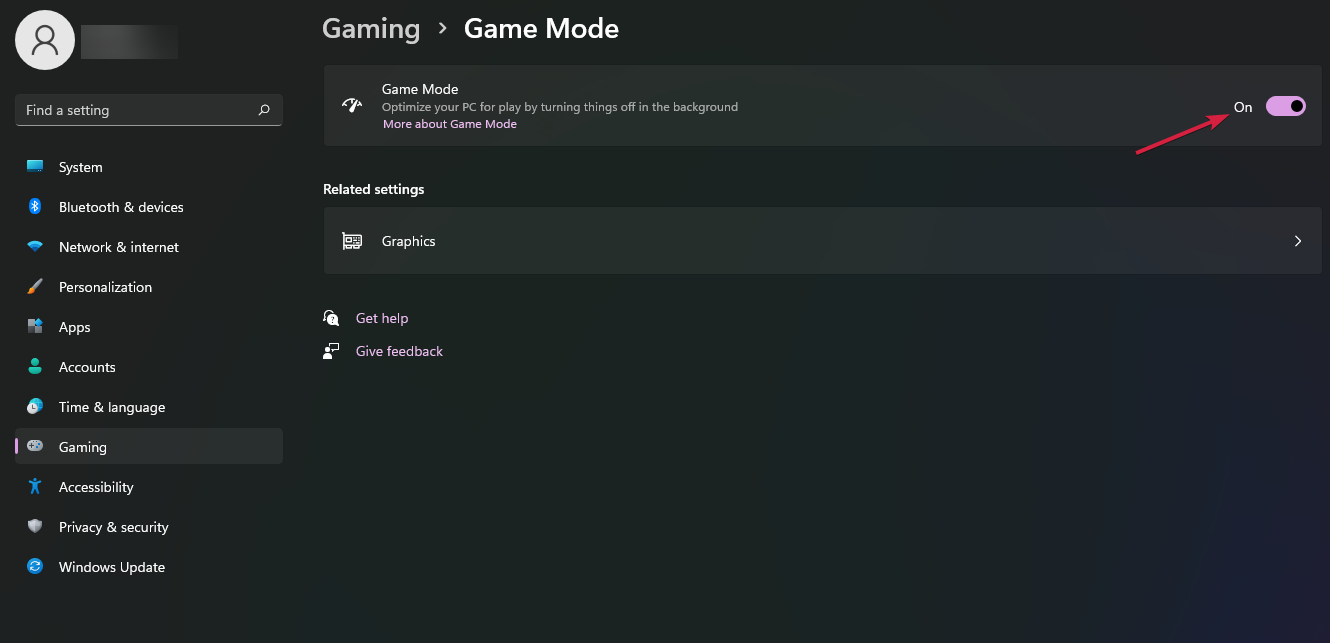
Often aggressive game settings can cause multiple issues with the game. The Game Mode is there to help boost gaming performance, but this could also be the culprit for this error. You can turn it off and check if this resolves the issue or not.
If you bought the game from Microsoft Store, this problem may be also caused by the app crashing during the download, although it says that it downloaded the game. In this case, we have a guide to deal with Microsoft Store crashing on Windows 11 that might help.
Also, you may face problems with titles downloaded from specific clients, say Steam games crashing on Windows 11, and it’s just as easy to fix. Besides, if the crash leads to a blue screen error, it’s likely the graphics driver, memory management, or hardware at fault.
We hope that our steps helped you fix the game issues you were experiencing, and now you can enjoy it without interruptions.
For any questions or suggestions, leave your comment in the dedicated section below, and we will get back to you as soon as possible.
Read our disclosure page to find out how can you help Windows Report sustain the editorial team. Read more


Improve this guide
User forum
1 messages