How to Disable Network Adapter on Windows 11: 5 Easy Ways
You can use the PowerShell or CMD to disable Network adapters
4 min. read
Updated on
Read our disclosure page to find out how can you help Windows Report sustain the editorial team Read more
Key notes
- The network adapter is a hardware component that allows the computer and other devices to connect to the network.
- Users can view hidden network adapters on their PC using the Windows Device Managers.
- You may disable the Network Adapter using the inbuilt Windows Settings.
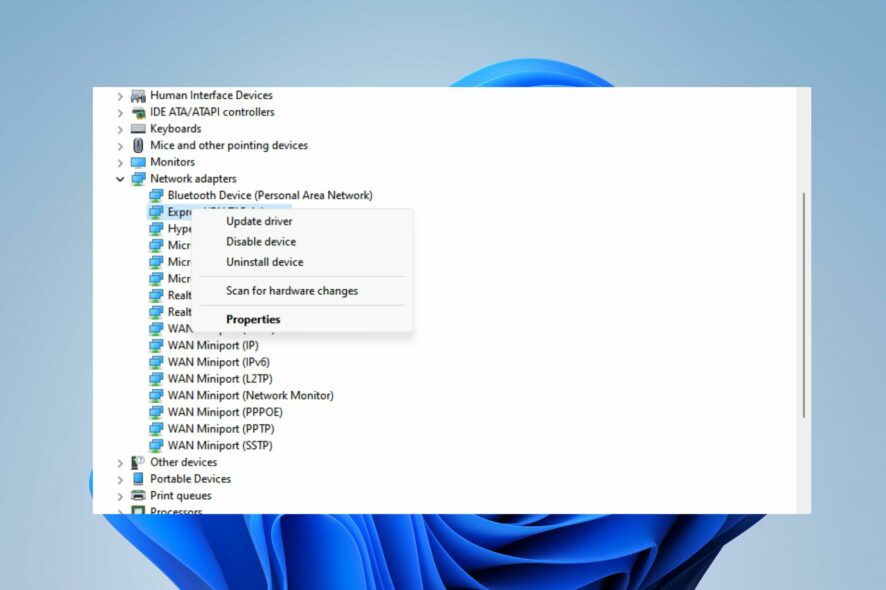
A network adapter is a hardware component that allows a computer or other device to connect to a network. Disabling it on Windows 11 can help troubleshoot network connectivity issues or security reasons.
We will guide you through how to disable Network Adapter on Windows 11. Also, users can read how to fix Network Adapter drivers that not be found on their Windows devices.
Can I find hidden network adapters on my PC?
Yes, it is possible to find hidden network adapters on your PC. Hidden Network Adapters are usually those that are not currently in use or those that are not visible in the Device Manager.
Finding hidden Network Adapters on your PC can be a tool for troubleshooting network issues and identifying potential security vulnerabilities. To find hidden Network Adapters, you can follow these steps:
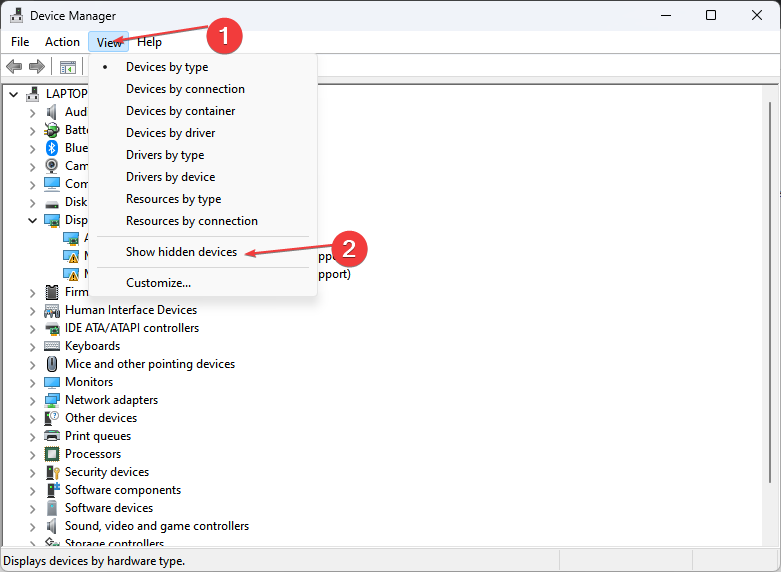
- Press the Windows + X button, navigate to the Device Manager, and open it.
- Further, select the View tab from the windows and select Show hidden devices.
- Expand the Network Adapter category. All the hidden Network Adapters on your PC will grey out.
Hidden network adapters can be hidden intentionally by the system administrator or device manufacturer, so enabling them may cause compatibility or security issues.
How can I disable the network adapter on Windows 11?
1. Use Windows Settings
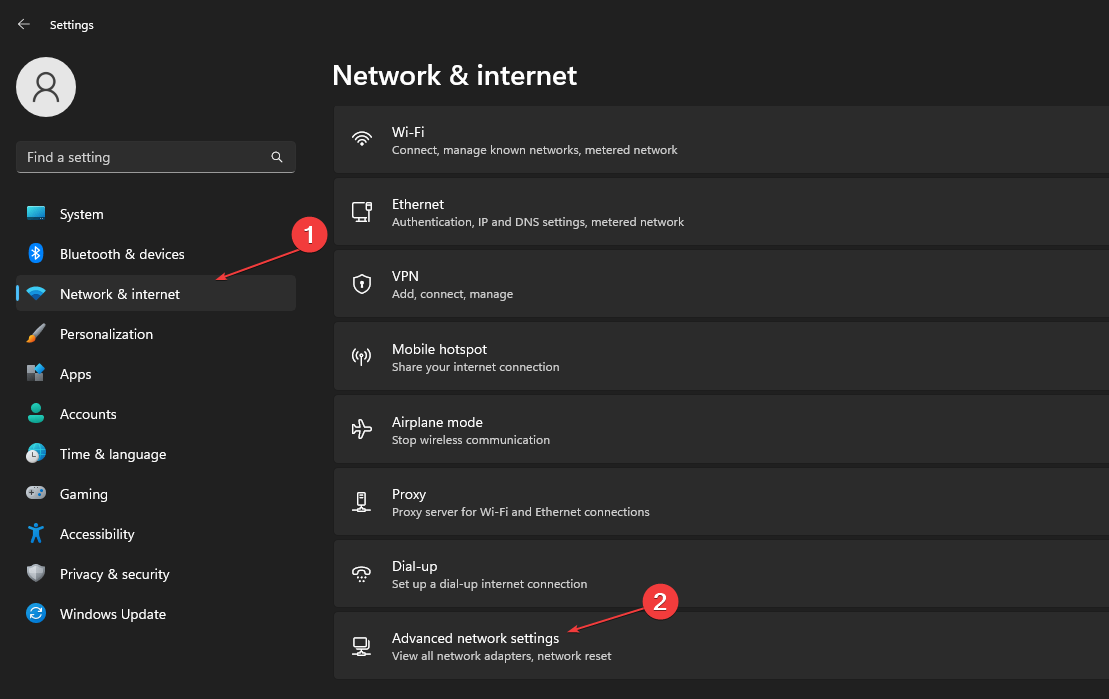
- Press the Windows + I to open the Windows Settings.
- Navigate to Network & Internet category and select the Advanced network settings from the right pane.
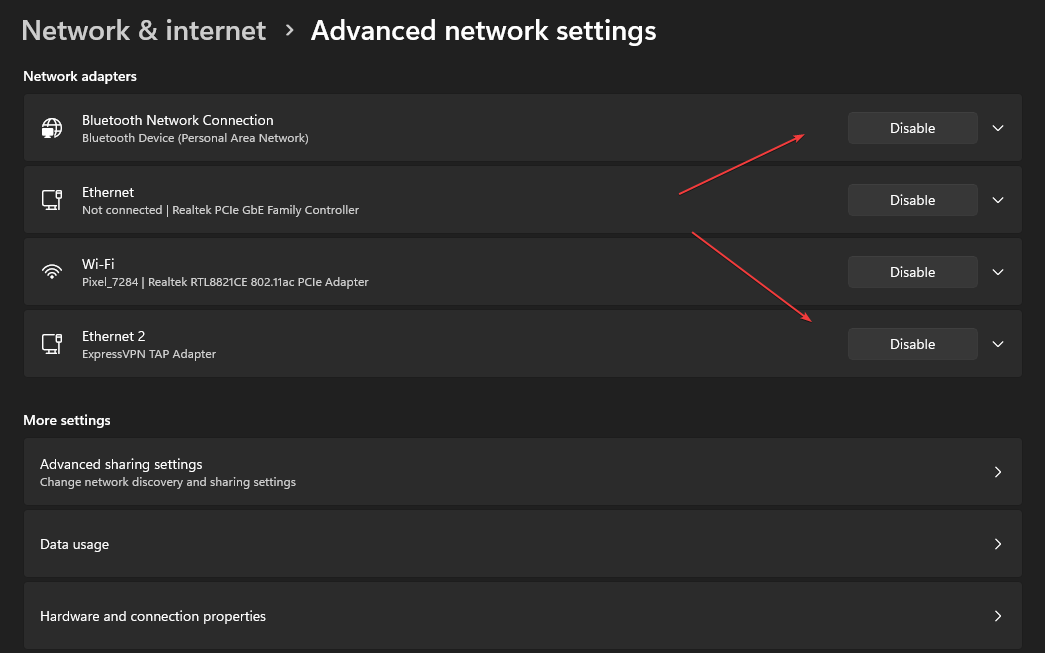
- Then, select the Disable button for the Network Adapter you wish to disable from the list.
- Close the Settings window and rest your PC.
The Windows settings have an in-built option that allows the user to view and disable the network adapter in Windows. Read about how you can fix Device Manager keeps refreshing in Windows.
2. Disable the Network Connections folder
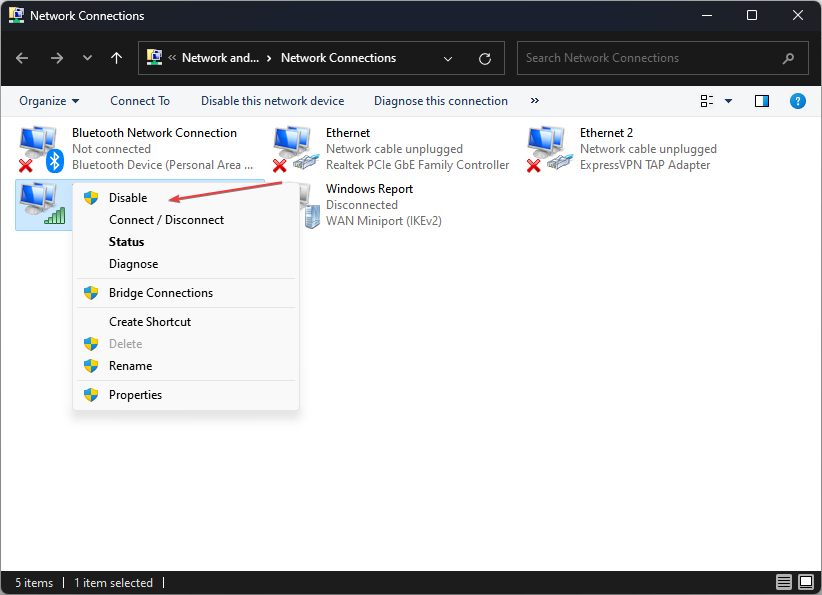
- Click on the Search icon, type Network Connections in the search box, and select the View network connections option.
- Then, right-click on the Network Adapter you want to disable in the View network connection folder and select Disable from the pop-up menu.
- Close the window and restart your PC to turn off Network Adapter.
The Network Connections folder is a Microsoft Windows OS folder that allows users to manage their network connections.
3. Use Command Prompt
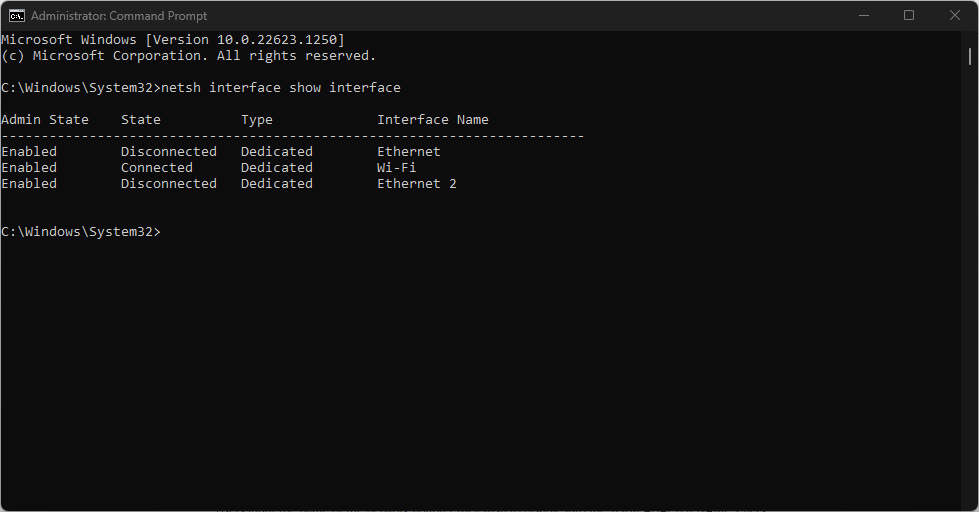
- Press the Windows button, type cmd, and select Run as administrator.
- Input the following command and press Enter to view Network Adapter list on your PC:
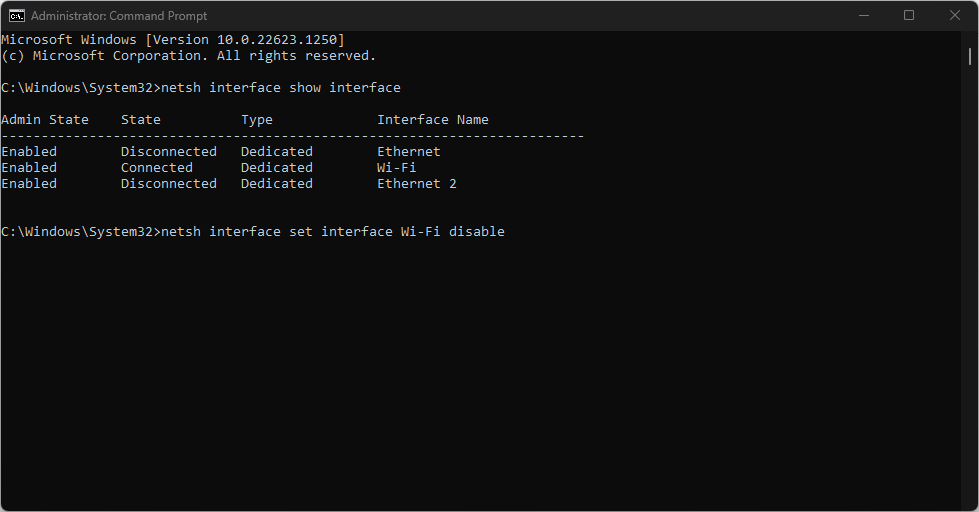
netsh interface show interface - Type the following command with the name of the network adapter you want to disable and press Enter:
netsh interface set interface "YOUR ADAPTER NAME" disable
Users input the name of the network adapter they wish to disable into the YOUR ADAPTER NAME. Check our guide on how to fix Command Prompt not working on your PC.
4. Use Device Manager
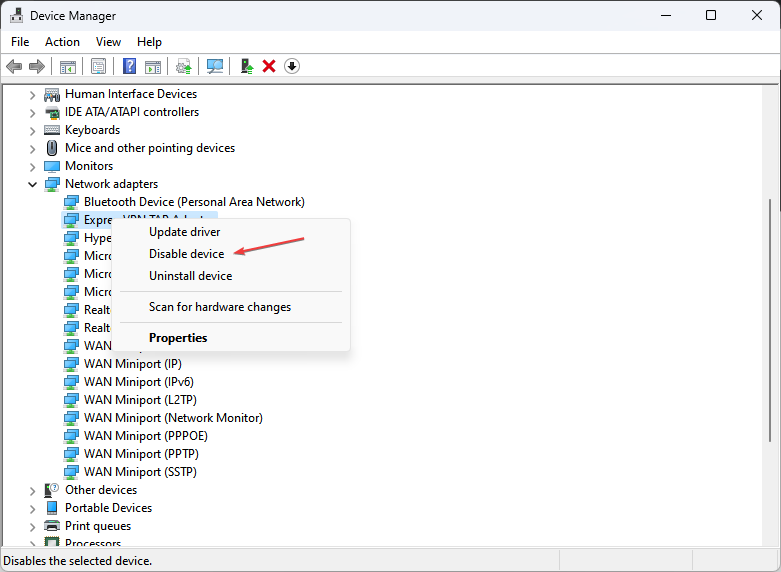
- Press the Windows + X button and select Device Manager from the list.
- Click on the drop-down button on the Network Adapter category to expand it. Right-click on the network adapter you want to disable.
- Then select Disable device from the context menu.
Microsoft device manager provides a centralized interface for controlling the various devices allowing users to enable and disable a Network Adapter.
5. Disable a network connection in PowerShell
- Press the Windows button, type PowerShell, and select Run as administrator from the right pane to open the PowerShell.
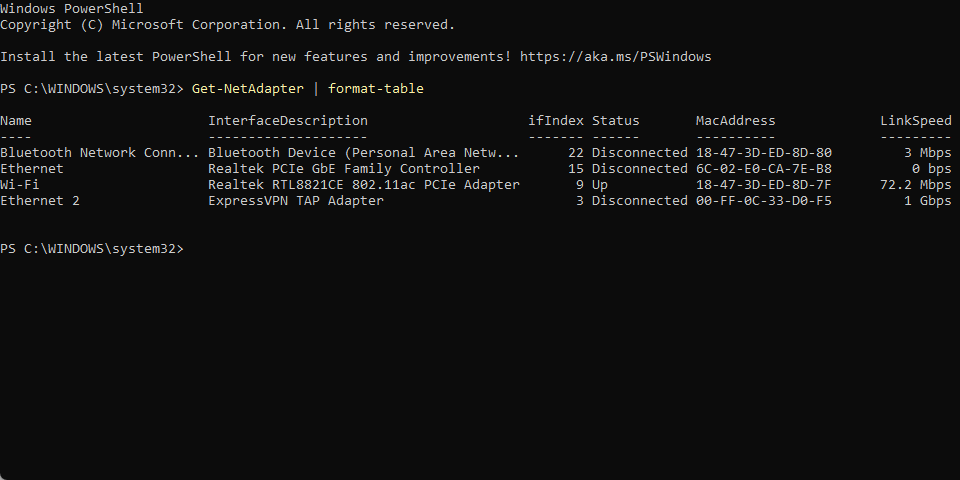
- Type the following command and press Enter to identify the name of the adapter you wish to disable:
Get-NetAdapter | format-table - Type the following command with the name of the network adapter you want to disable and press Enter:
Disable-NetAdapter -Name "YOUR-ADAPTER-NAME" -Confirm:$false - Close the PowerShell and restart your device.
PowerShell provides access to system functions and services to view, enable and disable network adapters.
Alternatively, you can read how to fix the network adapter that is missing on your device and how to get network settings from your router.
In conclusion, this article should help you to disable Network adapters on Windows 11. Should you have further questions or suggestions, kindly drop them in the comments section.



User forum
0 messages