How to Control Your Fan Speed in Windows 11 [4 Ways]
All you need to know about PC Fan control

Keeping an eye on your fan speed is crucial for preventing overheating. We’ve all been there—forced to shut down our laptops because of high temperatures and loud fan noises.
While regular maintenance like cleaning the fan and applying fresh thermal paste is a must, you can also monitor and adjust your fan speed through your operating system. Check out all methods explained below:
How can I control the fan speed on a PC?
1. Use your manufacturer’s fan control software
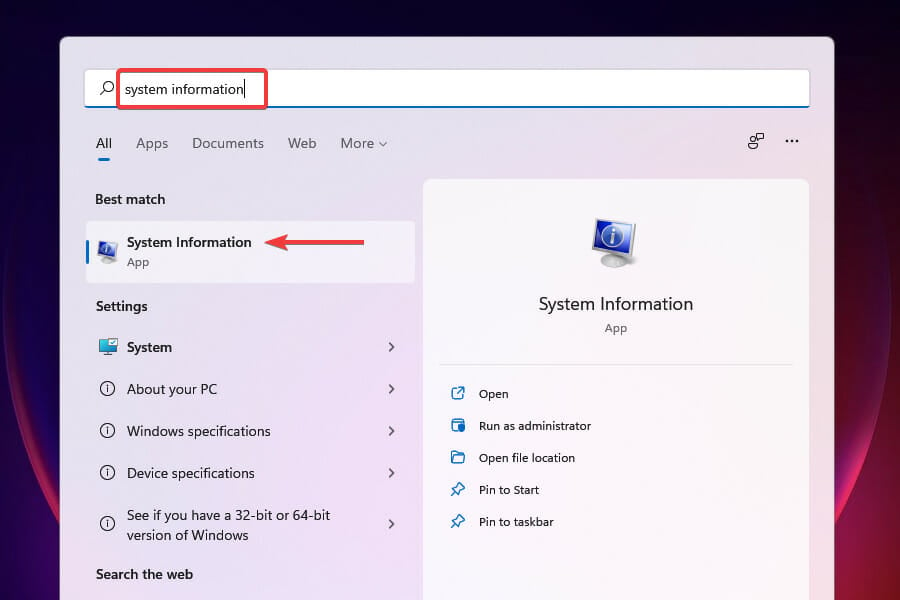
- Press Windows + S to launch the Search menu.
- Enter System Information in the text field at the top and click on the relevant search result that appears.

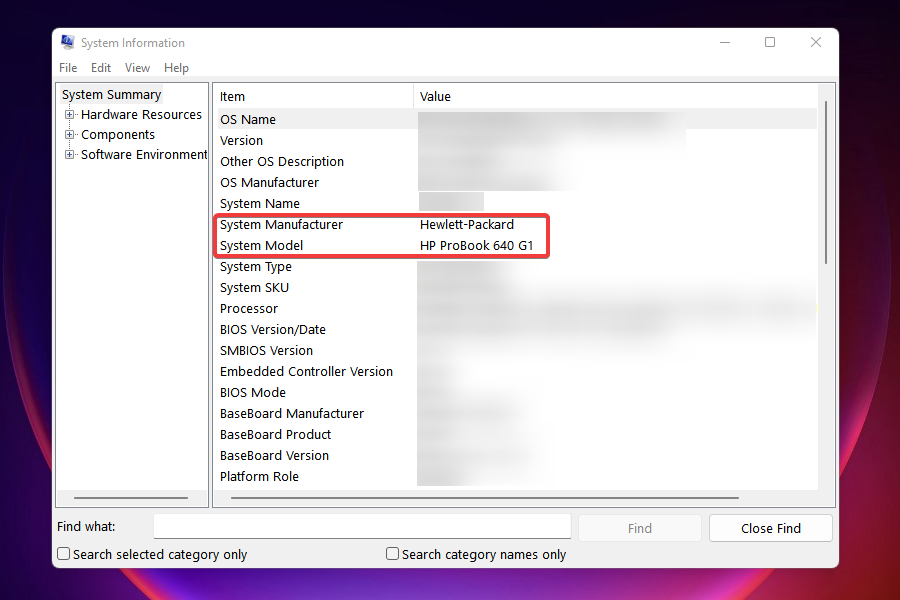
- Locate the System Manufacturer and System Model the in the System Summary tab.

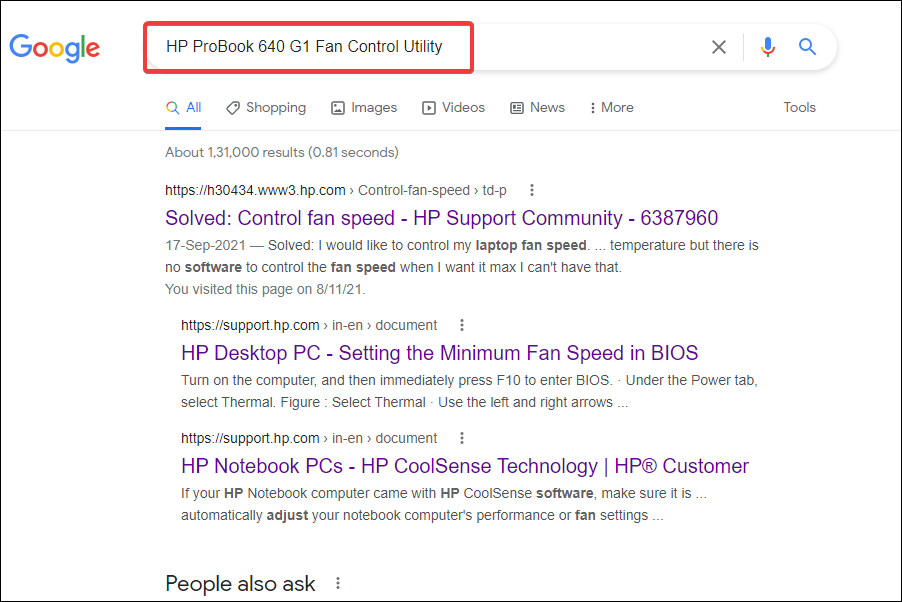
- Next, go to Google or any other search engine, and look up the fan control software in Windows 11 using the Manufacturer’s name and model followed by Fan Control Utility as the keywords.

- Next, open the OEM’s website, locate the relevant utility and download it.
- Locate the downloaded file and double-click on it to launch the installer.
- Follow the on-screen instructions to complete the installation process.
After installing the software, you can start controlling the computer fan and set it to run at the desired speed. Unfortunately, not all manufacturers release such tools. If yours doesn’t, try the next method:
1. Navigate to the desktop and press Alt + F4 to launch the Shut Down Windows box.
2. Select Shut down from the dropdown menu and click on OK at the bottom.

3. Next, press the Power button to turn on the computer.
4. As soon the screen lights up, press Esc or F12 key (depending on the computer settings) to enter the BIOS.
5. Navigate through the different options (Advanced, Overclocking, or something similar) and look for settings related to the computer fan.
6. After finding the relevant options, you can now control the computer fan and run it at the desired speed for optimal results.

2. Control fan speed on Windows 11 in BIOS
You can easily control fan speed on PC through BIOS. Controlling the PC fan from the BIOS is both time-consuming as well as an intricate affair. You have to be careful while making the changes since a minor lapse can prove fatal for the computer.
 NOTE
NOTE
Note: do not change any other settings unless you know the results.
3. Use Control Panel
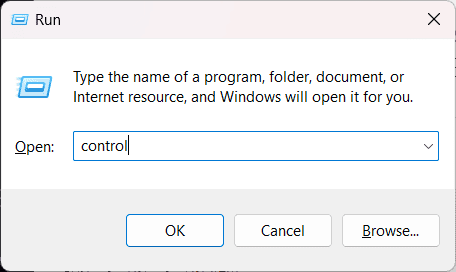
- Press the Windows key + R, type the “control” command and hit Enter.
- Locate the Power Options section.

- Select your power plan and click on Change plan settings, then Change advanced power settings.

- Expand the Processor power management tab.

- Adjust the Maximum processor state to reduce CPU usage, and, as a consequence, overheating. For optimal performance, you can set it up to 80%-90%.

You can’t control fan speed directly through the Control Panel, but you can adjust power settings, which can reduce overall system load and temperature, thus indirectly affecting fan behavior.
4. Download a third-party utility to control the fan speed on Windows 11
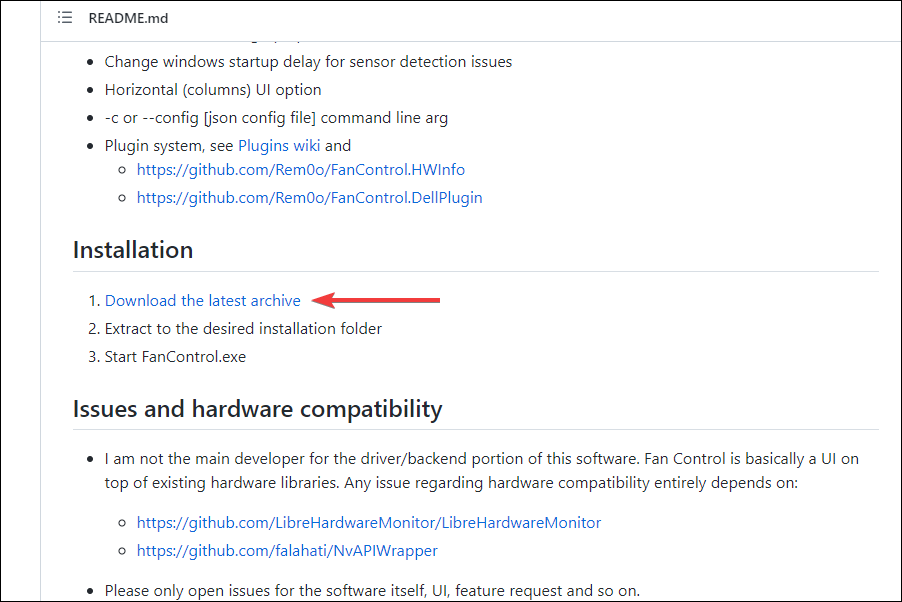
- Go to the GitHub page of Fan Control, scroll down, and click on Download the latest archive under Installation.
- Navigate to the folder where the downloaded file (.zip format) is stored, right-click on it, and select Extract all from the context menu.
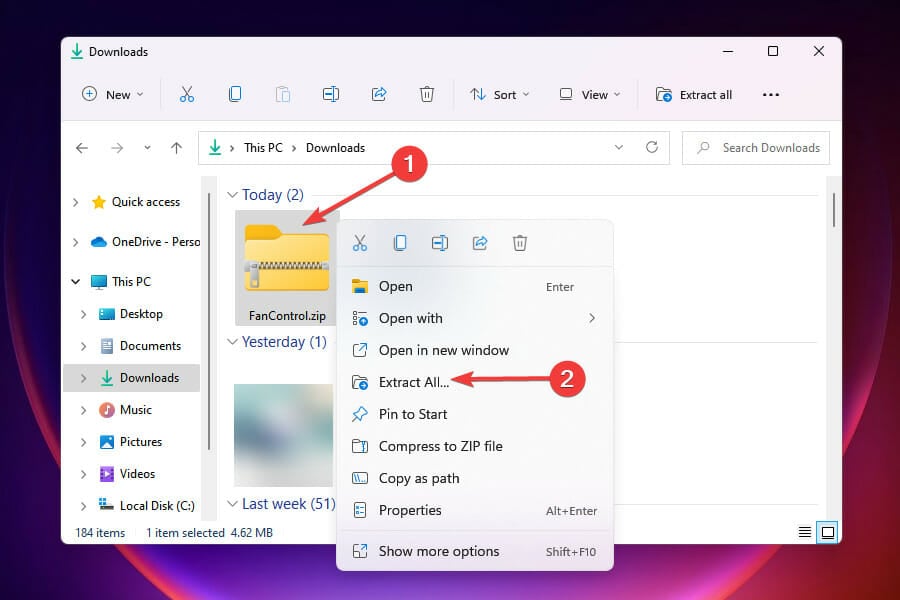
- Choose a destination to store the files and click on Extract in the window that appears.
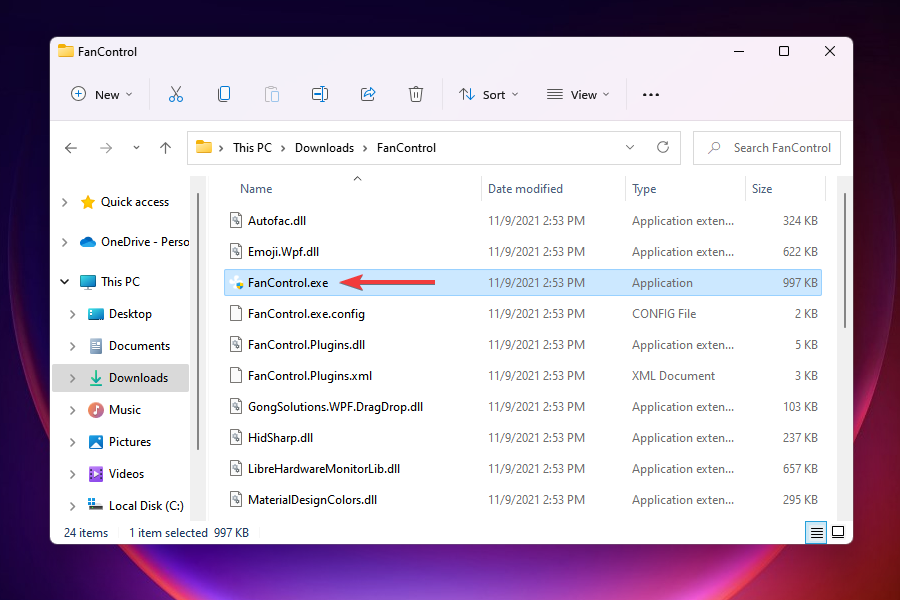
- Open the folder where the extracted files are stored, and double-click on the FanControl.exe file to launch the app.
- Choose the appropriate response in case a warning pops up, and then click on Yes in the UAC (User Account Control) prompt that appears.
- Let the Fan Control app scan the system and choose the relevant response when prompted.
- After scanning, it will list all the fans connected to the system under Controls and their subsequent running speed under Speeds.
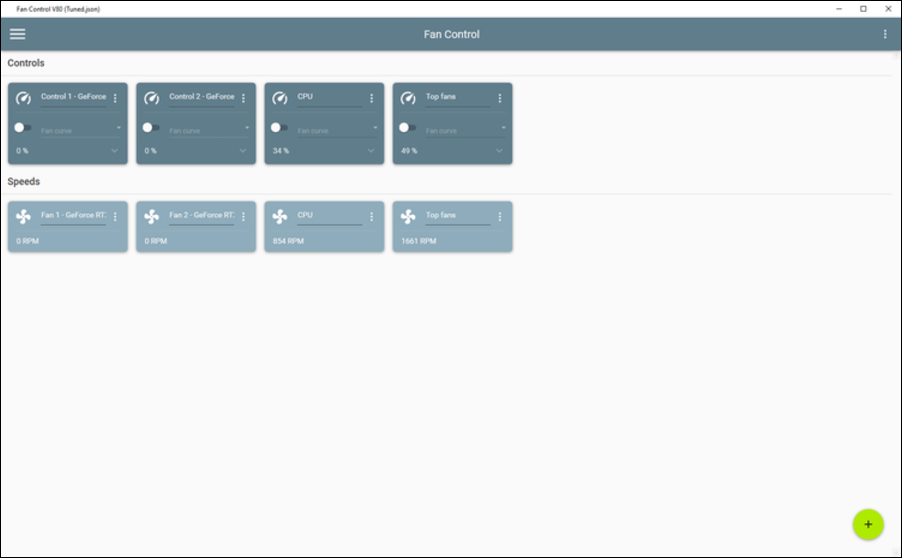
- You can now make the relevant changes to the fan speed and set it to the desired value.


Fan Control is one of the best open-source third-party utilities available in the market and is free to use. It offers a simple interface and allows users to quickly change the settings and control the fans in Windows 11.
How do I reduce the fan noise on Windows 11?
There are various ways to control the fan noise on a Windows 11 laptop. Below are some of the easy methods:
- Via power settings: Your power settings can significantly add to your Windows 11 fan speed problem. To get this under control, switch to either the Best power efficiency or the Balanced plan instead of high performance.
- Clearing of air vents: When the Windows 11 air vents are blocked by dust and debris, it can increase fan noise. The solution here is to clear the dirt using a vacuum or other suitable methods.
- Using a fan control tool: You can still experience high fan noise in some cases despite using the best power plan and cleaning the vents. In this case, you need to use a control tool to keep the noise in check. There is the option of using the tool released by OEM for your PC or fan control software for Windows 11.
That’s all there is to know about PC fan control in Windows 11. Before controlling and modifying the fan speed, do thorough research to understand the required settings.
You can also check the best available fans in the market if you are facing trouble with the installed one.
Tell us which of the above methods worked for you or whether you want to choose a utility not listed here in the comments section below.
Read our disclosure page to find out how can you help Windows Report sustain the editorial team. Read more


Improve this guide


User forum
0 messages