Windows 11: How to Check Graphics Card in 1 Minute

XINSTALL BY CLICKING THE DOWNLOAD
FILE
If you’re wondering what graphics card you have on your Windows 11 system and you don’t have time to waste, here are the fastest ways to find out.
1. Using Device Manager:
- Right-click on the Start button and select “Device Manager”

- In the Device Manager window, expand the “Display adapters” section. This will list the graphics card(s) installed in your computer.

Normally, this simple step should be enough to know what graphics card you have on Windows 11. But if for whatever reason it’s not working for you, here are a few additional ways that are just as short:
- Using DirectX Diagnostic Tool:
- Press
Windows Key + Rto open the Run dialog.
- Type
dxdiagand press Enter. - In the DirectX Diagnostic Tool, navigate to the “Display” tab. Here, you’ll find detailed information about your graphics card, including the manufacturer, model, and driver version.

- Press
- Through Settings:
- Open Settings by pressing
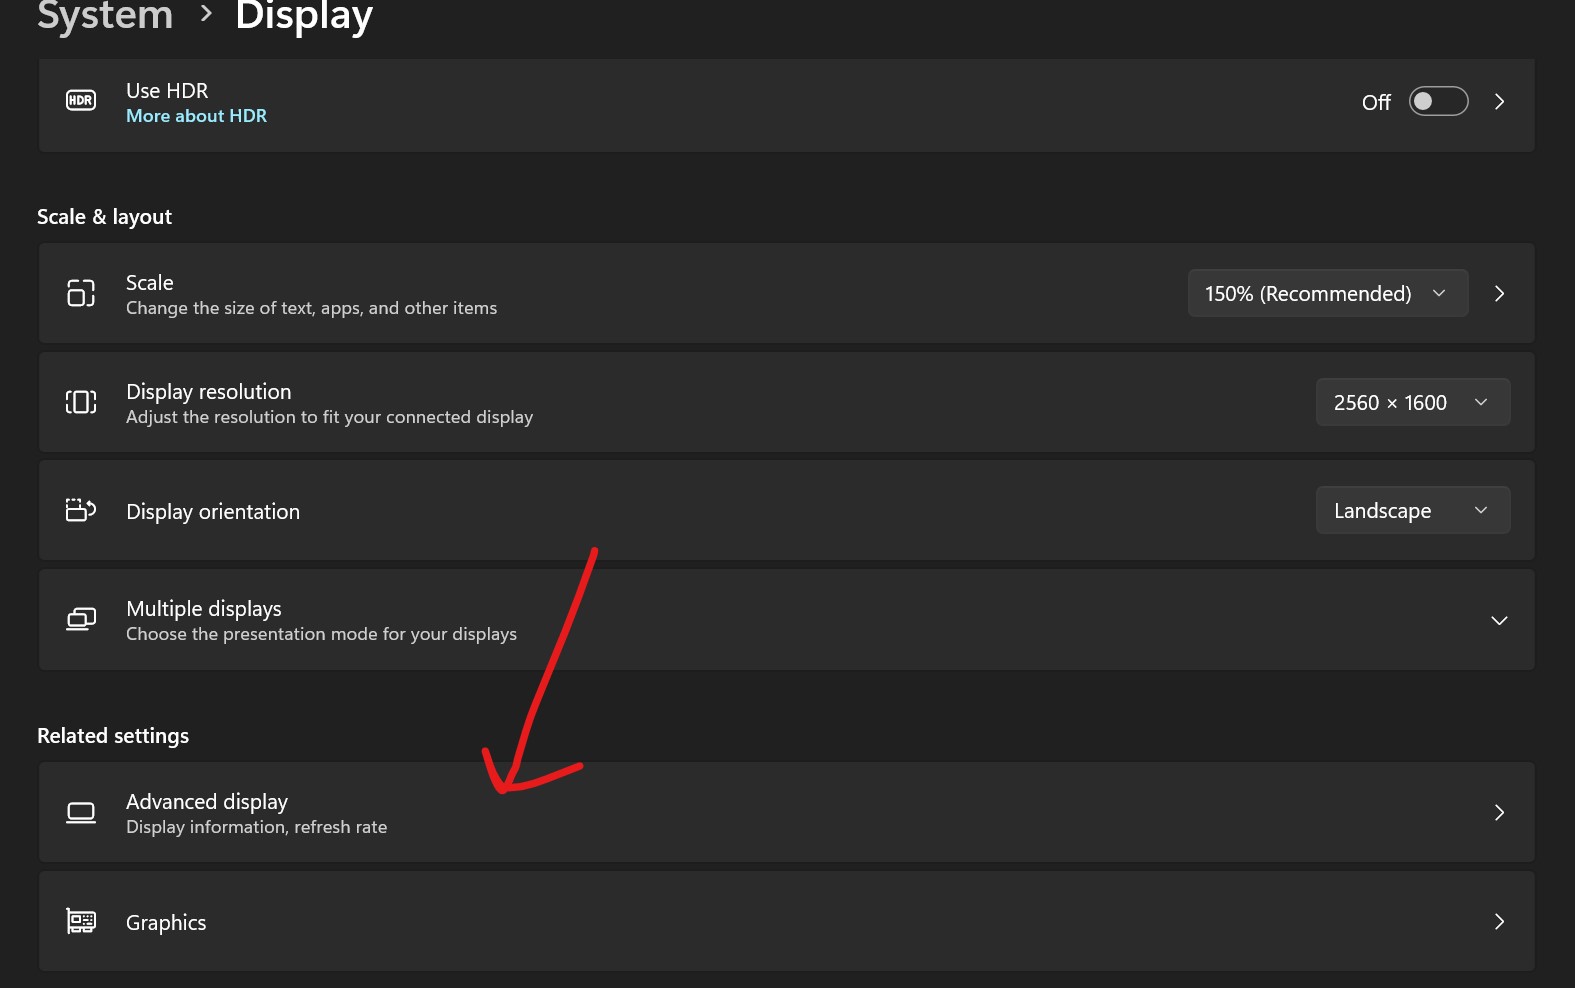
Windows Key + I. - Go to “System” and then “Display”.

- Scroll down and click on “Advanced display settings”. Here you will see the information about your display adapter.
- Open Settings by pressing
- Using System Information:
- Press
Windows Key + Rto open the Run dialog. - Type
msinfo32and press Enter. - In the System Information window, navigate to “Components” and then “Display”. You’ll see detailed information about your graphics card.
- Press
Which method mentioned above is the quickest to check the graphics card on Windows 11? Also, note that these steps were performed on the latest Windows 11 Pro version. Keep in mind that as Windows updates, some of these procedures may change.
Readers help support Windows Report. We may get a commission if you buy through our links.

Read our disclosure page to find out how can you help Windows Report sustain the editorial team. Read more


Improve this guide


User forum
0 messages