Windows 11 Won't Install from USB: Why & How To Fix
Windows 11 won't install from USB can happen due to outdated USB drivers
7 min. read
Updated on
Read our disclosure page to find out how can you help Windows Report sustain the editorial team Read more
Key notes
- Windows 11 is a great operating system, but sometimes it can be a little tricky to install from a USB.
- The issue could be arising due to low disk space, corrupted USB, or misconfigured settings.
- If the USB drive is too old, note that it may not be compatible with your PC. Consider trying a different USB drive.
If you’re having difficulty installing Windows 11 from a USB, it can be incredibly frustrating. Not many people know their way around computers, so this can be a daunting task. Unfortunately, this is a common problem that many users are trying to solve.
When installing Windows 11, it is important to be aware of the various risks and problems. For example, USB installation can be susceptible to errors and hardware malfunctions. Make sure you use an official Windows ISO file when installing from a USB stick.
Some possible reasons for a failed Windows OS installation using a USB stick include incompatible hardware, insufficient disk space, or a malfunctioning USB port. If none of those issues apply to you, the best solution is to use a different installation method.
The process can be overwhelming and frustrating, especially if you don’t know the necessary tricks. But don’t worry, this article will help with that. Read on to know more about the fixes.
Why can’t I install Windows 11 from USB?
There are several reasons why your Windows installation may have failed. The following are some of the most common ones:
- One possible reason you can’t install Windows 11 from the USB stick is that your USB stick itself doesn’t work. Another possibility is that the USB may be corrupted or not formatted correctly.
- If the UEFI settings are configured incorrectly, they can interfere with the installation. So, it’s wise to make sure that the settings are configured correctly before starting the installation process.
- The Windows 11 installation on your PC requires quite a lot of space (at least 64 GB). If it doesn’t have enough free space, you can’t complete the procedure.
- The problem might be due to your USB drive not being bootable.
Here are a few possible fixes that might help you get rid of this issue.
How to install Windows 11 on USB drive if it’s not working?
✅ Pre-checks:
✔️ Check for compatibility
Before installing Windows 11, please refer to the PC Health Check app to confirm that your device meets the minimum system requirement.
That being said, if you are on a laptop or desktop with good specs, chances are that you will enjoy the new release. The Windows release information status for known issues is also available for your reference.
✔️ Try a different USB port
Before proceeding, it is important to make sure the USB port you’re using is not broken. To ensure this, switch to a different USB port and try installing Windows 11 from the USB drive again to see if the issue resolves.
1. Check if your PC is configured to install Windows 11 from a USB
One of the best preparatory steps before installing Windows 11 is to plug in a USB and configure your computer to boot from it. This setting isn’t enabled by default, and you’ll need to manually set it up.
1️⃣ Firstly, reboot your computer. When the manufacturer’s logo appears, there are often some keys or a key combination that you can use. This will depend on the make and model of the PC. Refer to your PC manufacturer’s website for the same.
When pressing a special key, you’ll most likely see another prompt appear. It will show which key to press. For example, some common keys are F8 and F12. The options might differ based on the computer setup.
You’ll most likely see a menu that has options for different boot-up types. On the top-right corner, you’ll see an option that indicates which key is likely to trigger what. Therefore, pay close attention to the screen.
Upon pressing the key, find the option to access CD-ROM or DVD-ROM and make sure it’s enabled.
2. Free up space to install Windows 11
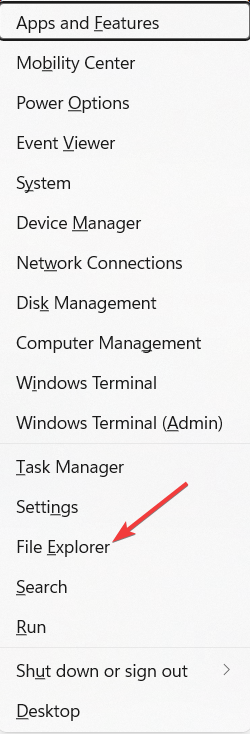
- Press Windows + X key and locate File Explorer.
- Navigate to My PC and verify the disk with the Windows label has at least 20 GB of free space.
- If not, it’s time to delete some files to free up space for Windows 11.
Windows 11 installations require a certain amount of free space on the storage drive. If enough space is not available, then the installation will be interrupted.
3. Update USB drivers
- Go to the Windows Search bar and type Device Manager. Hit Enter.
- In the Device Manager, locate the USB in question.
- Right-click the USB and select Update device.
At times, an outdated driver can prevent you from installing Windows 11 using a USB. Therefore, it is advisable to keep your drivers up to date to avoid any unpleasant experiences.
Searching for drivers on the web is time-consuming and frustrating. Outbyte Driver Updater is a great way to keep your computer up to date without spending hours researching the right drivers.
It works by scanning your computer and finding any outdated drivers; it then searches the web for updated drivers and installs them on your computer.

Outbyte Driver Updater
To fix USB installation issues with Windows 11, update the USB drivers automatically with this tool.4. Create a different bootable USB
If you didn’t repair the Windows 11 booting errors with the USB, then it might be a good idea to try with another flash drive.
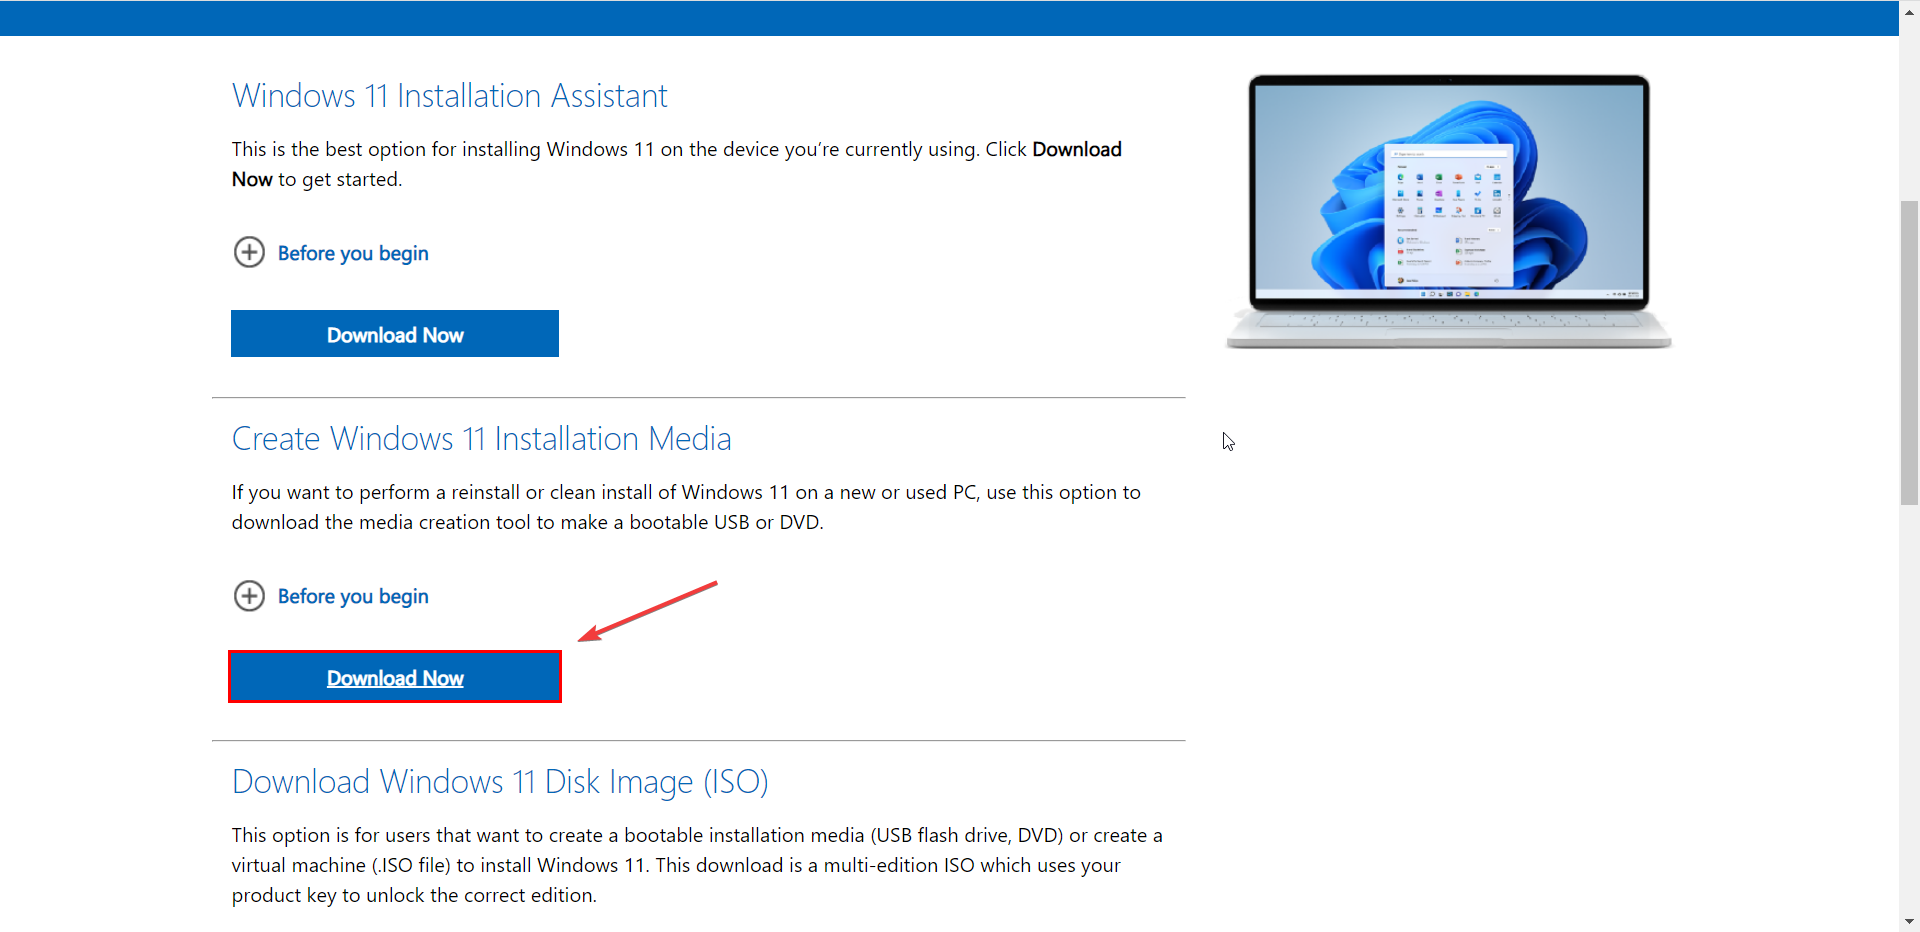
1. Go to the Windows 11 download page on Microsoft’s website.
2. Navigate to Create Windows 11 Installation Media and click on Download now.
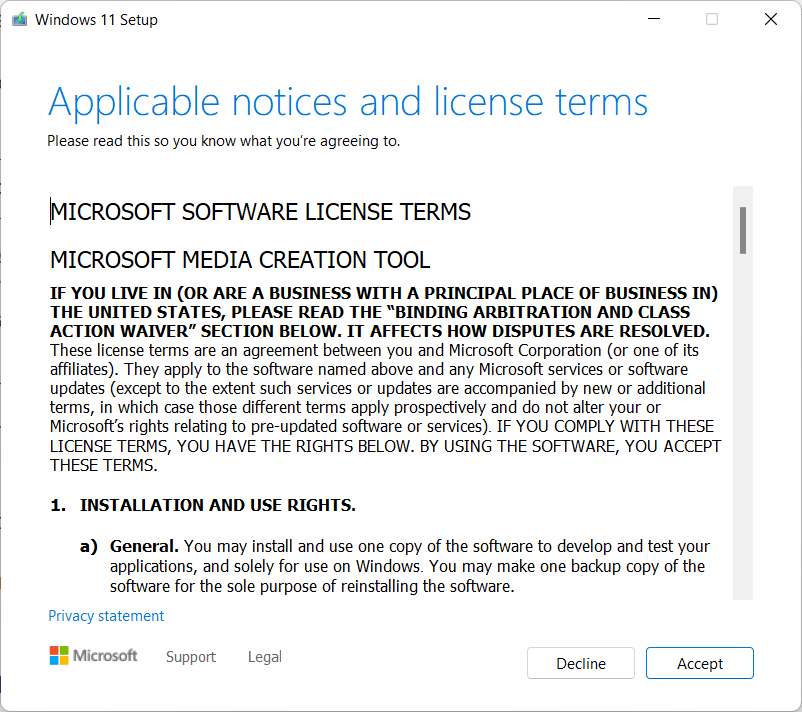
3. Accept applicable notices and license terms.
4. Plugin your USB drive.
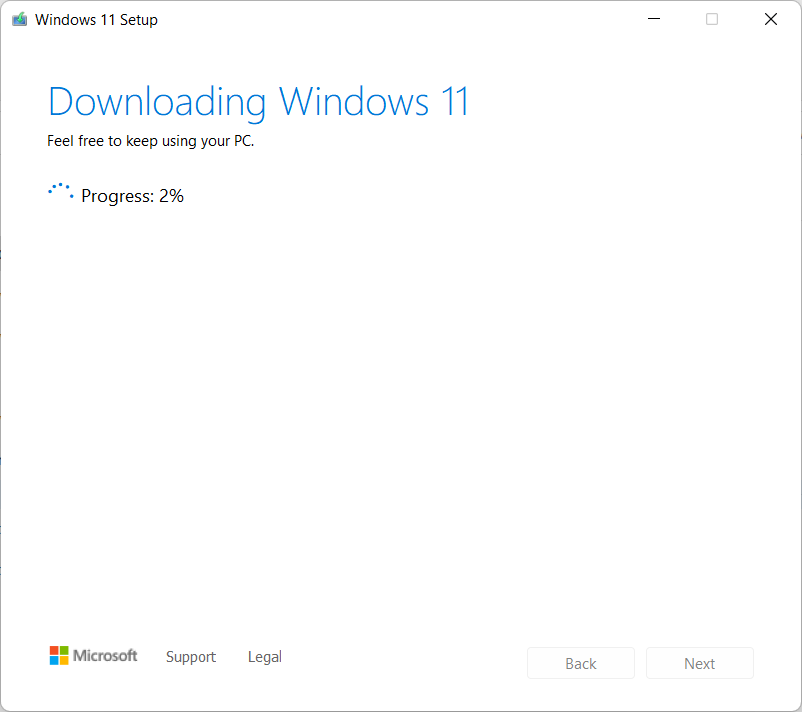
5. Open the downloaded Windows 11 Media Creation Tool, follow the on-screen instructions to create a Windows 11 installation USB drive.
6. Having done this, restart your computer and navigate to the BIOS. And then set the USB media as the boot drive.
7. When you see the installation interface, click Next to proceed.
In the next window, you can reinstall/install Windows 11 by clicking the Install now button and following the on-screen instructions.
Most probably, this should fix the problem and you should be able to install Windows 11 on your PC. If it doesn’t, move on to the next resolution.
5. Try a different USB drive
If your USB drive is too old, it may not be compatible with your computer. You should, therefore, consider replacing it with a more up-to-date model. USB 1.0 or USB 2.0 drives, for example, are not suitable for being used as bootable USB drives these days.
6. Run Windows Troubleshooter
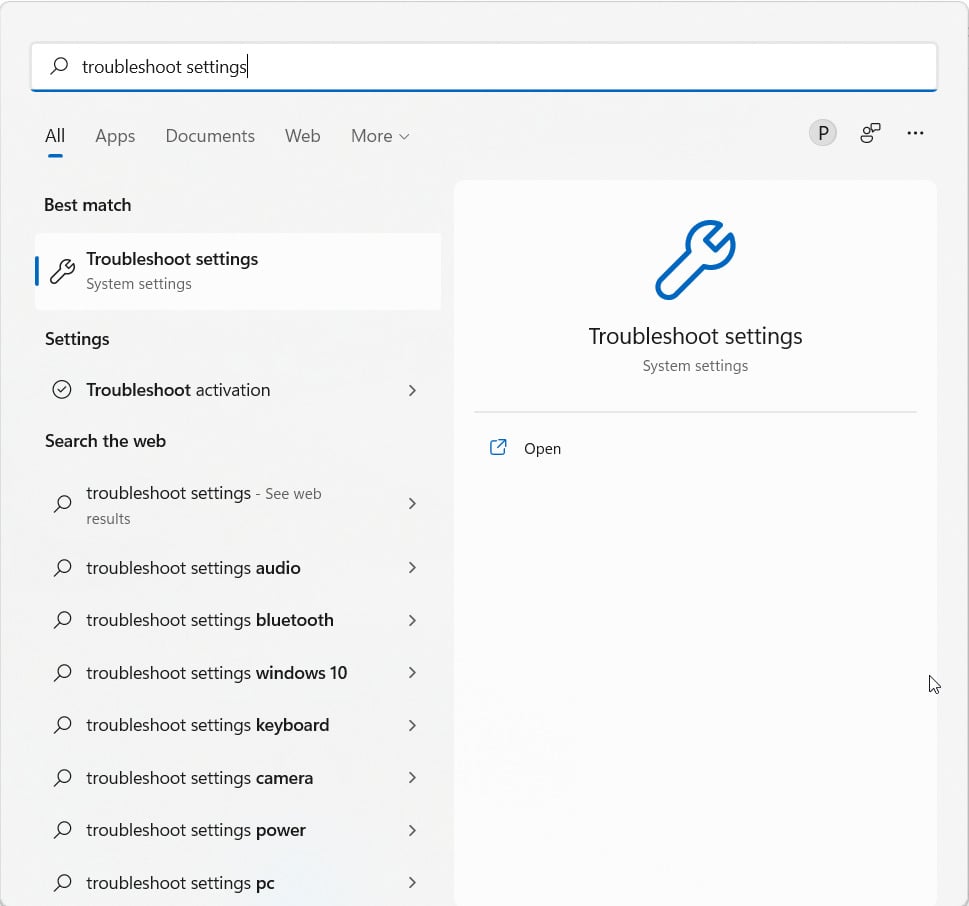
- Go to the Windows Search bar and type Troubleshoot settings. Hit Enter.
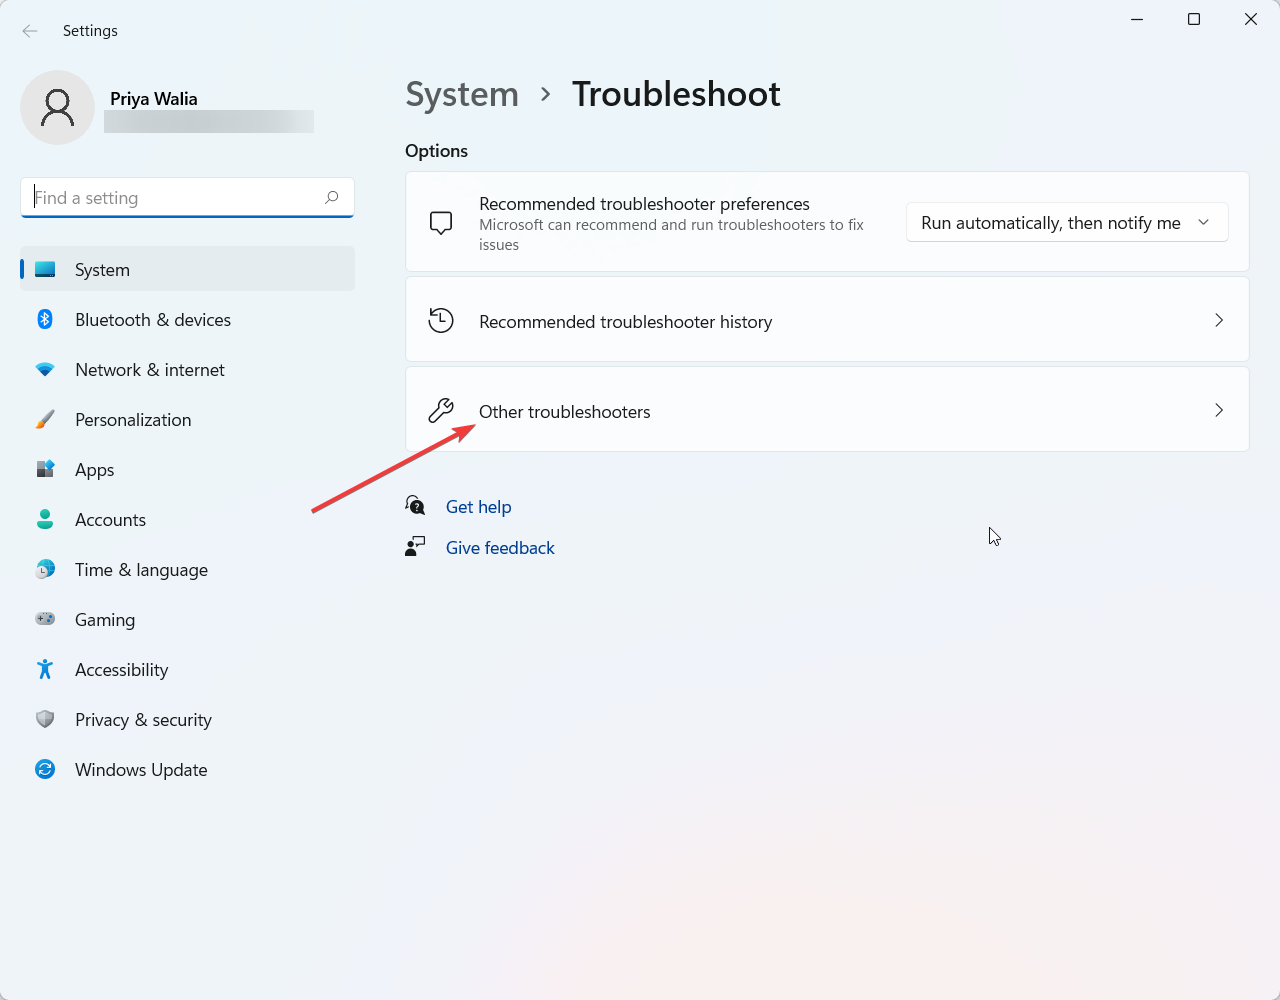
- Select the option, Other troubleshooters.
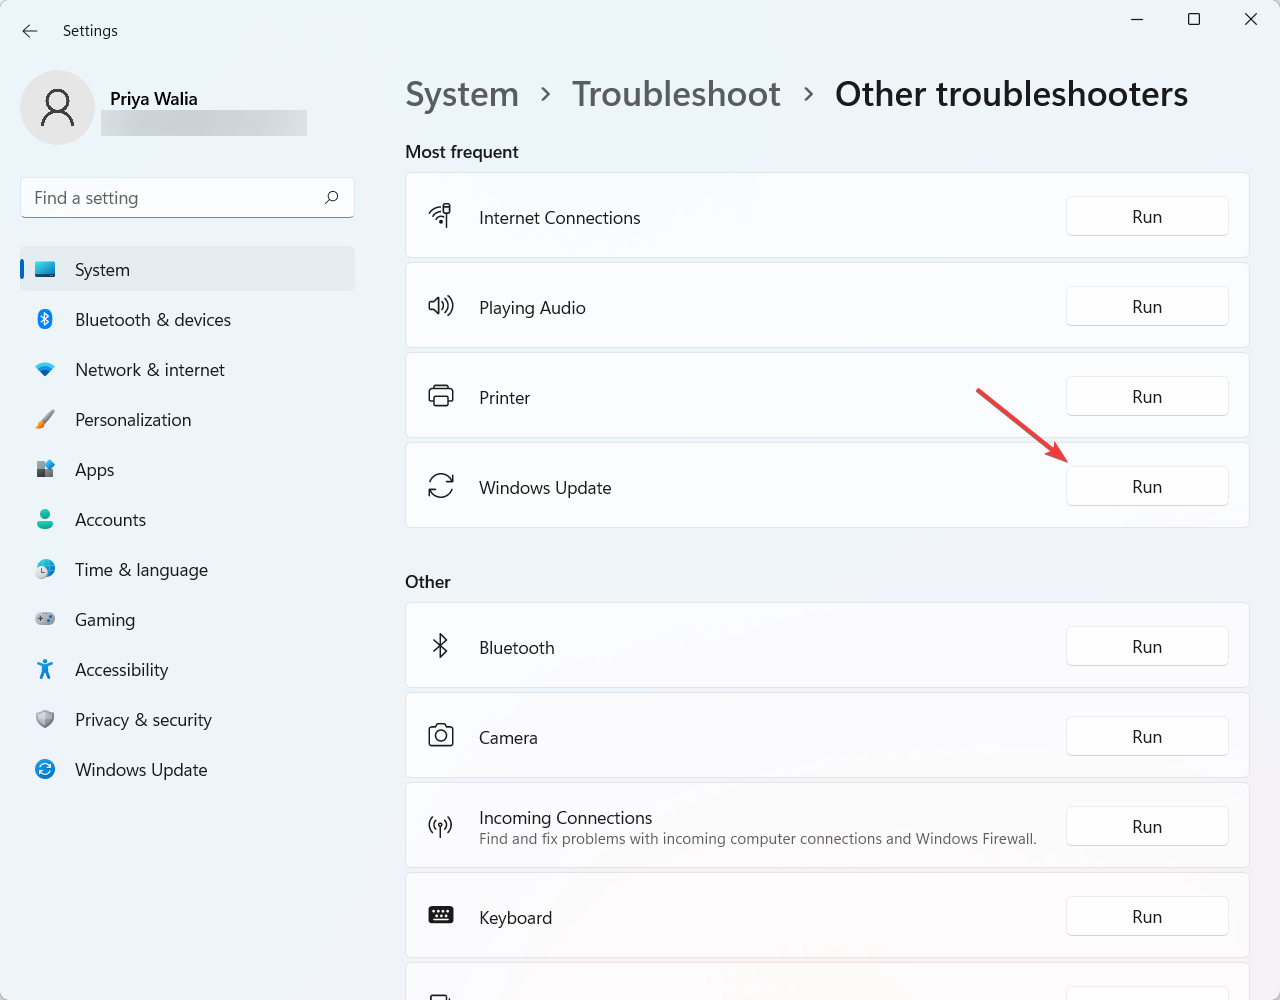
- Navigate to Windows Update and click on Run.
One of the most effective ways to determine what’s causing your problem is to run the Windows 11 troubleshooter. It can detect and try to fix some of the most common problems with the OS.
7. Check if the USB is formatted as FAT32
- Press Windows + X key simultaneously and choose File Explorer from the menu that appears.
- Next, locate My PC and expand it.
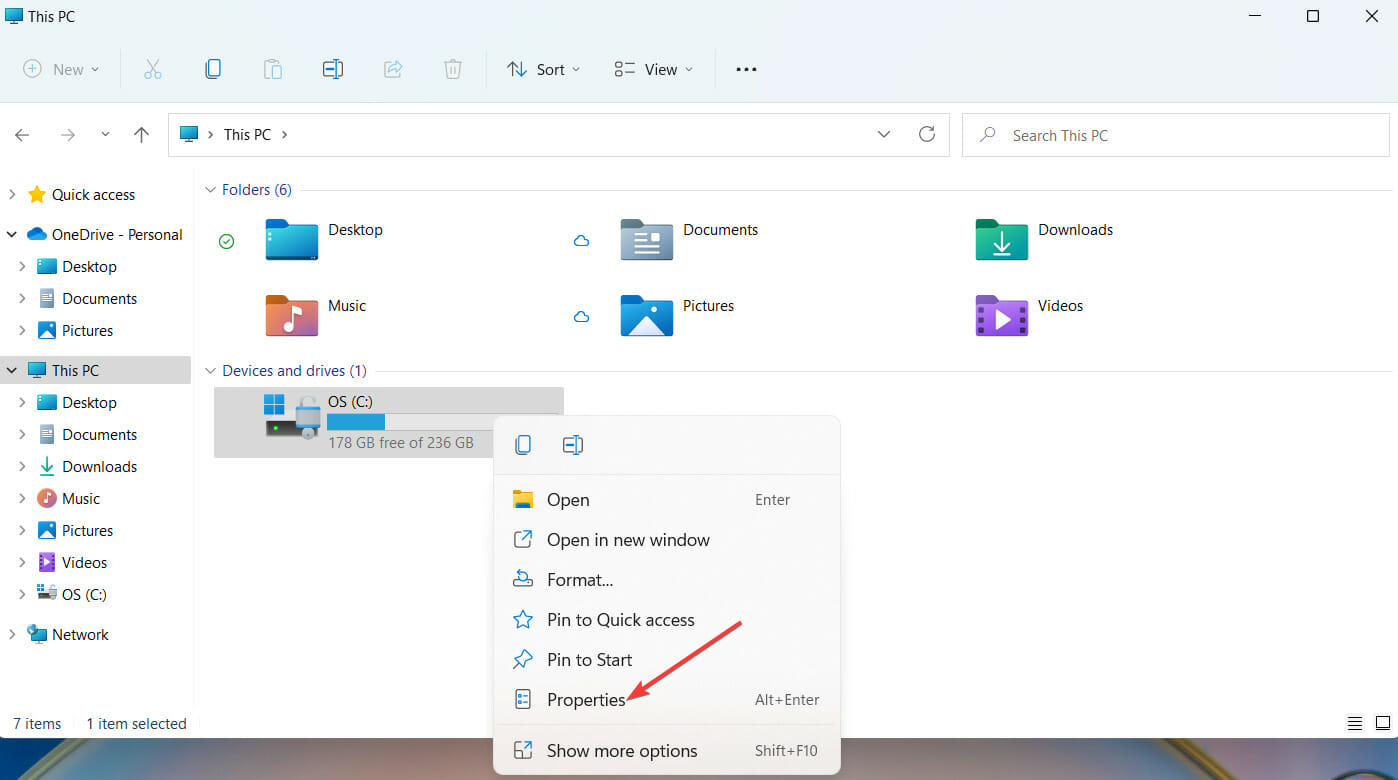
- Right-click the USB in question and select Properties.
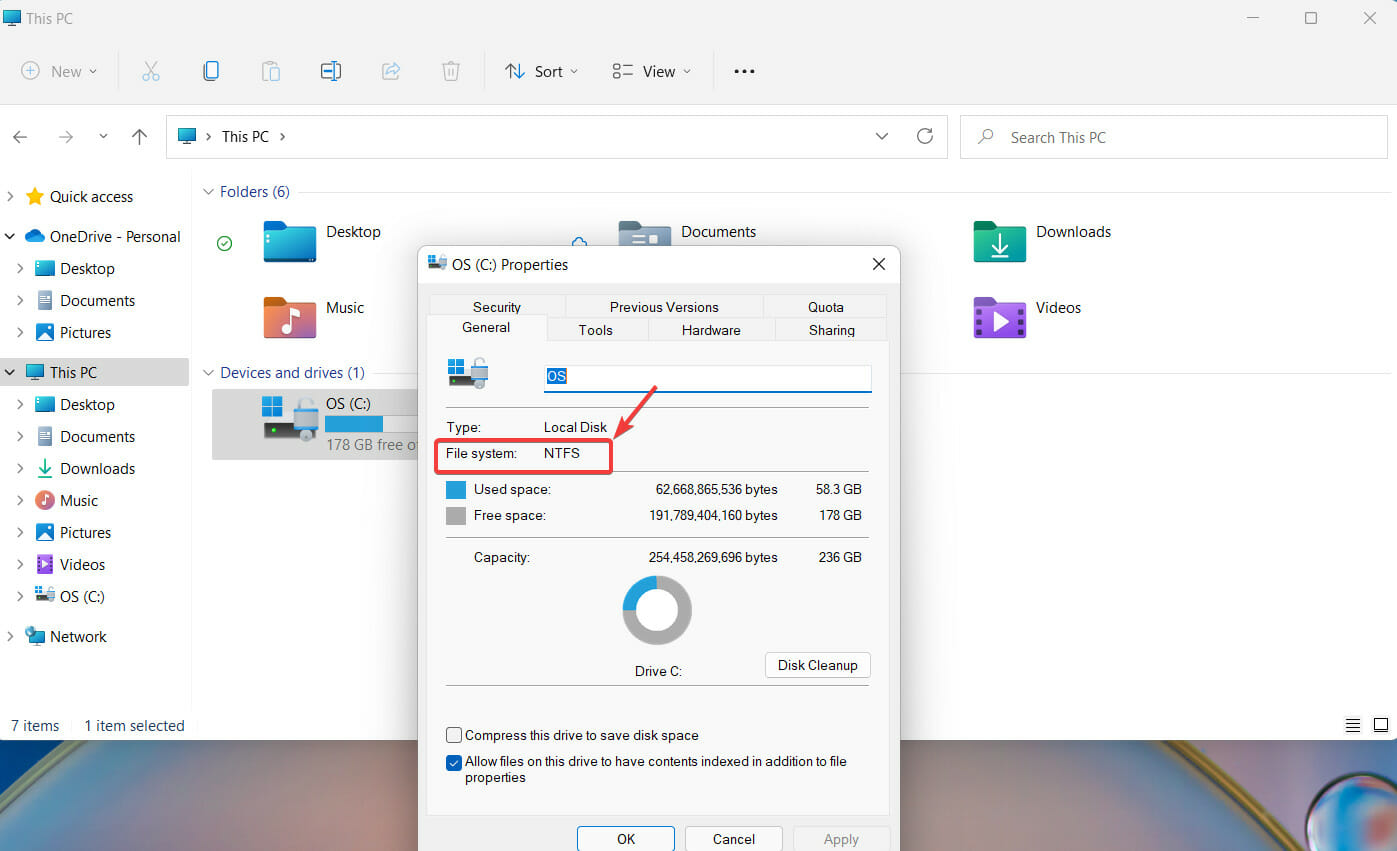
- Navigate to the General tab and check whether the USB is formatted as FAT32 or not. As you can see in the screenshot below, the USB is formatted as NTFS.
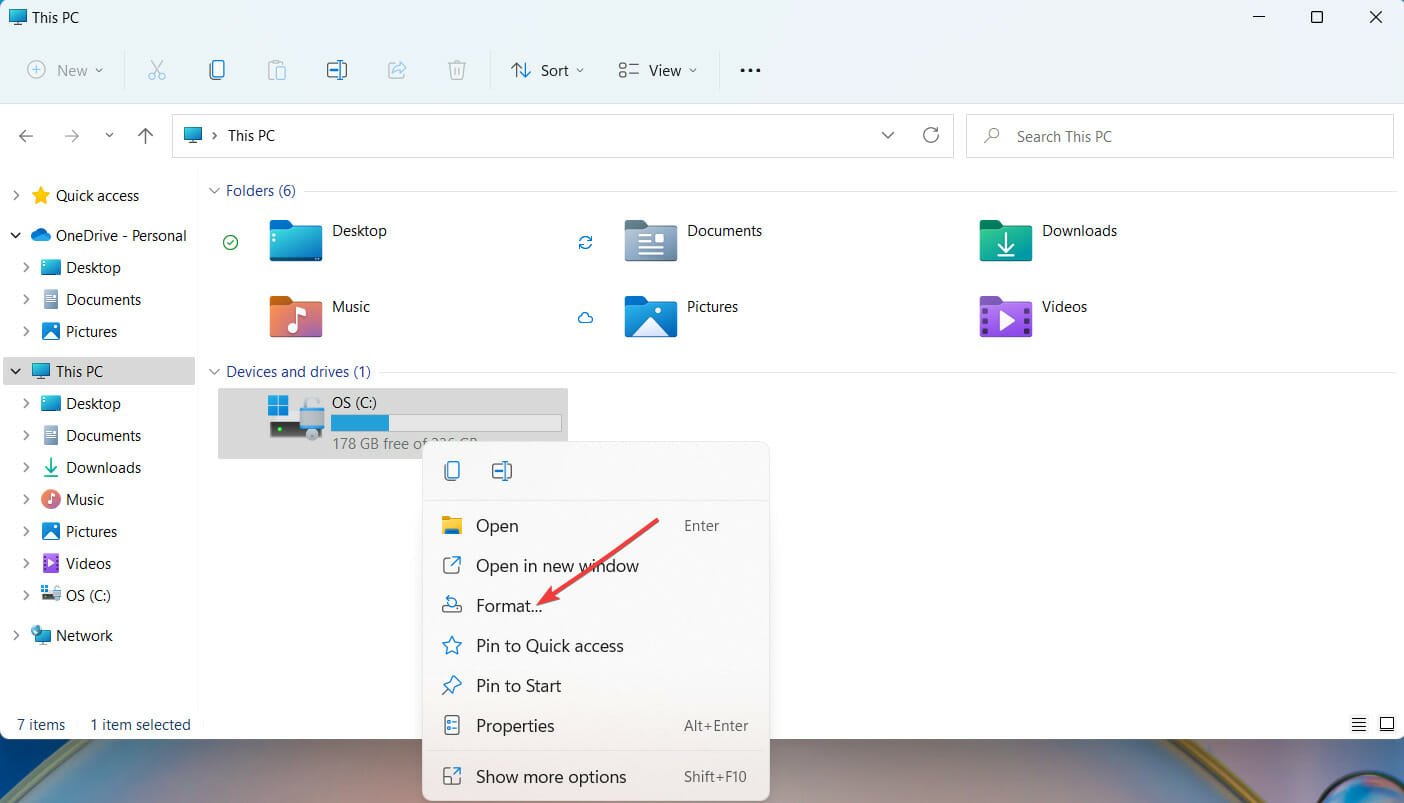
- You can change the format to FAT32 by right-clicking the USB driver again. This time select the option Format.
- On the new window that pops up, select FAT32 format, and click Ok to proceed.
If you are going to reformat the USB stick, it’s a good idea to make a copy of the files you want to store on the USB. Once you’ve done that, reformatting the USB is pretty straightforward.
8. Enter the BIOS Configuration
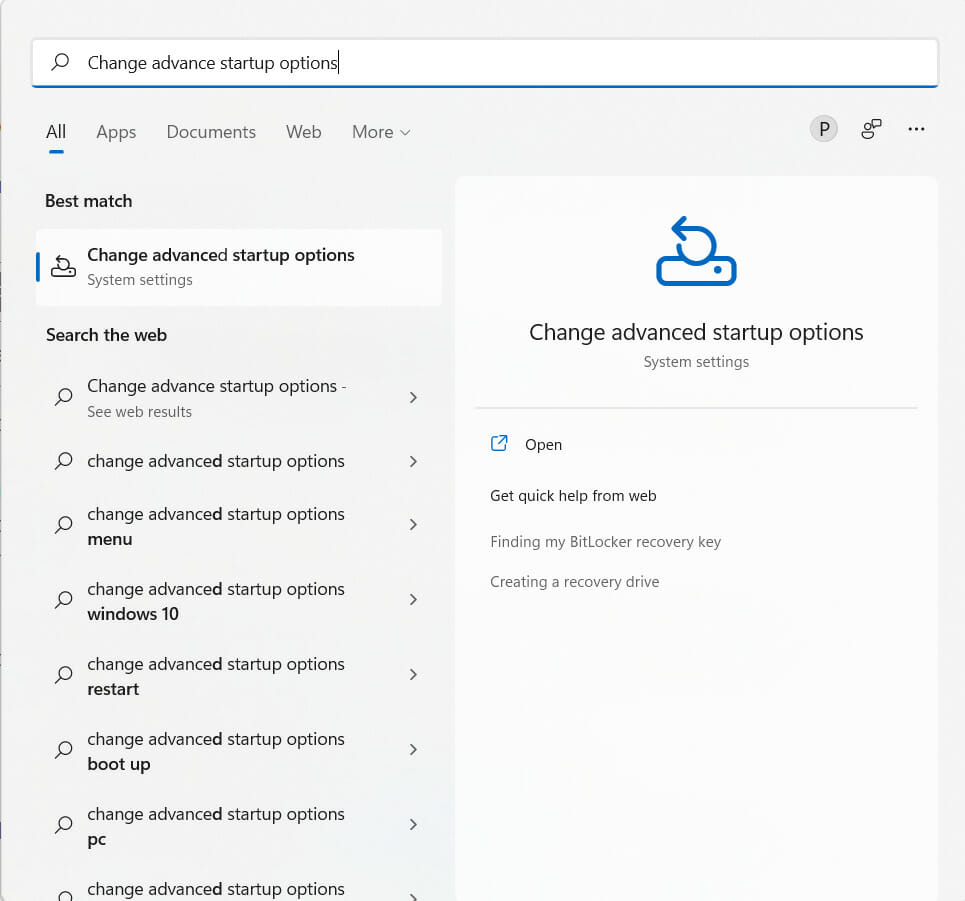
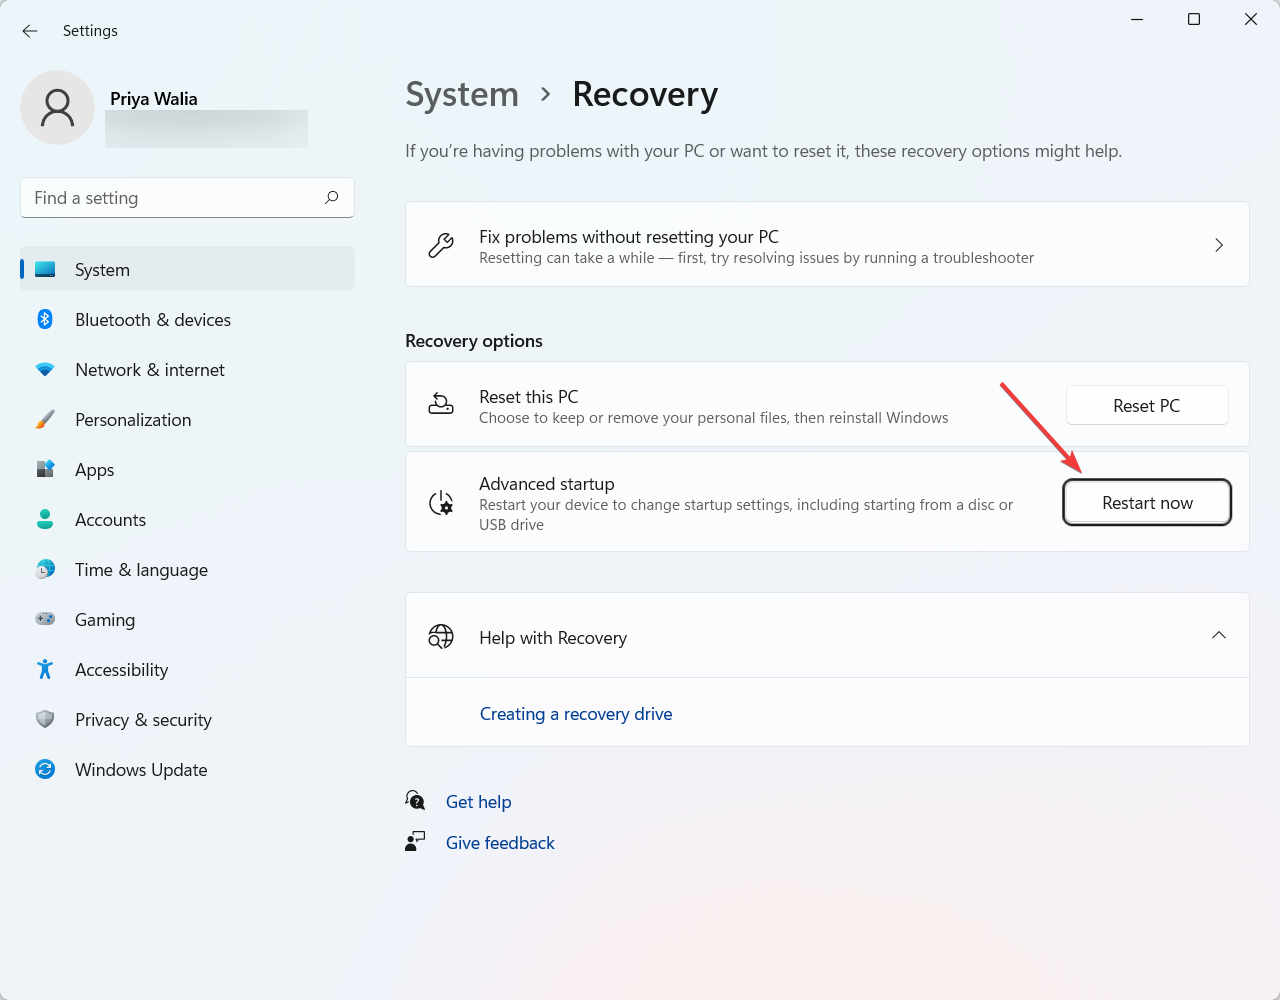
- In the Windows Search bar, type Change advance startup options and hit Enter.
- Next, select restart now.
- Windows will now reboot your computer.
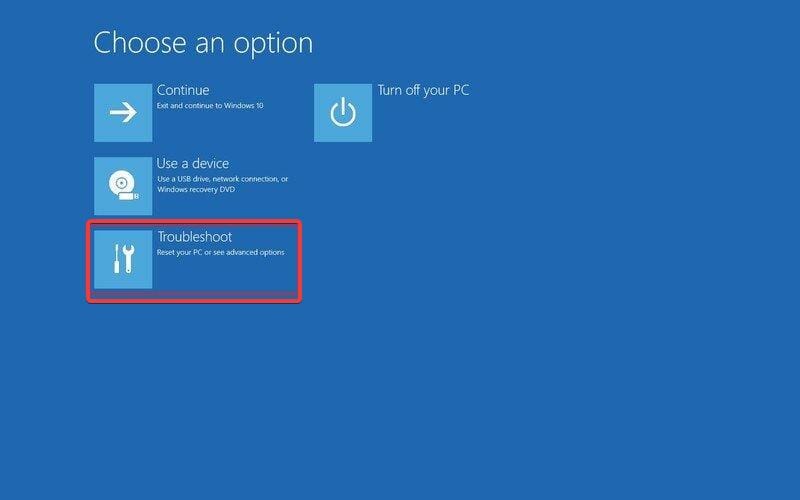
- Once your computer reboots, click on troubleshooting.
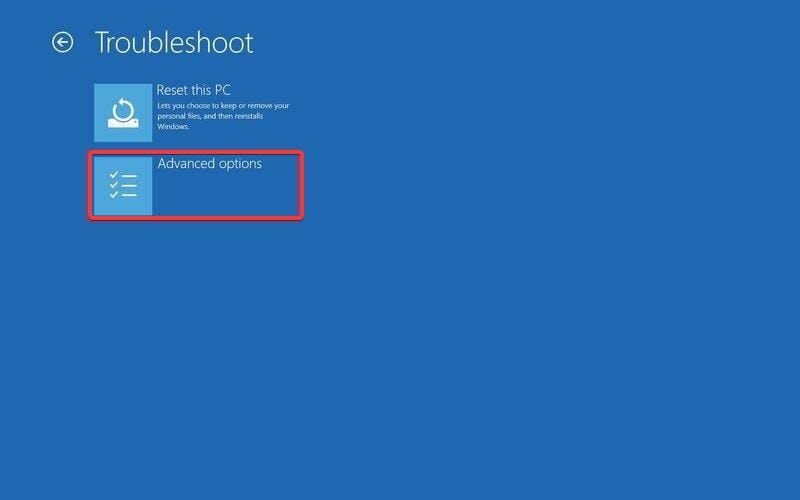
- Select Advanced options.
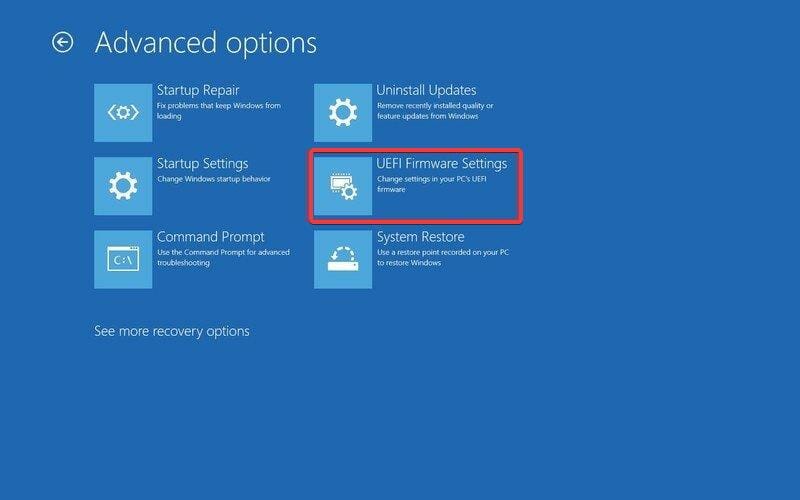
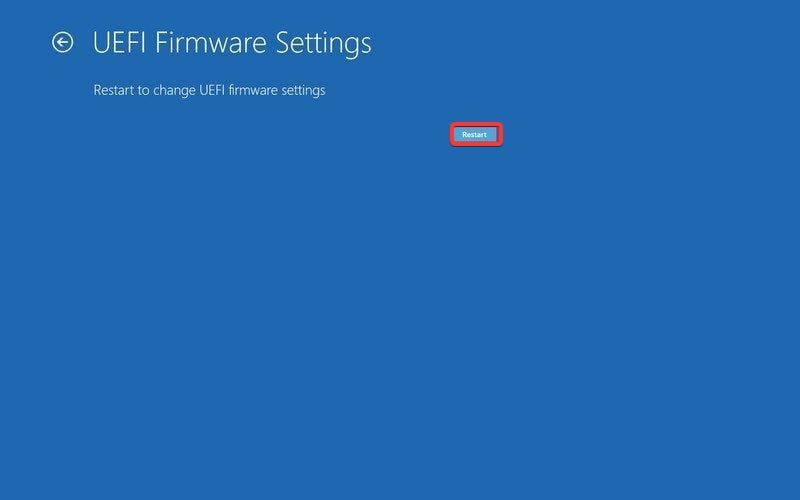
- Click on UEFI Firmware Settings.
- Then, click on the restart option to enter the BIOS configuration.
BIOS (stands for Basic Input Output System) is a type of firmware for computers. The principal job of a computer’s BIOS is to control the early stages of the startup process, such as ensuring that the Windows 11 operating system is successfully loaded into memory.
How can I create a Virtual machine (.ISO file) to install Windows 11?
You can create a Virtual machine (.ISO file) by visiting the Microsoft Website. Find the option Download Windows 11 Disk Image (ISO). Next, click on download and then follow the on-screen instructions.
Also, check our guide if Windows 11 installation has failed on your computer. If you want to try Windows 11 without installing it on your PC, we got you covered there too.
If you found this guide indeed helpful, do let us know in the comments section below.



User forum
0 messages