How to Split Screen on Windows 11 [2 Different Ways]
You can split your screen into up to 4 windows at once
Key notes
- Some Windows 11 users want to customize their daily workplace, and one of the most popular options is to split the screen.
- You can quickly personalize the snap windows through the Settings menu.
- Using Snap Layouts is also a great way to split the screen in Windows 11.
![How to split the screen in Windows 11 [Easy Guide]](https://windowsreport.com/wp-content/uploads/2021/08/tcJQKqMLIl-1-886x590.jpg)
The latest Microsoft OS is brand new, coming up with new features and great capabilities. Among others, it allows you to easily change specific designs, according to your own necessities.
Some users seem to be interested in how to split-screen in Windows 11. And if you’re one of them, keep in mind that you can do it in different ways.
Fortunately, these take only a few seconds, so do not worry about performing them. And if you change your mind, you can quickly go back to the default aspect.
There are multiple reasons to split your Windows 11 screen, but we selected only the best of them. Take a look at the following section and discover them.
Why should I split the Windows 11 screen?
To be more efficient in your workplace, there might be times when you need to run two monitors, either we talk about connecting a new one or using VMware support.
Splitting the screen allows you to do this on a single one, dividing your PC screen into two or more halves so you can view different windows at the same time.
This will definitely create more screen real estate and also build a more efficient workflow. And note that having a large monitor is an important advantage to clearly view your split sections.
How can I split the screen in Windows 11?
1. Use Snap Layouts
The Snap Layouts feature allows users to able to split the screen into two, three, or four sections. It is built-in and easy to use, as you will see in the lines below.
1.1 Split the Windows 11 screen into two sections
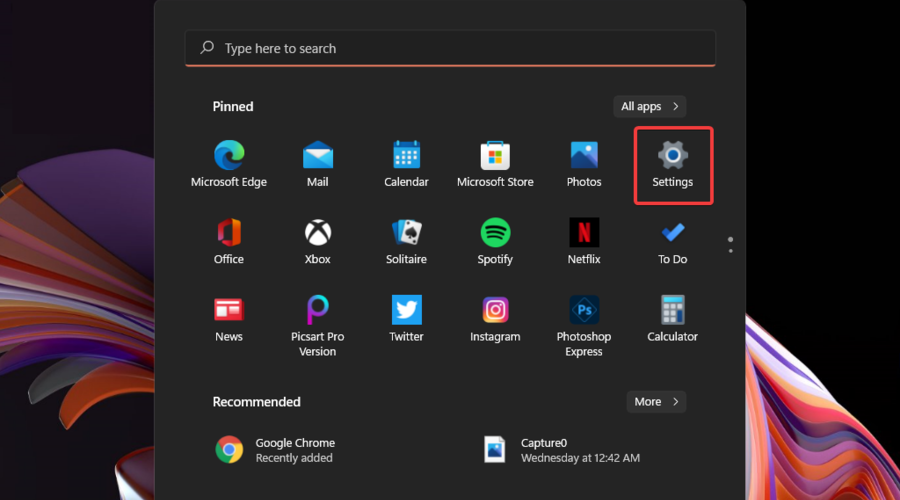
1. Click on the Windows key, then open the Settings menu.
2. Go to System, then navigate to Multitasking.

3. Look at the Snap windows section and turn it On.

4. To explore various options, you can expand this section by clicking on it.
5. There, checkmark whatever you need. Keep in mind that you can choose multiple options.

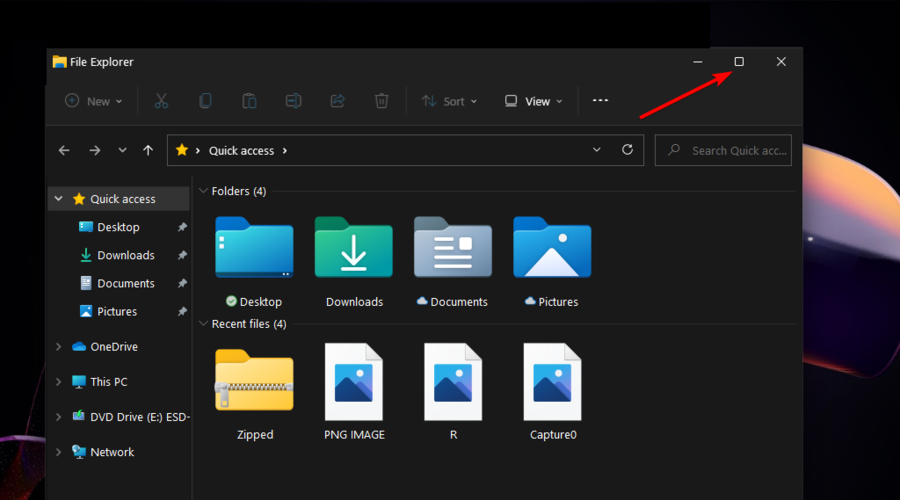
6. To split the screen into two sections, you have to open the folder you want to split and hover the mouse cursor over the maximize button, near the top-right corner of a window.
7. Select the first layout to split the window in two sections.

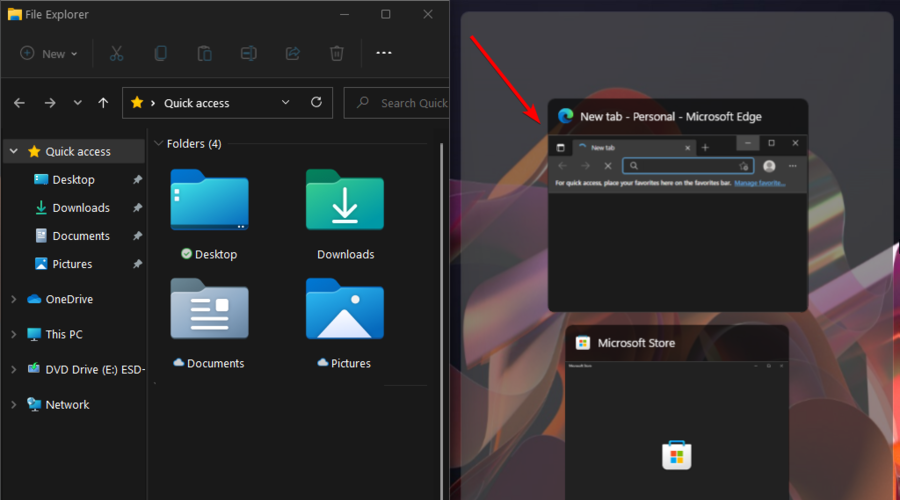
8. Now, your current app window will snap into the selected half of the screen, and the other open apps will be displayed as thumbnails in the other half.
9. Click on the one that you want to add to the other half of the screen.
10. You’ll now see two app windows. And the best part is that you can access and work on them simultaneously.
You can easily split the screen in two different sections using Snap Layouts. To be able to do this, you first have to enable Snap Layouts from the Windows Settings Menu.
Afterwards, you can use the Maximize button on your folder’s window to split it in two.
1.2 Split the screen into three sections
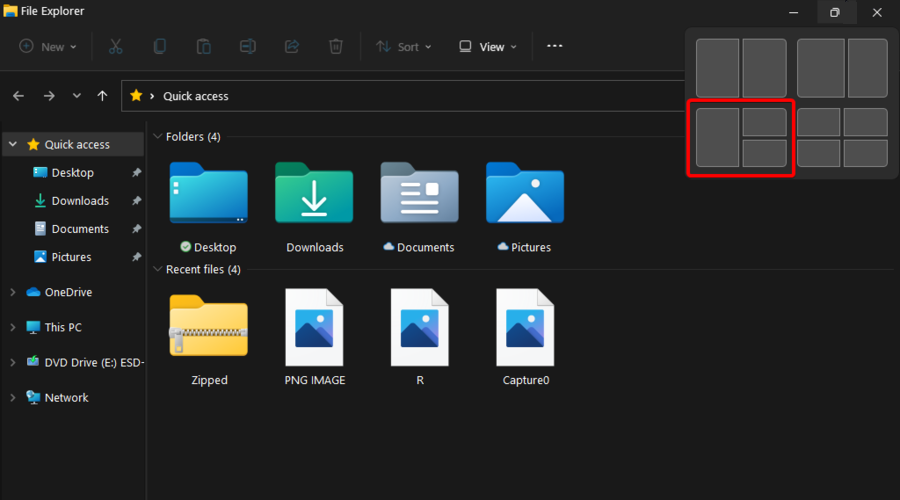
- Hover the cursor again over the maximize button, then choose either of the three parts from the left-bottom section (We recommend selecting the biggest one).
- Now, the current window will fit the part you selected earlier. You’ll also see the other open windows shown as thumbnails. There, choose the window that requires the most attention.

- After you’ve selected the needed window, your screen will take up the left half.
- Similarly as before, the other open windows will be displayed as thumbnails in the remaining quarter.
- You’ll have to choose again which app you want to be displayed in the last quarter.
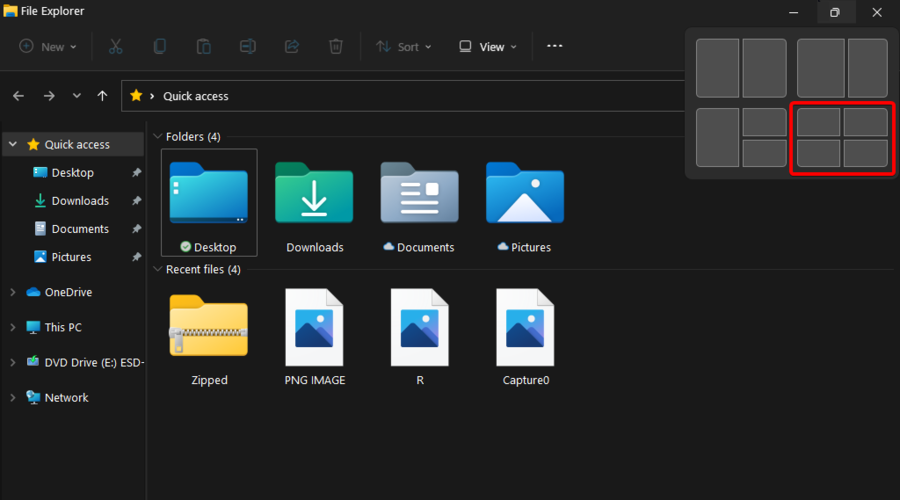
1.3 Split the screen into four sections
- You’ll have to hover the cursor again over the maximize button.
- The process will be pretty similar to what we’ve discussed before. But you’ll have to choose the needed quarter from the last option.
- Select the other apps to be on the split screen accordingly.

We also prepared a dedicated guide about how to enable Snap layouts on Windows 11, so do not hesitate to fully check it.
2. Manually snap Windows to the Sides
2.1 Try a specific keyboard shortcut
- Open the desired window.
- To split the screen into two sections, you’ll need to use the following keyboard shortcut: Windows + Left or Right keys.
- If you want to split the screen into three sections, apply the already mentioned keyboard shortcut. Remain on the least important window, then use again the same combo.
- For a four sections screen splitting, you’ll need to follow all the above steps. Then, click again on the most expanded window, and use again the following keyboard shortcut: Windows + Left or Right arrow key.
- Once the main windows display on the screen, the other open windows will appear on the opposite side.
- Choose the ones you want to add to the other side of the screen.
- Now, your screen will be split into different sections.
2.2 Use the mouse
2.2.1 Split into two sections
- To split the Windows 11 screen into two sections, you’ll have to hold and drag the needed window to either of the sides as far as the cursor would go.
- When you’re able to see a hazy outline, release the cursor. This shows the portion to be taken up by the app in the background.
- Now, choose the second window you need.
- After the two desired windows appear on your screen, to resize them, drag the line that separates them.
2.2.2 Divide into three or four sections
- Hold and drag the window you need to the corner.
- Again, once you see a hazy outline in the background that covers a quarter of the screen, release the cursor.
- Now, the main window and the other apps will appear on your screen. Select two of the most important ones to add to other sections.
- You’ll now have three windows on the screen.
- Note that you’re able to resize the windows by dragging the line that separates the windows, just as you did earlier.
- You can similarly split the screen into four sections.
What are other useful Windows 11 screen features?
- Rotate the screen – With its great features, you’ll be able to rotate your screen in Windows 11.
- Record the screen – Also, thanks to the latest Microsoft OS version, recording the screen will be a piece of cake. To get the best out of this option, you should try a screen recorder app with webcam overlay support.
- Make print screens – For most users, screen captures are mandatory during their day-to-day work. Fortunately, some easy methods will help you to take a screenshot in Windows 11.
We ensured delivering only valuable options and information, so make sure if you apply them, you’ll be surprisingly pleased. Additionally, you can try DisplayFusion which can also split-screen your PC screen without the need of following manual steps.
As you can see, besides split-screen, you can benefit from other incredible Windows 11 screen customizations. Of course, the latest OS design comes up with plenty of new features, so take your time to them out.
Any other questions or thoughts? We always support you to share them with us by leaving a comment in the section below.
Read our disclosure page to find out how can you help Windows Report sustain the editorial team. Read more


Improve this guide


User forum
0 messages