How to Dual Boot Windows 11 and Linux [Step-by-Step Guide]
There are two ways of doing this
Key notes
- In order to dual boot Window 11 and Linux, find out all about Secure Boot interfering with Linux dual boot.
- For the procedure to work, create a separate partition and install the new operating system on it.
- If Linux is missing, consider that Windows might overwrite the Linux bootloader but there’s an easy fix to apply.
One of the biggest competitors of Windows is Linux, and with Windows 11 in the spotlight, the competition is greater than ever.
Both systems have their advantages and flaws, and if you want to learn more, we suggest that you read out Windows 11 vs Linux guide for in-depth information.
However, you don’t have to pick one or the other. With a bit of effort you can dual boot Windows 11 and Linux on your PC, and today we’re going to show you how to do that.
How can I dual boot Windows 11 and Linux?
Note that dual-booting can be done in two ways. You can install Windows 11 from Linux and if you already have Windows 11 on your PC, just install Linux by applying the below steps.
 Tip
Tip
1. Install Linux from Windows 11
1. Create a new partition for Linux
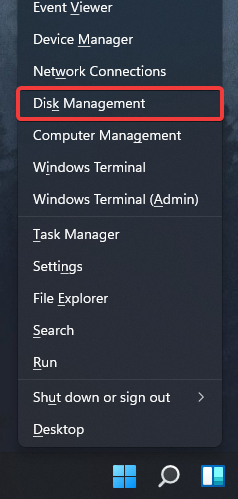
- Press Windows Key + X and select Disk Management from the list.
- Select the drive that has extra space. Different Linux distributions have different requirements, so you’ll need about 50-100GB+ of space, depending on your needs.
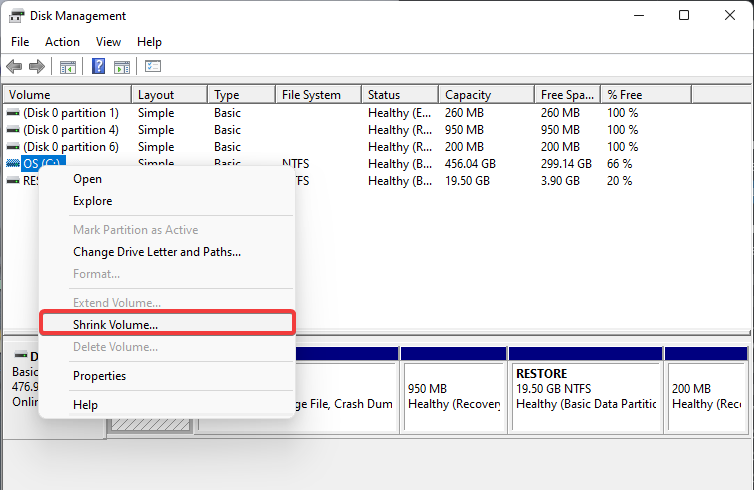
- Right-click that drive and select Shrink Volume from the menu.
- Set the desired amount of space in MB in the Enter the amount of space to shrink in MB field and click the Shrink button.

- This will create unallocated space. Right-click the Unallocated space and select New Simple Volume.
- Set the Simple volume size in MB to the maximum possible value and click on Next.
- Now you just need to enter the desired letter for this drive and its label.
- Click the Finish button to complete the process.
In order to have a new partition created, you need to download Linux and create a bootable flash drive to install it.
2. Download Windows ISO and create a bootable flash drive
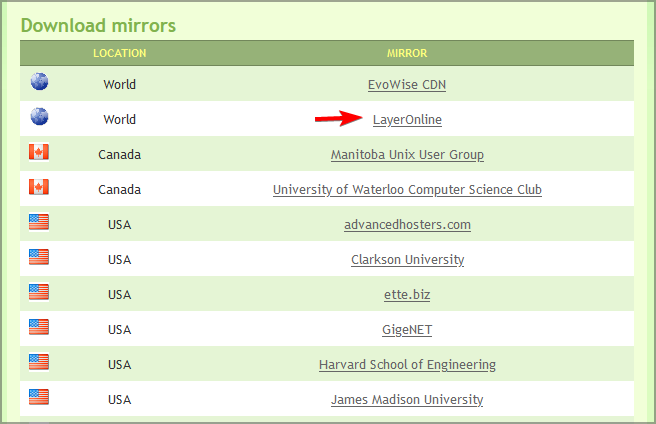
- Visit the download page of the distribution that you want to download. In our example, we used Linux Mint, but you can use any other distribution that you want.
- Select the source that you want to use and wait for the download to finish.
- Connect a USB flash drive to your PC.
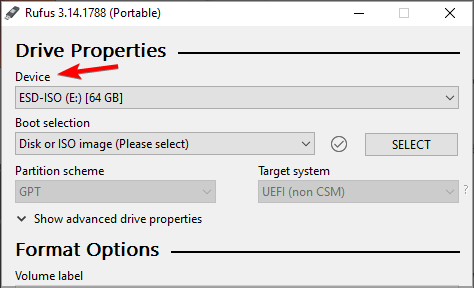
- Once the ISO file is downloaded, download Rufus and run it.
- Select your flash drive from the list of devices.
- Click on Select and select the ISO file that you downloaded.
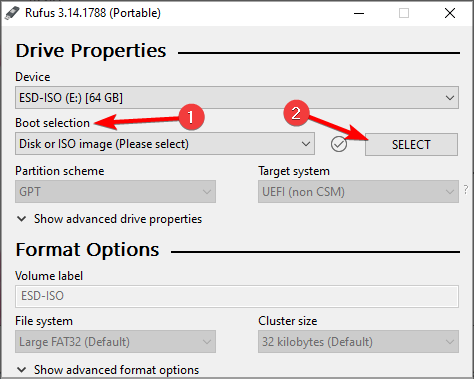
- Make sure that your settings are correct and click on Start.

- A confirmation dialog will appear asking you to format the drive, so be sure to format it to proceed.
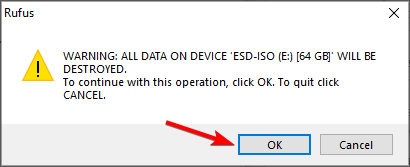
- Wait for the process to finish.
Once the process is finished, you’ll have a bootable Linux flash drive ready. Now we can go on and install Linux.
3. Change the boot order and install Linux
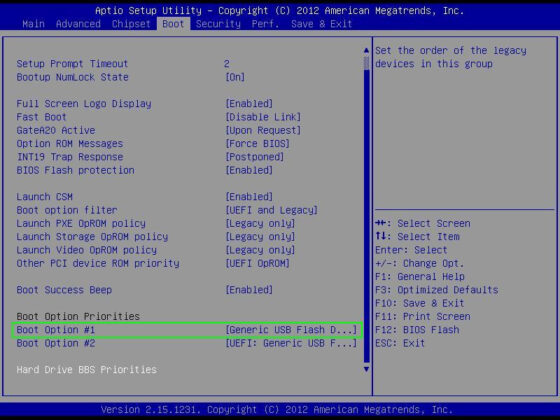
- Restart your PC and press Del to access BIOS. Some motherboards use a different key, so be sure to check your PC’s documentation/motherboard documentation.
- Navigate to the Boot section, set your flash drive as the primary boot device, and save the changes.
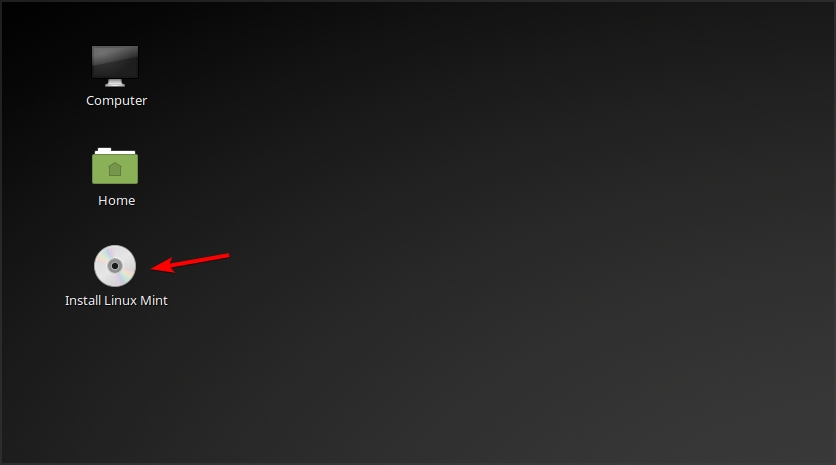
- Once your PC restarts, you’ll be booted to Linux Mint live session. Select Install Linux Mint.
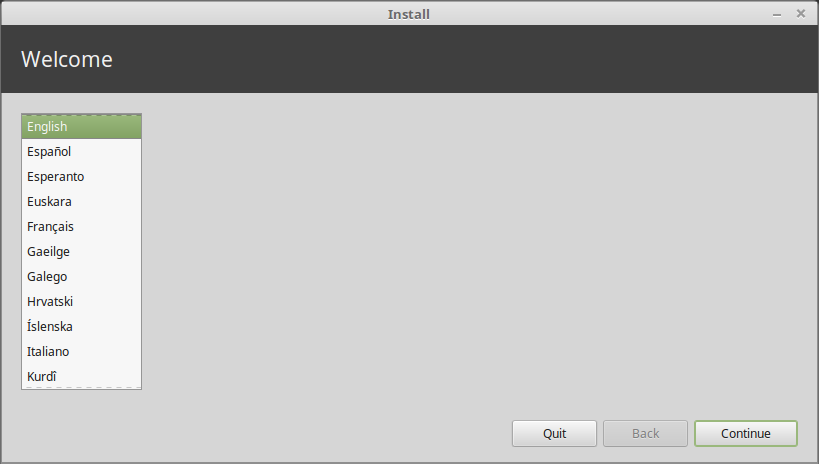
- Select the desired language and click on Continue.
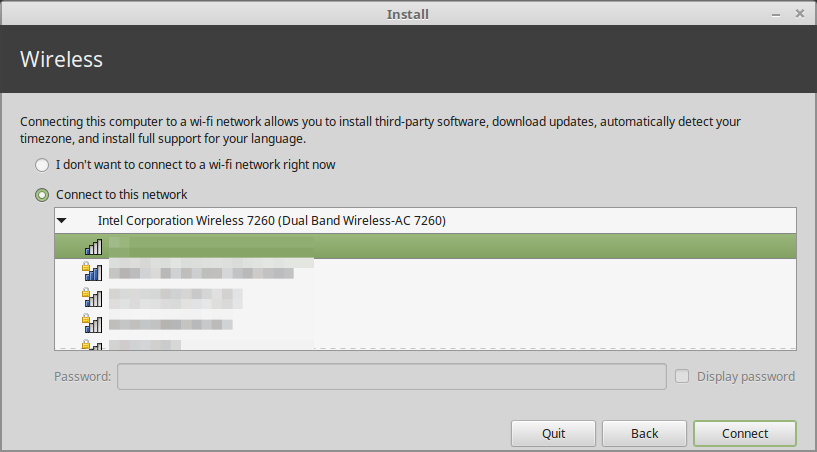
- Up next, select your network if you want to download the third-party software for your graphics card, Wi-Fi, and media devices.
- Select Something else and choose Continue.
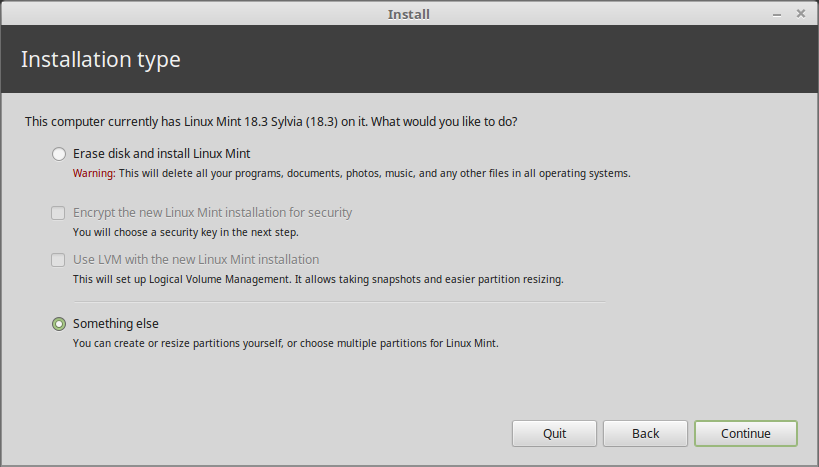
- You can now select the partition created at the beginning of this section. It’s crucial that you select the correct partition or else you might format the wrong drive and lose your data.
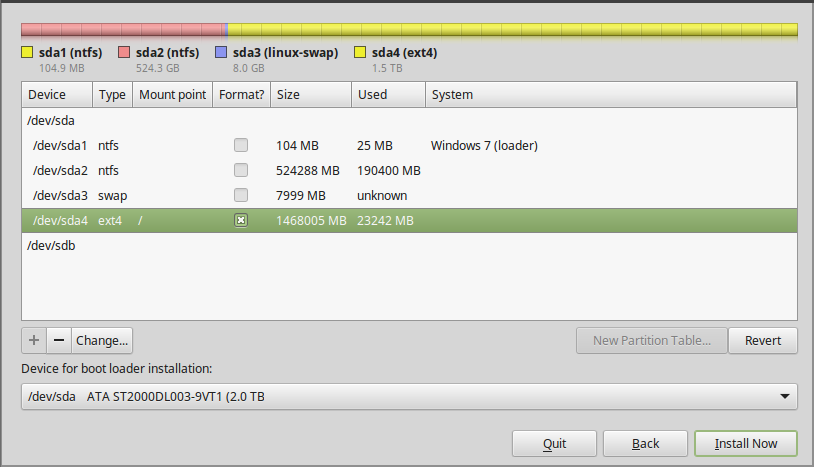
- Since Linux doesn’t work with Windows filetypes, you’ll need to edit the partition and set its file type to Ext4. Keep in mind that this process will format the partition and remove all files from it.
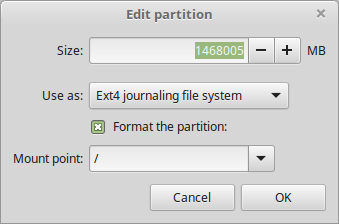
- Once the drive is converted to the Ext4, you can proceed and install Linux on it.
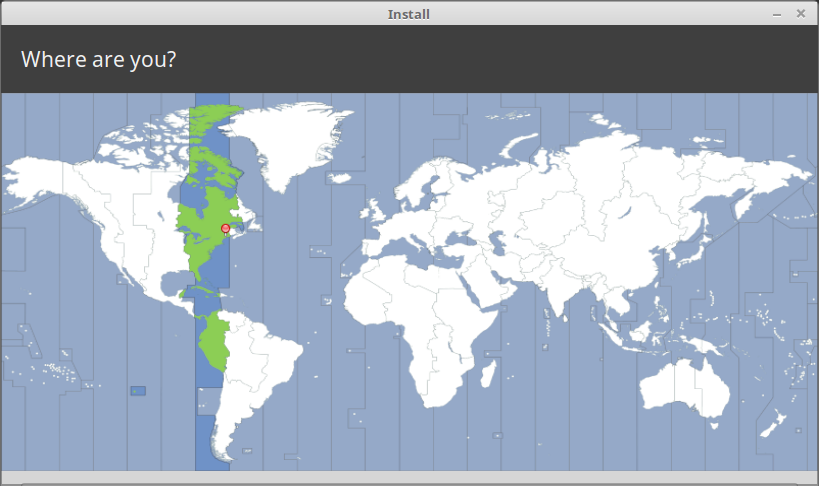
- Select your time zone.
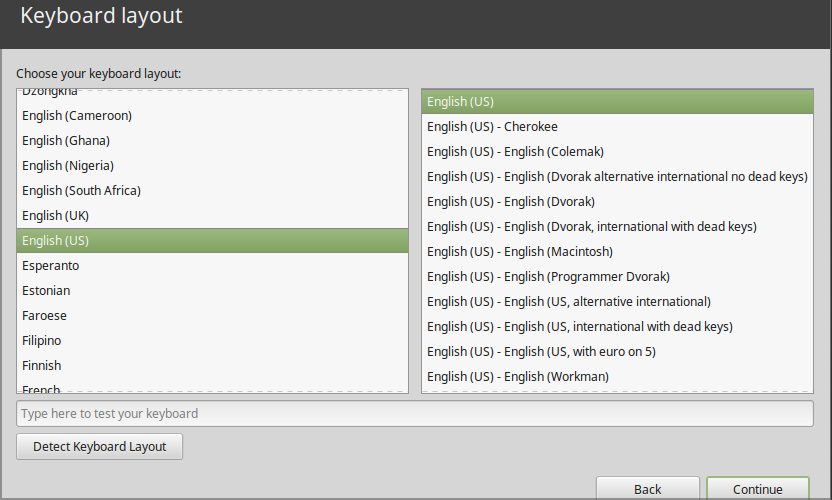
- Select the desired keyboard layout.
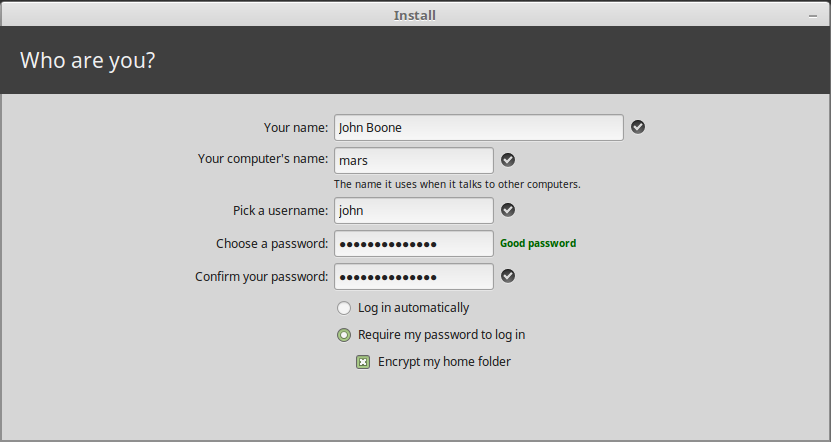
- Now enter your user information. You can uncheck Encrypt my home folder option.
- Wait for the installation to finish.
- Once the installation is finished, click on Restart now button.

- Optional: Enter BIOS once again, and set your hard drive as the primary boot device.
- Once your PC boots, you’ll be asked to choose between Windows 11 and Linux, so pick the desired operating system and that’s it.
After completing all these steps, dual booting Windows 11 and Linux should be working properly. Of course, you’ll have to select the desired operating system every time you boot your PC.
We used Linux Mint in our example, but the steps are more or less the same for every Linux distribution.
2. Install Windows 11 from Linux
1. Create a new partition for Windows
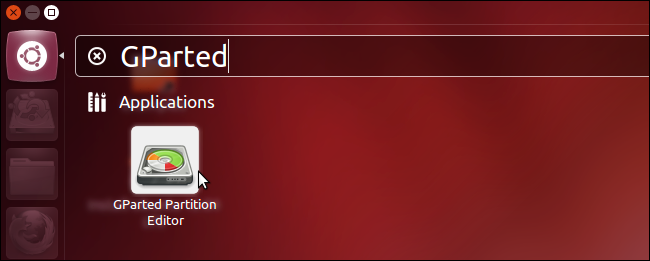
- On your Linux PC, open GParted or any other disk management software that you’re using.
- Optional: You can install GParted by running the following command in the Terminal:
sudo apt install gparted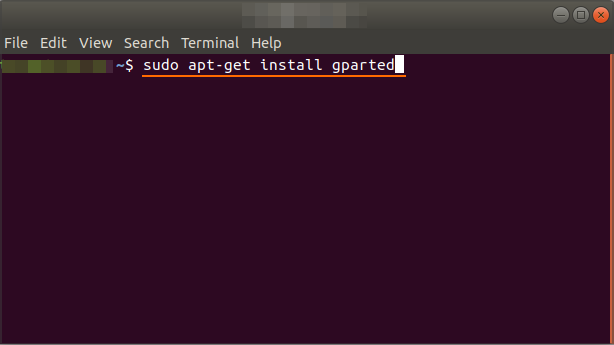
- Locate the partition that you need to shrink. Keep in mind that you can’t shrink the partition that has Linux installed on it while running Linux. If you want to do that, you need to boot from Linux Live USB and perform these steps from there.
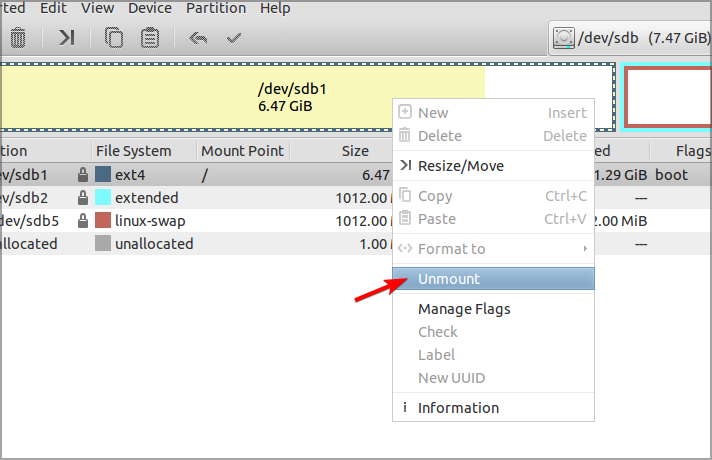
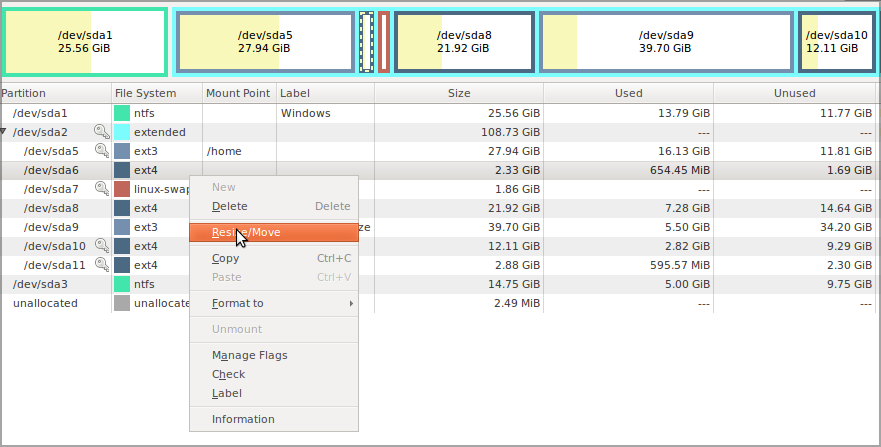
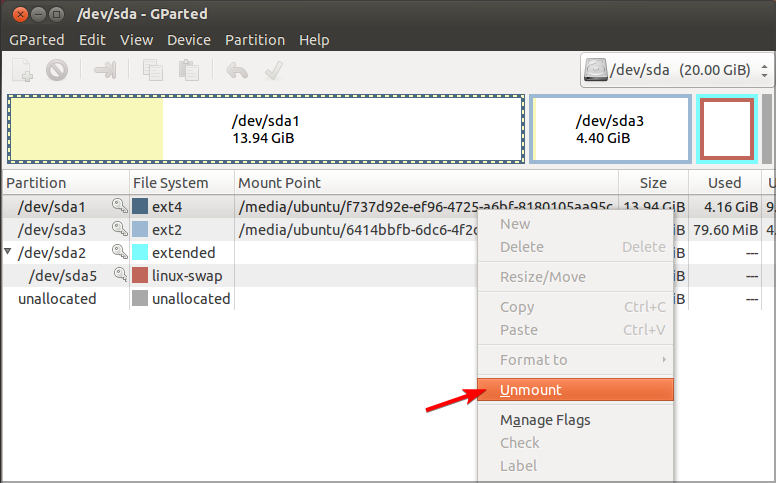
- Right-click the partition that you want to shrink and select Unmount.
- Just right-click the partition again and choose Resize/Move from the menu.
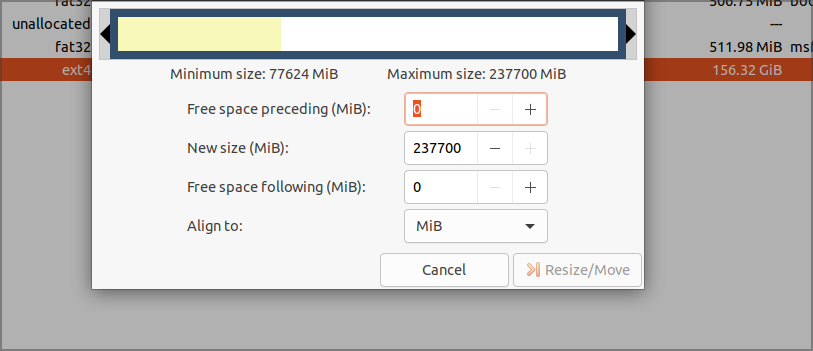
- Set the New size to at least 50000, but if you want to install additional apps, we suggest making it larger. Click on Resize/Move once you’re done.
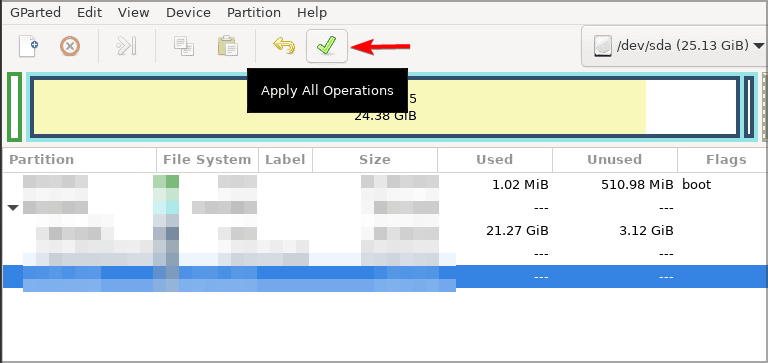
- Now click the Apply icon in the toolbar to make the changes.
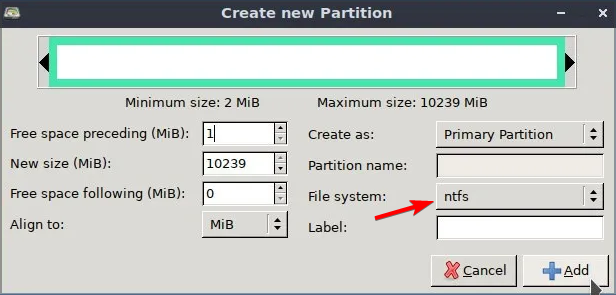
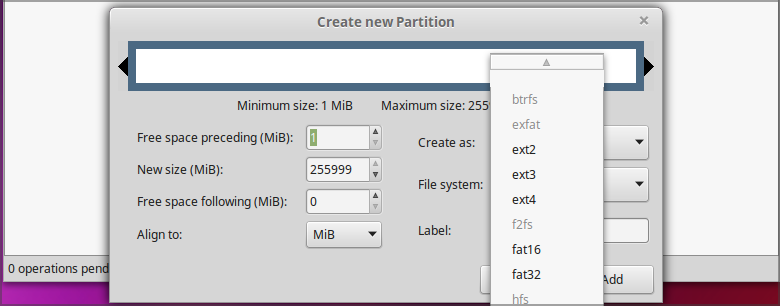
- Right-click the unallocated space that you just created and choose New.
- Set the File system to NTFS and click on Add.
- Click the Apply button to now save changes.
- Locate the partition that you unmounted in Step 4, right-click it and choose Mount.
Now that we have our Windows partition ready, we need to download Windows and create a bootable USB flash drive.
2. Download Windows and create a bootable flash drive
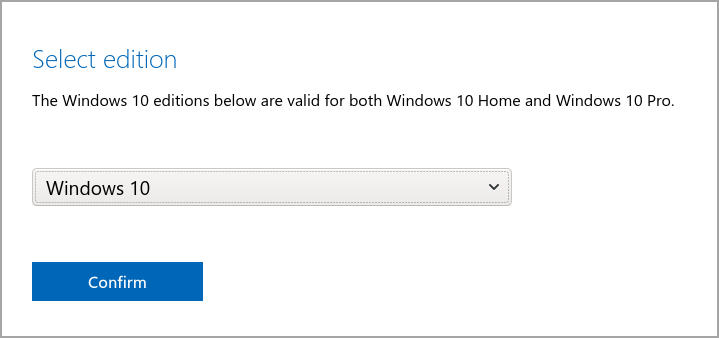
- Go to the Microsoft download page on your Linux PC.
- Select the version of Windows that you want to download and click on Confirm.
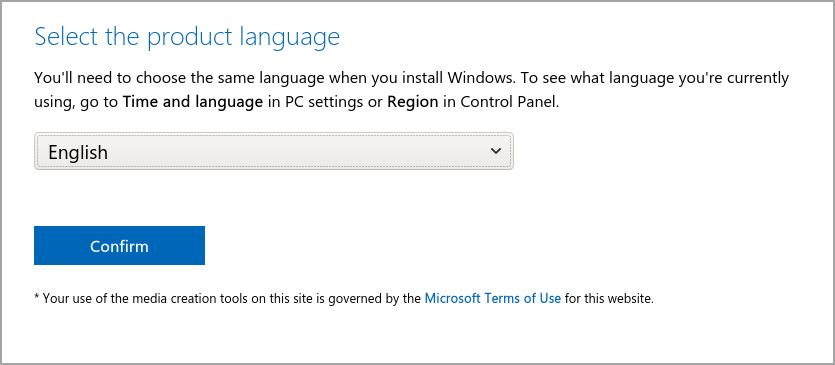
- Choose the desired language and click the Confirm button.
- Select the version that you want, but we recommend using the 64-bit version to avoid compatibility issues.

- Choose the save location and start the download.

- Wait for the process to finish.
 NOTE
NOTE
3. Create a bootable USB flash drive
- Connect the USB flash drive to your PC. Make sure that the drive is at least 8GB in size, but 16GB is recommended.
- Start GParted or any other disk management software that you have.
- Select your USB flash drive from the menu in the top right corner. Your drive should be labeled /dev/sdb or something similar. Make sure that you select the correct drive.
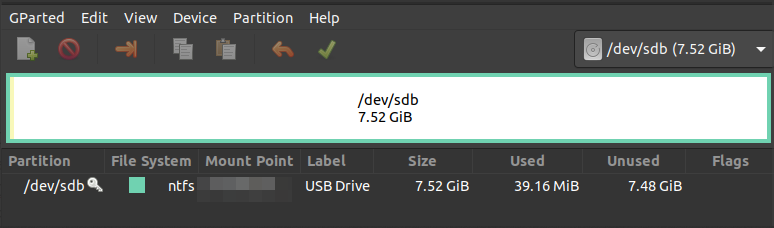
- Check if partitions have a key icon next to them. If so, right-click those partitions and choose Unmount.
- Now right-click the partition on your flash drive and choose Format from the menu.
- Make sure that the new partition will use the maximum space of your flash drive.
- Set the file system to ntfs or exfat and click Apply.
- Now click the Apply button in the toolbar to save the changes.
Learn how to use Win32 Disk Imager to create bootable USB drives from ISO files: How to Use Win32 Disk Imager.
4. Mount Windows 10 ISO and create installation media
- Make sure that your USB flash drive is connected.
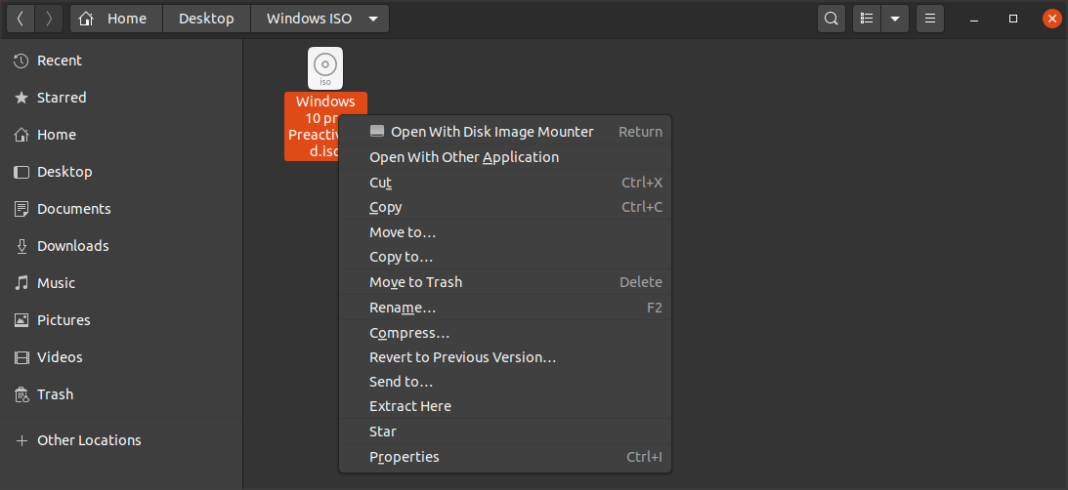
- Locate the Windows 10 ISO file that you downloaded.
- Right-click it, and choose Open With and select Disk Image Mounter.
- Locate the mounted ISO file and select all files. Now select Copy.
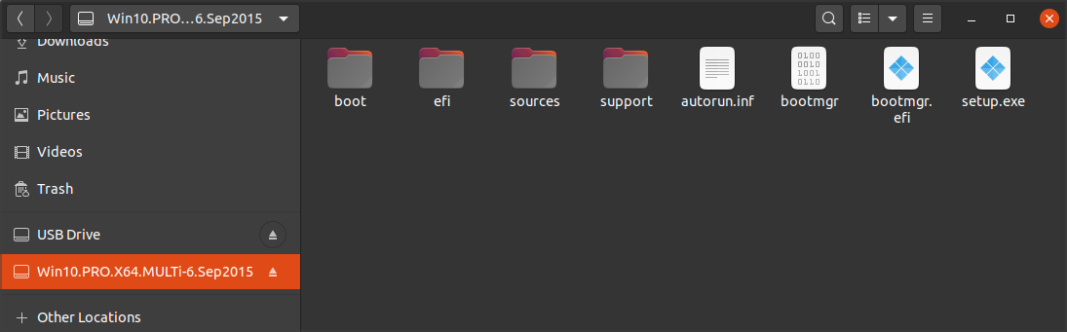
- Navigate to your USB flash drive and paste the files there.
If you don’t have the option to mount the drive from the context menu, you can do that with these commands in the Terminal:
sudo mkdir /mnt/windows10/
sudo mount -t auto -o loop /path/to/window-10-iso /mnt/windows10/
Once the files have been copied, your bootable flash drive is ready to use, so let’s go on and install Windows 10.
5. Install Windows 10
- Access BIOS on your PC. You can usually do this by pressing a dedicated key while the system boots. Usually, that’s Del but it can vary depending on your motherboard.
- Go to the Boot section and set your USB flash drive as the first boot device.
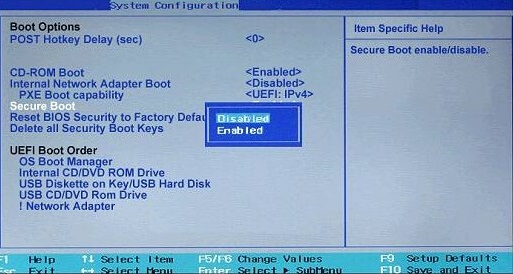
- Navigate to the Security section and disable Secure Boot. Some users are also recommending disabling the Compatibility Support Module so you can do that as well.
- Save changes and restart your PC.
- When your PC restarts, press any key to boot from your flash drive.
- Choose the language that you want to use and click on Next.
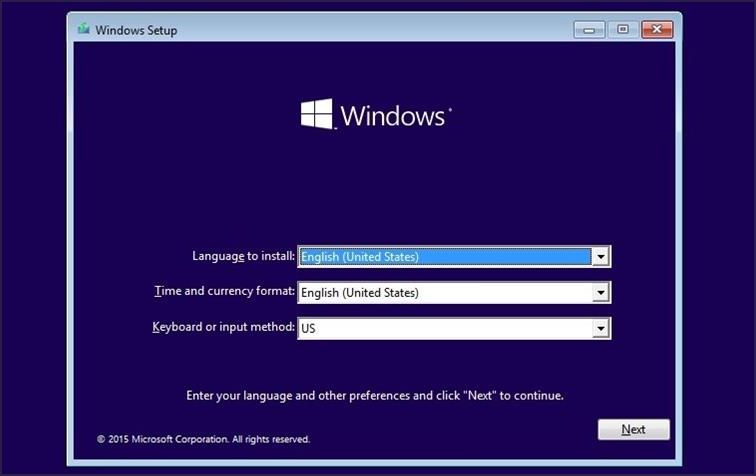
- Select the version of Windows 10 that you want to install.
- Be sure to accept the terms of service.
- Choose Custom: Install Windows only (advanced).

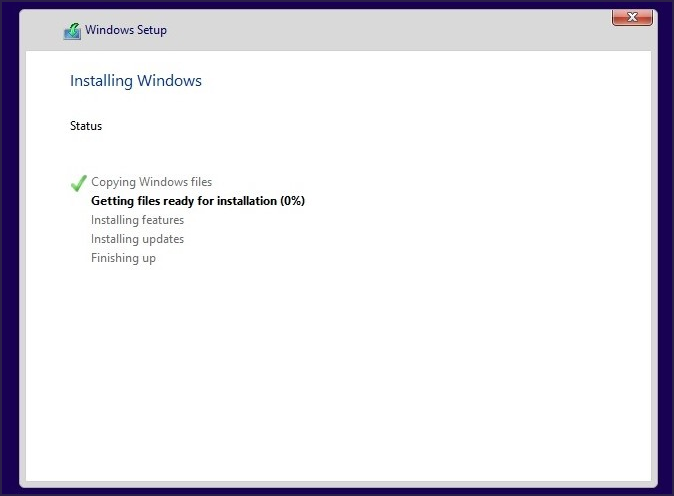
- Select the partition on which you want to install Windows 10. It’s essential to select the partition that you made for Windows 10. Click Next.

- Wait for the installation to finish.
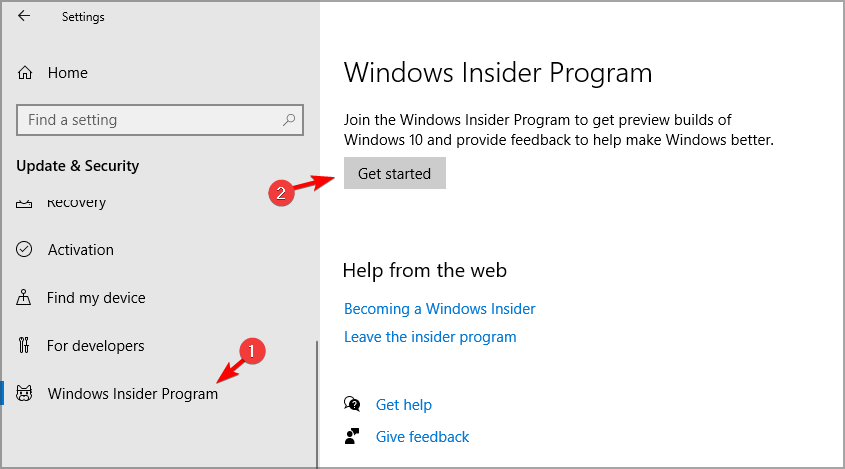
6. Join the Windows Insiders Program and download Windows 11
- Boot to Windows 10.
- Open the Settings app and select Update & Security.

- Select Windows Insider Program and click the Get Started button.
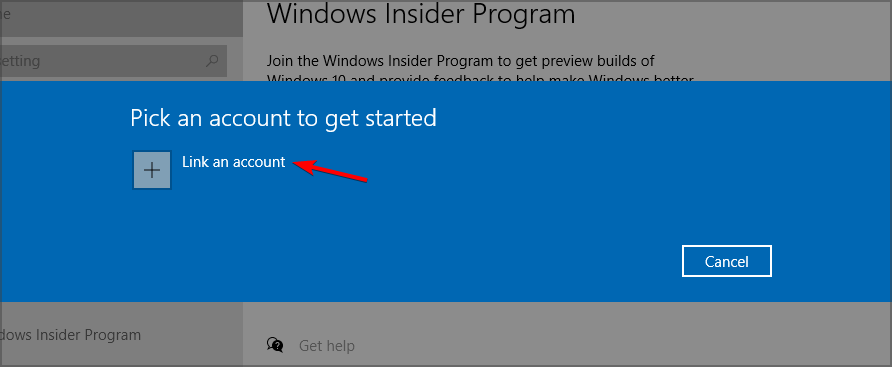
- Click on Link an account and select your Microsoft account.
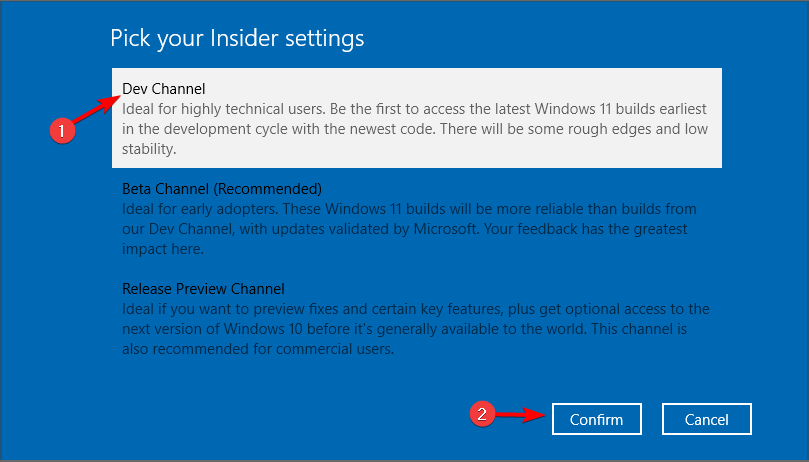
- Make sure to select Dev Channel or Beta Channel. Dev Channel gets more frequent updates, but the Beta Channel is more stable. After that, click on Confirm.
- On the privacy statement window, click Confirm.
- Click on Restart Now.
- Once your PC restarts, go to the Settings app. Head to the Update & Security section and click the Check for updates button.
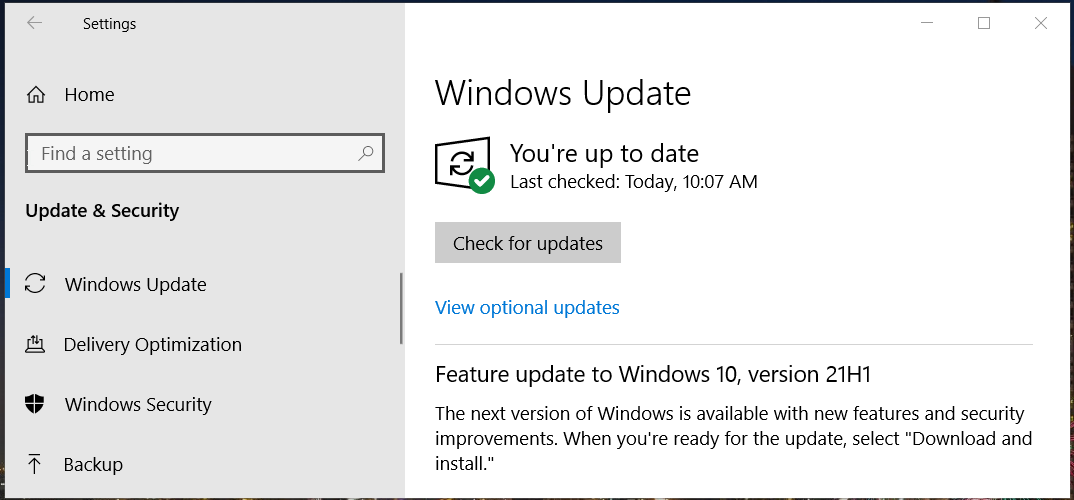
- Windows 11 update will download.
- After the download is finished, restart your PC to install it.
After completing these steps, you should have Windows 11 running on your PC, alongside Linux.
Why is Linux missing after installing Windows in dual boot mode?
We’ve observed that Linux might be missing after installing Windows in dual boot mode. Although this can be extremely alarming, it’s expected because Windows will overwrite the Linux bootloader.
However, there’s a way to repair this:
- Press the boot menu key while your system boots. Usually, it’s F12, but it can change depending on your motherboard. Now select Ubuntu to boot to it. If this method doesn’t work, use Linux Live USB.
- Create a Linux Live USB.
- Boot from the Linux Live USB.
- Make sure that you’re connected to the Internet.
- Open the Terminal and run the following commands:
sudo add-apt-repository ppa:yannubuntu/boot-repair
sudo apt-get update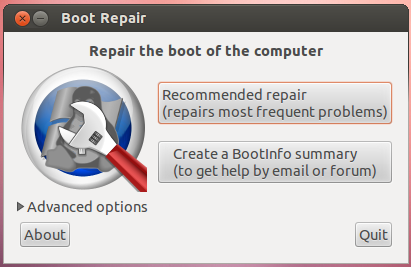
sudo apt-get install -y boot-repair && boot-repair - Now open Boot-Repair, you should find it in the list of installed applications, or type boot-repair in the Terminal.
- Select Recommended repair and that should hopefully fix the problem.
Some users claim that you can fix this issue by this method as well:
- Boot to Linux or start Linux from Live USB.
- Open Terminal and run the following command:
sudo update-grub2 - Wait for the command to finish.
- After doing that, access BIOS and set Linux as the first boot disk.
- Save changes.
These instructions are intended for Ubuntu distributions, and other versions of Linux might require you to use different methods to repair the bootloader.
We have a dedicated guide on how to repair Windows 10 bootloader from Linux, so be sure to check it for more information.
Does Secure Boot interfere with Linux dual boot?
The Secure Boot capability is one of Windows 11’s requirements along with the TPM, so let us tell you how this could affect Linux computers and dual booting.
Secure Boot technology allows only the approved boot loaders to boot your PC in order to protect it from malware.
The issue arises because many versions of Linux aren’t compatible with Secure Boot, and since Secure Boot is a requirement for Windows 11, many were worried that Linux might not run in dual boot mode with Windows 11.
The answer is yes, Linux will be able to run long Windows 11, but you’ll have to use Linux that is compatible with Secure Boot, such as Ubuntu or Fedora, or disable the Secure Boot from the BIOS.
As you can see, to use Windows 11, you need to have Secure Boot capability, but you don’t have to keep this option enabled at all, which means that you can dual boot Linux without any issues.
Should I install Linux or Windows 11 first when dual booting?
If you want to dual boot Linux and Windows, it is usually a better option to install Windows first, and then create a new partition for Linux.
For starters, it’s a lot easier to create a Linux bootable drive and the necessary partitions from Windows, however, the biggest issue is the bootloader.
If you install Windows after Linux, you’re going to overwrite your bootloader and you won’t be able to boot to Linux until you repair the bootloader.
Therefore, we suggest installing Linux after your install Windows to avoid these types of problems. Are you using dual boot on your system? Let us know in the comments below.
Read our disclosure page to find out how can you help Windows Report sustain the editorial team. Read more


Improve this guide


User forum
1 messages