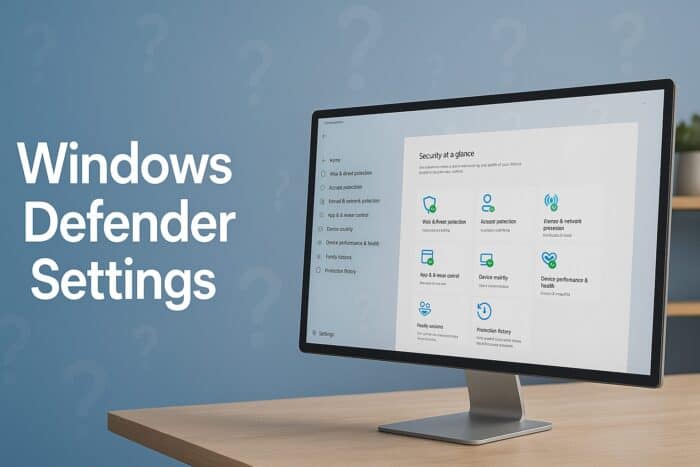
Windows Defender Settings Explained for Windows 11 Users
Windows Defender (now called Microsoft Defender Antivirus) protects your PC from viruses and malware. Learn how to access, configure, and optimize Windows Defender settings for maximum security in Windows 11.
Table of contents
Everything You Need to Know About Windows Defender Settings
How to Open Windows Defender Settings
Follow these simple steps to access your antivirus settings:
- Press the Windows + I keys to open Settings.
- Select Privacy & Security from the left pane.
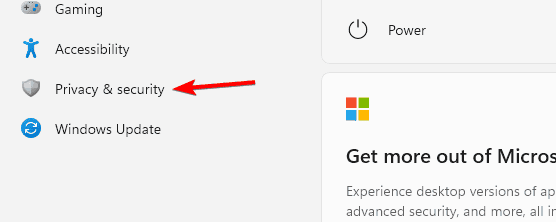
- Click Windows Security.

- Choose Open Windows Security to launch the dashboard.
You’ll now see all Defender modules such as Virus & Threat Protection, Firewall & Network Protection, and Device Security.
If you need to enable Defender manually, follow the guide on how to turn on Windows Defender in Windows 11.
Key Windows Defender Settings to Review
1. Virus & Threat Protection
This section helps you manage real-time virus scanning and protection updates.
- Open Virus & Threat Protection in the Windows Security window.

- Click Manage Settings under “Virus & threat protection settings.”
- Enable the following options:
- Real-time protection
- Cloud-delivered protection
- Automatic sample submission
- Run a Quick Scan to check for current threats.
Why it works: Keeping real-time and cloud protection active ensures Defender reacts instantly to new threats detected online.
For more advanced cleanup, you can scan your system with Windows Defender Offline. You can explore every option in the Virus & threat protection panel more deeply by checking our full guide to Windows 11 Virus & Threat Protection.
To understand when to choose a full scan or an offline scan for tougher infections, read this comparison of Windows Defender Full Scan vs Offline Scan.
2. Firewall & Network Protection
Your firewall controls what data enters or leaves your PC.
- Go back to the main Windows Security menu.
- Select Firewall & Network Protection.
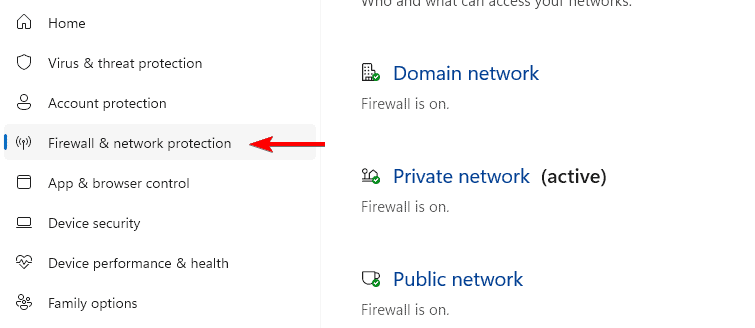
- Check that Domain, Private, and Public networks all show “Firewall is on.”
- Click each network type to confirm Defender Firewall is enabled.
Tip: If you use a third party VPN, ensure it does not disable your Defender firewall automatically.
3. App & Browser Control
SmartScreen helps protect you from unsafe apps and downloads.
- Open App & Browser Control.
- Select Reputation-based protection settings.
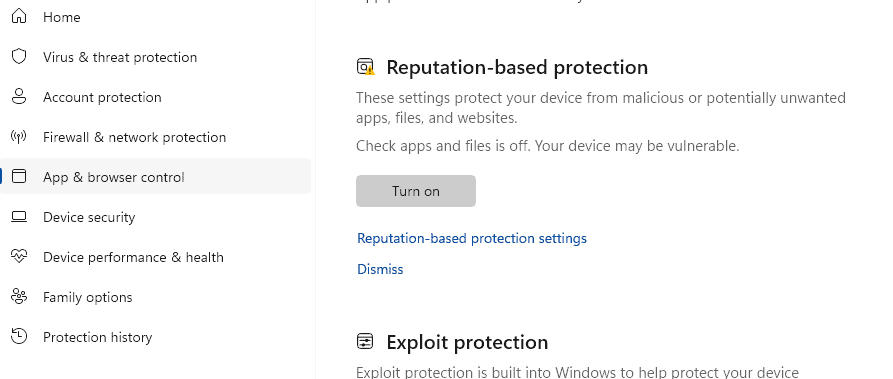
- Turn on:
- Check apps and files
- SmartScreen for Microsoft Edge
- Potentially unwanted app blocking
Why it works: SmartScreen filters out malicious downloads before they reach your system.
4. Device Security
Windows Defender also guards your system firmware and hardware.
- Go to Device Security.
- Check if Core Isolation is enabled for memory integrity protection.
- If not, turn on Memory Integrity and restart your PC.
Why it works: This prevents attackers from injecting malicious code into protected system memory.
Device Security provides hardware level protection features such as Core Isolation and Memory Integrity. You can learn how the underlying Microsoft security agents support these protections by visiting Microsoft security agents.
Optional: Customize Defender Notifications
If you want fewer pop ups from Defender:
- Open Windows Security → Virus & threat protection.
- Scroll down and click Notifications.
- Uncheck “Recent activity and scan results.”
FAQs
Open Virus & Threat Protection, select Manage Settings, then toggle off Real-time protection. It will re enable automatically after a restart. For more detail, see how to disable Windows Defender in Windows 11.
Yes, but it will automatically turn off real time protection when it detects another antivirus app to avoid conflicts.
For most home and small office users, yes. It provides robust real time protection and integrates deeply with Windows 11.
Type Task Scheduler in the search bar, open it, then go to Task Scheduler Library > Microsoft > Windows > Windows Defender. Right click Windows Defender Scheduled Scan and choose Run or Properties to adjust timing.
Conclusion
Windows Defender is a reliable built in security layer in Windows 11. By checking your antivirus, firewall, SmartScreen, and device security settings, you keep threats out without installing extra software. Keep all protection features enabled, review notifications, and run occasional full or offline scans for best results.
Read our disclosure page to find out how can you help Windows Report sustain the editorial team. Read more


Improve this guide


User forum
0 messages