FIX: Windows Fax and Scan error Applying settings to driver
4 min. read
Updated on
Read our disclosure page to find out how can you help Windows Report sustain the editorial team. Read more

Issues with USB printers are not that common as the mere procedure of printing or scanning something doesn’t require overlying software. However, the Windows Fax and Scan error we’ll try to address today crashes the printing/scanning procedure and informs users that it’s “Applying settings to the driver“. In case you’re affected by this error, make sure to check the steps below.
What to fix ‘Applying settings to driver’ error in Windows Fax and Scan
Solution 1 – Run built-in Printer troubleshooter
Let’s start by using the resources we have immediately at our disposal. The built-in troubleshooter differs based on what Windows iteration you’re running, but it’s there either way. For Windows 7 and Windows 8 users, the troubleshooter is found in Control Panel, while Windows 10 users can find it in the Settings menu.
Here’s how to run the built-in troubleshooter in Windows 7 or Windows 8 (8.1):
- Open Start and then Control Panel.
- In the Search bar, type Troubleshooting and open Troubleshooting.
- Choose Hardware and Sound.
- Select the Printer and follow the instructions.
And this is how to run it on Windows 10:
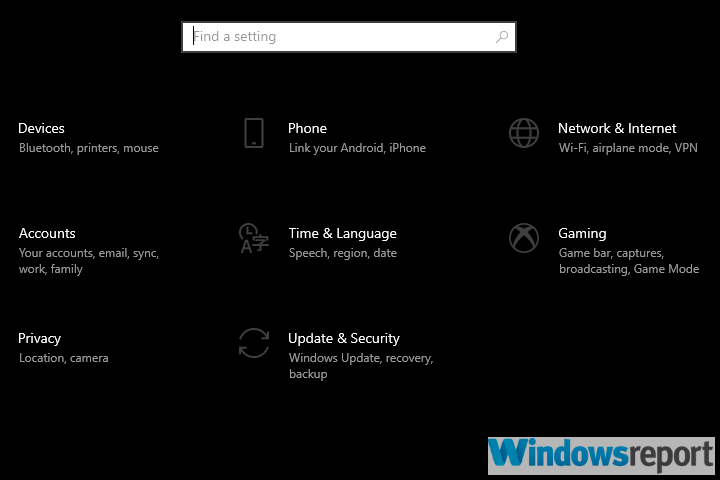
- Press Windows key + I to open the Settings app.
- Choose Update & Security.
- Select Troubleshoot from the left pane.
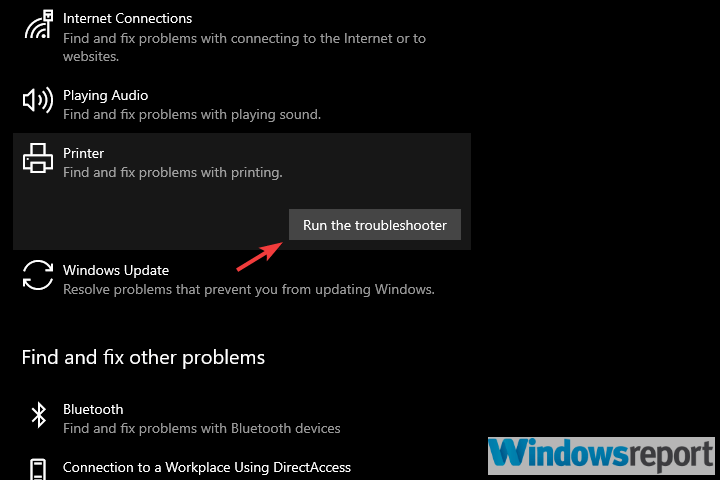
- Expand the Printer troubleshooter and click Run the troubleshooter.
If that doesn’t help, try using an alternative USB port (USB 2.0 preferably) to connect your printer/scanner.
Solution 2 – Check the drivers
More time than not this and similar issues appear due to the improper driver for your printer or scanner. If you’ve got the software installation disk coming with the device, it’s highly advised to install both drivers and accompanying software. If that’s not the case, we still encourage you to avoid generic drivers automatically installed by Windows 10.
What you rather need to do is navigate to OEM’s official support site and grab drivers there. In case you’re running an older printer/scanner, it’s important to install proper legacy drivers. Also, watch out for the system architecture, as x86 (32-bit) platform drivers won’t work on the x64 (64-bit) one.
With that in mind, check your device’s full name and check for proper drivers online. If you own an HP device, there’s a tool that might help called HP Print and Scan Doctor which, upon running, automatically resolves issues. So might as well work for the “Applying settings to the driver“. You can find it here.
Alternatively, we recommend using third-party software that scans your PC and downloads the most suitable printer drivers. With a simple click, you can set it to automatically install the drivers and bring your OS to a stable condition.
First and foremost, install a driver installer and updater such as PC HelpSoft Driver Updater on your computer. Scan for new updates in the utility on the main screen.
The application detects your printer and searches its database for significant updates. Following the discovery of the most recent driver, the software will later supply your PC with it. It is the simplest and least time-consuming method for renewing your printer driver.
⇒ Get PC HelpSoft Driver Updater
Solution 3 – Edit the registry
Finally, if none of the previous solutions get you over the “Applying settings to driver” error, we have, what possibly might be, the definitive solution. There’s a catch though, as it requires editing the registry which can lead to massive problems if misused. That’s why we suggest backing up your registry (exporting it) and only then change the values we’ll suggest below.
Here’s what to do in order to resolve the error at hand with Windows Fax and Scan application:
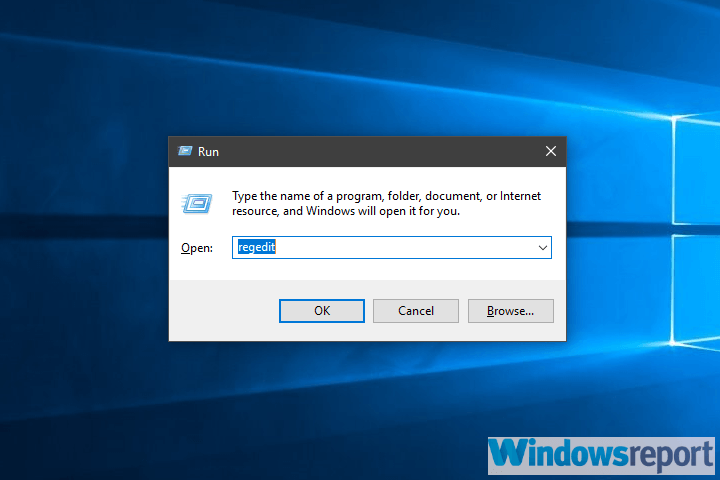
- Press Windows key + R to summon the Run command line.
- Enter regedit and click OK.
- Choose File > Export to back up your current Registry state.
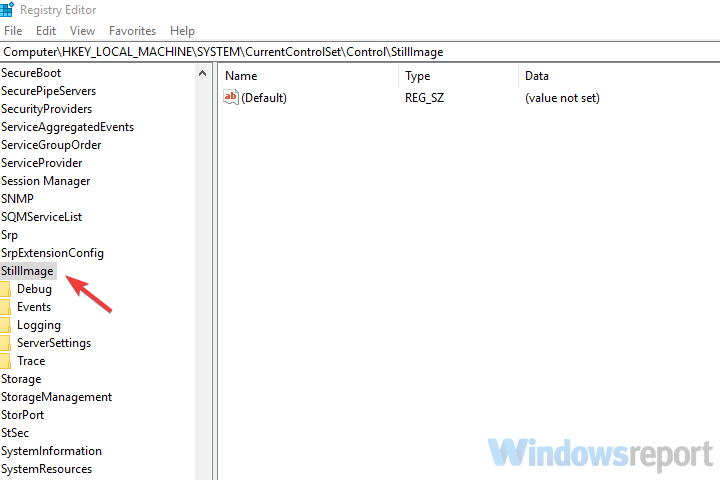
- Now, navigate to Computer\HKEY_LOCAL_MACHINE\SYSTEM\CurrentControlSet\Control\StillImage.
- Right-click and delete the StillImage from the left pane.
- Restart your PC and look for improvements.
With that said, we can conclude this article. In case you have anything to add or take, do so in the comments section below.


User forum
0 messages