Where Are Fonts Stored in Windows 10 and 11?
There are 3 easy ways to get to your Fonts folder in Windows 10 & 11
3 min. read
Published on
Read our disclosure page to find out how can you help Windows Report sustain the editorial team Read more
Have you ever wondered where all those fonts on your computer are stored? Knowing where to find your fonts is crucial whether you’re a graphic designer or someone who likes to personalize their system. In this comprehensive guide, we will walk you through the locations of fonts in Windows 10 and Windows 11 and show you how to manage them effectively.
Where are Fonts Located?
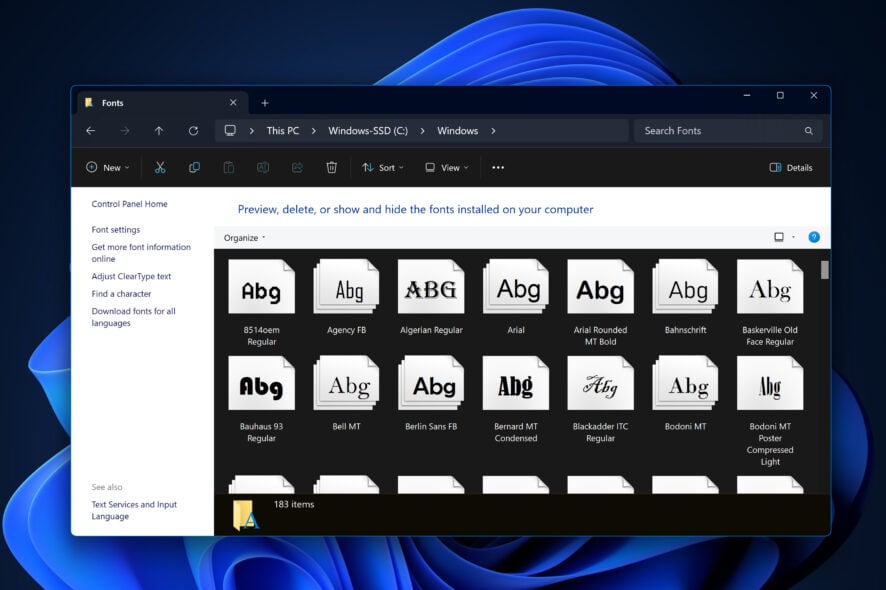
In Windows 10 and Windows 11, fonts are primarily stored in the same directory, C:\Windows\Fonts. This default font folder contains all the preinstalled fonts and user-installed fonts.
How to Navigate to the Fonts Folder
Method 1: Using File Explorer
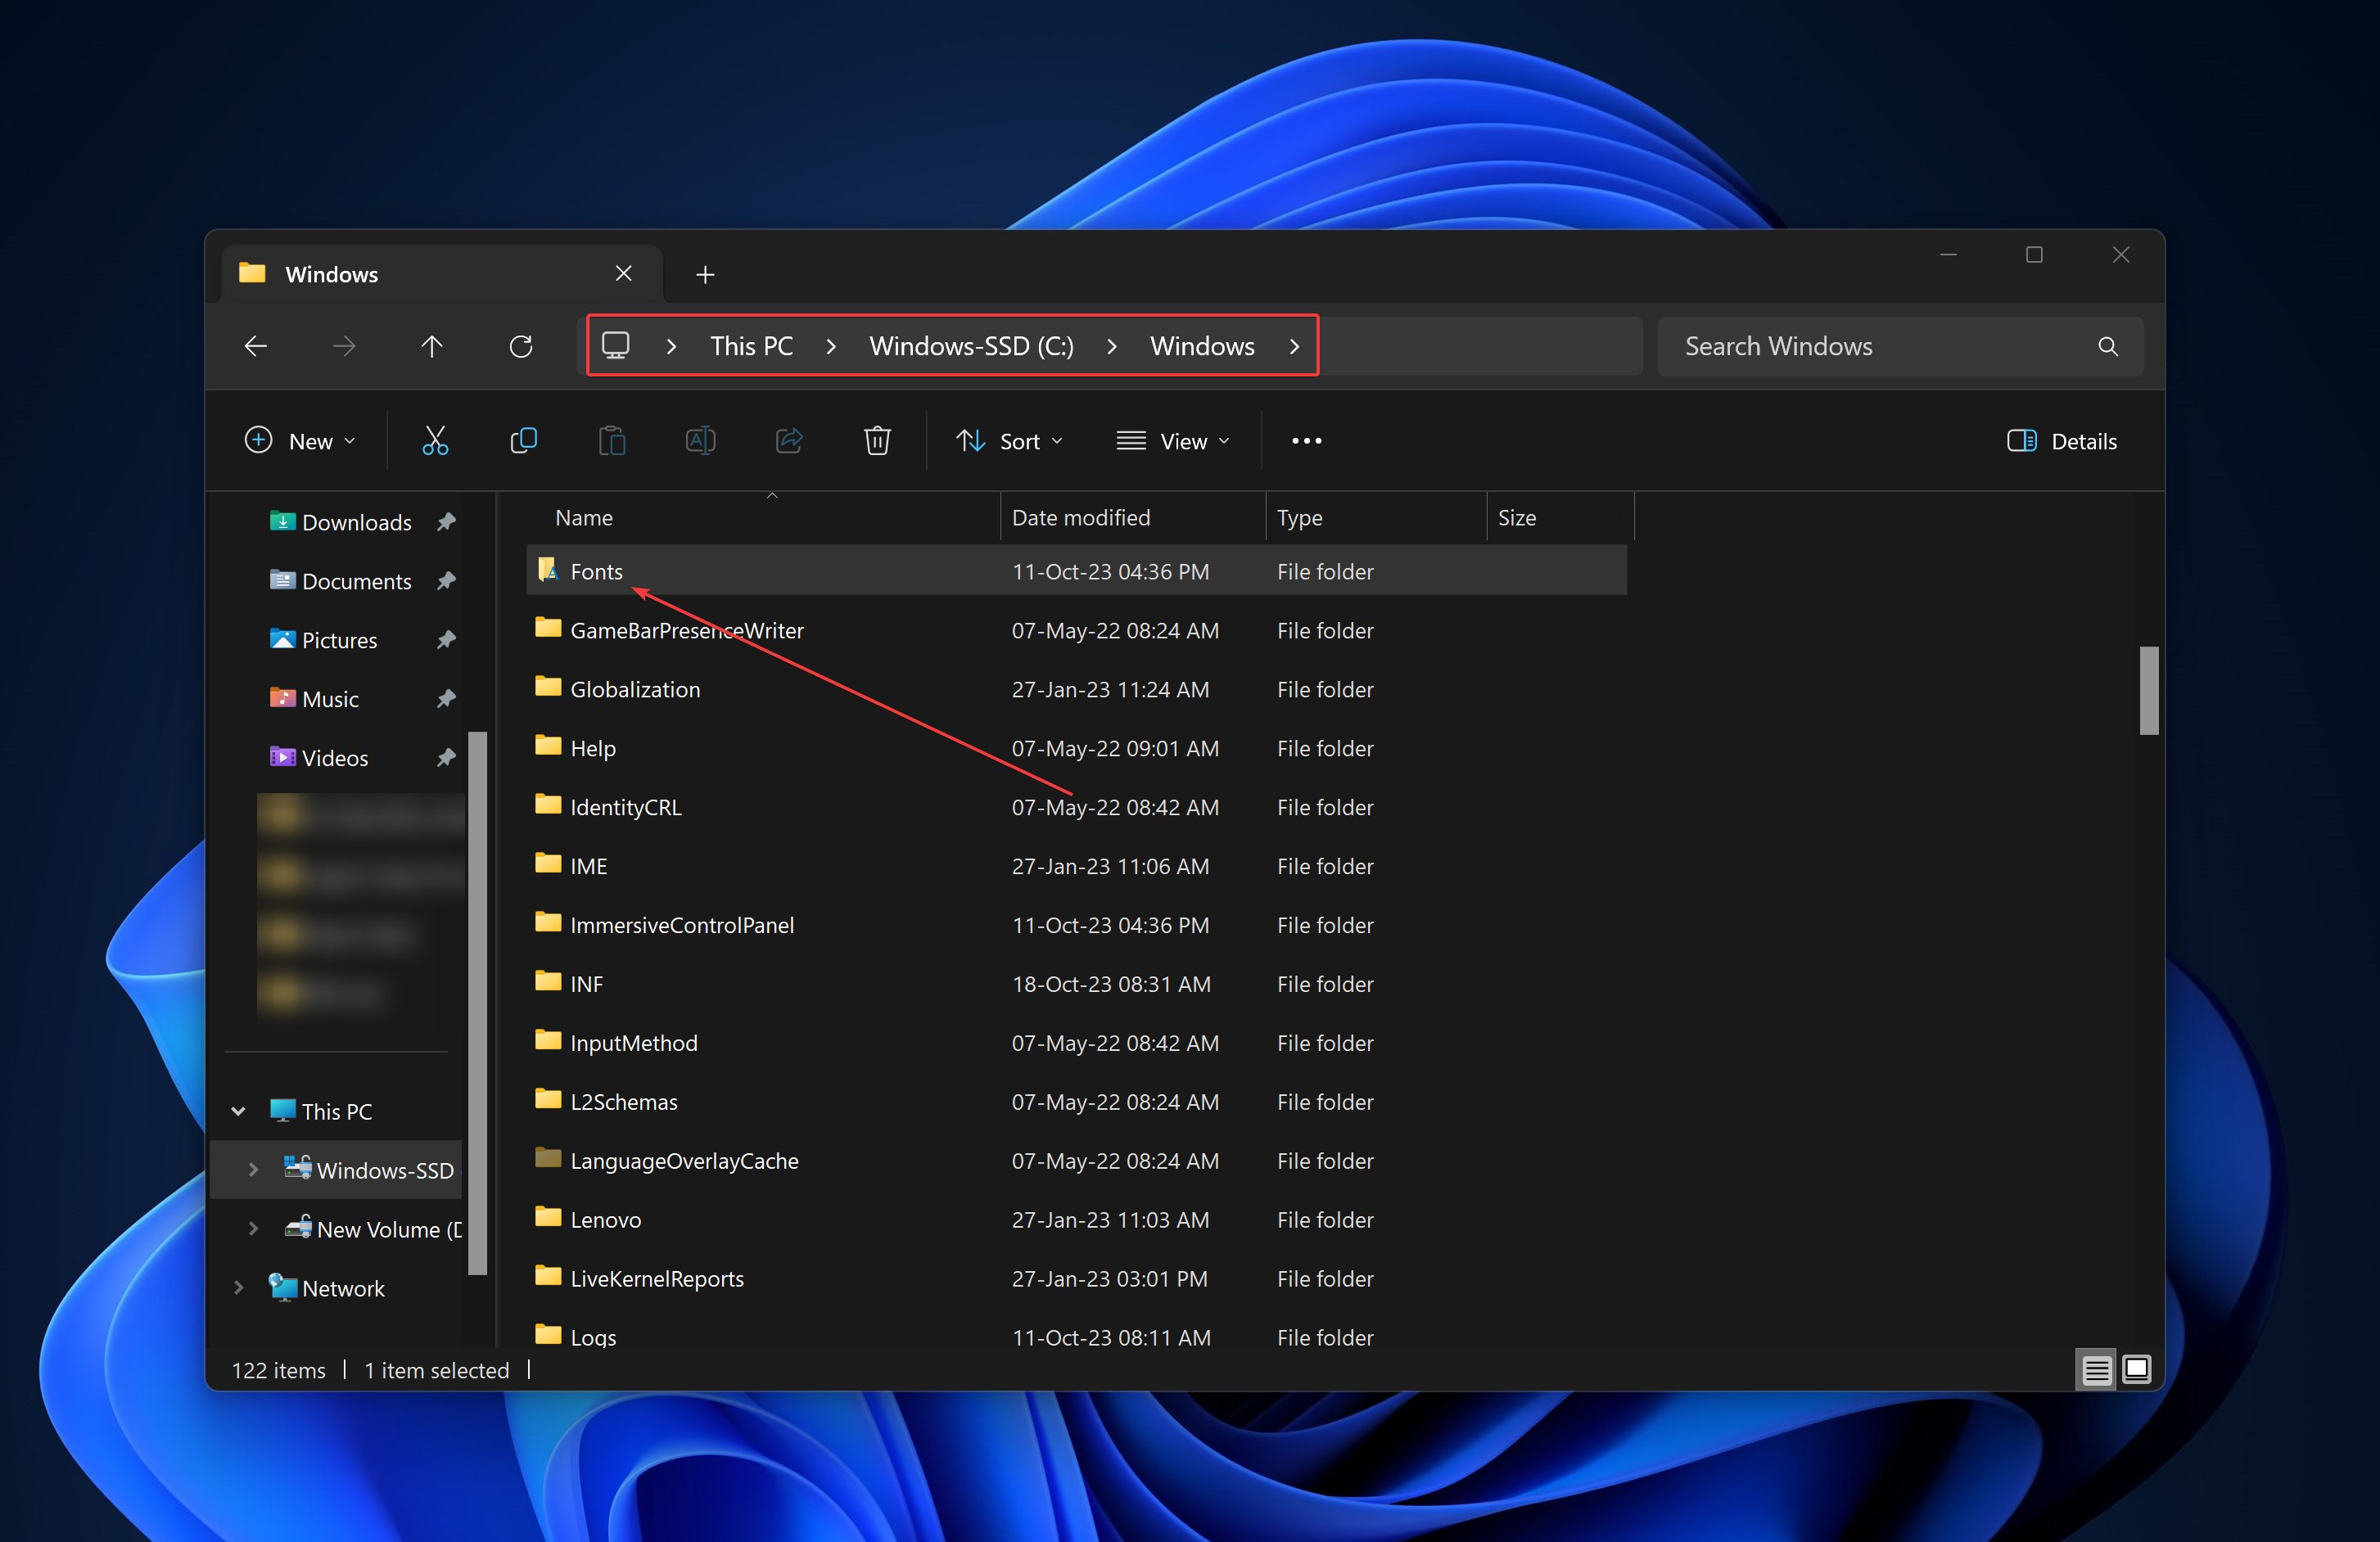
- Open File Explorer by pressing Windows Key + E.
- Now open your C drive > Windows > Fonts folder.
Method 2: Using Control Panel
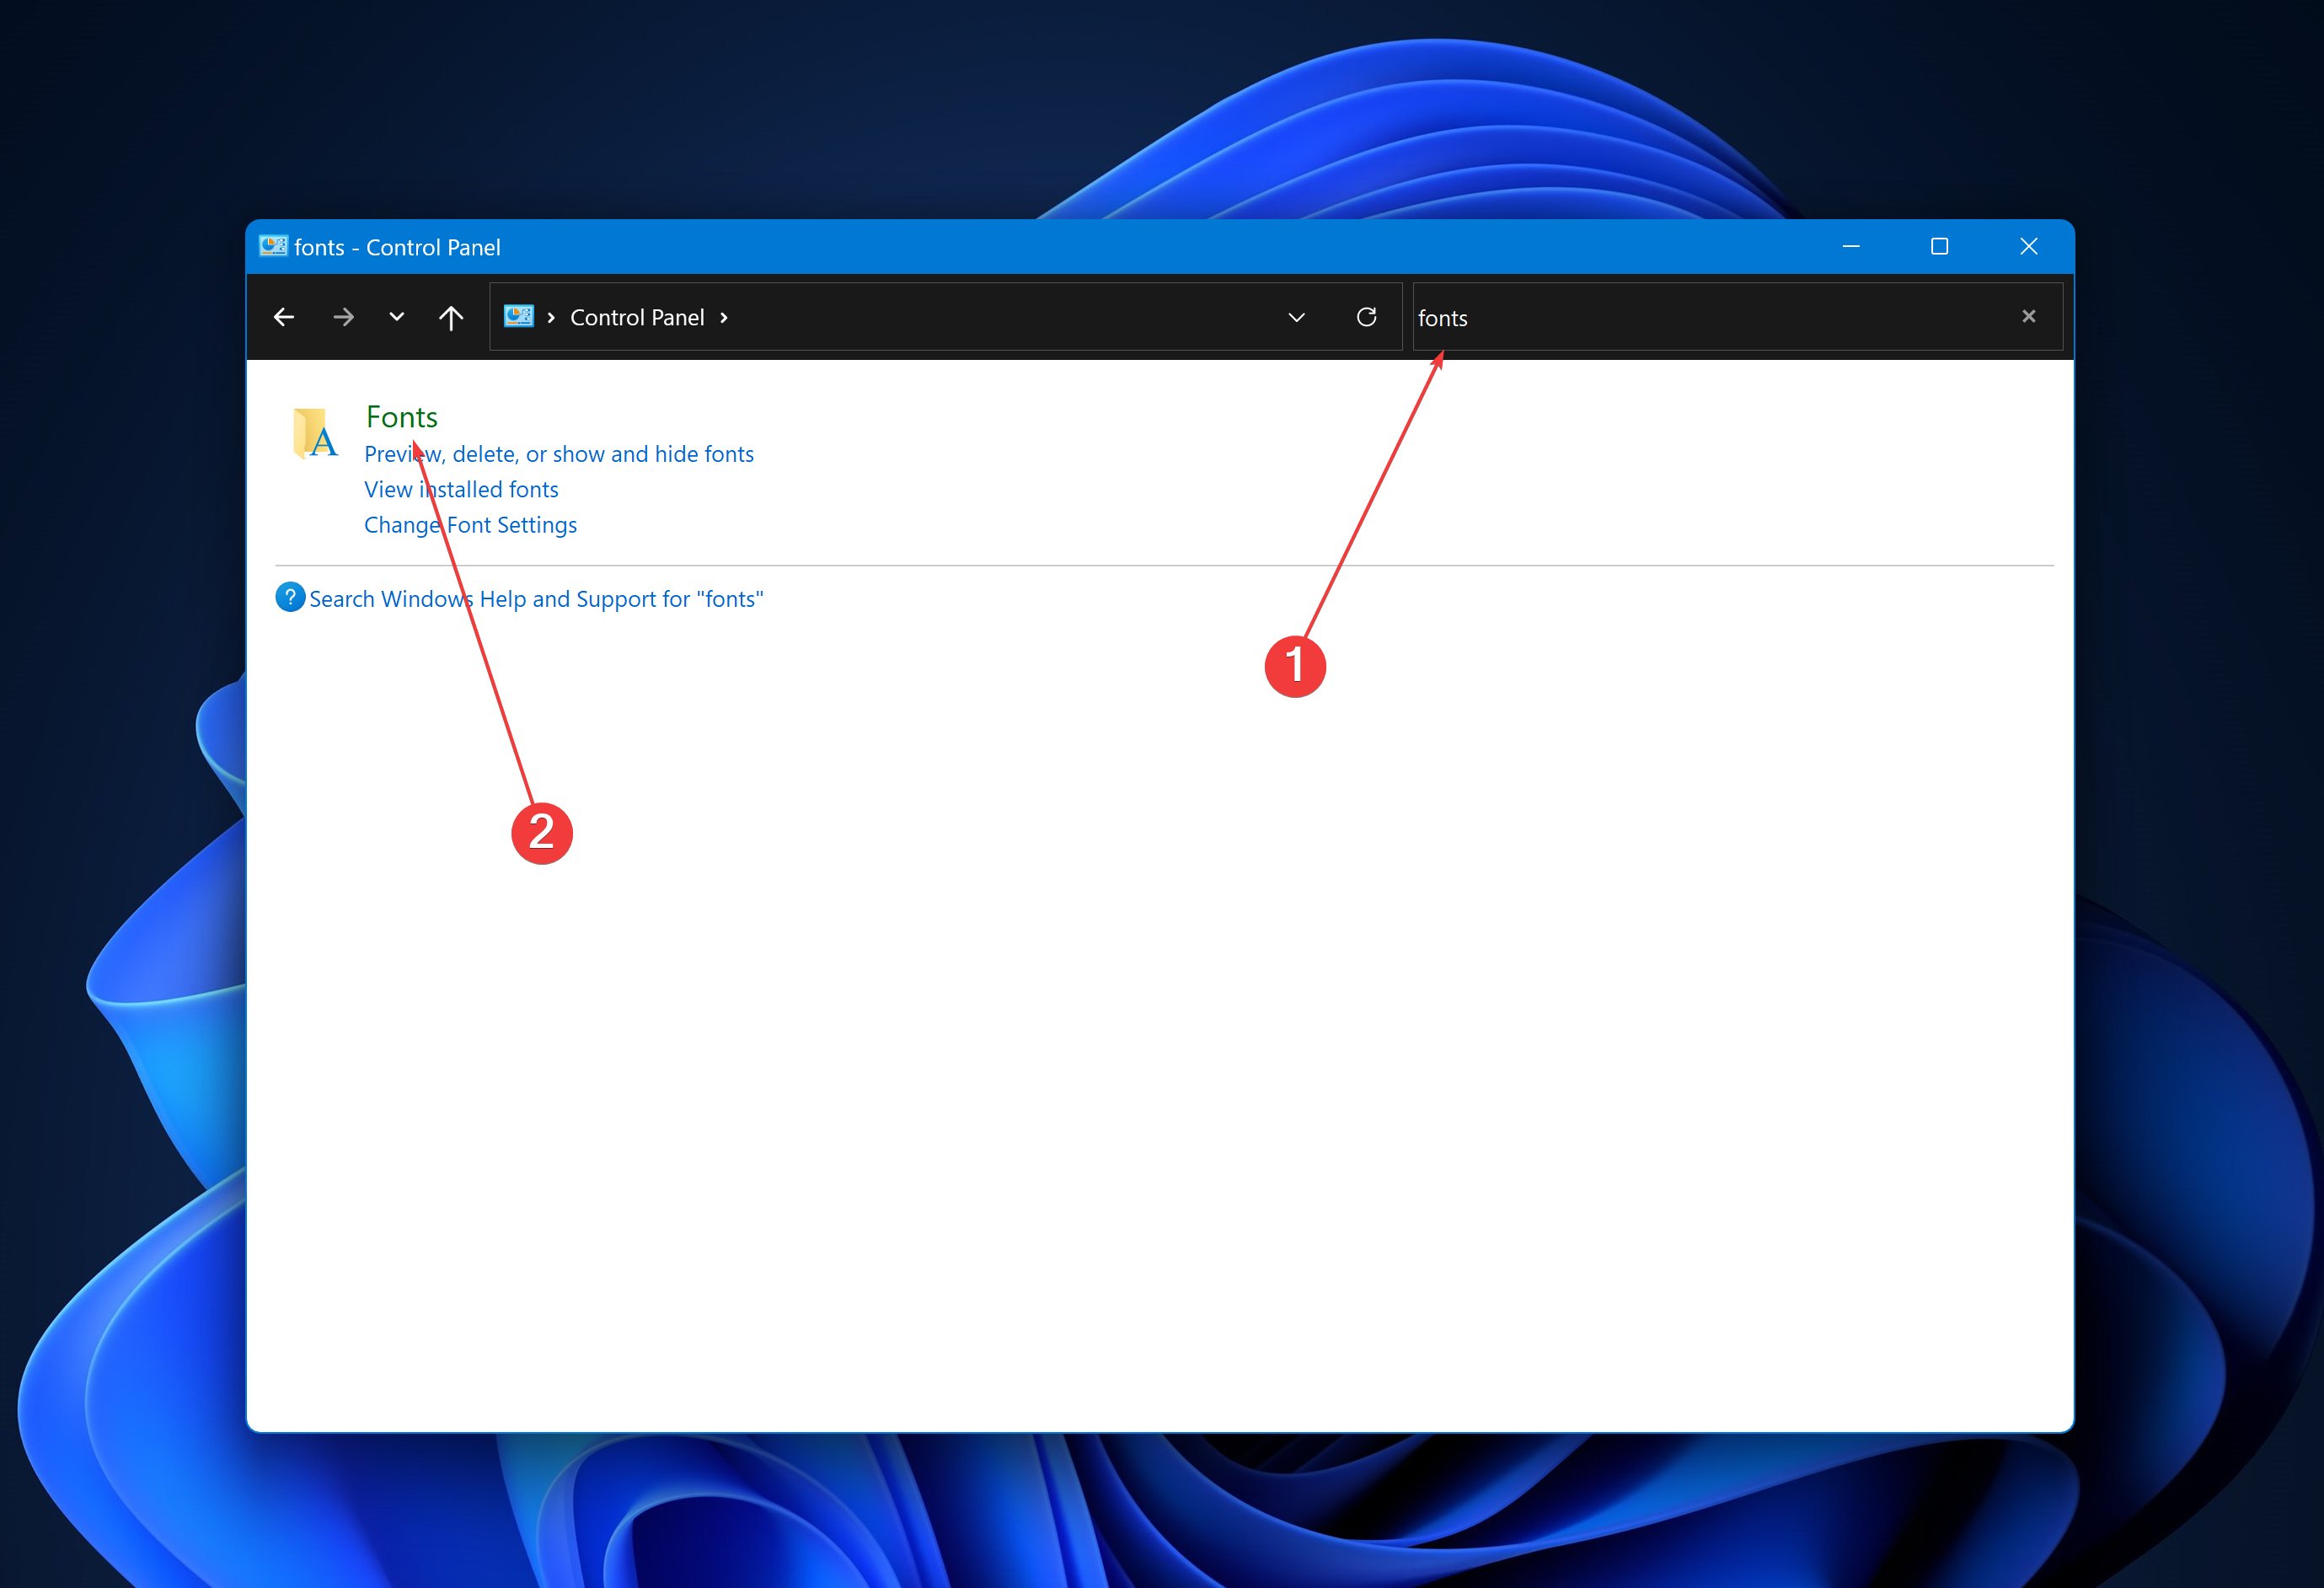
- On your taskbar, open the Search field and type Control Panel. Hit Enter.
- In the top-right of the Control Panel windows, in the Search Control Panel bar, type fonts and press Enter.
Method 3: Using Shell Command
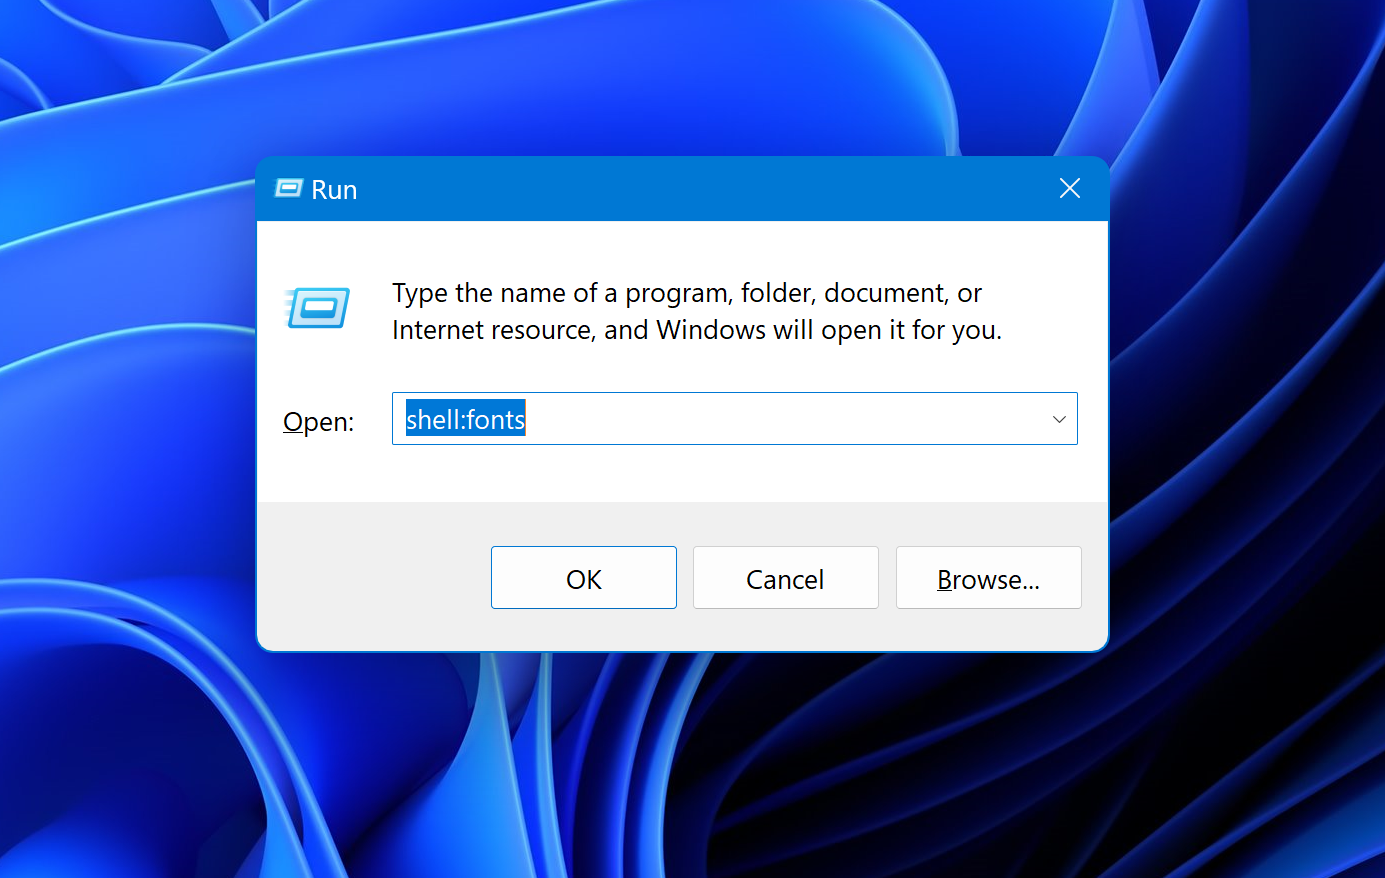
- Press Windows Key + R to open the Run dialog box.
- Type shell:fonts and press Enter.
Creating a Shortcut to the Fonts Folder
Having quick access to the fonts directory can be helpful. Here’s how to create a shortcut:
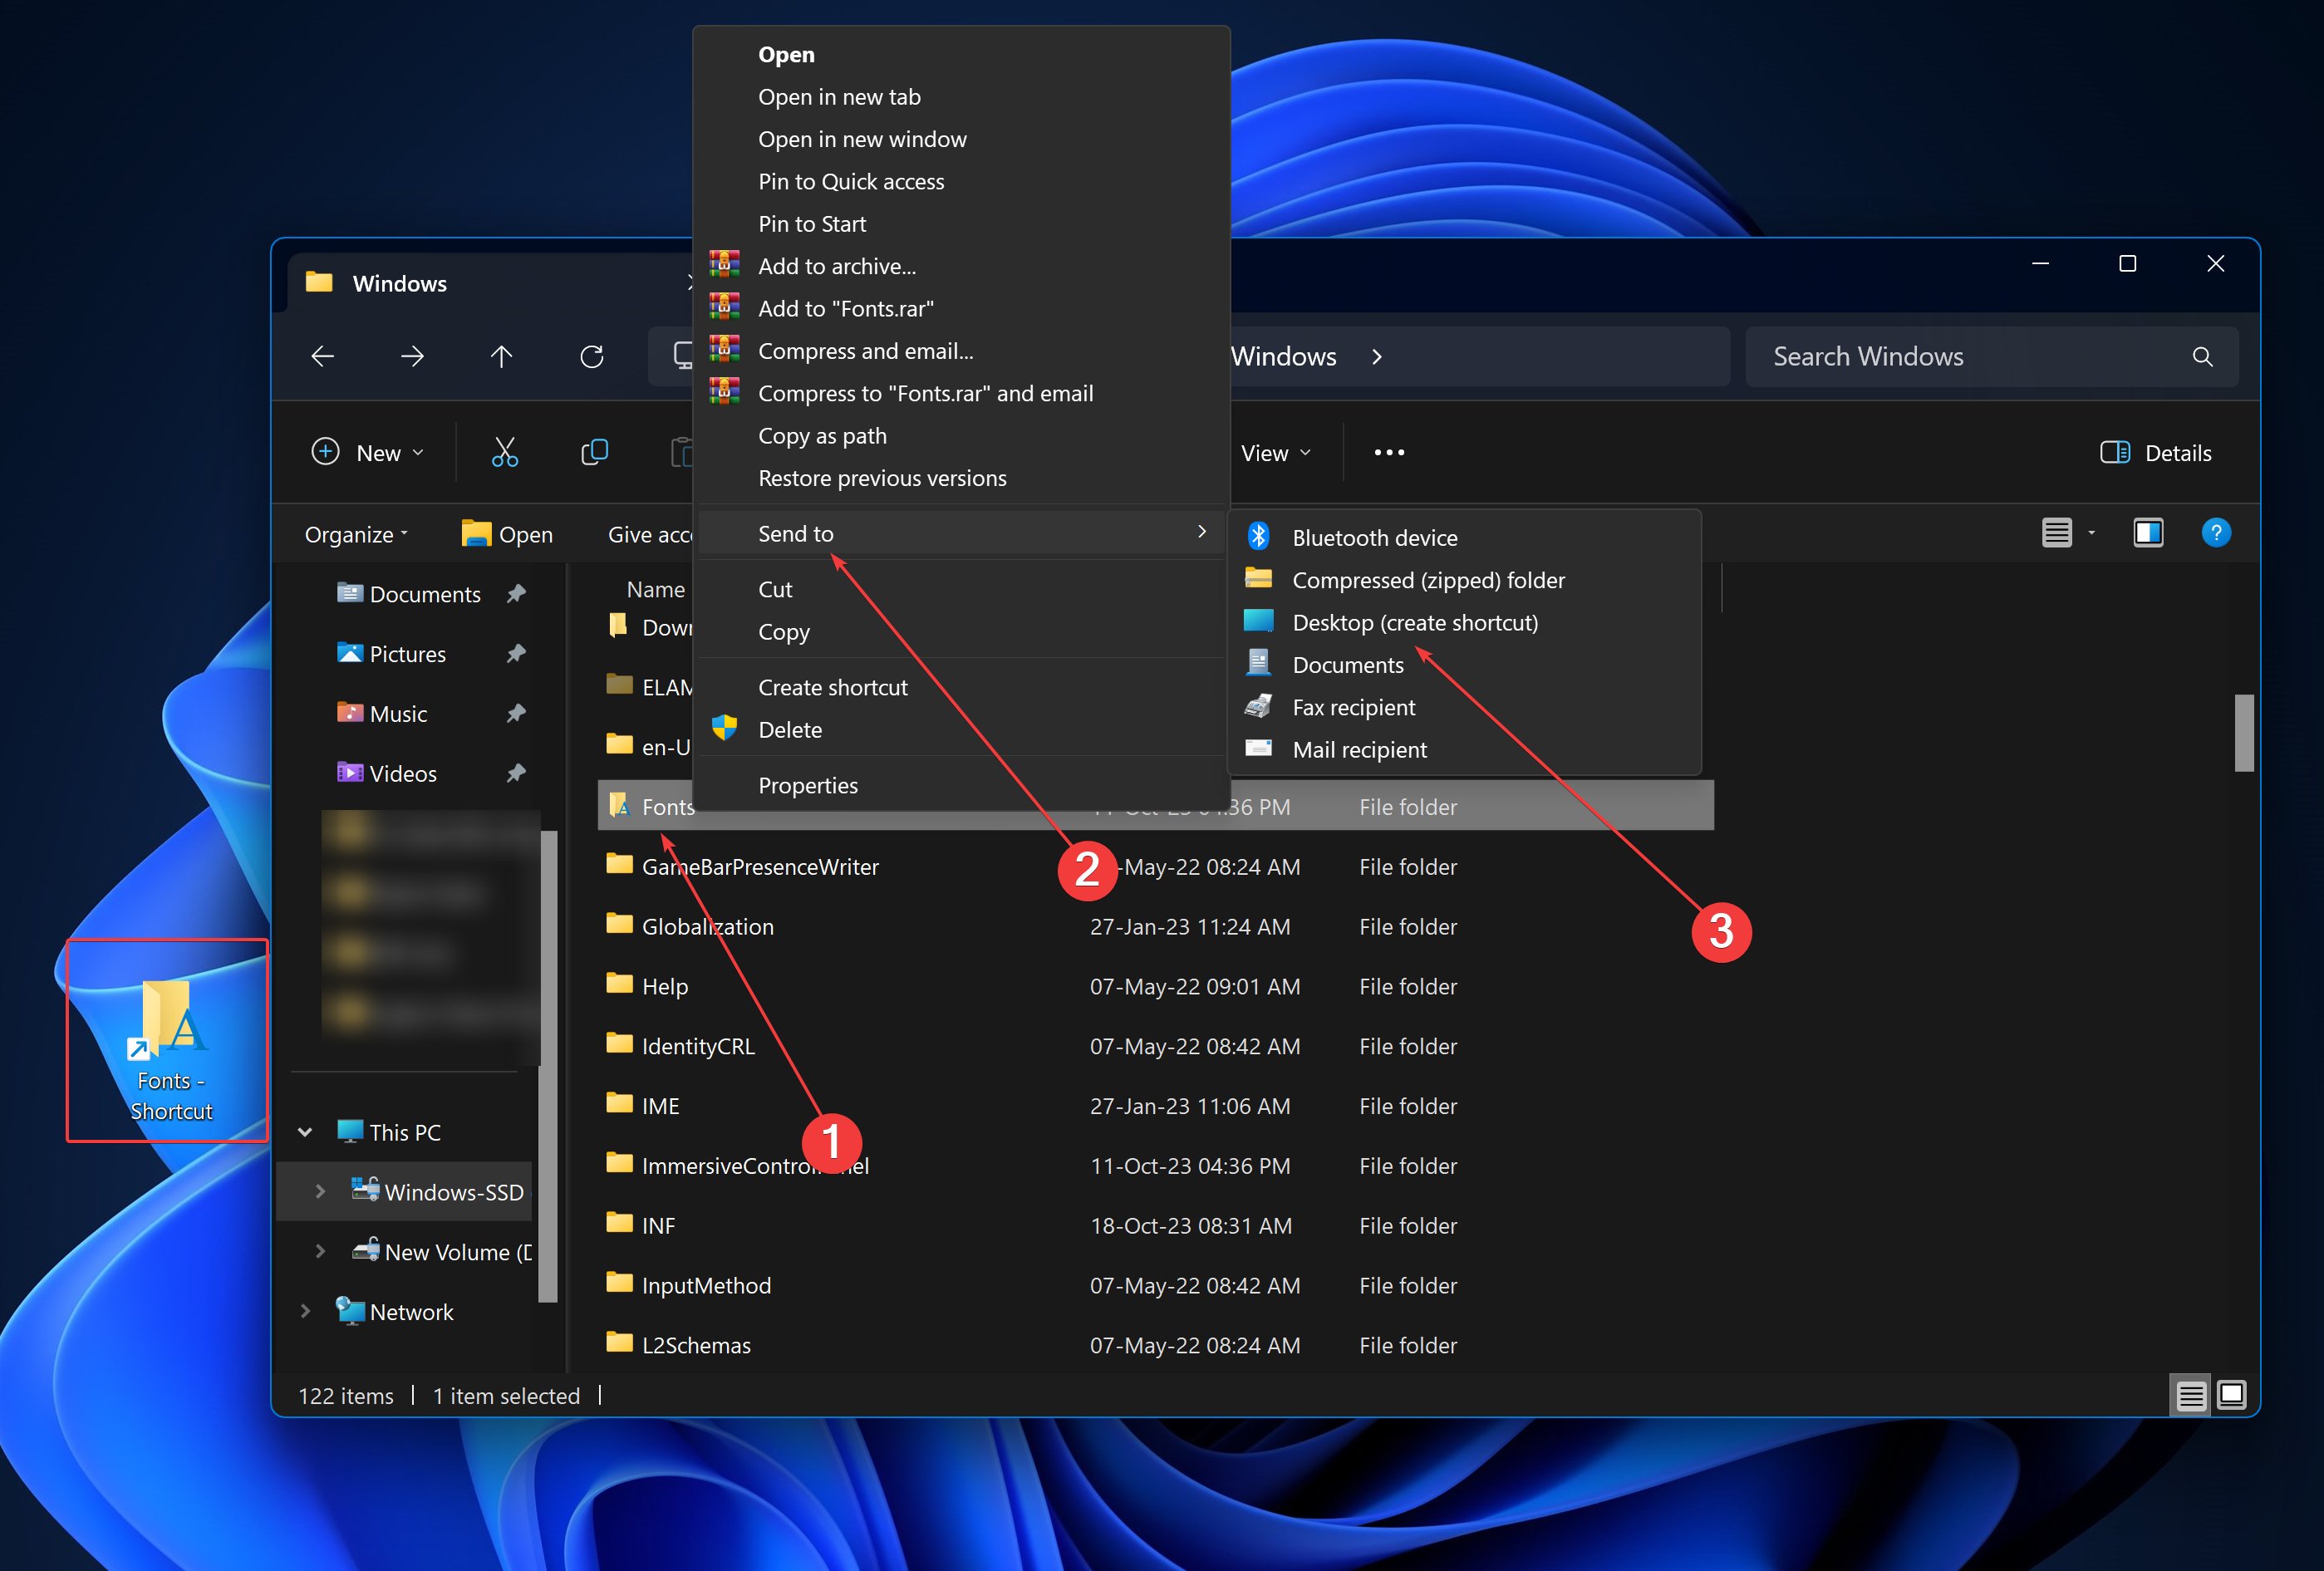
- Navigate to the Fonts folder using the above methods.
- Right-click on the Fonts folder, then click on Show more options.
- Choose Send to and then Desktop (create shortcut).
Now, you’ll have a shortcut to the default font folder location on your Windows 11 desktop for easier access. You can even use a keyboard shortcut to open it: right-click the shortcut > click Proprieties > click Shortcut tab > under Shortcut key, add your preferred key combination.
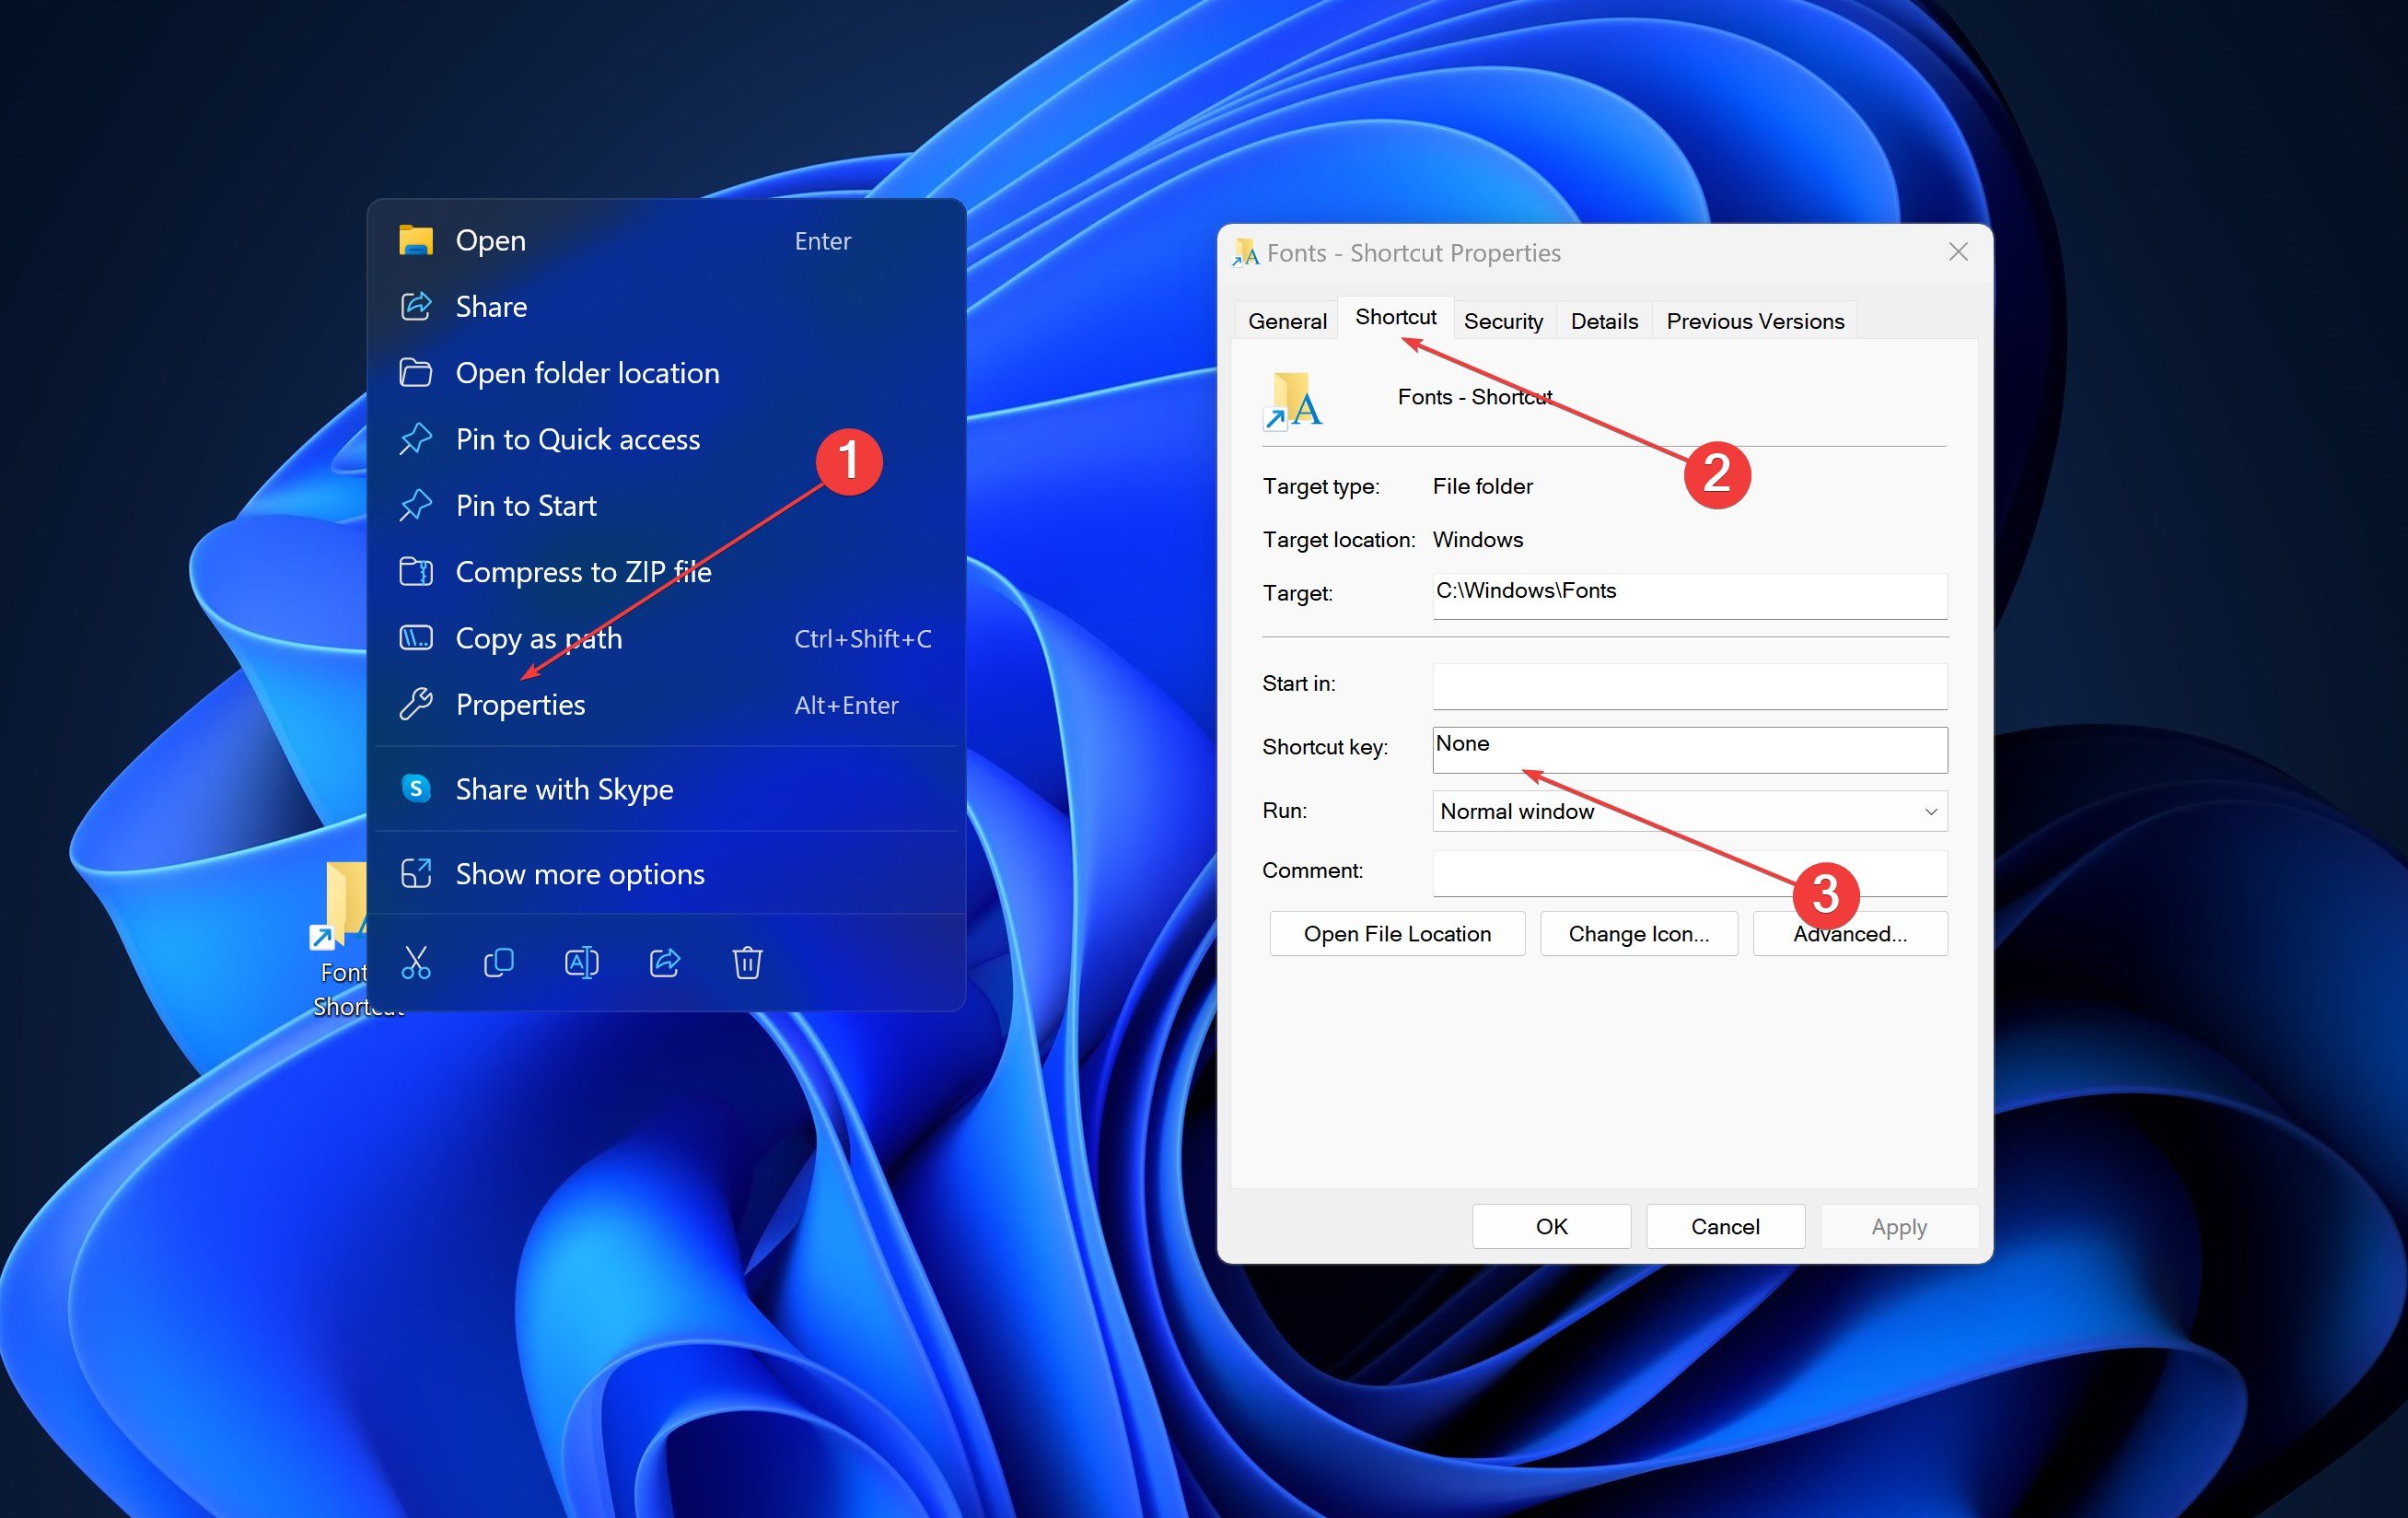
Remember that depending on your user profile, you might need administrative rights.
Adding or Removing Fonts
To Add Fonts:
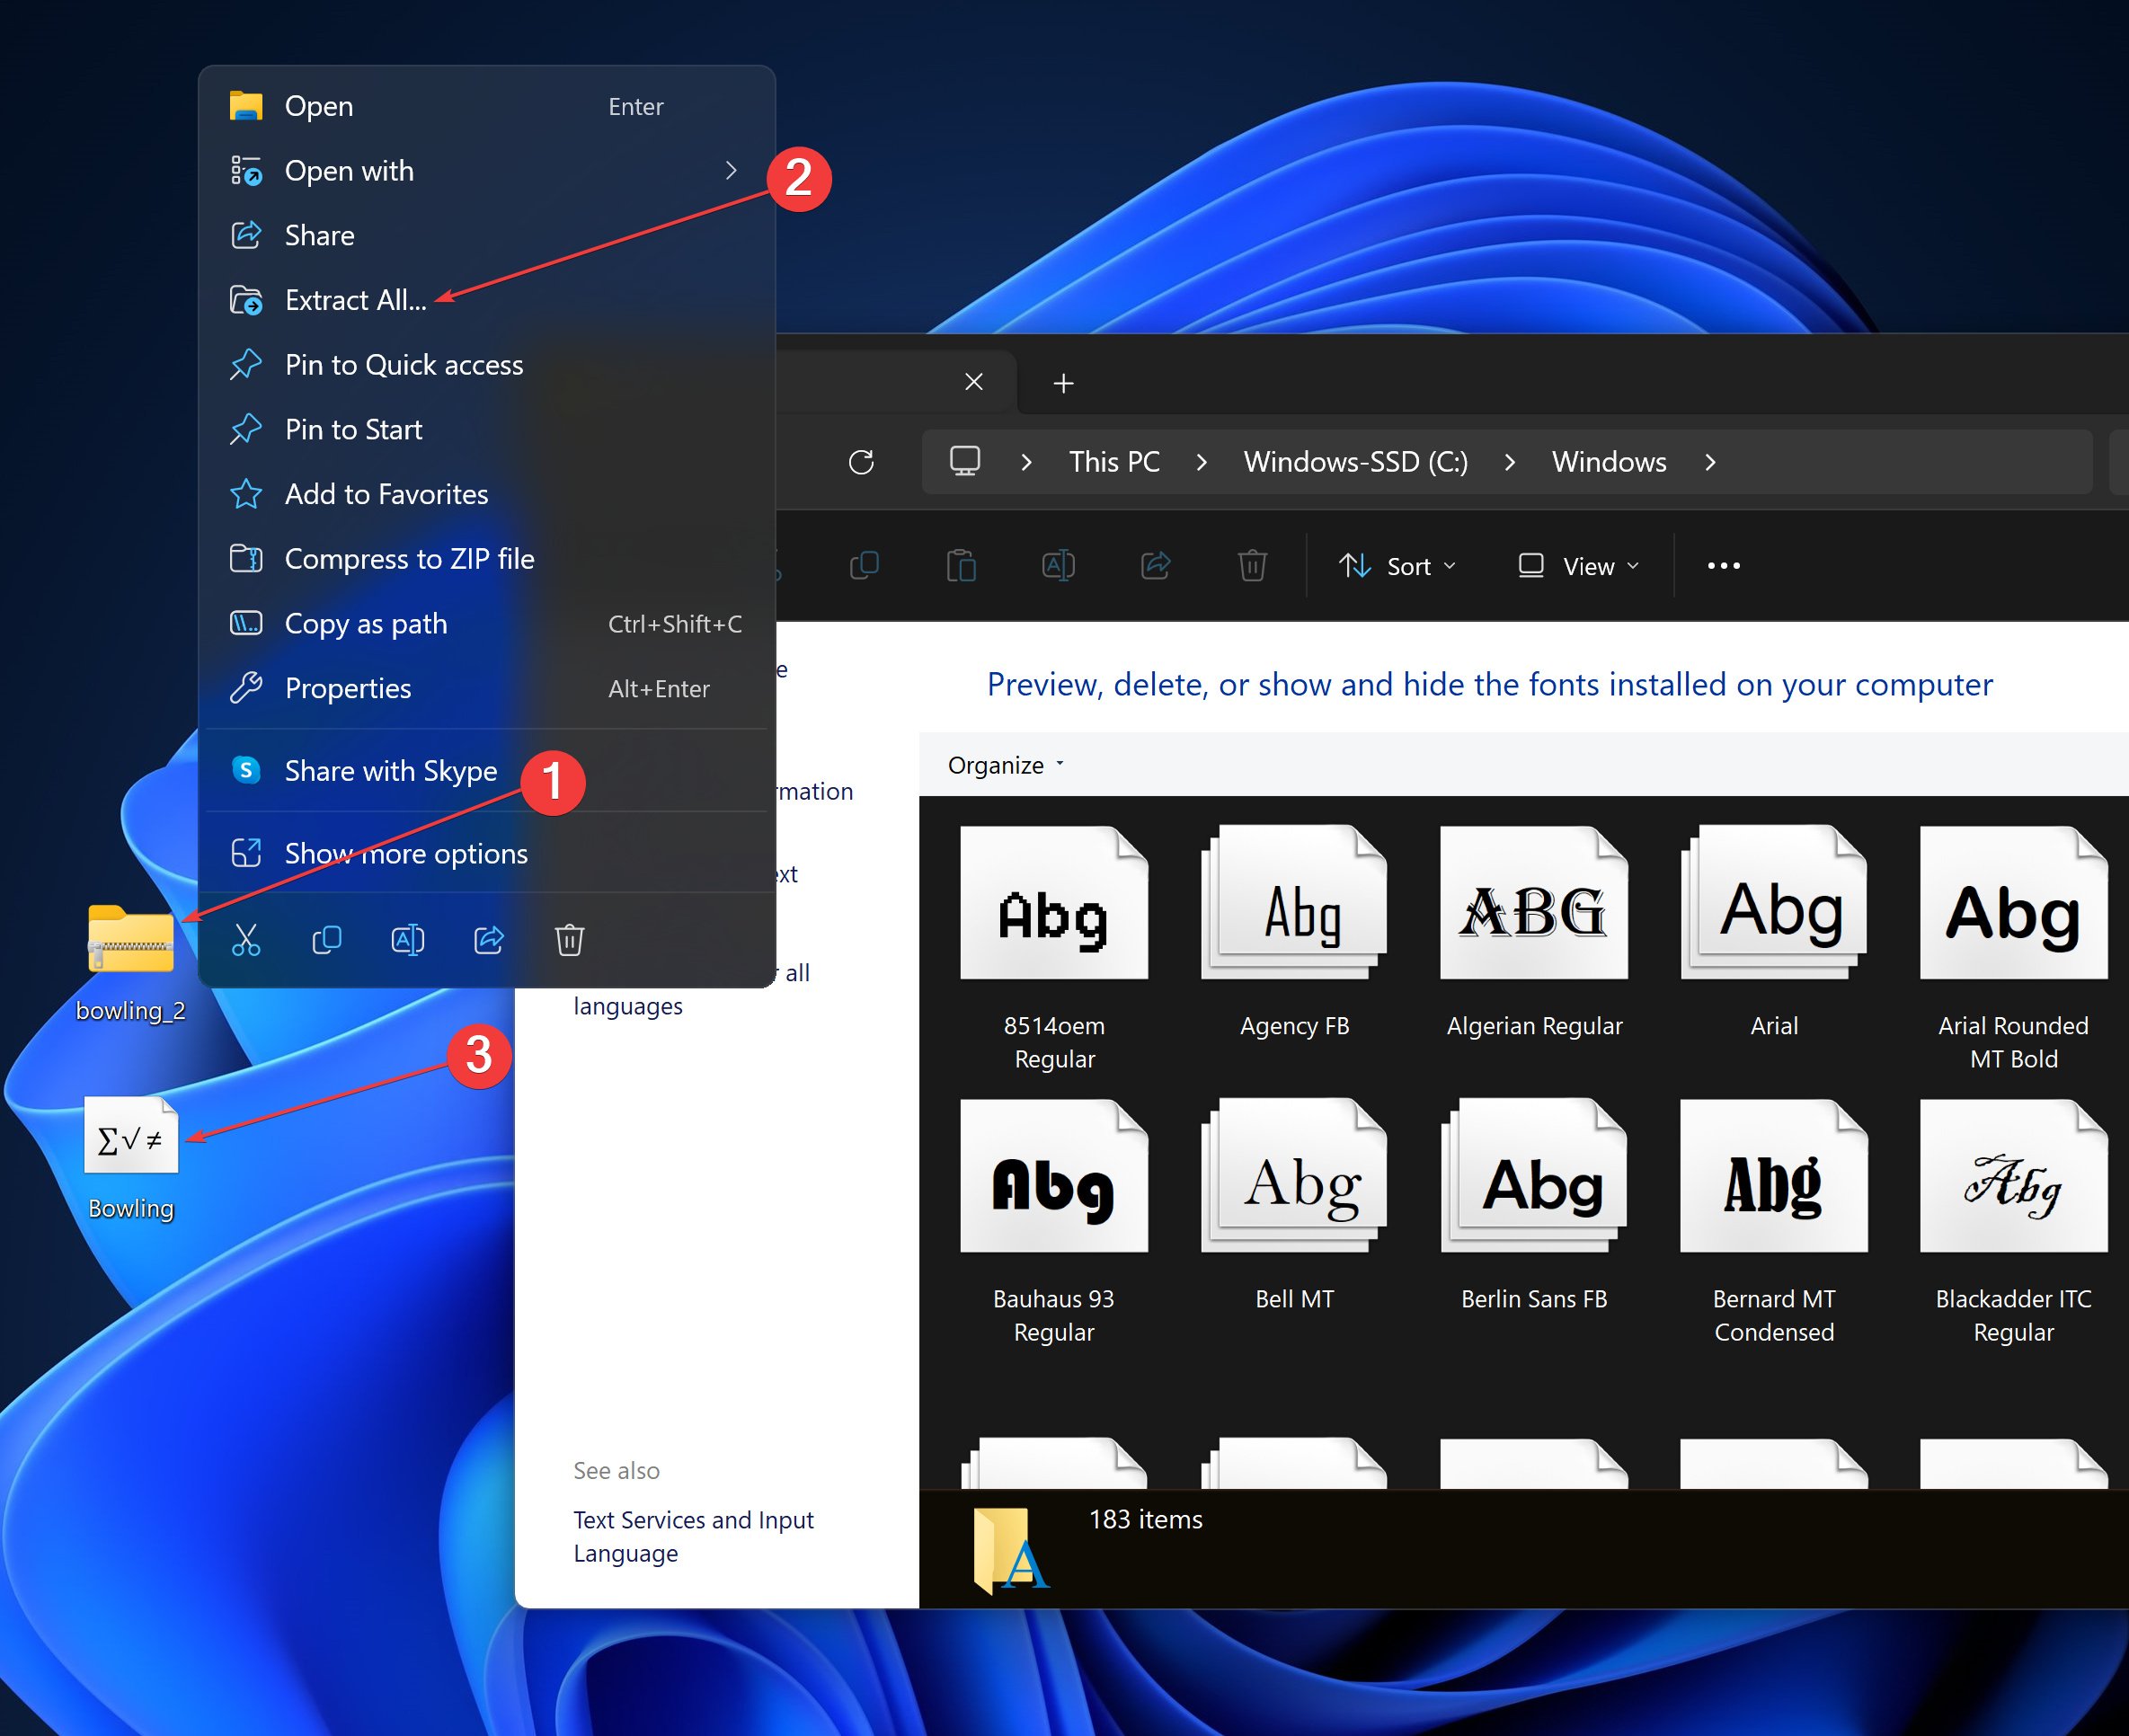
- Download the font file (usually TTF files or OTF files). If it’s archived, unzip it.
- Open the Fonts folder.
- Drag and drop the downloaded font file into the folder.
To Remove/Uninstall Fonts:
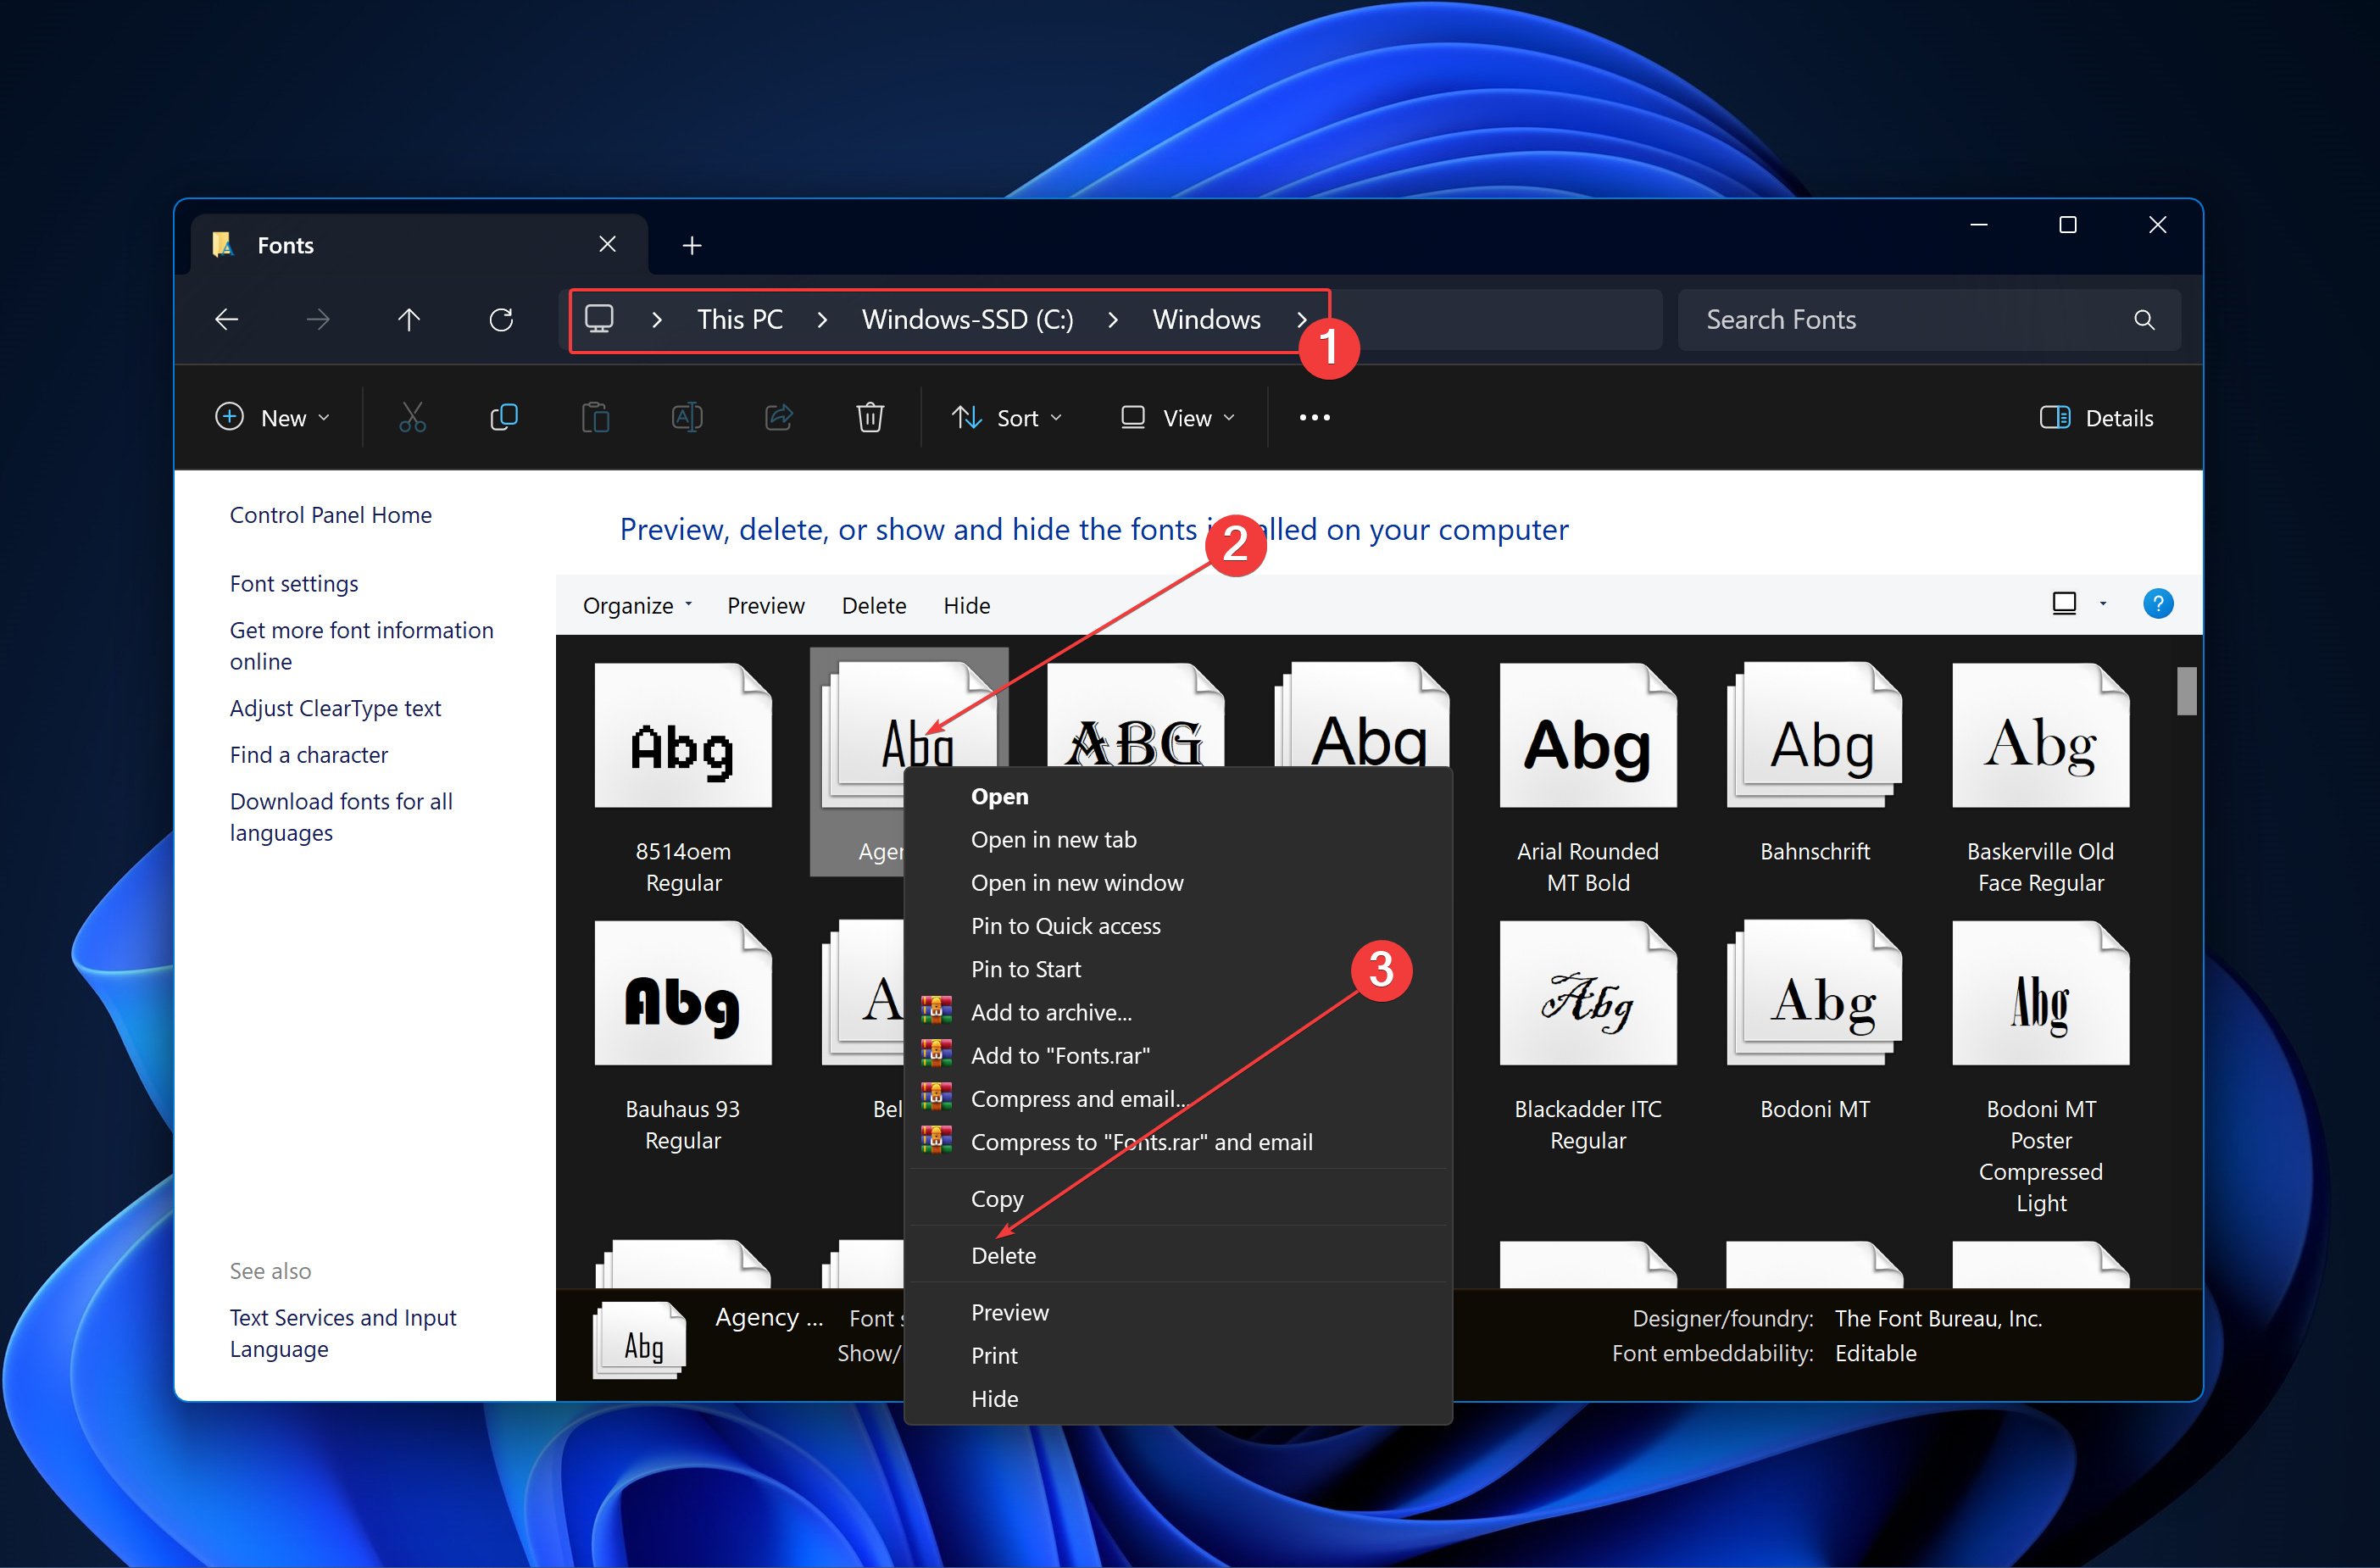
- Open the Fonts folder.
- Locate the font you wish to remove.
- Right-click on the font and choose Delete.
Downloading and Installing New Fonts
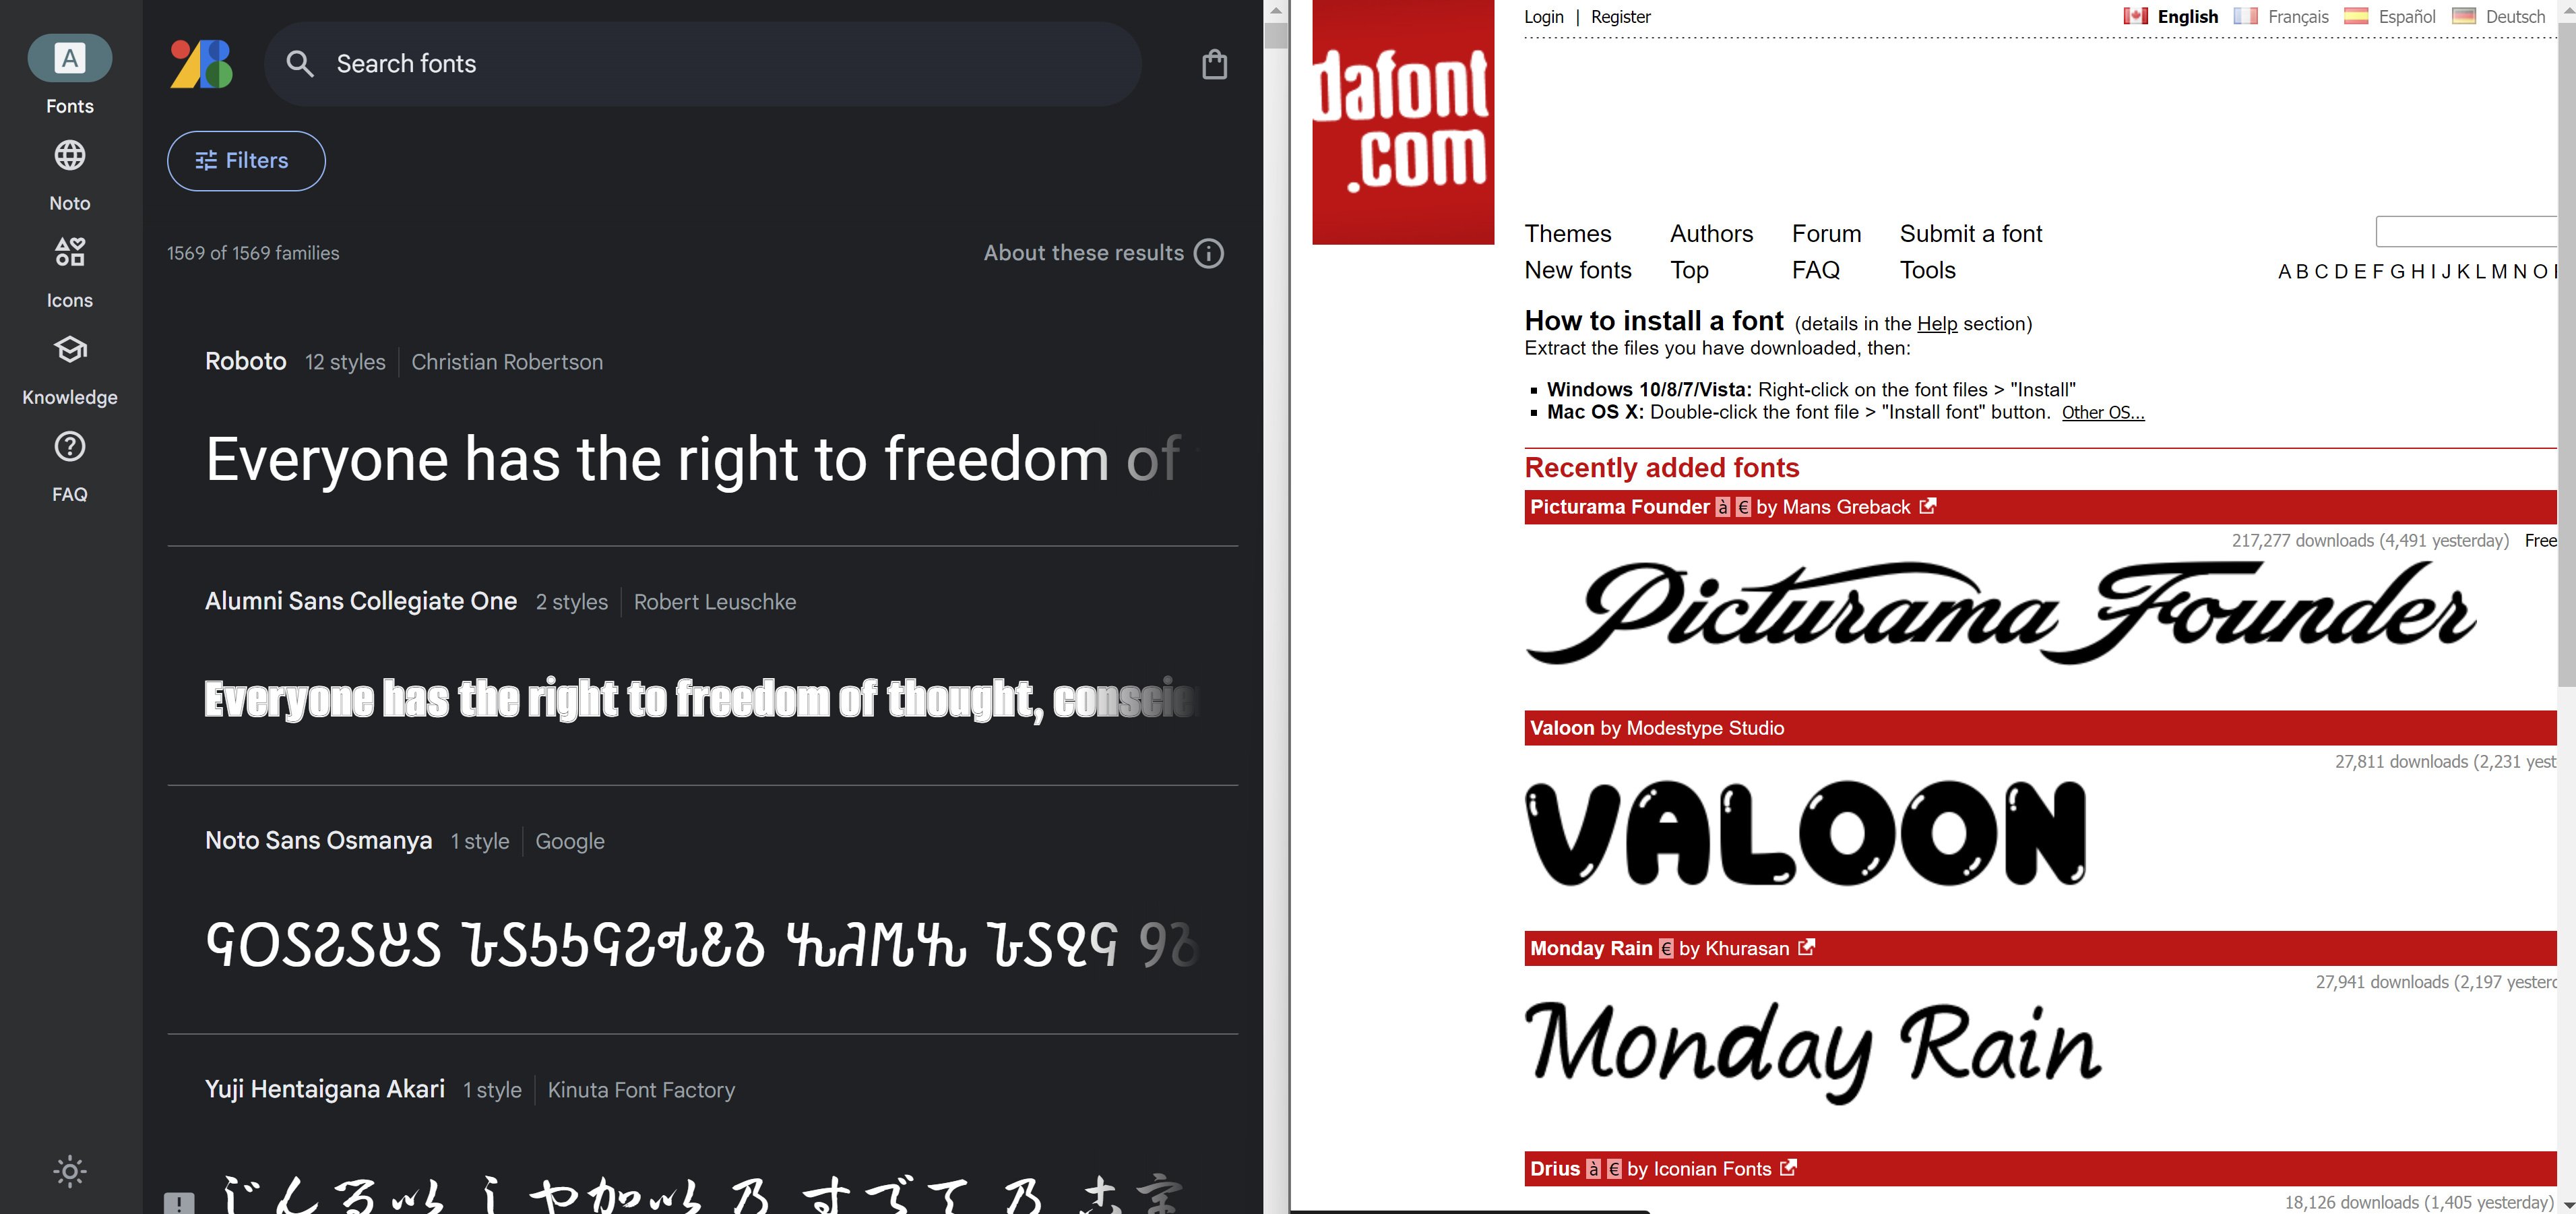
Adding additional fonts can give your projects a new look. You can add Thai fonts, TrueType fonts, non-European fonts, 3D fonts, or even custom fonts.
- Visit a reputable font website like Google Fonts or DaFont.
- Choose a font and download the file.
- Follow the steps above to Add Fonts.
If you want more details on how to download fonts on Windows 10 and 11, check out this guide. Also, if you want to download Microsoft Office fonts, the process is pretty similar.
Conclusion
Knowing where fonts are stored and how to manage them empowers you to take full control of your system’s aesthetics and functionality. From locating the default fonts folder location to adding or removing fonts, these simple steps can make a big difference in how you use and personalize Windows 10 and Windows 11.
You can also use fonts software to create your own. If that’s too time consuming, check out the most popular fonts for Windows 11 that you can download right now.

