[Fixed] Windows Image Acquisition High CPU Usage: 6 Ways
Expert solutions to fix the issue caused by WIA
Key notes
- Windows Image Acquisition (WIA) is a service used by scanners, printers, and cameras for image acquisition.
- Usually, it is known to cause high CPU usage if there is a problem with the service.

If the Windows Image Acquisition service is causing high CPU usage, the chances are there are problems with imaging hardware or some malfunction in your computer. But don’t worry; it can be fixed.
This guide will talk about all the possible ways to eliminate the problem. But first, let’s look at the causes of the issue.
What causes Windows Image Acquisition High CPU Usage?
Pinpointing the cause of the WIA’s high CPU usage can be difficult as there could be a handful of reasons that could lead to the problem. However, some of the potential ones are listed below:
- Virus or malware on your computer: If your PC is infected with malware, there are chances that it is disguising as a WIA service and hence causing the issue. You can run a scan using a reliable antivirus tool to know for sure.
- Conflicting hardware: If hardware connected to your computer has pending jobs or has encountered some error, it can cause the issue.
- Windows Image Acquisition is corrupt: If Windows Image Acquisition is corrupt, it will not work correctly, thereby causing the issue.
- Windows Image Acquisition API misconfigured: If the WIA service is stuck at some point, your computer might face a high CPU and disk utilization issue.
How do I fix Windows Image Acquisition High CPU Usage?
Before diving into the detailed troubleshooting steps, let us try these easy fixes:
- Run the Memory diagnostic tool, and Windows will resolve the issue.
- Check whether your computer’s RAM is sufficient to run your Windows 10/11 computer.
- Make sure there are no pending Windows Updates.
- Unplug and replug the imaging hardware.
- Disable Superfetch.
- Run a deep scan using your Antivirus tool.
1. Clean boot
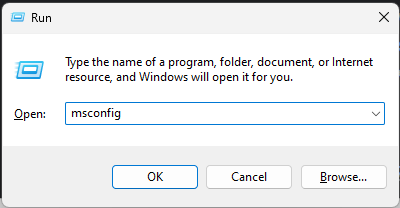
- Press Windows + R to open the Run window.
- Type msconfig and hit Enter to open System Configuration.
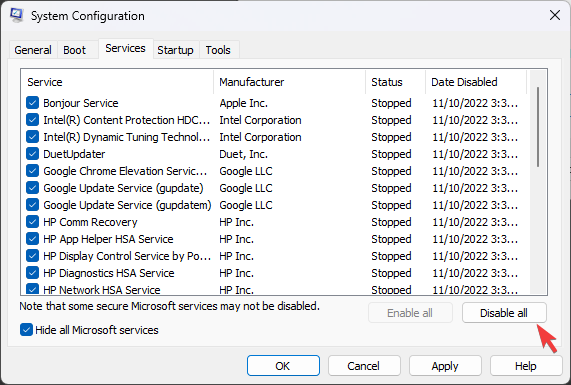
- Go to the Services tab, and place a checkmark beside Hide all Microsoft Services. Now click Disable All.
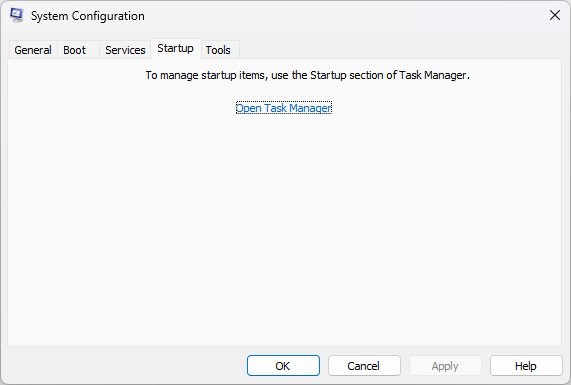
- Next, go to the Startup tab, and click Open Task Manager.
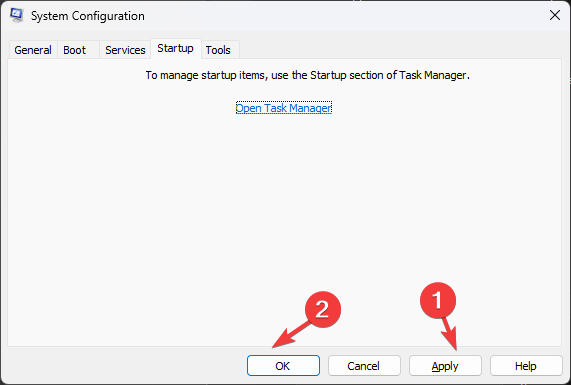
- Go to each Enabled startup item, right-click on it, and select Disable.

- Close Task Manager. On the System Configuration window, click Apply and OK.
- Restart your computer.
2. Set the PC to the best performance
- Press Windows and Pause/Break keys to open the System About page.
- Click Advanced system settings.

- On the Advanced tab, under Performance, click Settings.

- Go to the Visual Effects tab, and click on the radio button beside Adjust for best performance.

- Click Apply and OK.
3. Restart the WIA service
- Press Windows + R to get the Run console.

- Type services.msc and press Enter to open the Services window.
- On the next screen, locate and double-click on Windows Image Acquisition.

- On the WIA Properties window, click on Stop under Service status.

- If the service restarts, change the Startup type to Disabled.
4. Update Drivers
4.1 Use Device Manager
- Press the Windows key and type Device Manager. Click Open.

- Go to the graphics driver, and right-click on it to get the Update Driver option.

- Follow the on-screen prompts to complete the process.
4.2 Use a third-party tool
- Download and Install Outbyte Driver Updater.
- The tool will scan and look for outdated drivers.
- From the list of drivers, select the drivers and click Update.
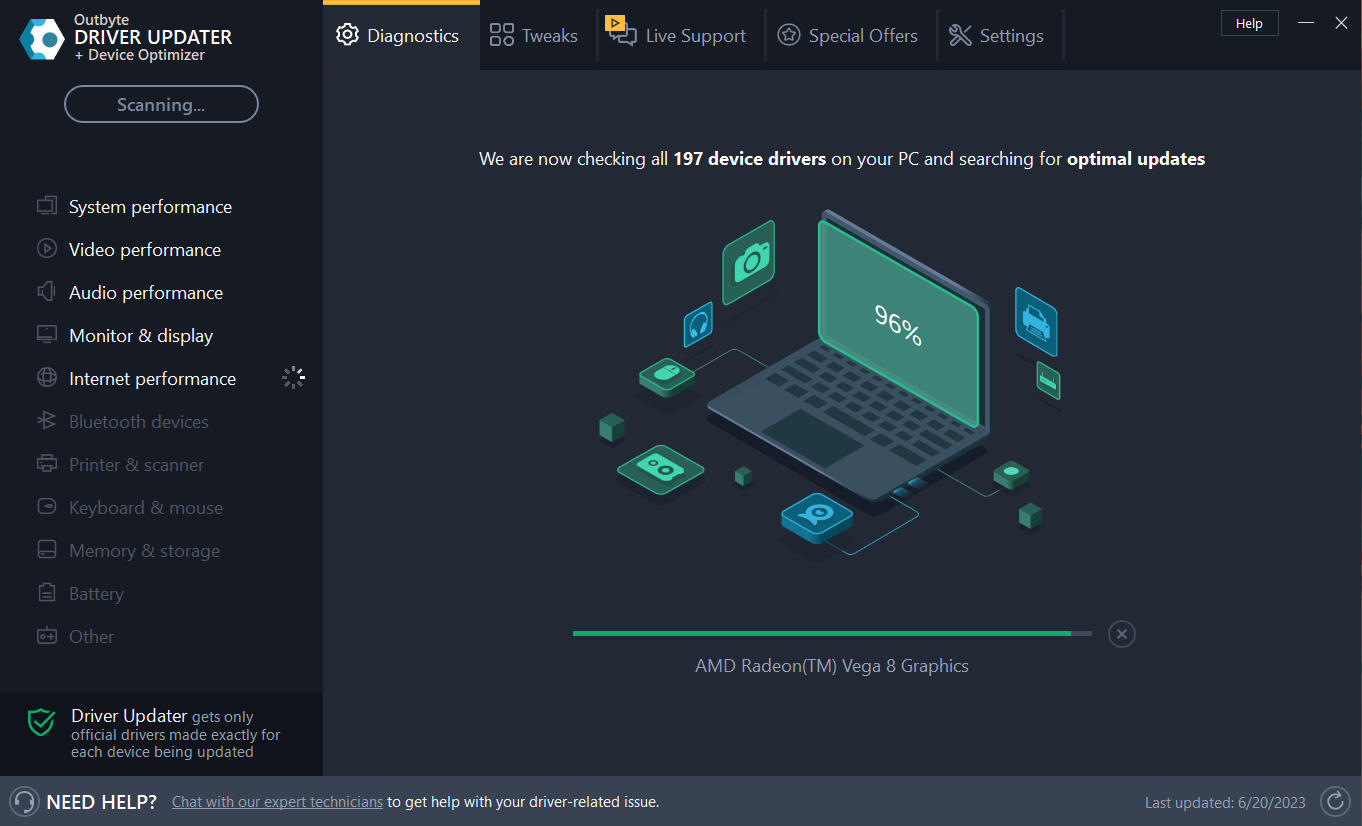
- The utility will download compatible drivers.
- Once done, click Install.
- Now follow the on-screen prompts.

Outbyte Driver Updater
Have all your drivers updated quickly and safe with just a few clicks.5. Run System File Checker
- Press the Windows key and type CMD and click Run as administrator.
- Type the following command and press Enter:
SFC/scan - Copy and paste these commands one by one and press Enter after every command:
DISM /Online /Cleanup-Image /CheckHealthDISM /Online /Cleanup-Image /ScanHealthDISM /Online /Cleanup-Image /RestoreHealth
- Restart your computer.
6. Restart Background Intelligent Transfer Service
- Press Windows + R to get the Run console.
- Type services.msc and press Enter.
- Navigate to Background Intelligent Transfer Service and double-click on it.

- Go to Service status, and click Stop.
- For the Startup type, select Disabled from the drop-down menu.

- Click Apply.
- To restart the service, go to Service status again and click on Start.
- Now for the Startup type, set it to Automatic (Delayed Start).

- Click Apply and OK
- Restart your PC to let the changes take effect.
So, these are steps to eliminate the Windows Image Acquisition High CPU usage problem. Try them and let us know which method worked for you in the comment section below.
Read our disclosure page to find out how can you help Windows Report sustain the editorial team. Read more


Improve this guide


User forum
0 messages