Windows 10 Keeps Reinstalling the Same Update: 6 Ways to Fix
Deleting the SoftwareDistribution directory is a fast fix
5 min. read
Updated on
Read our disclosure page to find out how can you help Windows Report sustain the editorial team. Read more
Key notes
- If Windows continues to install the same update, you may need to perform a system restore.
- You should also remove the problematic update in order to fix this issue.

Update reminders could be annoying sometimes, but how annoying is it when you constantly get the reminder about the same update, even if you’ve installed that update before? This is the case when Windows update keeps reinstalling.
So if your computer is receiving the same update repeatedly, we maybe have a solution.
Why is my Windows 10 constantly updating?
If Windows keeps installing the same update, it could be triggered by different factors. Here are the most common:
- Badly installed updates – This error mostly happens when the OS cannot install the update correctly. Sometimes, these updates need deletion.
- Problematic updates – While updates are welcome additions, there are a few cases of bad updates, which can cause bugs on your computer.
- Windows unable to detect updates – Even after an update is installed, in some rare cases, the OS may be unable to detect it, leading to fresh installation attempts.
Speaking of Windows Update issues, users also reported the following problems:
- Windows 10 keeps installing updates – According to users, Windows 10 keeps installing the same updates on their PC. You must stop the Windows Update service and delete the SoftwareDistribution directory to fix this problem.
- Same Windows update keeps trying to install – This is another problem that Windows users can encounter. If you’re having this issue on your PC, you should be able to fix it using one of our solutions.
- Windows 10 keeps downloading the same updates – This is also a common problem with Windows 10. If Windows 10 keeps downloading the same update, you can fix the problem by removing the problematic update or by using System Restore.
Now let us explore the best solutions.
What can I do when Windows Update keeps installing the same update?
1. Delete the SoftwareDistribution directory
- Press Windows Key + X and select Command Prompt (Admin) from the menu.
- Type the following scripts, pressing Enter after each one:
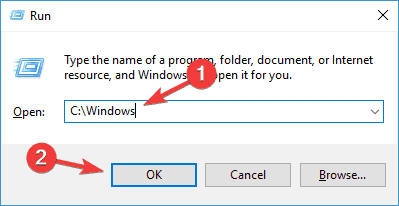
net stop wuauservrename c:windowsSoftwareDistribution softwaredistribution.oldnet start wuauservexit - Press Windows Key + R and enter C:\Windows, press Enter, or click OK.
- This will open the Windows folder, search for SoftwareDistribution and delete it.
- Finally, restart your computer.
Now all backups and downloads of Windows Update are deleted, and your problematic update, and you shouldn’t face this issue anymore.
2. Remove the problematic update
- Open the Settings by using the Windows Key + I shortcut.
- When the Settings app opens, click the Update & Security section.
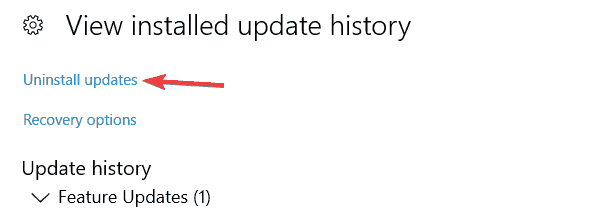
- Now click View installed update history.
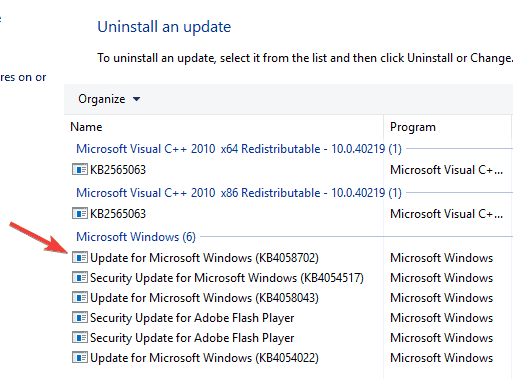
- Select Uninstall updates.
- Lastly, double-click an update to remove it.
After uninstalling recent updates, check if the issue persists. If this solution solves the problem, you’ll need to prevent Windows from downloading the problematic update again.
Windows 10 automatically installs the missing updates; however, you can also prevent Windows 10 from installing updates automatically.
After doing that, your problem should be resolved entirely.
3. Reinstall .NET Framework
Usually, uninstalling and then reinstalling or repairing the.NET Framework should resolve many problems, but specific systems may encounter errors or failure for various reasons.
When installing, removing, or cleaning the traces of the.NET Framework, a cleanup program named CCleaner is available to complete all necessary tasks.
This process requires you to remove all fires related to .NET Framework 4 and download it again as a Windows update.
The tool will clean up the system by removing files, folders, registry keys and values, and Windows Installer product registration information for the.NET Framework.
After removing .NET Framework 4, you can download it automatically as a Windows update, and the problem should be resolved.
4. Perform a system restore
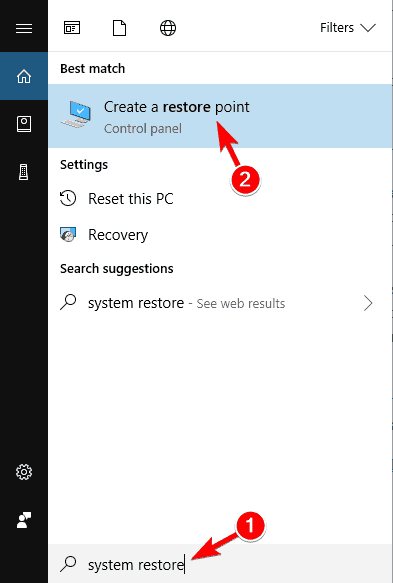
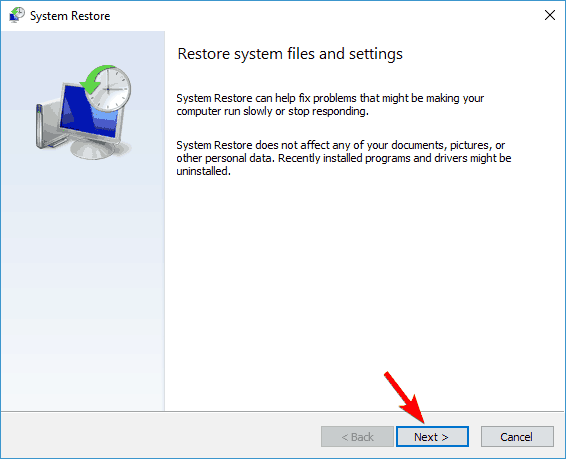
- Press Windows Key + S and enter system restore, then select Create a restore point from the results list.
- The System Properties window will now appear. Select System Restore.
- When the System Restore window opens, click Next.
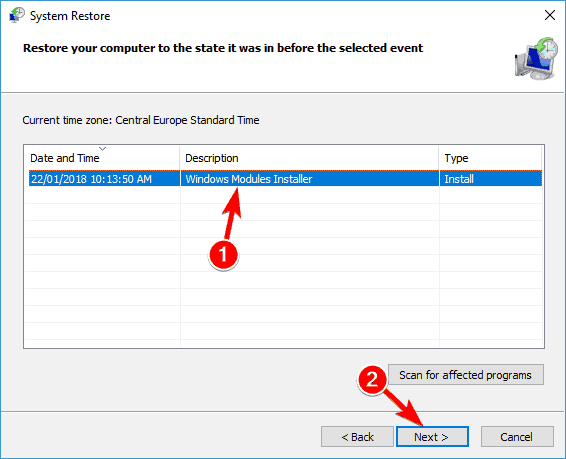
- If available, tick the show more restore points checkbox. Select the desired restore point and click Next.
- Finally, follow the instructions on the screen to complete the restoration process.
Note that a clean registry will save you the need for a system restore in many cases.
5. Run Windows Update Troubleshooter
- Go to Start, and click on Settings.
- Head over to Update & Security.
- Click Troubleshoot, find Windows Update and click Run the troubleshooter.
- Lastly, follow further on-screen instructions, restart your computer, and check if the Windows update keeps reinstalling.
6. Run the SFC and DISM scans
6.1 Running the SFC scan
- Go to Start, type command, right-click on Command Prompt, and select Run as administrator.
- A new cmd window appears. Type the line below and hit Enter:
sfc /scannow - Finally, wait until the scan and repair process is finished.
6.2 Running DISM
- Go to Start, type command, right-click on Command Prompt, and select Run as administrator.
- A new cmd window appears. Type the line below and hit Enter:
DISM.exe/Online /Cleanup-image /Restorehealth - Also, if the DISM can’t obtain files online, try using your USB or DVD installation. Insert media, type the command below, and hit Enter (be sure to replace /C:/RepairSourceWindows with the path of your DVD or USB).
DISM.exe/Online /Cleanup-Image /RestoreHealth /Source:C:RepairSourceWindows /LimitAccess
That is all you should do if the Windows update keeps reinstalling on your devices.
Lastly, please reach the comments section below if you have any additional comments or questions or if this solution somehow didn’t work.









User forum
4 messages