Windows Photo Viewer Not Full Screen: 5 Ways to Fix it
Enjoy your images in full screen mode again
5 min. read
Updated on
Read our disclosure page to find out how can you help Windows Report sustain the editorial team Read more
Key notes
- The full screen feature in Windows Photo Viewer allows users to view their photos without any distractions from other applications or windows on their desktop.
- However, in some cases, you can’t go to full screen mode. It could be due to incorrect display settings but let us look at some workarounds.
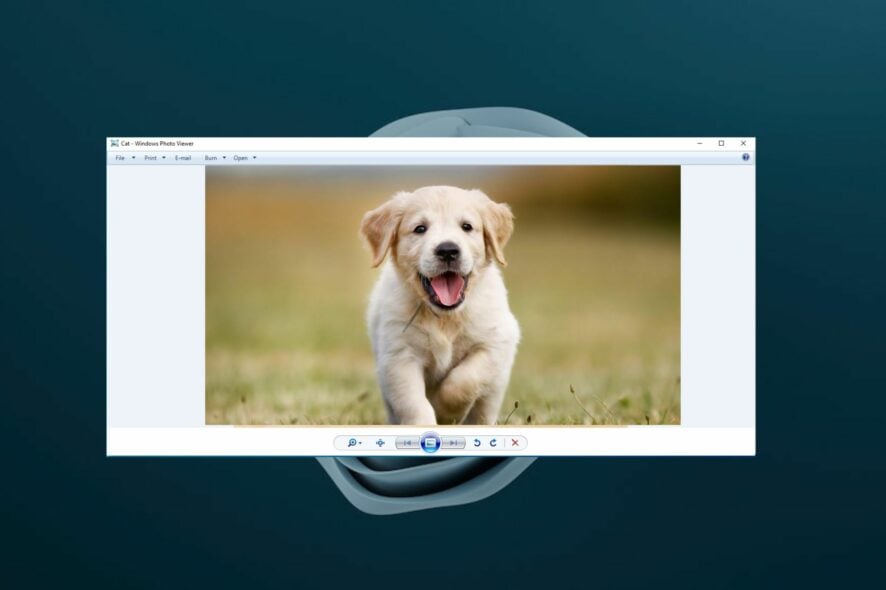
Windows Photo Viewer is now Microsoft Photos in Windows 11. It is the default image viewer in Windows systems but it has its own share of problems. Some users are having issues as they cannot launch images on fullscreen.
Most will opt for other photo viewer applications but if you are running low on storage space, you have to troubleshoot this issue. Let’s look at some possible solutions for this problem.
Why is my screen not showing full size?
If your screen is not showing the full size, it could be due to a few reasons. Here are some common causes:
- Resolution settings – The most common reason is that your display resolution is set to a lower setting than the native resolution of your monitor. When you install Windows, it automatically detects and sets your default display resolution to match your monitor’s native resolution. You may need to set custom resolution for each program.
- Your graphics card has a problem – A display driver issue could cause problems with Windows scaling feature especially if it is outdated. This happens when Windows doesn’t know how to scale certain content on its own. If you’re using an old computer, it might be time to replace your graphics card.
- Bad cable – If you’re using an HDMI cable, try using a different one, or plugging directly into the display port on your computer instead of using an adapter. The cable could be loose or disconnected or your PC doesn’t recognize your HDMI cable.
- Problems with your monitor – Windows is designed to automatically adjust your screen resolution when you change your display settings. If the display is not showing full size, you may have an issue with your monitor. To test this, connect the computer to another monitor that you know works and see if the problem persists. You may have to consider getting a new monitor.
- Photos cache – Some apps store photos in their cache, and they may not be able to show them in full size. To fix this, clear the cache for Windows Photo Viewer by resetting and repairing the application or generally clear cache in Windows 11.
Now let’s have a closer look at how to resolve these issues.
What can I do if Windows Photo Viewer is not showing in full screen?
As always, it is important to do preliminary checks before moving on to advanced solutions. These checks include:
- Check that all cables are securely connected to their ports. You can also try another HDMI cable and see if the issue persists.
- Try the Windows Photo Viewer full-screen shortcut: Windows Key + Shift + Enter.
- Disconnect any other external monitors that may be causing conflicts.
- Try with another monitor or external display if available.
- Restart your PC.
If your screen goes to full screen after trying out these, no need to proceed to the steps below. However, if you are out of luck, here are more troubleshooting steps to try.
1. Adjust display settings
- Hit the Windows key and select Settings.
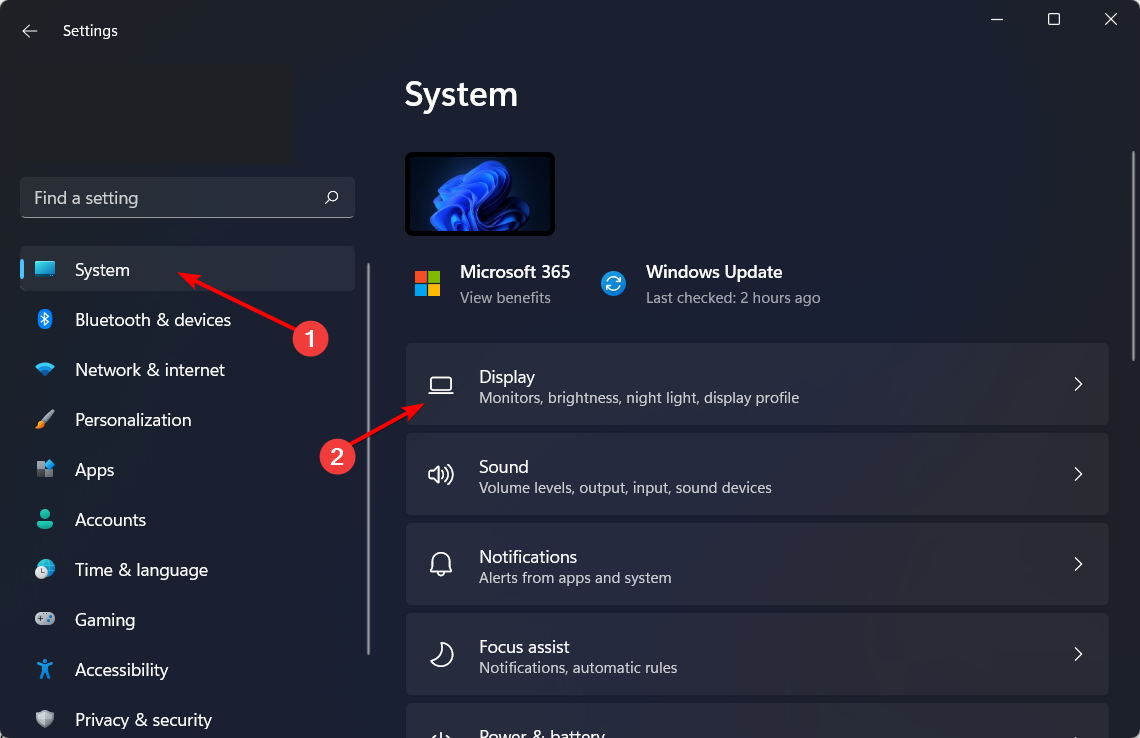
- Click on System then select Display.
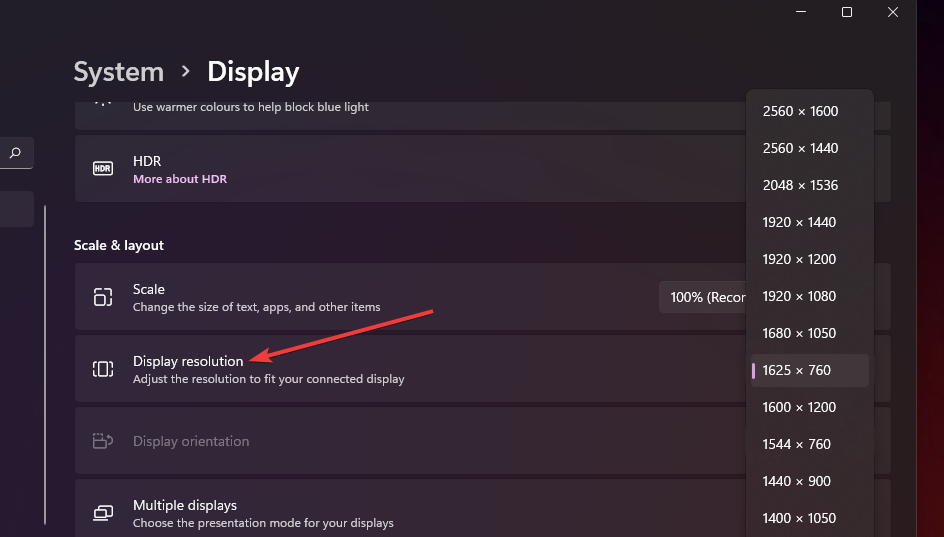
- Hit the drop-down next to Display resolution and select an alternative setting.
- Restart your PC.
2. Update display drivers
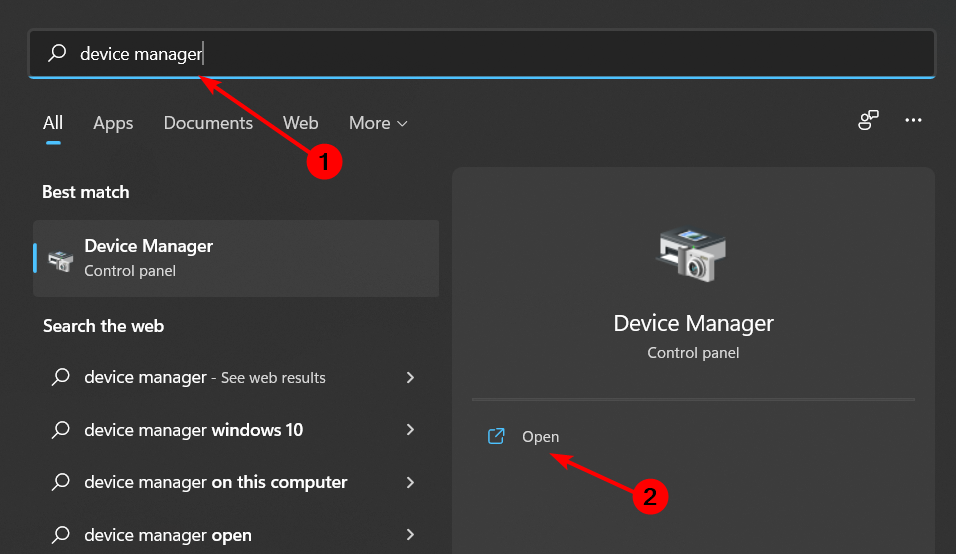
- Hit the Windows key, type Device Manager in the search bar, and click Open.
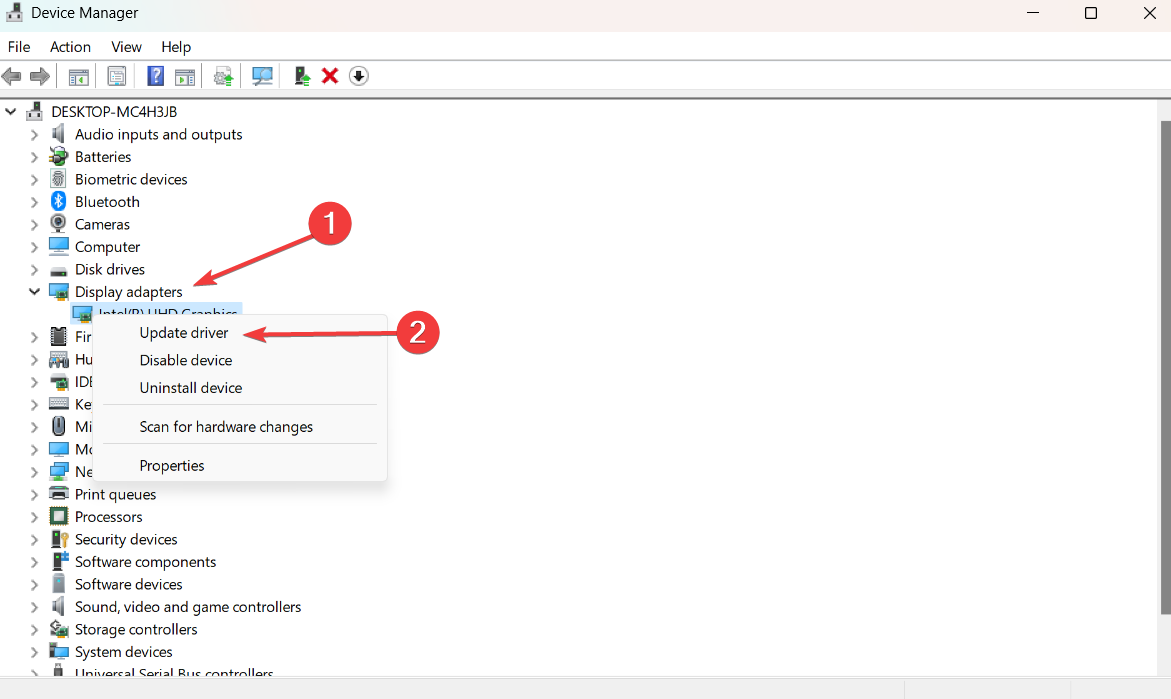
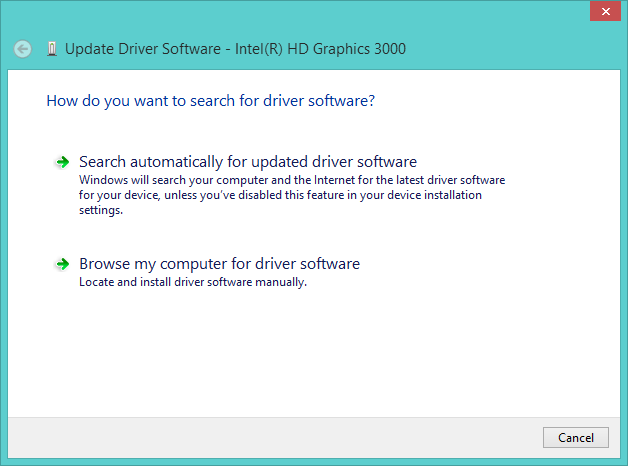
- Locate Display adapters, click to expand, right-click on your display device, and select Update driver.
- Select Search automatically for drivers.
If you don’t want to proceed manually, you can opt for a specialized tool, like Outbyte Driver Updater, to detect outdated or missing drivers and update them automatically.

Outbyte Driver Updater
Improve your device’s performance by keeping your drivers updated with Outbyte Driver Updater.3. Reset and repair Windows Photo Viewer
- Hit the Windows key and select Settings.
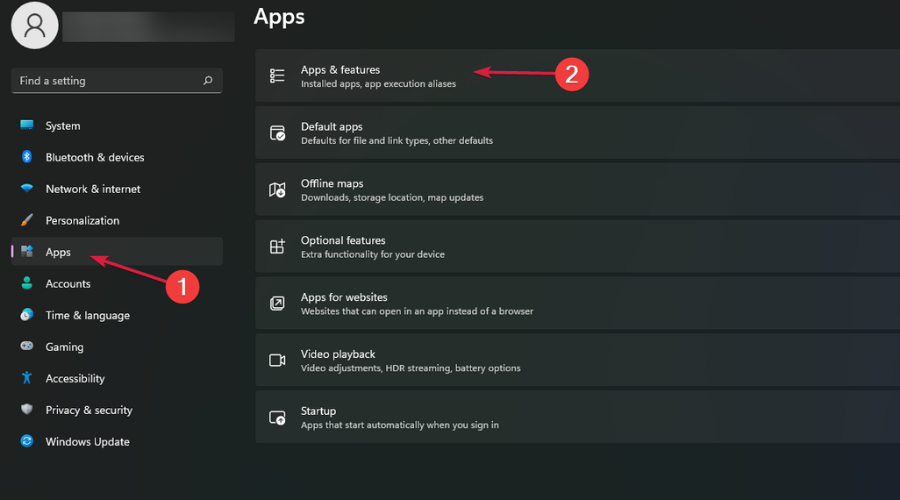
- Click on Apps on the left pane then select Apps & features on the right pane.
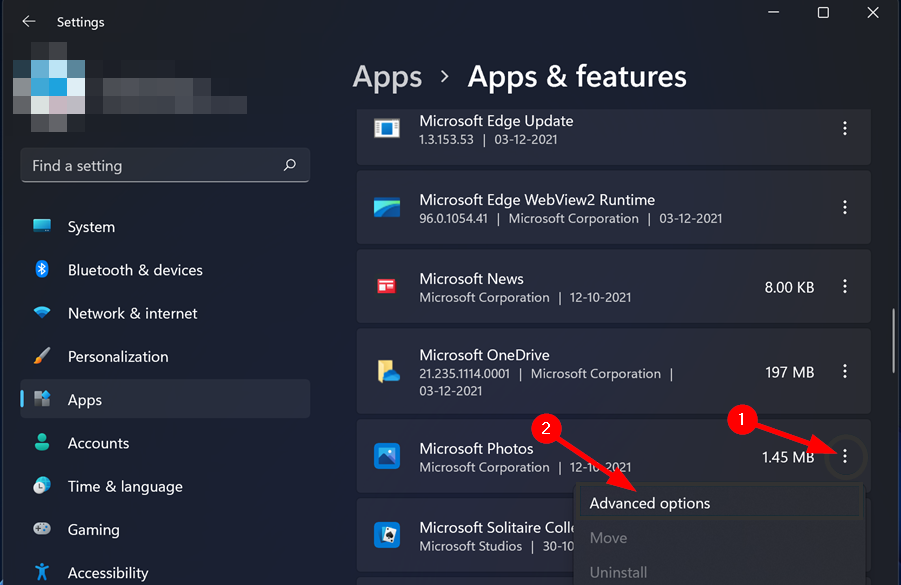
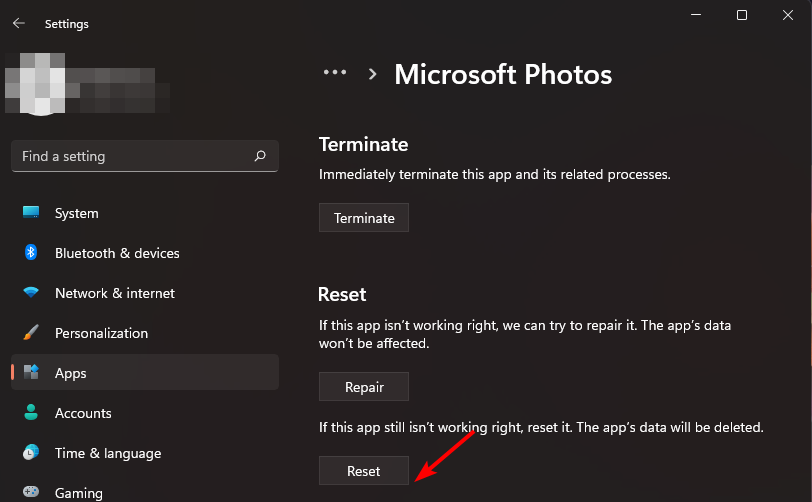
- Locate Windows Photo Viewer, click on the three vertical ellipses and select Advanced options.
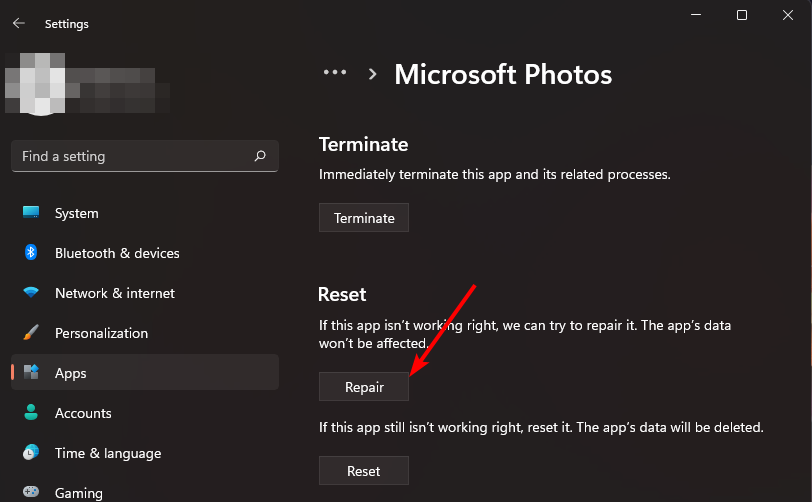
- Click the Repair button.
- Go back and click the Reset button.
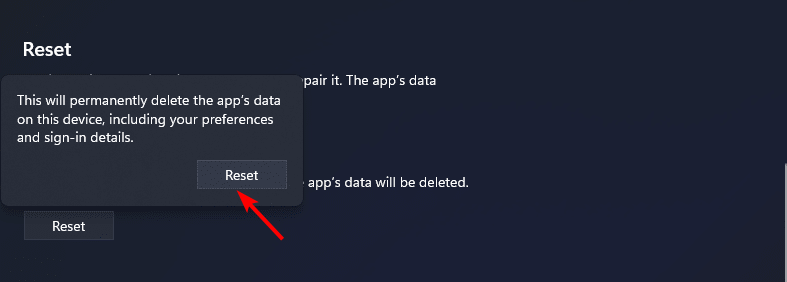
- Again, click Reset on the pop up that appears.
4. Disable Game Mode
- Hit the Windows key and select Settings.
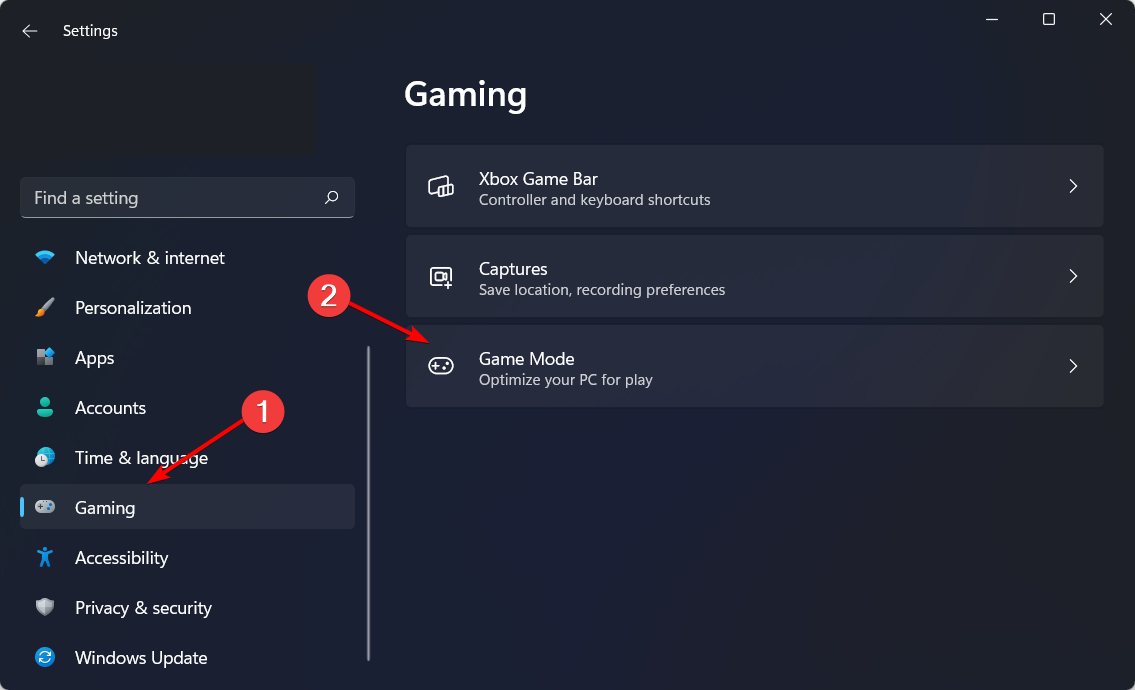
- Select the Gaming category and then click on the Game Mode button.
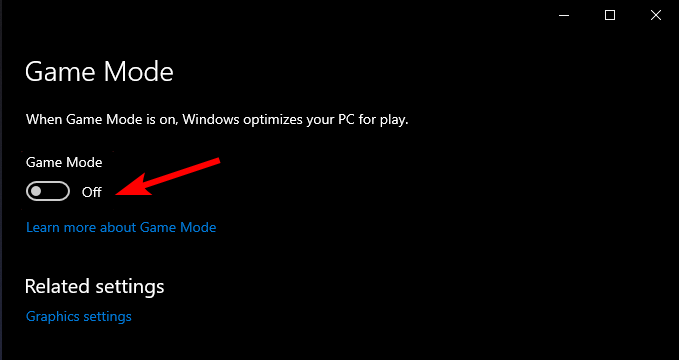
- Toggle the Game Mode option to Off.
Game Mode is a feature in Windows 11 that automatically optimizes your PC for an enhanced gaming experience. It can prioritize CPU and GPU resources so that they’re used by games instead of other apps running in the background.
The feature can also affect how other apps run including Windows Photo Viewer so it is best to disable it when not in use.
5. Restore app package
- Hit the Windows key, type Powershell in the search bar and click Run as administrator.
- Type in the following command and press Enter:
Get-AppXPackage -AllUsers | Foreach {Add-AppxPackage -DisableDevelopmentMode -Register “$($_.InstallLocation)\AppXManifest.xml”} - Restart your PC.
Hopefully, you have been able to resolve this issue and can now view your images on Windows Photo Viewer in full screen again. If you occasionally face low resolution issues on your Windows PC, don’t hesitate to check out our guide for simple workarounds.
Alternatively, you can opt for slideshow maker software that allows you to view images in full screen with no extra effort needed from you.
Should you encounter any other hiccups such as Windows Photo Viewer can’t print, we have covered various steps in our detailed guide to help you resolve this issue.
Let us know of any other solution not mentioned here that may have done the trick for you in the comments section below.


