Windows Power Options Greyed Out: 5 Ways to Fix It
Simple solutions for Windows Power Options greyed out
5 min. read
Updated on
Read our disclosure page to find out how can you help Windows Report sustain the editorial team. Read more
Key notes
- Third-party power management software can cause Windows Power Options to grey out.
- Create an occasional system restore points so you can always restore your system in the case of an error.
- Make sure your battery drivers are up to date and digitally signed by the manufacturer.
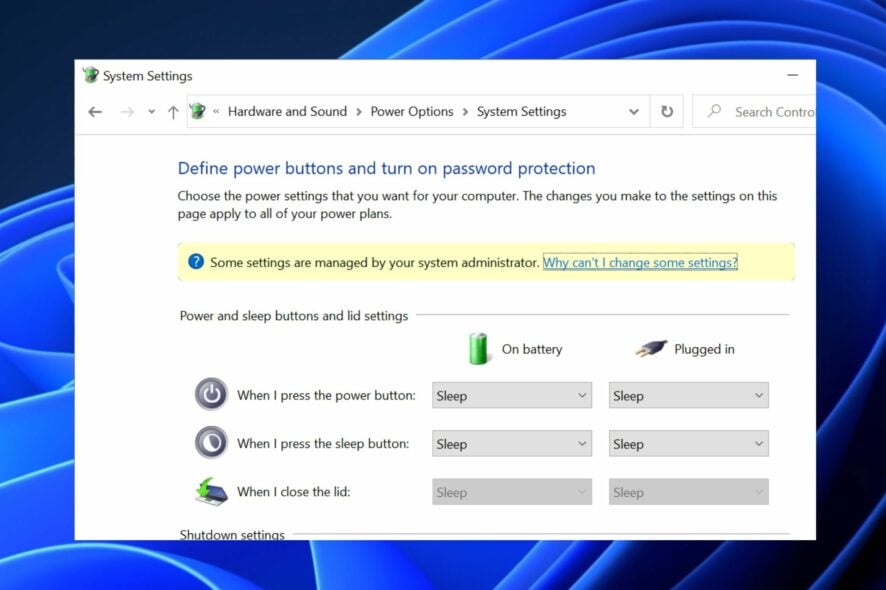
Windows Power Options is an essential built-in feature that allows you to adjust your power settings to improve your Windows 11 battery life.
However, you might often find the Windows Power Options overridden or greyed out across multiple operating systems. Hence, we’ll explore the causes and possible solutions here.
Why are the Windows Power Options greyed out?
The grayed-out Windows Power Options aren’t a widespread error in the Windows community. We’re more used to minor errors like the power plan keeps changing. However, here are a couple of reasons why Windows Power Options were greyed out:
- Corrupt system files – If Windows system files are corrupt, it will lead to a chain of problems, including display issues which can cause the Windows Power Options icon to be greyed out.
- Third-party app – Several third-party tools for battery management come with peculiar settings and configurations; one of these tools may be the reason behind the greyed-out Power Options icon.
- Outdated or incompatible drivers – Batteries have specific drivers released and maintained by Microsoft. If you install a driver not built for your PC, you might encounter incompatibility issues.
- Recent hardware changes – The effect could grey out your Windows Power Options if you’ve recently changed any system hardware.
Of course, you also need to keep in mind that the Power Options are mainly used in portable systems that use a battery, not desktop PCs.
Now that we know why this might happen, let’s go through the solutions to fix the problem.
How do I fix Windows Power Options greyed out?
Before we proceed to advanced troubleshooting, ensure the following checks are applied:
- Ensure your device is fully charged.
- Close all third-party power management tools.
- Restart your PC.
If the issue persists after these, try the solutions below.
1. Scan for hardware changes
- Press the Windows button, type Device Manager, and launch it.
- Click on the Action tab at the top of the Device Manager and select Scan for Hardware Changes.
- Expand the Batteries section and ensure that the Microsoft AC Adapter and the Microsoft ACPI-Compliant Control Method Battery are displayed.
- Check to see if the Windows Power Options is still greyed out.
Check our detailed guide to see how you can use the Device Manager to scan for hardware changes.
2. Update your battery drivers
- Press the Windows button, type device manager, and launch it.
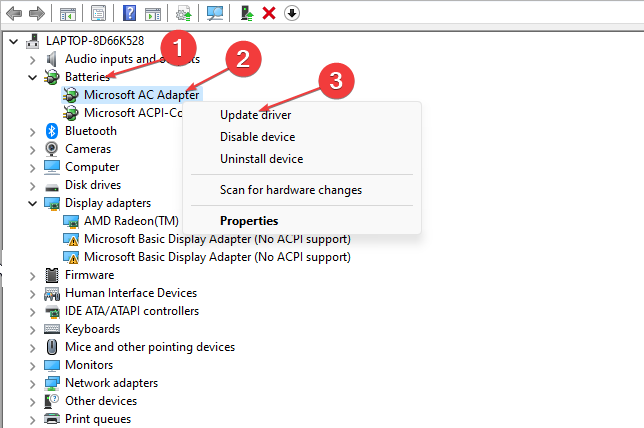
- Select Batteries to open the drop-down menu, right-click on any of the two options, and select Update driver.
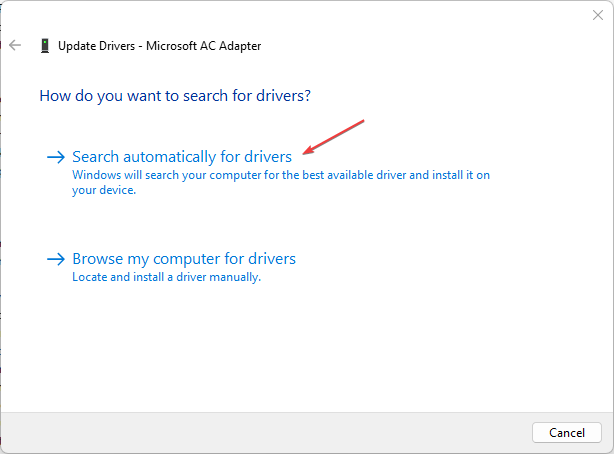
- Select Search automatically for drivers and restart your PC.
If you can’t update your driver with the steps above, follow our detailed guide on installing drivers on Windows 11, or just use an automated driver updater tool.
- Download and install Outbyte Driver Updater.
- Launch the software.
- Wait for the app to detect all faulty drivers.
- Now, it will show you all the malfunctioning drivers listed to select the ones to Update or Ignore.
- Click on Update & Apply Selected to download and install the newest versions.
- Restart your PC to ensure the applied changes.

Outbyte Driver Updater
Secure your Windows PC with Outbyte from various errors caused by problematic drivers.3. Remove third-party power management apps
- In the search box, type control panel and select it from the results.
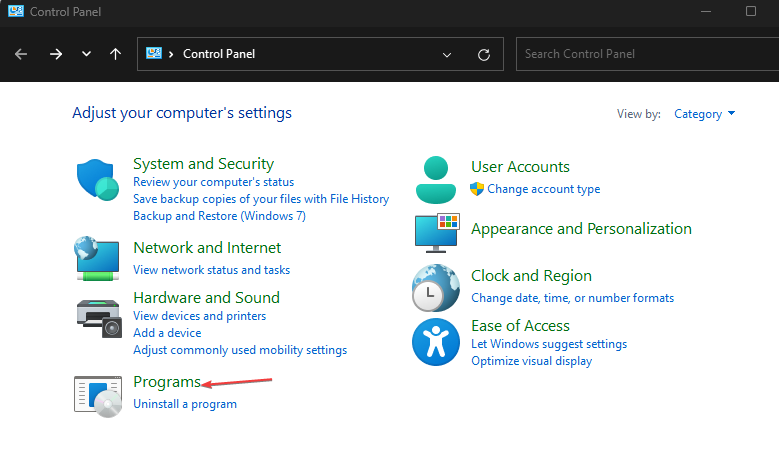
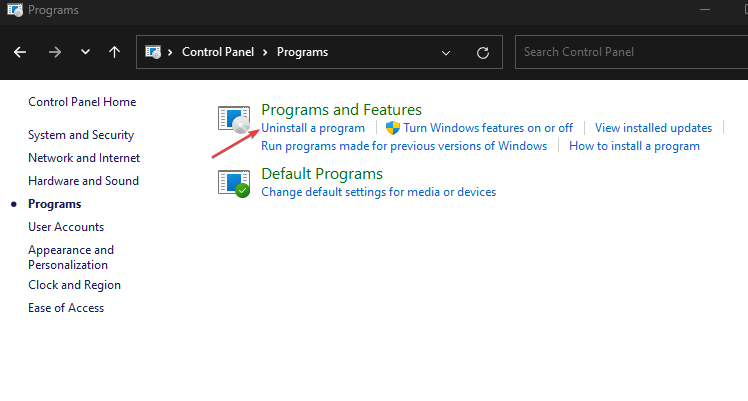
- Select Programs.
- Under Programs and Features and click on Uninstall a program.
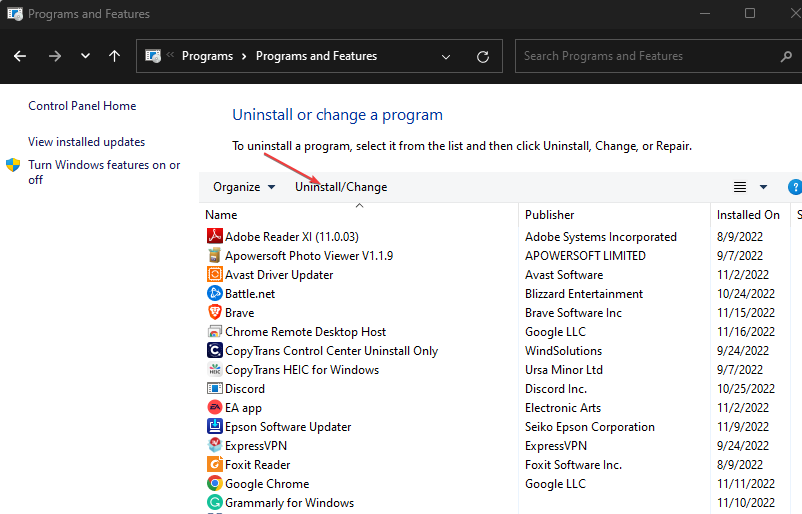
- Then choose the program you wish to remove and click on Uninstall/Change.
- Restart your computer
If you uninstall your third-party power management tool, all the settings and configurations previously used by your computer will be ineffective.
Third-party power management apps can interfere with your device’s battery configurations. Disabling them will ensure that windows Power Options remain visible.
4. Update your BIOS
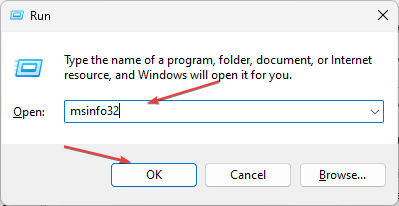
- Press the Windows + R to open the Run window, type msinfo32, and click OK.
- Find the system information – serial number/ system model.
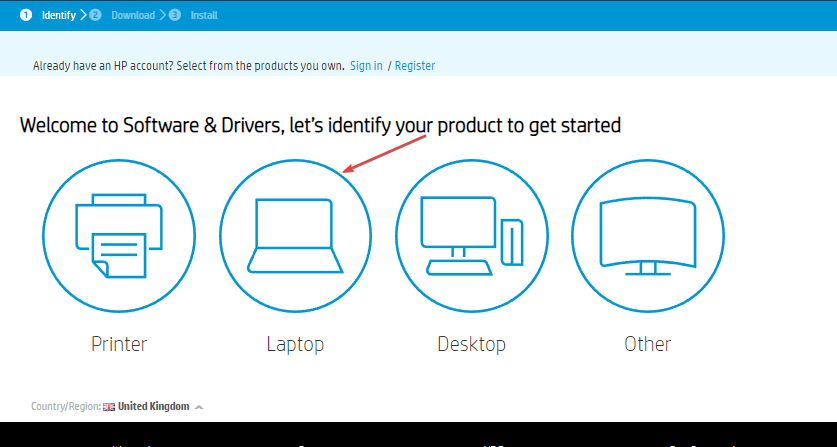
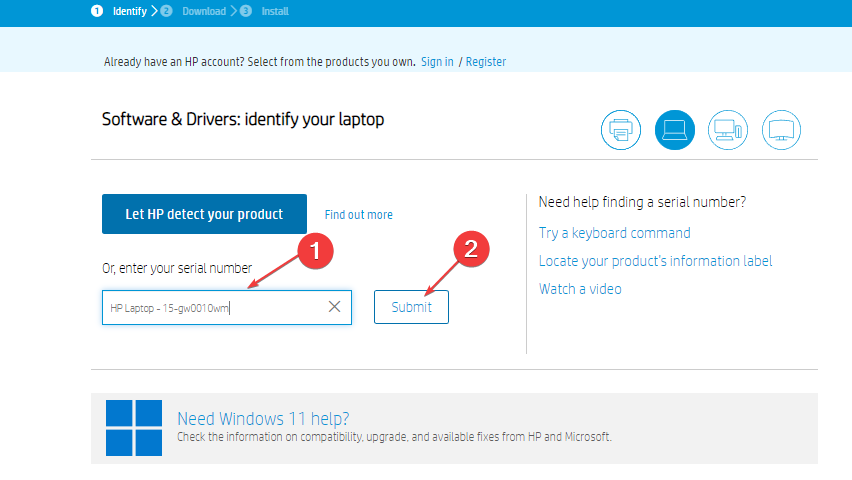
- Navigate to the Official HP driver and software download page and select your product.
- Enter your exact serial number or your computer model, and click Submit.
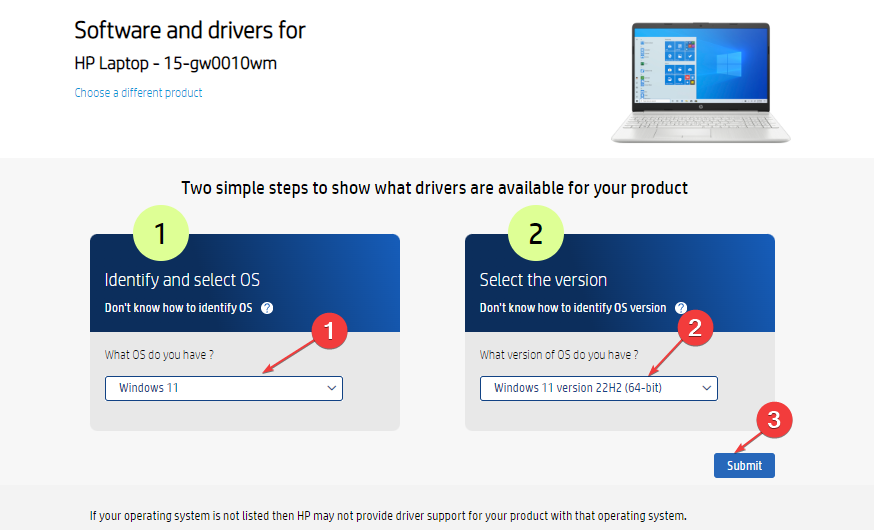
- Select your OS and OS version, then click Submit.
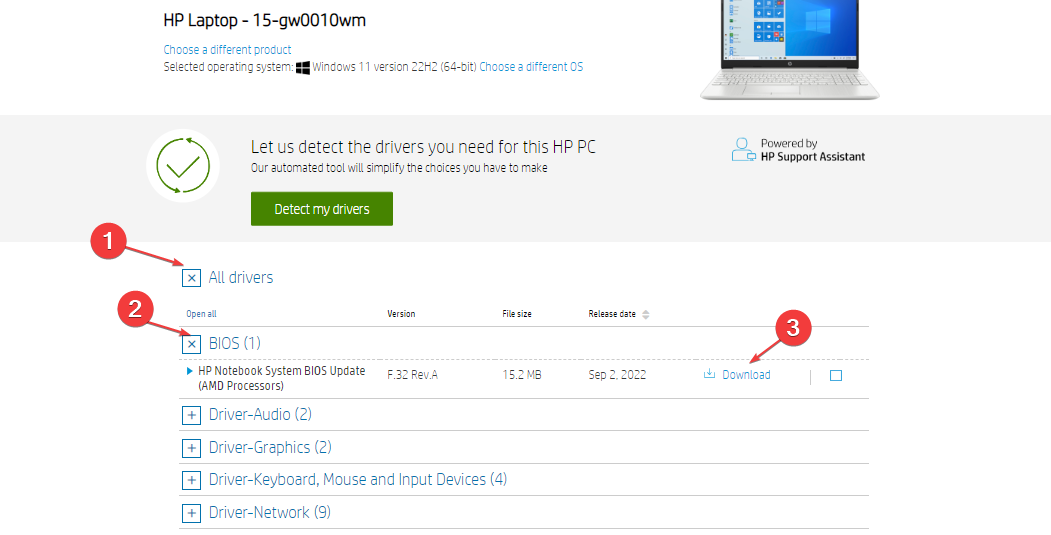
- Then, expand the All Drivers tab, click on the BIOS tab, and select the download button.
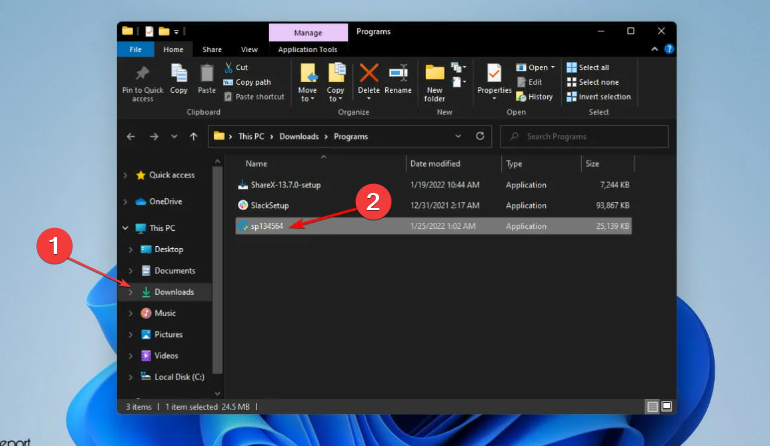
- Press Windows + E to open Windows Explorer and go to the Downloads folder. By default, all downloaded files should be in this folder.
- Install the .exe file that you just downloaded and follow the installation instructions.
- Restart your PC to apply the update.
Updating your BIOS will help restructure your PC’s hardware configurations and enable the motherboard to identify hardware, e.g., battery, more efficiently.
The steps are different, depending on the PC manufacturer. However, ensure to get the motherboard’s model number or serial number before anything.
5. Restore your Windows to a previous point
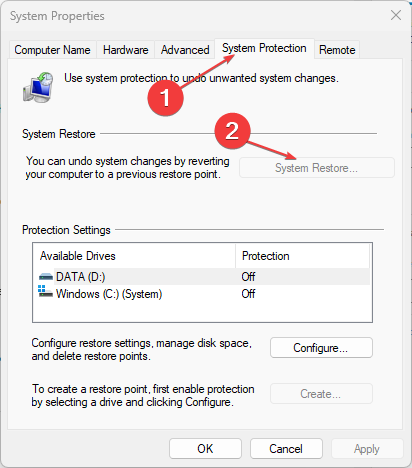
- In your Windows search, type in restore, and click on Create a restore point.
- Navigate to the System Protection tab and hit click on the System Restore button.
- The window that opens will display the recent system from the most recent to the oldest versions.
- Choose a restore point saved before the Power Options became greyed out.
- Click the Finish button and restart your PC.
If you know the timeline before the Power Options became greyed out, you can restore your PC to an earlier Windows version.
If you don’t know how to create a system restore point, then follow this guide for an overview.
Ensure to follow all the steps outlined above to fix your Windows Power Options if some options are greyed out.
If you have further queries or suggestions about this guide, kindly use the comments section below.






User forum
0 messages