How to Delay Actions in Windows Task Scheduler
Learn the procedure to delay startup tasks
Key notes
- You can set delay some of the startup actions and tasks using Windows Task Scheduler instead of deleting them to improve the system bootup time.
- Go through this detailed guide to learn how to delay some of the non-essential or less-priority startup tasks for a time period easily.
The Windows Task Scheduler is an important Windows tool that helps automate certain tasks to run during startup. Unfortunately, this can delay or the startup increasing the startup time of your PC.
Interestingly, it is possible to optimize your PC’s startup time without disabling the startup items. To achieve this, you need to schedule some of the startup actions after a bit of delay. If you want to know how to delay the actions using Windows Task Scheduler to improve the overall PC performance, we’ve got you covered.
How does task delay impact the system resources?
Delaying the startup tasks or actions in the task scheduler prevents them from booting at the exact time when the system boots up. This eliminates the need to delete some essential startup tasks and prevents system resource overutilization.
Using the task scheduler to set up a calculated delay in the execution of advanced tasks and actions during startup significantly reduces the time Windows takes to boot, thereby preventing the system from freezing or crashing abruptly. This significantly refines the overall system performance, especially for configurations of PCs.
How do I delay tasks using Task Scheduler?
1. Launch Task Scheduler
- Press the Windows key to launch the Start menu, and type task scheduler in the top search bar.
- Right-click Task Scheduler in the search results and choose Run as administrator from the context menu.

- Press Yes on the User Action Control popup to launch Task Scheduler with administrative privileges.
2. Task Creation
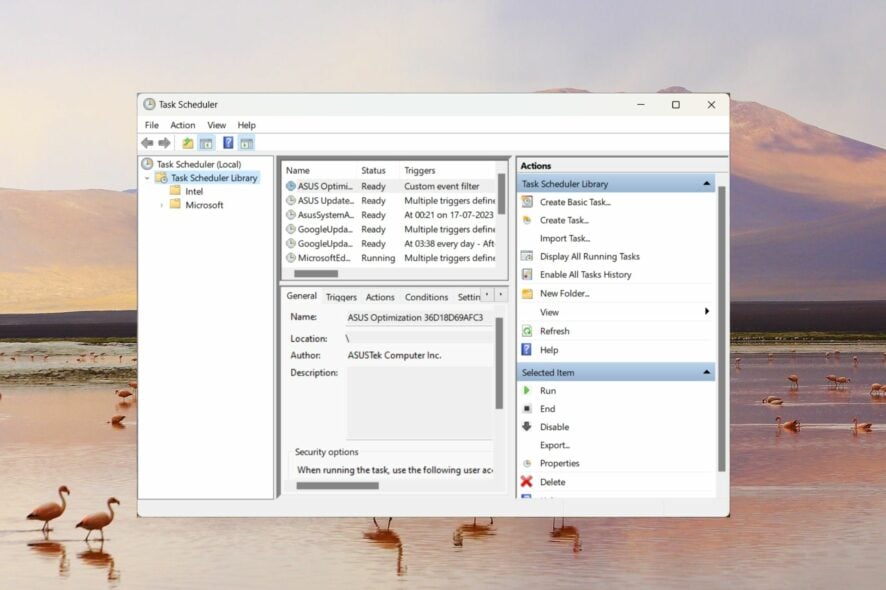
- Click the Task Scheduler Library option located on the left sidebar to view the list of tasks in Task Scheduler window.
- Next, choose Create Task option from the right sidebar to access the Create Task window.

- Now provide a name and description of the task in the relevant sections.
- Enable the checkbox next to Run with the highest privileges if you need to prioritize this task over others as several other tasks are dependent on it.

3. Assign a trigger
- Next, switch to the Triggers tab and press the New button located on the bottom left.

- Expand the Begin the task drop-down menu and select the At Startup option from the list of triggers.
- Proceed to the Advanced settings section and enable the checkbox preceding the Delay task for up to (random delay) option and assign the suitable period of time (ranging from 30 seconds to 1 day) using the drop-down menu.

- Press the OK button to save the changes and close the window.
Now that you have created a new task trigger and assigned the delay time for the startup task using the Task Scheduler, you need to set the action using the steps mentioned below.
4. Choose an action
- Next, switch to the Actions tab of the New Task window and press the New button at the bottom.
- Expand the Action dropdown in the New Action window and choose Start a program from the list of options.

- Now press the Browse button and choose the executable file for the program that you want to delay at startup.
- Press the OK button to save the changes and exit the New Task window.
5. Test the task
- Now right-click the newly created task in the Task Scheduler and choose the Run option from the context menu to test the task execution process.

- If the newly created task was successfully configured, it will execute immediately without any errors.
- Finally, exit the Task Scheduler and restart your PC to view the results.
In case the new task scheduled using Task Scheduler does not run on your Windows PC, you can refer to this guide for help.
Common mistakes to avoid in delaying tasks using Task Scheduler
Now that you know the step-by-step procedure to configure a task or action to run with delay after the system starts up, let’s look at some important mistakes you should avoid when delaying actions using the Task Scheduler:
- Incorrect delay timings – Assigning an incorrect delay period might prevent the task from running at the scheduled time.
- Task dependencies – You must analyze the tasks scheduled in the task scheduler to determine the task dependencies and ensure that the essential tasks on which others are dependent are executed first.
- Task priority – You must always prioritize the valuable tasks using the Task Scheduler and delay tasks with low priority and fewer task dependencies.
That’s all about this guide! We hope that you can easily delay actions and tasks using the advanced settings of the Windows Task Scheduler program to improve the startup time and optimize your system’s performance.
Before you leave, you might be interested in some of the essential Task Scheduler tips and tricks to improve your task management skills on a Windows PC or how to open a website automatically using Task Scheduler.
If you have any suggestions or feedback, do let us know in the comments section.
Read our disclosure page to find out how can you help Windows Report sustain the editorial team. Read more


Improve this guide


User forum
0 messages