7 Ways to Enable or Disable Startup Apps on Windows 11
Take control of your startup programs with these easy methods
Key notes
- Are you trying to clean up your Startup programs’ list? You don’t need some of these programs as they leave a high memory footprint.
- Here’s how to enable and disable these apps using Windows Registry and other tools including a third-party program.

When you switch on your computer, it takes some time for Windows to boot up. This is mainly because the applications perform their tasks in the background. These applications are called startup apps.
While they make work easier, they can be disabled if they do not benefit your computer. If you have been wondering how to improve your boot time, we share which apps to disable and how to disable them.
Why should I enable/disable startup apps?
When you turn on your PC, it launches several applications automatically. Startup apps can be either good or bad for your computer. So, what are the advantages of enabling startup apps?
- They save time since they launch automatically when your system boots up. This lets you get on with what you must do as soon as possible.
- Startup apps also reduce potential security risks, especially if you have enabled antiviruses as startup apps to check for malware immediately after your system boots up.
Now, onto the disadvantages:
- If you have multiple startup applications that are set to run at startup automatically, they can significantly slow down the time needed for your computer to boot up. This is because each of these applications needs to load before the operating system will continue booting up, which can affect your system’s performance.
- Some startup apps can lead to performance issues or even drain your battery faster than normal because they’re running continuously whether or not they need to do anything at any given moment.
- Too many unnecessary startup apps can eat up your RAM. If your PC is low on memory, you’ll have problems operating your PC, such as freezing random crashes.
- It can take a long time to boot your PC. The time your computer takes to boot up is directly proportional to the number of startup apps you have loaded. Therefore, the more apps you have running at startup, the longer it will take for your computer to boot up completely.
Disabling will help reduce memory usage on your computer and improve its overall speed and performance by making available more memory for other programs that need it urgently.
You can also follow a dedicated guide on how to make a program run on startup in Windows 11 when you want specific apps to launch automatically as soon as the system boots.
How do I change what programs run at startup?
1. Use the Task Manager
- Hit the Windows key, type Task Manager in the search bar, and click Open.
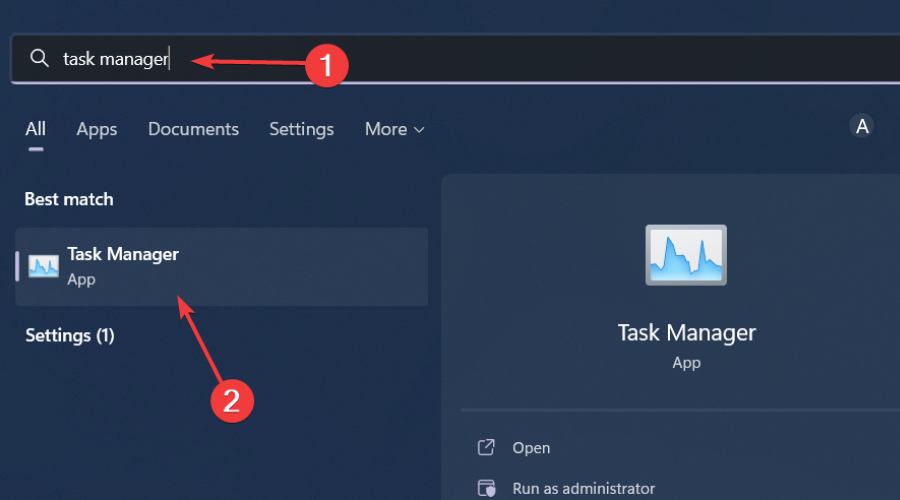
- Navigate to the Startup tab to view the list of startup apps.
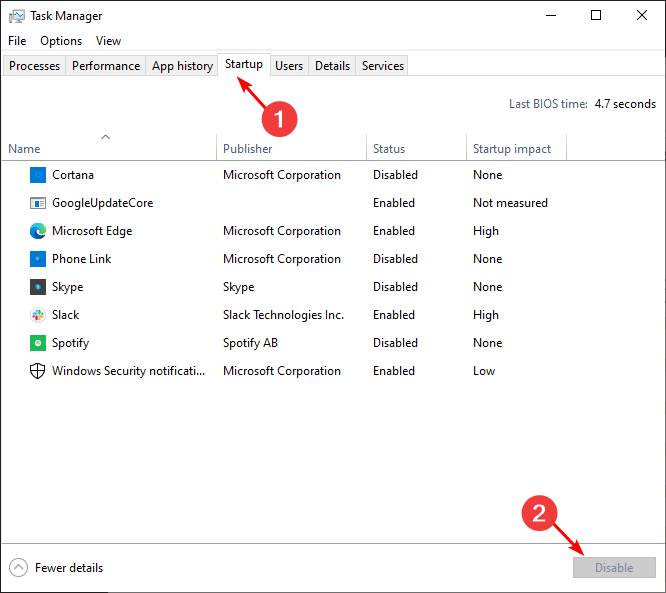
- Go through the list and select each app you want to disable or enable by clicking on the options at the bottom.
2. Use Settings
- Hit the Start Menu icon and click on Settings.

- Click on Apps on the left pane then select Startup on the right pane.

- A list of apps on Startup will appear. Toggle the off button to disable and the on button to enable.

If you are unsure which apps to disable, you can sort by high impact. The difference between a high-impact and low-impact app is the amount of resources they use.
High-impact apps are programs that require a lot of resources to run. These programs can slow down your computer if you have too many running simultaneously.
Low-impact apps are lightweight applications that don’t take up much space on your hard drive or require much power from your computer’s CPU or RAM.
You can, therefore, balance between the two categories and only enable the necessary apps.
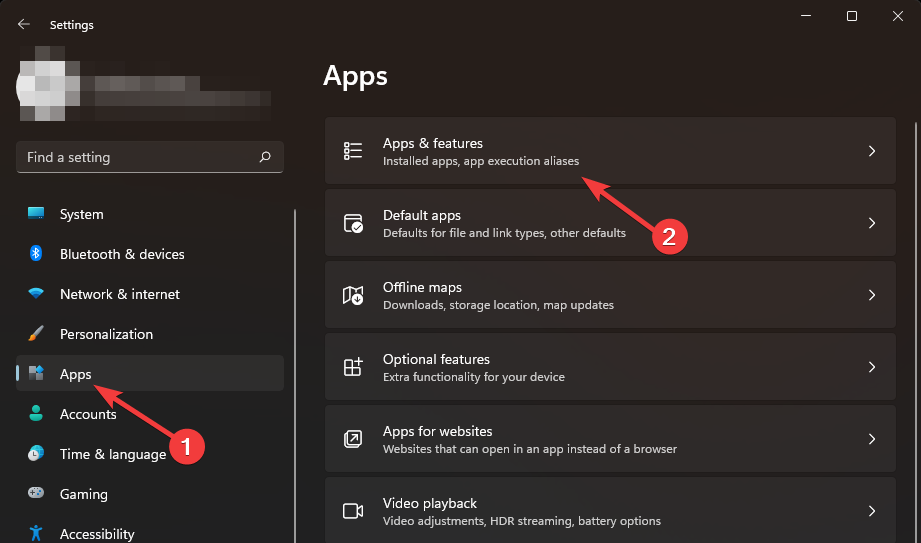
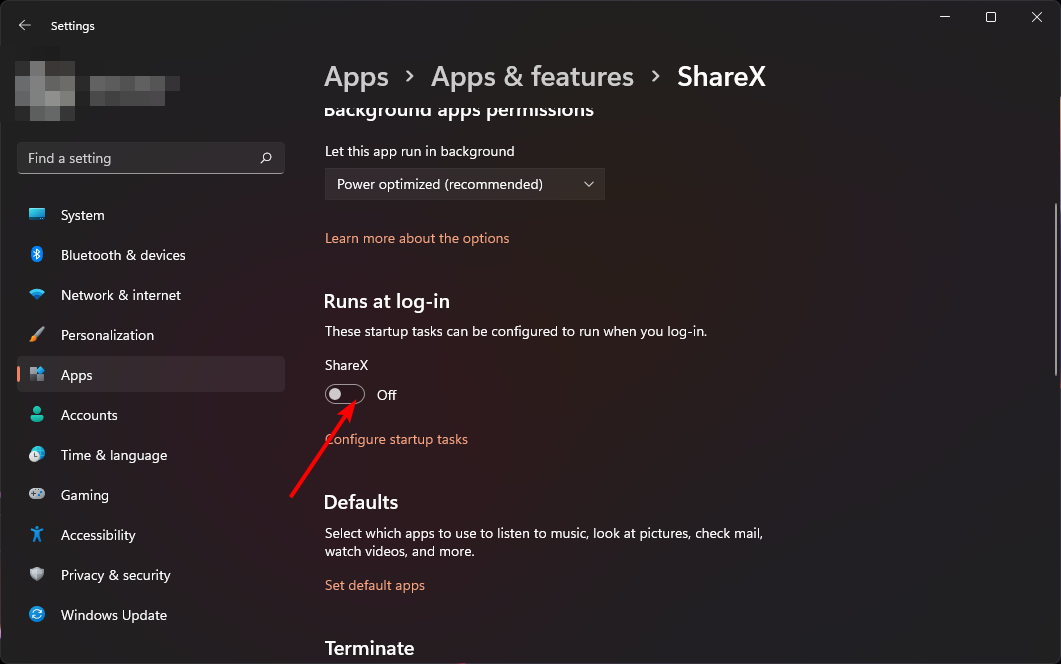
3. Use app built-in settings
- Hit the Windows key and click on Settings.
- Click on Apps on the left pane then select Apps & features.
- Examine the list and find the apps you want to disable on Startup.
- Click on the three ellipses of the select app and click on Advanced options.
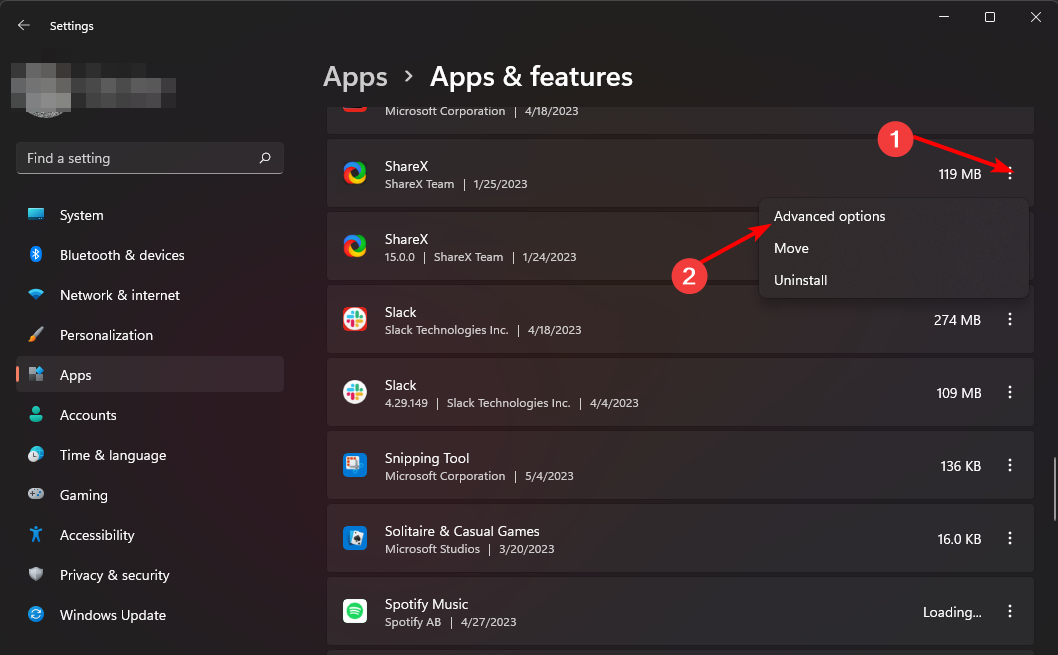
- Under Runs at log-in option, toggle the Off button to disable and back on to enable.
If you want to remove the app from your computer completely, we have a great guide to remove apps using PowerShell to get the work done using a single command.
4. Use a third-party app
Although Windows offers a handful of options to change startup programs in Windows 11, you may have noticed that these steps are somehow cumbersome and can take a significant amount of time, especially if you have a lot of programs.
You don’t have to go through this excruciatingly painful process when installing a third-party tool. Startup managers are incredibly helpful in managing your startup apps, so you should consider installing one.
CCleaner is our recommended fighter, and this is how to go about it.
- Download and launch the CCleaner app.
- Click on the Tools option, then select Startup.

- Navigate to the Windows tab and select the app you want to enable or disable by clicking the options on your right.
5. Use the Startup folder
- Hit the Windows + R keys to open the Run command.
- Type in shell:startup in the dialog box and hit Enter to open the Startup folder.
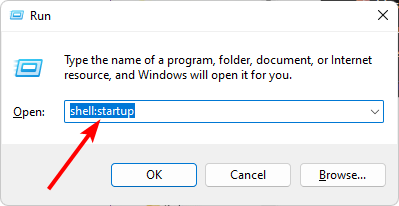
- Select the app you want to disable then click on the trash icon to delete. To enable, restore this folder from the Recycle bin.
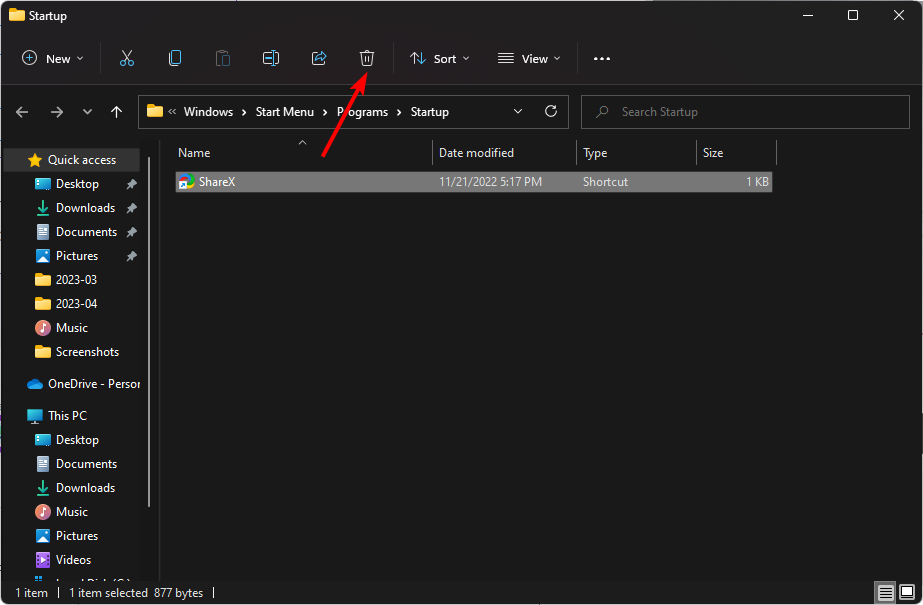
- If you want to add a new startup program, find the executable file and drop it in the startup folder.
Should you find out that your Startup folder is not working, we have an excellent article on how to bypass this issue.
6. Use System Configuration
- Hit the Search icon on the taskbar, type msconfig, and click Open.
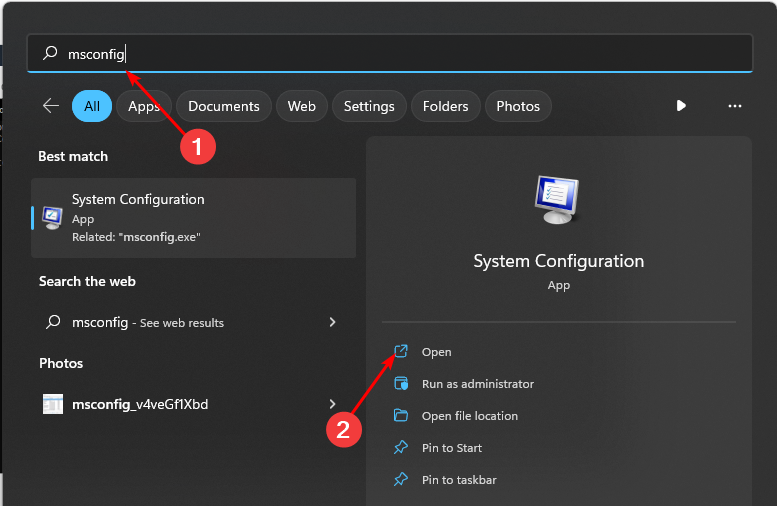
- Navigate to the Services tab and click Open Task Manager to view all the startup programs.

- Go through the list click and disable all the apps you want to disable, then check those you want to enable.

- Restart your PC for the changes to take effect.
7. Use the Registry Editor
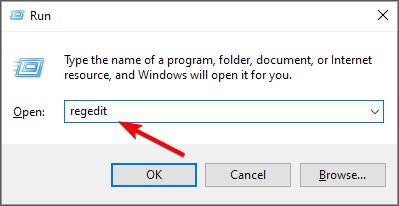
- Hit the Windows + R keys to open the Run command.
- Type regedit in the dialog box and hit Enter to open the Registry Editor.
- Navigate to the following location:
Computer\HKEY_LOCAL_MACHINE\SOFTWARE\Microsoft\Windows\CurrentVersion\Run - A list of startup apps will appear on the right.
- Right-click on those you want to disable then select Delete to remove startup programs from Registry in Windows 11.
- To enable a new startup program, right-click on Run in the left pane and select New String value.

- In the Value name entry, set it to the name of the program you want to enable. For instance, Slack in this case.
- Under Value data, enter the path location of the app, then hit Enter.
- Repeat these steps for all the apps you want to enable for startup.
As a disclaimer, changing any portion of the Registry can have unpredictable effects on your computer. The scary thing is that some may not even be immediately apparent.
If you aren’t comfortable making Registry changes, don’t do it. However, if necessary, create a restore point first to act as a safety net. This way, should anything happen, you can revert to an earlier time when your PC was functioning correctly.
You can also look at ways to optimize your startup to minimize the excessive use of resources. Also, check out how to disable startup apps in Windows 10.
And that’s how to change startup programs in Windows 11. Let us know of any additional thoughts you may have on this topic down below.
Read our disclosure page to find out how can you help Windows Report sustain the editorial team. Read more


Improve this guide


User forum
0 messages