FIX: Xhunter1.sys blue screen errors in Windows 10/11
Key notes
- Xhunter1.sys blue screen issues can arise due to faulty hardware, antivirus software, outdated or incompatible drivers, and virtual memory.
- Disabling Windows Security or third-party antivirus features might fix this problem for some users.
- Some built-in Windows 10 system tools can fix corrupted system files and this error message.
- If you’re getting PUBG blue screen in Windows 10, perhaps you should try using different Android emulator on your PC.

Xhunter1.sys is a third-party driver file for the XIGNCODE3 System Guard anti-cheat engine. Some players have said in support forums that xhunter1.sys blue screen errors occur when they try to play certain games.
These are two widely cited BSOD error messages that reference the xhunter1.sys file:
- PAGE_FAULT_IN_NONPAGED_AREA
- DRIVER_IRQL_NOT_LESS_OR_EQUAL
Quite a few players have reported that xhunter1.sys blue screen errors can arise when trying to play (or install) PUBG Lite (now discontinued) and PUBG Mobile with Android emulators, such as Tencent Gaming Buddy.
In today’s guide, we’re going to take a closer look and show you how to fix this problem.
How can I fix xhunter1.sys blue screen errors?
1. Fix BSOD errors with Windows repair software
The best Windows repair software can be invaluable tools for fixing blue screen errors. There are numerous third-party BSOD repair tools with which users can scan their PCs to detect issues.
Then all users usually need to do is click fix buttons for those utilities to weave their magic!
Using a specialized tool will provide efficient help to avoid serious screen errors on your Windows PC. Such a method is practically designed to repair malfunctioning system files and replace them.
All in all, restoring your PC from this kind of BSoD error using professional repair tools is the most reliable method of all.
2. Disable Automatically manage paging file size
- First, click the magnifying glass taskbar button, which will open Windows 10’s search tool.
- Type the keyword system in the search box.
- Click System to open the window in the screenshot directly below.

- Next, click Advanced system settings to open the System Properties window.

- Click Settings on the Advanced tab to open a Performance Options window.
- Then select the Advanced tab in Performance Options.

- Press the Change button to open the Virtual Memory window.

- Uncheck the checkbox for the Automatically manage paging file size for all drives option to deselect it.
- Select the No paging file radio button.
- Press the Set button, and select Yes to confirm.
- Click the OK button to close the window.
- Restart Windows after disabling Automatic manage paging.
Once you make this change, check if xhunter1.sys Blue Screen still appears.
3. Disable antivirus software
- Click the Windows Security system tray icon.
- Next, click the Virus & threat protection button on Windows Security’s sidebar.
- Select Manage settings to open the options shown directly below.

- Toggle off the Real-time protection option to disable the antivirus tool.
If you’ve installed a third-party antivirus utility, you’ll need to disable that. To do so, right-click the antivirus tool’s system tray icon and select a disable/shut down context menu option.
Select to disable it for a few hours, and then try playing the game the BSOD issue arises for.
4. Use a different Android emulator
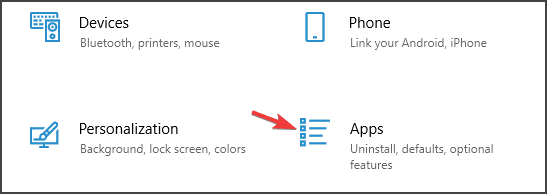
- Open the Settings app.
- Select Apps.
- Locate your current Android emulator, select it and click on Uninstall.
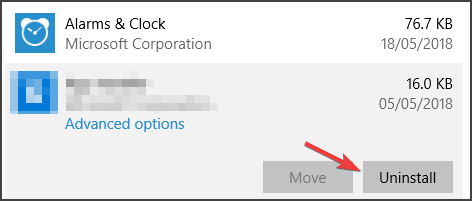
- Follow the instructions on the screen to complete the process.
Once the emulator is removed, try switching to a different emulator. You can use any emulator that you want, but for the best performance, we suggest using LD Player.
5. Update Windows 10
- Click the Settings button on the Start menu in Windows 10.
- Select Update & Security to open the Windows Update tab.

- If there’s a Windows feature update available, click the Download and Install option for it.
- Click the Check for updates button to install available patch updates if you can’t update your Windows version.
Once your system is up to date, check if xhunter1.sys blue screen still appears.
6. Run the Windows Memory Diagnostic tool
- Open the search text box in Windows 10.
- Input Windows Memory Diagnostic in the search box to find that tool.
- Click Windows Memory Diagnostic to open the window in the shot directly below.

- Then select Restart now and check for problems within the WMD tool.
- Thereafter, WMD will display results after the restart. If it detects RAM errors, you might need to replace one of your PC’s RAM modules.
 NOTE
NOTE
7. Scan system files
- Type Command Prompt in Windows 10’s search box.
- Right-click the Command Prompt search result to select a Run as administrator option for it.
- Input this command in the Prompt’s window and press Enter:
DISM.exe /Online /Cleanup-image /Restorehealth - When the Deployment Image scan is complete, type in this command and press Enter:
sfc /scannow
- Wait for the SFC scan to reach 100 percent verification.
- If the scan’s outcome tells you Windows Resource Protection repaired files, restart your desktop or laptop.
8. Run a Chkdsk scan
- Open the Command Prompt as an administrator as outlined in the first two steps of the previous resolution.
- Type in this Chkdsk command:
chkdsk /f /r
- Press the Enter key to initiate the Chkdsk scan.
9. Restore Windows to a previous date
- Press the Windows key and X at the same time, and select Run on the menu that opens.
- To open System Restore, enter the following Run command in the Open box and click OK:
rstrui
- Select a Choose a different restore point option if System Restore presents that option to you, and click the Next button.
- Then select the Show more restore points checkbox to view a full list of restoration dates.

- Choose a restoration point that will restore Windows to a time when there wasn’t a xhunter1.sys blue screen issue on your PC.
- Select the Next option to proceed to the confirmation step.
- Finally, click Finish to roll Windows 10 back to your selected restoration point.
 NOTE
NOTE
The above potential resolutions can feasibly fix many xhunter1.sys blue screen errors, but aren’t necessarily guaranteed for all users.
In addition, try resetting Windows 10, as outlined within our factory reset guide, as a last resort. Also, check out Microsoft’s BSOD troubleshooter for further potential fixes.
Read our disclosure page to find out how can you help Windows Report sustain the editorial team. Read more


Improve this guide


User forum
0 messages