0x80071ab1: How to Fix This Windows Update Error Code
Try out 6 expert-tested methods to get rid of this error
Key notes
- When users try to install .NET Framework to effectively run an application that requires it, the 0x80071AB1 error is encountered.
- The install error – 0x80071ab1 could be caused by a problem with the Windows Update feature.
- To fix the problem, try updating Windows 11, perform a quick SFC scan, or run an in-place upgrade, amongst other fixes listed below.
Windows 11, the most advanced iteration from Microsoft, contrary to popular opinion is prone to errors. And, the worst are the ones that affect basic functioning. In this article, we will be discussing the 0x80071AB1 error.
Note that it is encountered when users try to get the .NET framework, but 0x80071AB1 shows up instead. This poses a major hurdle since a lot of apps require these to function effectively.
To fix the 0x80071AB1 error, we have dedicated this article that explains how the .NET Framework functions along with the most effective methods to eliminate the error.
In the next section, we will walk you through the methods to resolve the 0x80071AB1 error and get .NET Framework.
How can I fix the error code 0x80071ab1 in Windows 11?
1. Update Windows 11
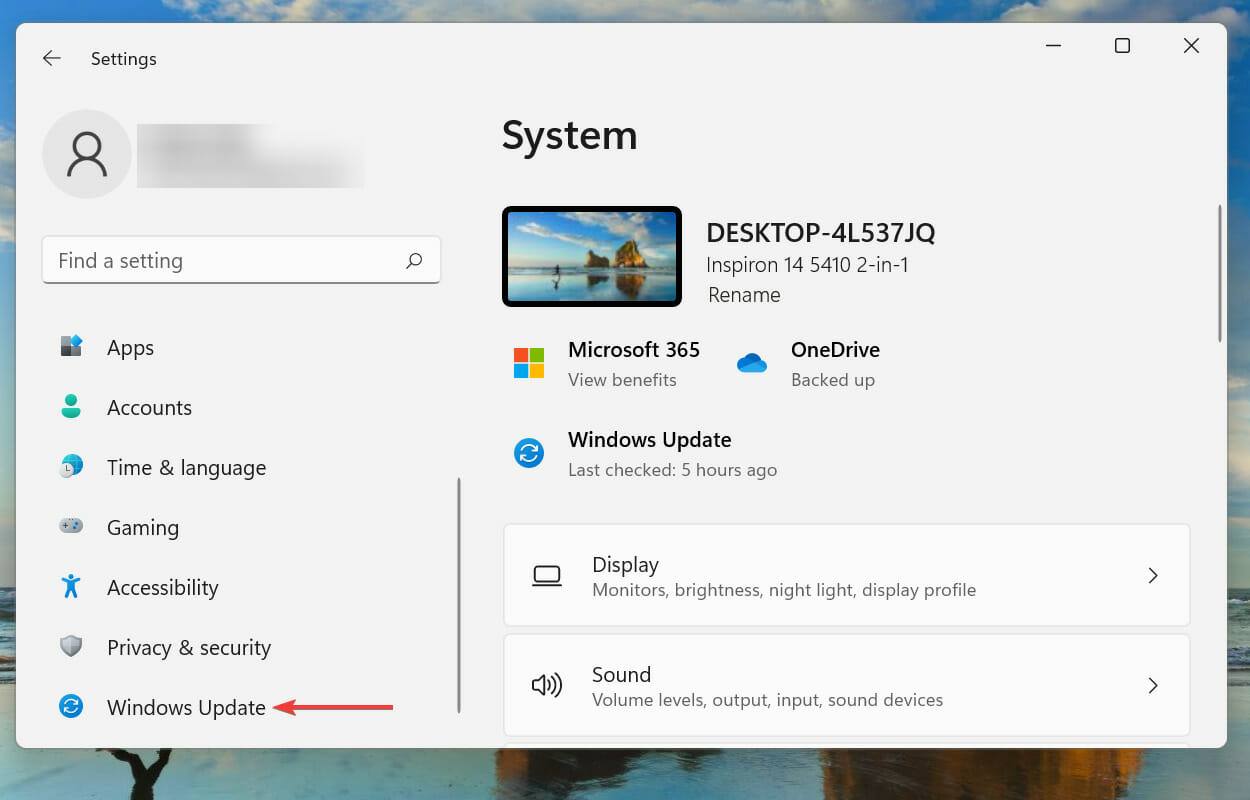
1. Press Windows + I on your keyboard to launch the Settings app.
1. Select Windows Update from the list of tabs in the navigation pane on the left.
3. Next, click on Check for updates to scan for any updates pertaining to .NET Framework.
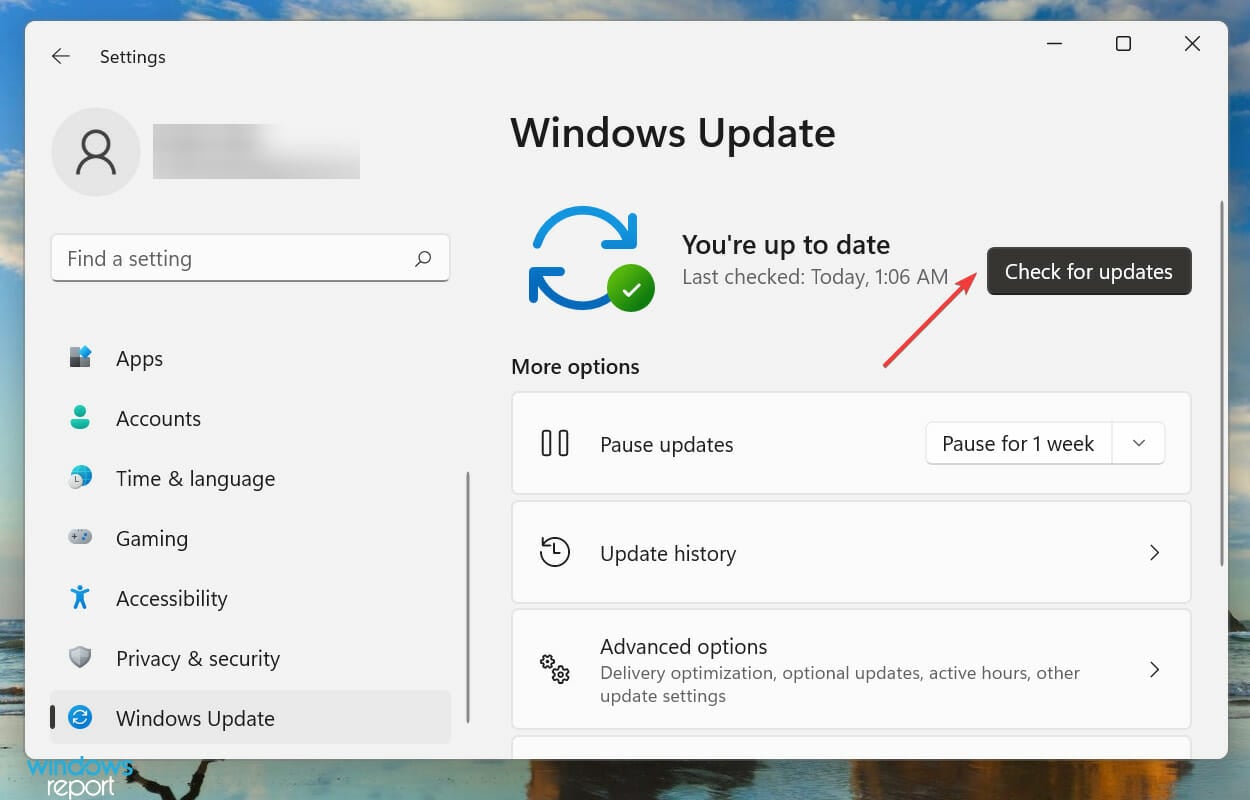
4. If any updates are found, download and install them.
5. Check whether the error persists.
The first thing you should do if you encounter error code 0x80071ab1 on your Windows PC is ensure that your device is up to date with the latest updates.
After the introduction of .NET Frameworks 3.5, any updates with respect to these were released through Windows Update. So users now don’t have to do pretty much anything other than regularly check for updates.
It is possible that the error will go away on its own after you update your Windows, and you won’t have to rely on other more complicated methods.
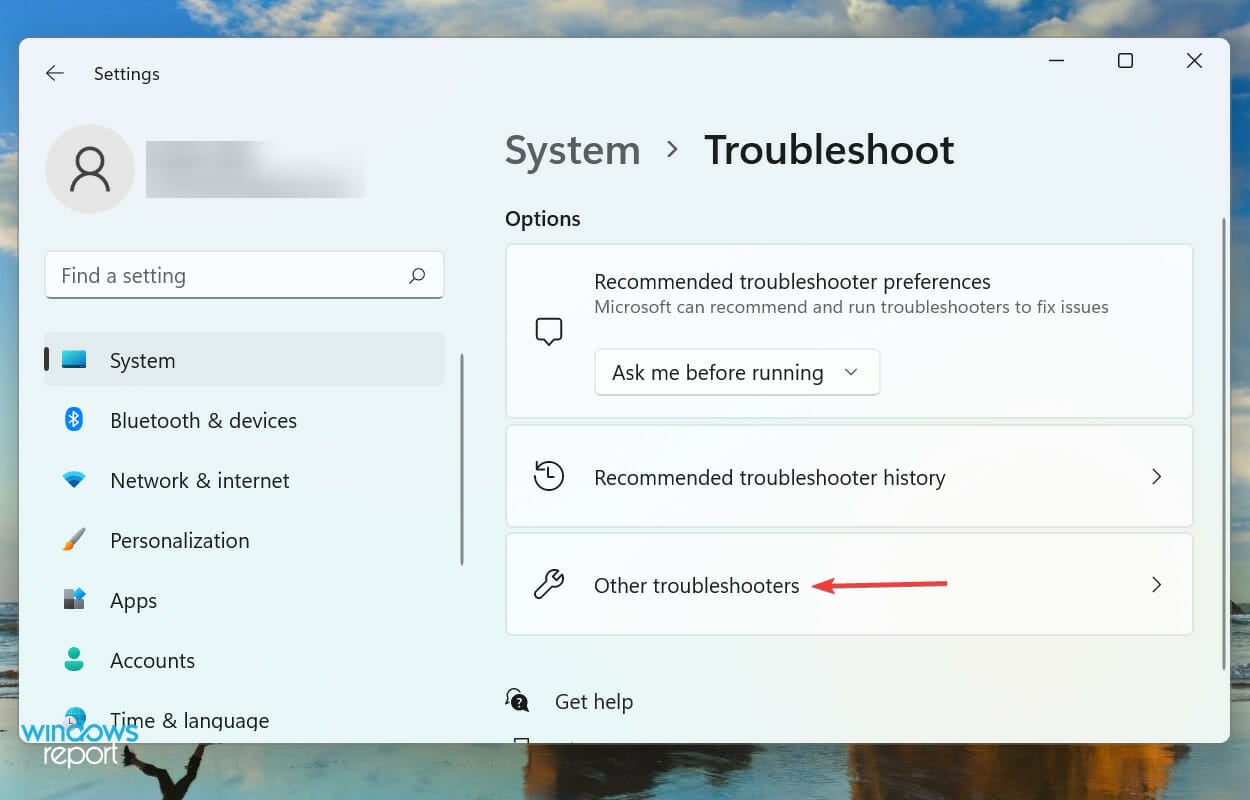
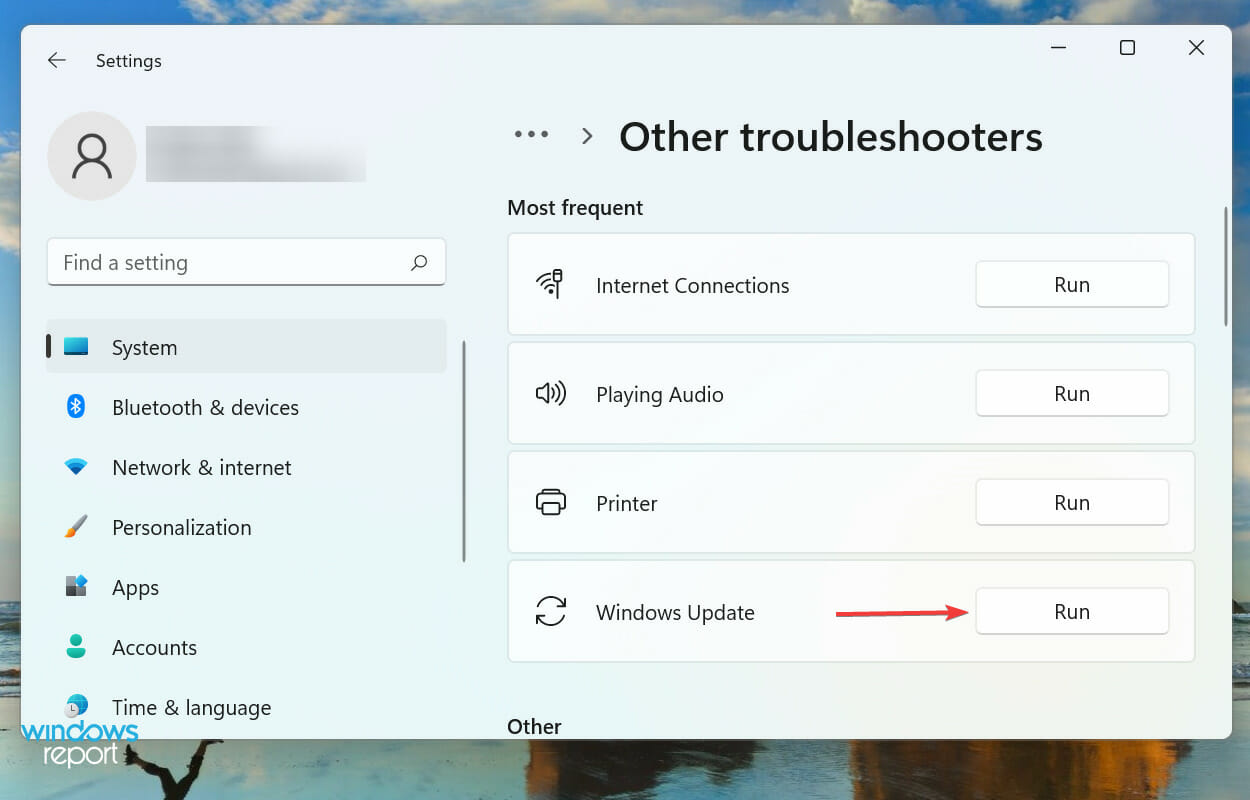
2. Run the Windows Update troubleshooter
- Press Windows + I to launch the Settings app.
- Click on Troubleshoot on the right in the System tab.

- Click on Other troubleshooters.

- Now, locate the Windows Update entry and then click on the Run button next to it.

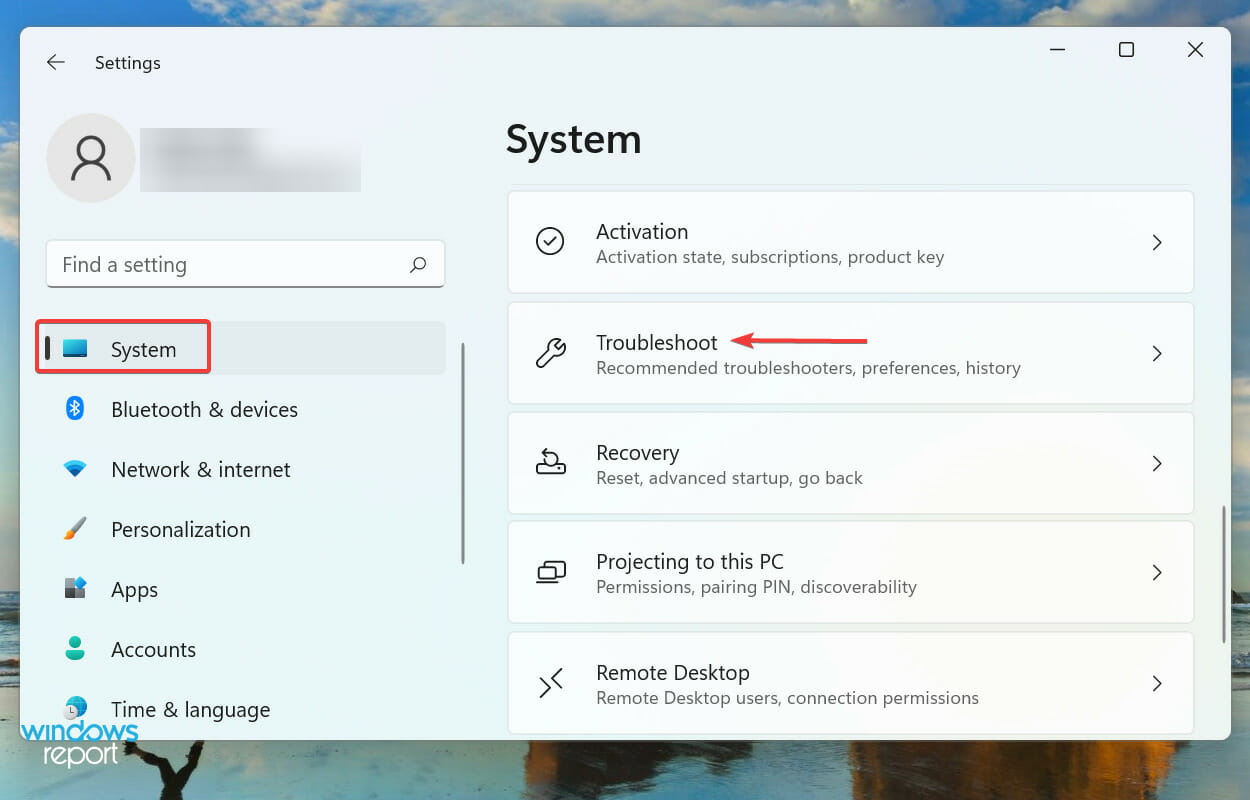
The built-in troubleshooters offered by Microsoft are pretty good at eliminating a plethora of errors, including the 0x80071AB1 Windows Update error. If .NET Framework didn’t appear in Windows Update in the last method, it could indicate a problem with the update process itself.
Hence, it’s recommended that you run the Windows Update troubleshooter to diagnose and fix the issues preventing .NET Framework from appearing in the update section.
If that does not help, you can try a specialized repair tool, which will scan your PC and fix any errors related to missing DLL files, faulty registry entries, or malware.
3. Perform a quick SFC scan
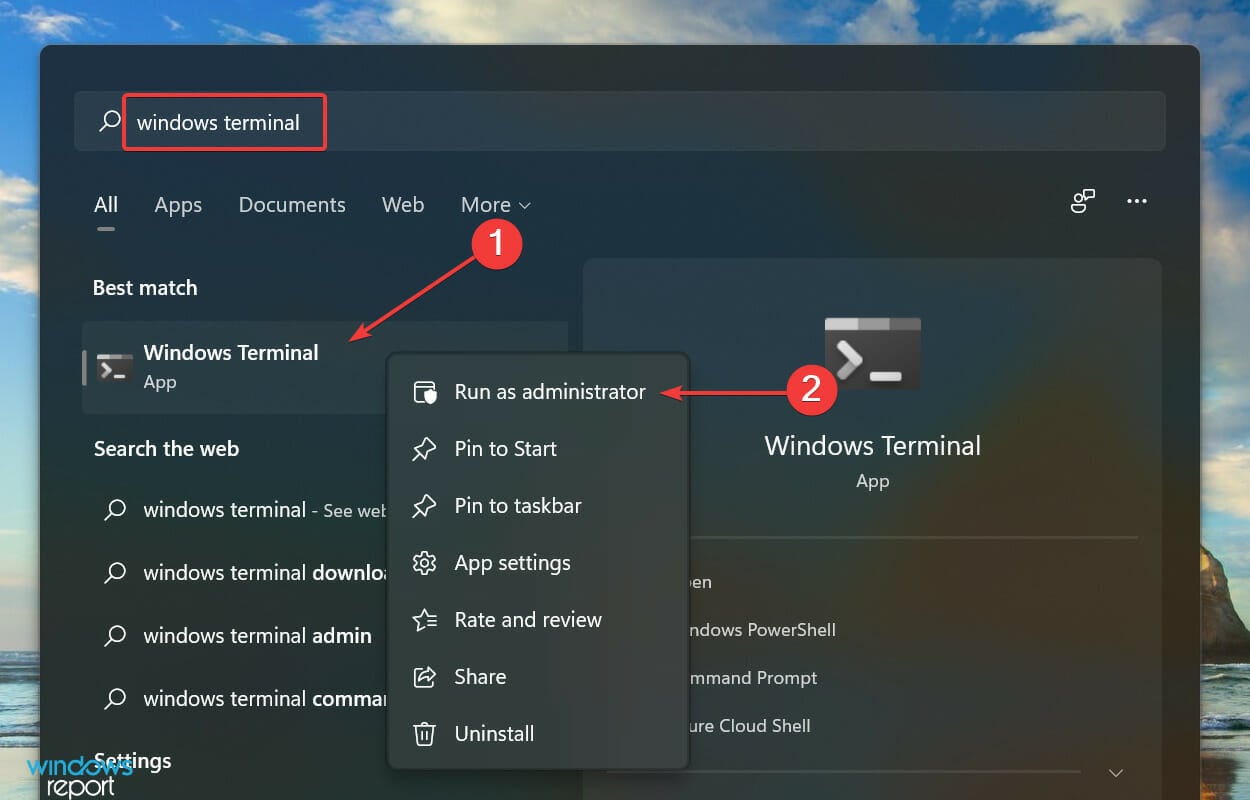
- Press Windows + S to launch the Search menu.
- Enter Windows Terminal in the text field at the top, right-click on the relevant search result, and select Run as administrator from the context menu.
- Click Yes on the UAC (User Account Control) prompt that pops up.

- Next, click on the downward-facing arrow at the top, and select Command Prompt from the list of options in the menu. Alternatively, you can hit Ctrl + Shift + 2 to launch Command Prompt in a new tab.

- Type the following command and hit Enter to run the SFC scan:
sfc /scannow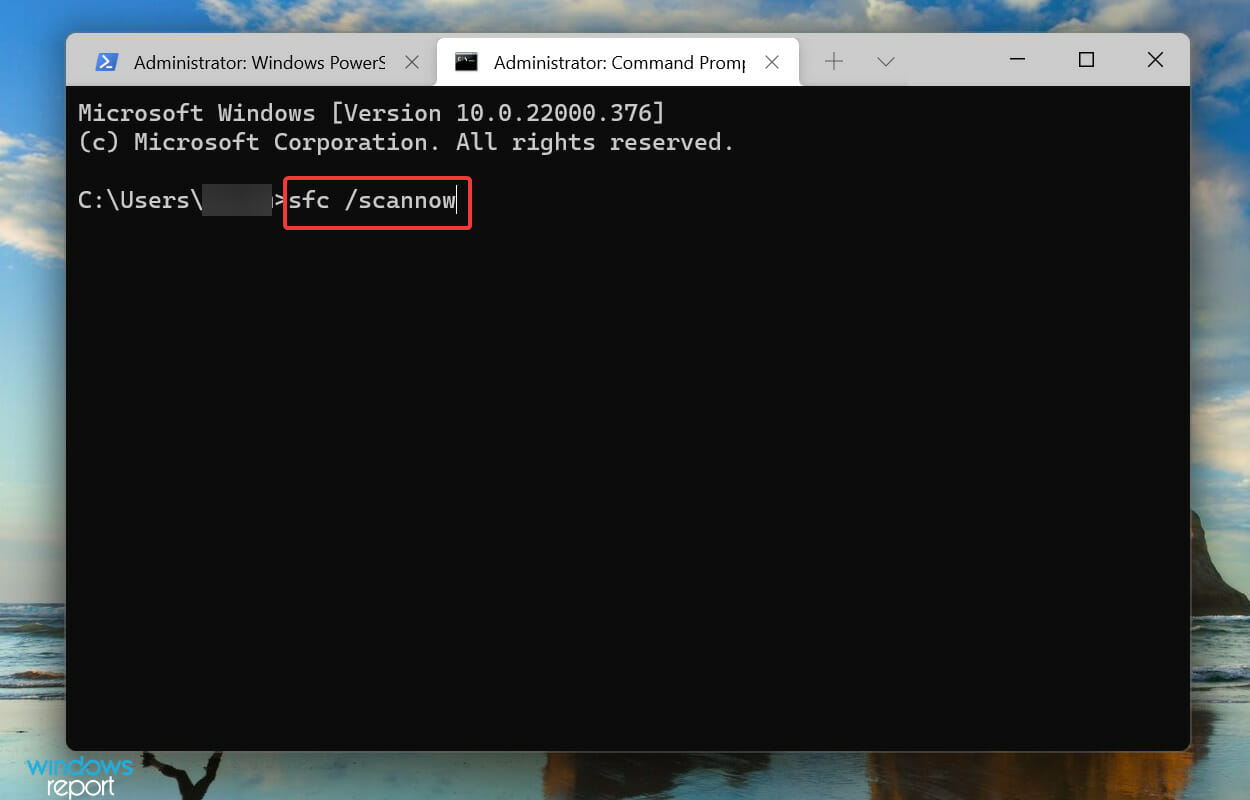
- Wait for the scan to complete, restart the computer, and check if the error is fixed,


The SFC (System File Checker) scan identifies the corrupt system files, and if any are found, replaces them with their cached copy stored on the system.
Corrupt system files are known to cause a bunch of errors including install error 0x80071AB1 in Windows 11.
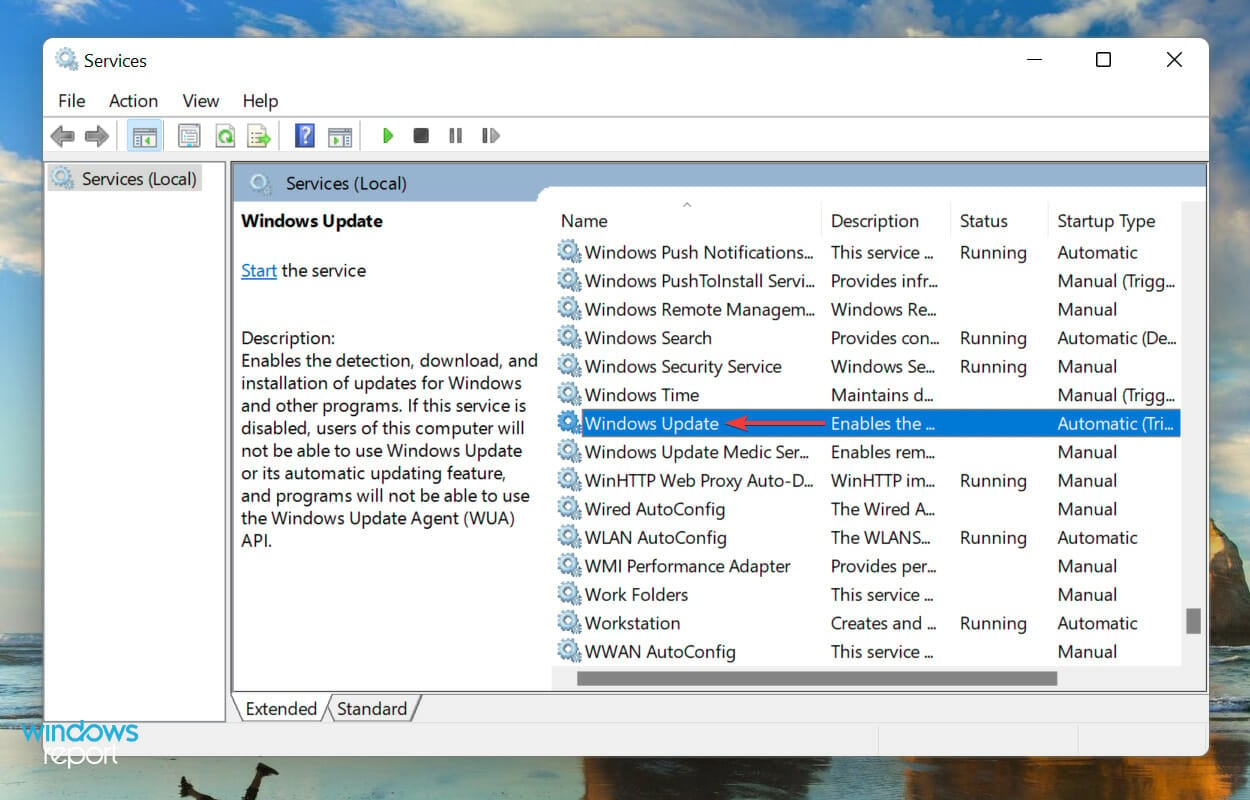
4. Run the Windows Update service
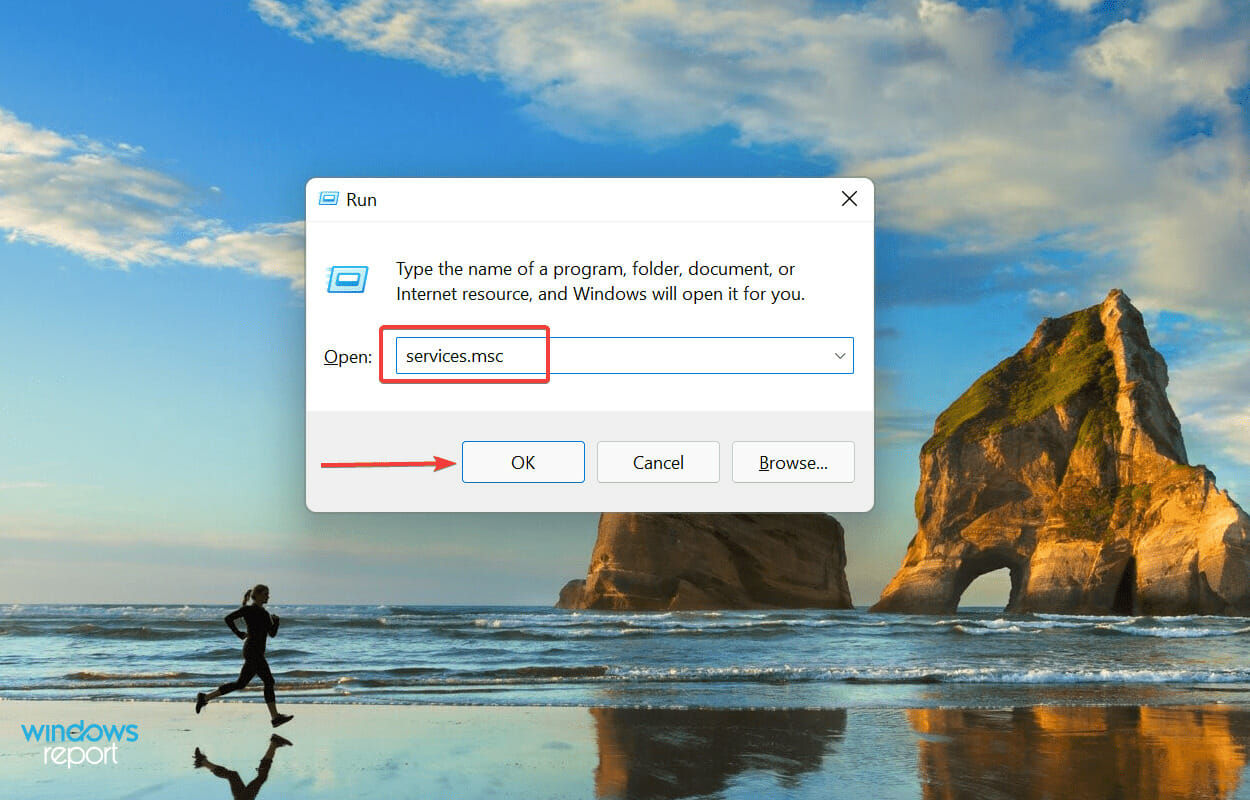
- Press Windows + R to launch the Run command, enter services.msc in the text field, and then either click on OK or hit Enter to launch the Services app.
- Now, scroll down, locate the Windows Update service, and double-click on it to launch the Properties. The services here are listed in alphabetical/reverse-alphabetical order, so it shouldn’t be difficult locating the service.
- Click on the Startup type dropdown menu, and select Automatic from the list of options.
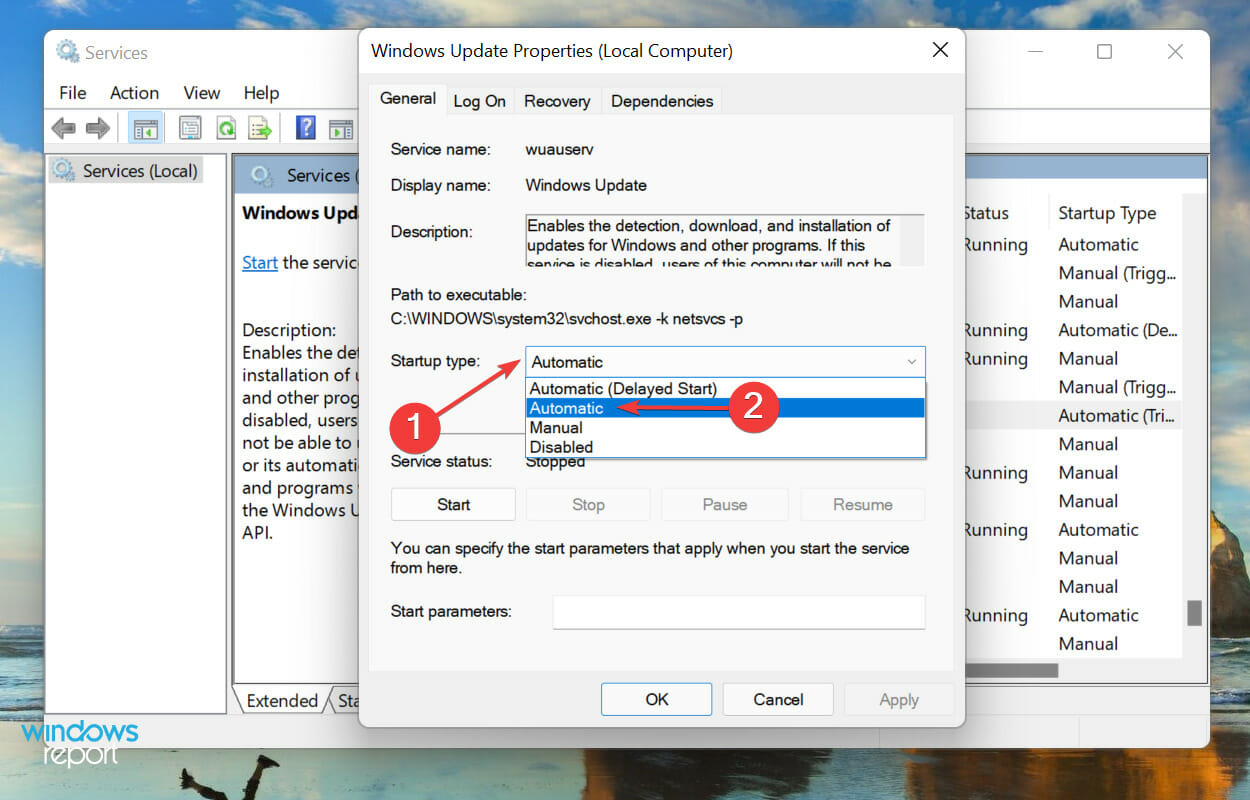
- If the service isn’t running, click on the Start button under Service status, wait for it to run, and click on OK to save the changes.


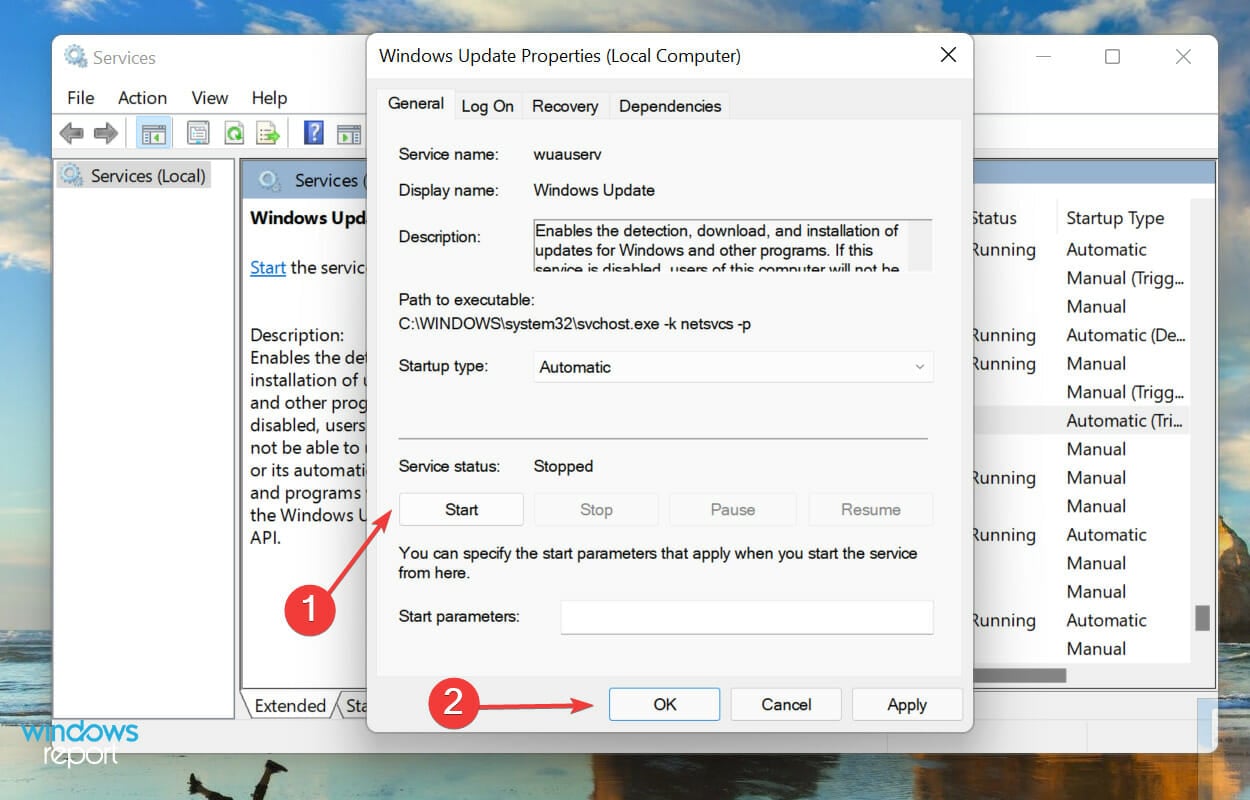
Once done, restart the computer and check if the 0x80071AB1 error is eliminated.
5. Reset Windows Update components
- Right-click on the Start icon in the Taskbar or press Windows + X to launch the Power User/Quick Access menu, and select Windows Terminal (Admin) from the list of options.
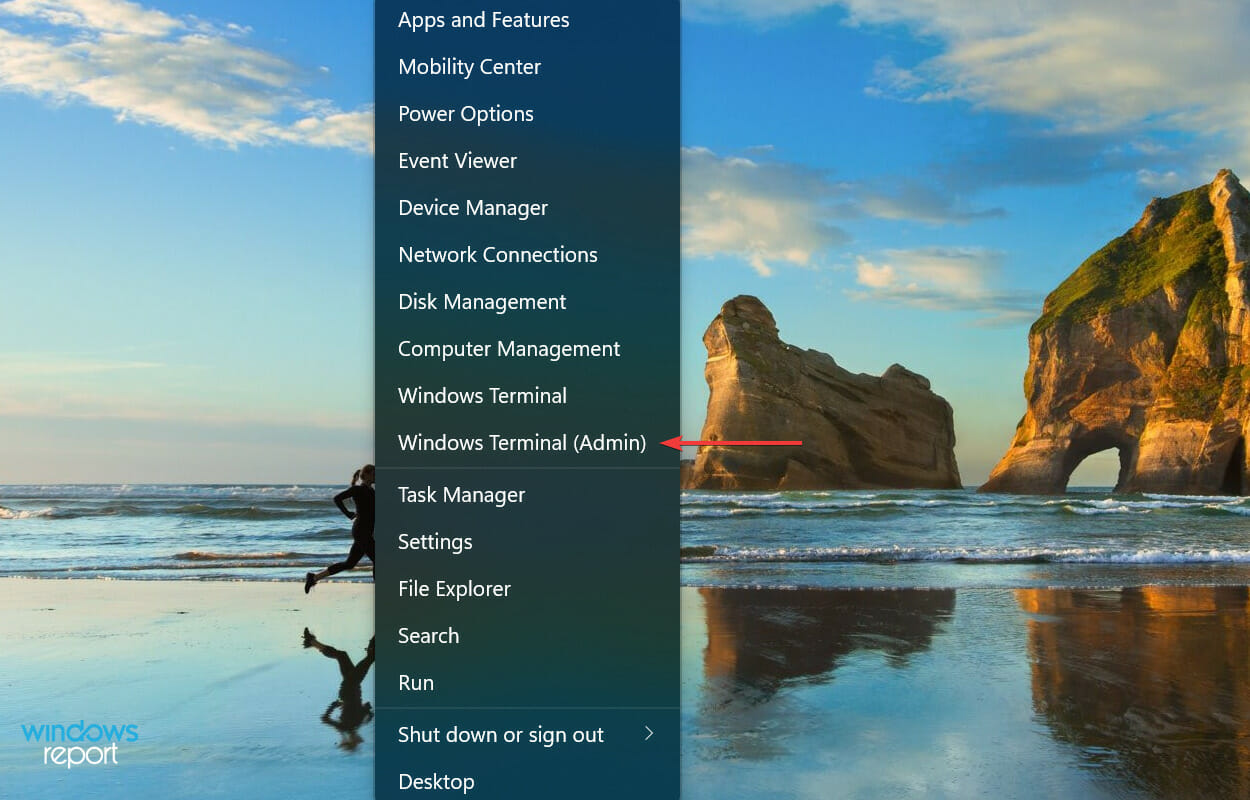
- Click Yes on the UAC (User Account Control) prompt that appears.

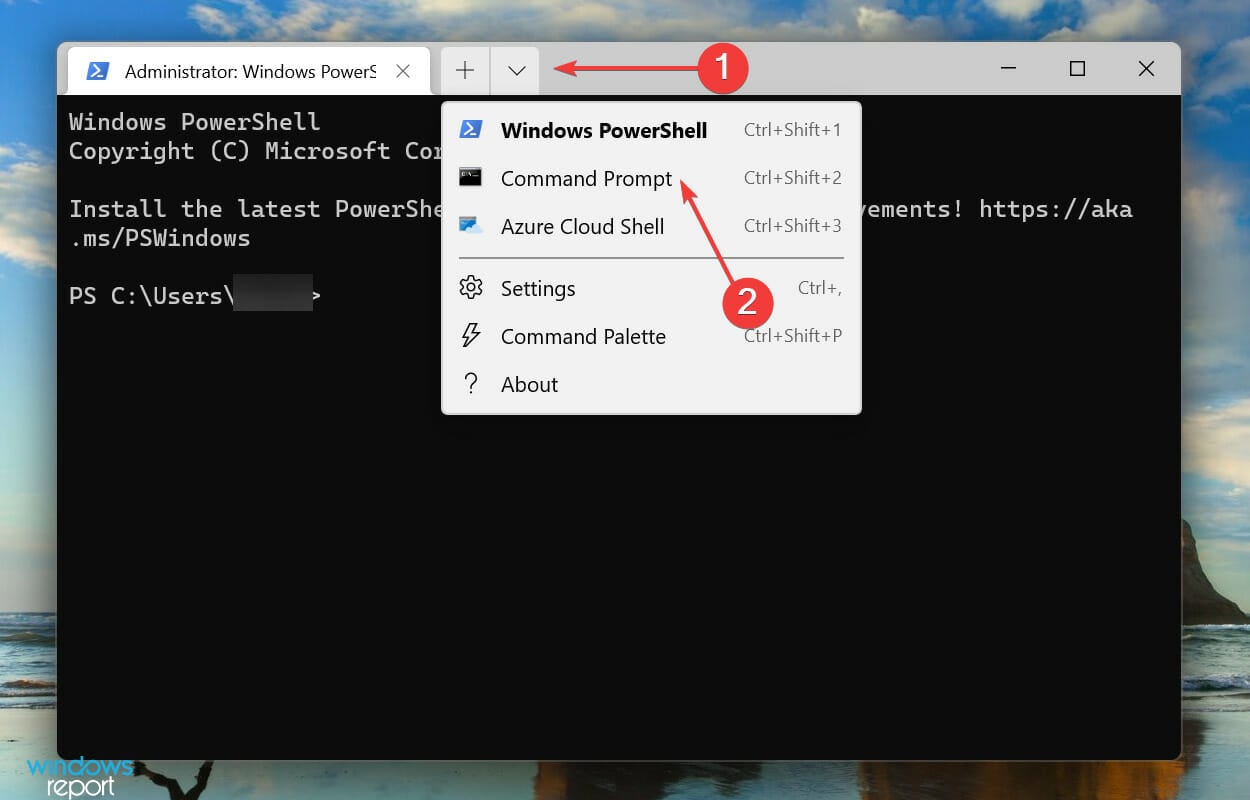
- Click on the downward arrow at the top, and select Command Prompt from the menu to launch it in a new tab.

- Now, start pasting the following commands one at a time and hit Enter after each to reset Windows Update components These two commands will stop BITS and Windows Update service:
net stop bitsnet stop wuauserv - Next, execute the following command to delete the qmgr*.dat files:
Del “%ALLUSERSPROFILE%Application DataMicrosoftNetworkDownloaderqmgr*.dat” - If this is your first attempt at resetting, skip the following three commands and move to the next step. In case it doesn’t work out, you can execute these in the subsequent attempt:
Ren %Systemroot%\SoftwareDistribution\DataStore DataStore.bakRen %Systemroot%\SoftwareDistribution\Download Download.bakRen %Systemroot%\System32\catroot2 catroot2.bak - Next, execute the following commands to reset the BITS and Windows Update service:
sc.exe sdset bits D:(A;;CCLCSWRPWPDTLOCRRC;;;SY)(A;;CCDCLCSWRPWPDTLOCRSDRCWDWO;;;BA)(A;;CCLCSWLOCRRC;;;AU)(A;;CCLCSWRPWPDTLOCRRC;;;PU)sc.exe sdset wuauserv D:(A;;CCLCSWRPWPDTLOCRRC;;;SY)(A;;CCDCLCSWRPWPDTLOCRSDRCWDWO;;;BA)(A;;CCLCSWLOCRRC;;;AU)(A;;CCLCSWRPWPDTLOCRRC;;;PU) - Paste the following command and hit Enter:
cd /d %windir%\system32 - Now, execute each of the following commands individually to re-register the critical files:


regsvr32.exe atl.dll
regsvr32.exe urlmon.dll
regsvr32.exe mshtml.dll
regsvr32.exe shdocvw.dll
regsvr32.exe browseui.dll
regsvr32.exe jscript.dll
regsvr32.exe vbscript.dll
regsvr32.exe scrrun.dll
regsvr32.exe msxml.dll
regsvr32.exe msxml3.dll
regsvr32.exe msxml6.dll
regsvr32.exe actxprxy.dll
regsvr32.exe softpub.dll
regsvr32.exe wintrust.dll
regsvr32.exe dssenh.dll
regsvr32.exe rsaenh.dll
regsvr32.exe gpkcsp.dll
regsvr32.exe sccbase.dll
regsvr32.exe slbcsp.dll
regsvr32.exe cryptdlg.dll
regsvr32.exe oleaut32.dll
regsvr32.exe ole32.dll
regsvr32.exe shell32.dll
regsvr32.exe initpki.dll
regsvr32.exe wuapi.dll
regsvr32.exe wuaueng.dll
regsvr32.exe wuaueng1.dll
regsvr32.exe wucltui.dll
regsvr32.exe wups.dll
regsvr32.exe wups2.dll
regsvr32.exe wuweb.dll
regsvr32.exe qmgr.dll
regsvr32.exe qmgrprxy.dll
regsvr32.exe wucltux.dll
regsvr32.exe muweb.dll
regsvr32.exe wuwebv.dll
10. Now, execute the following command to reset Winsock:netsh winsock reset
11. The last step is to restart the BITS and Windows Update service. Execute the following two commands to do that:net start bits net start wuauserv
After resetting the Windows Update components, check if the 0x80071AB1 error is fixed and you are able to get the .NET Framework in Windows 11.
6. Run an in-place upgrade
 NOTE
NOTE
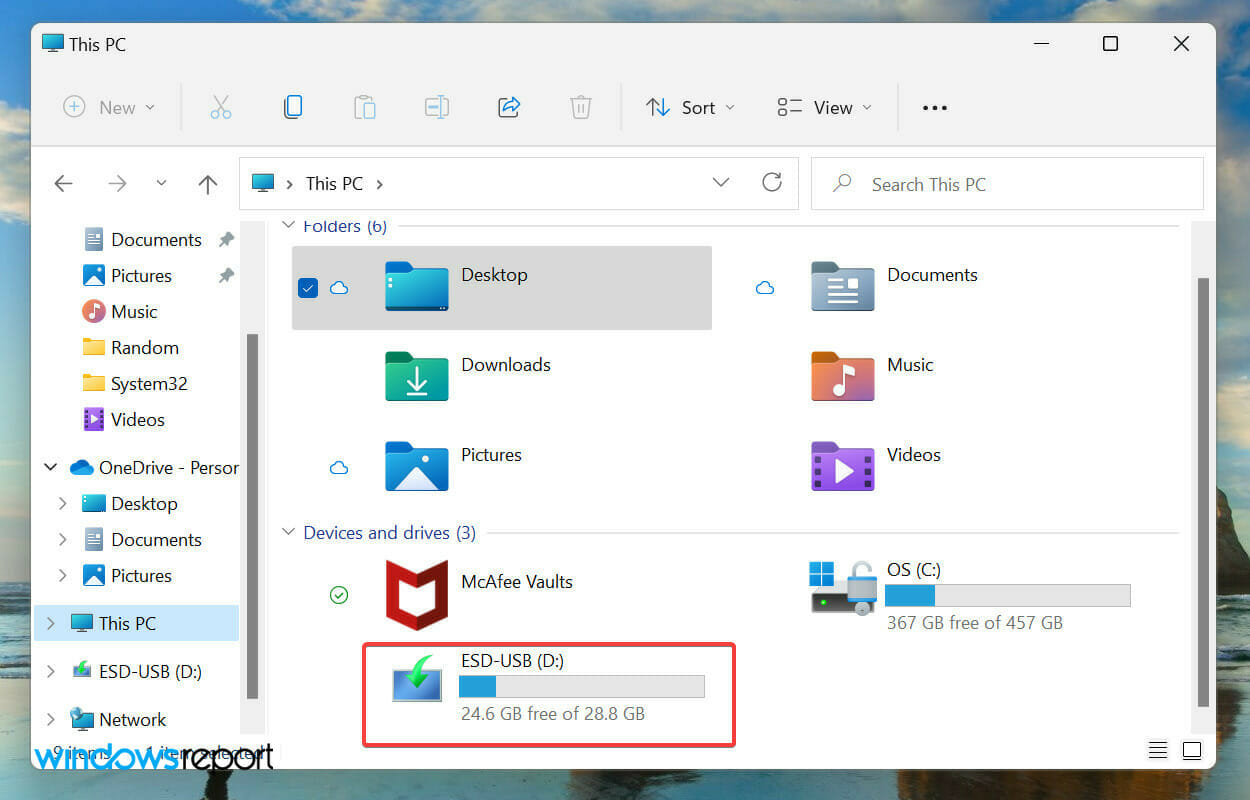
- Create a bootable USB drive for Windows 11.
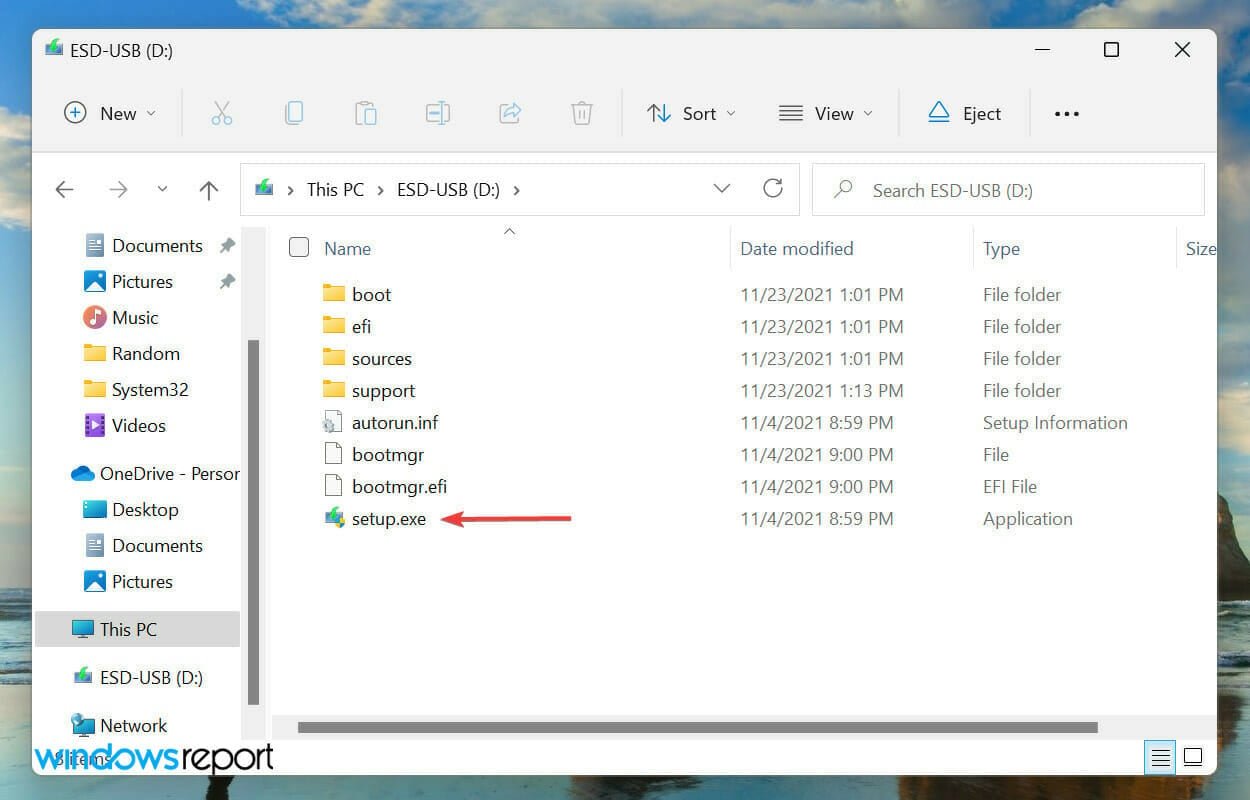
- Once created, connect the drive to the system. Now, press Windows + E to launch File Explorer and double-click on the bootable USB drive.
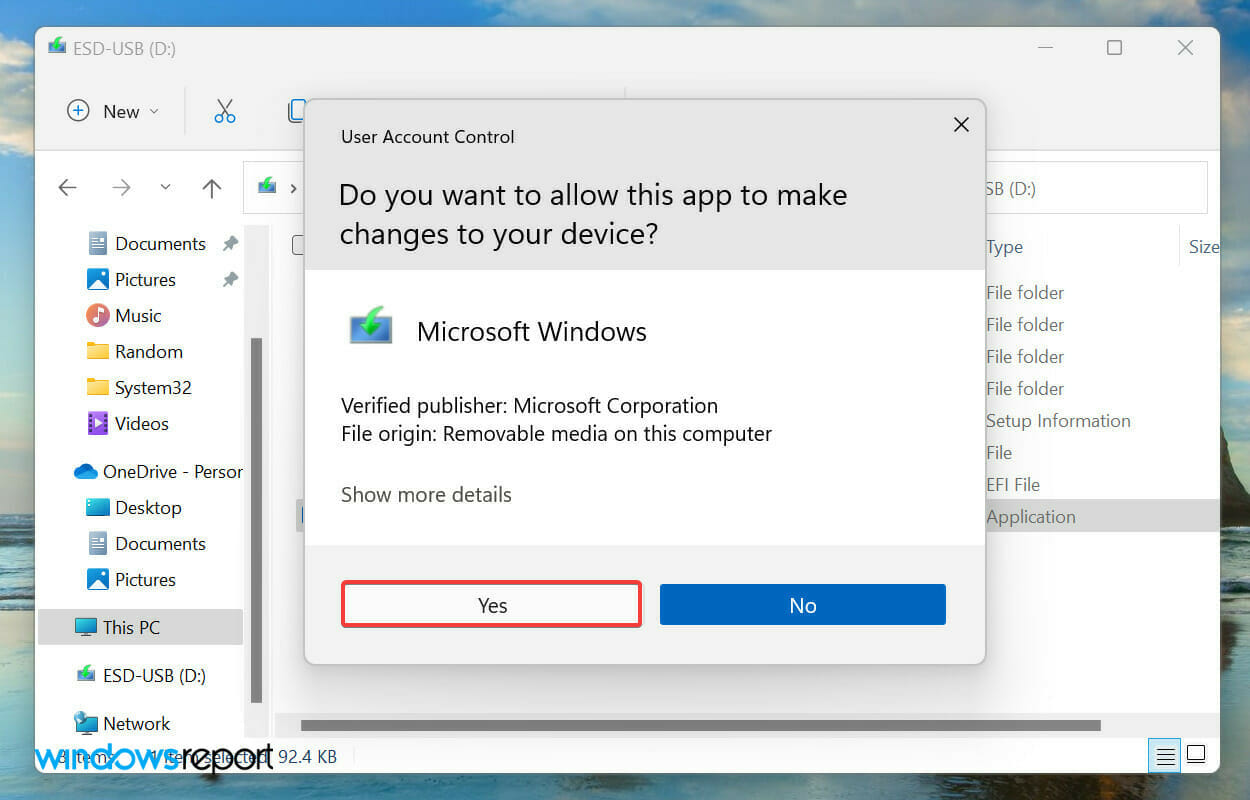
- Double-click on the setup.exe file to launch it.

- Click Yes on the UAC (User Account Control) prompt.
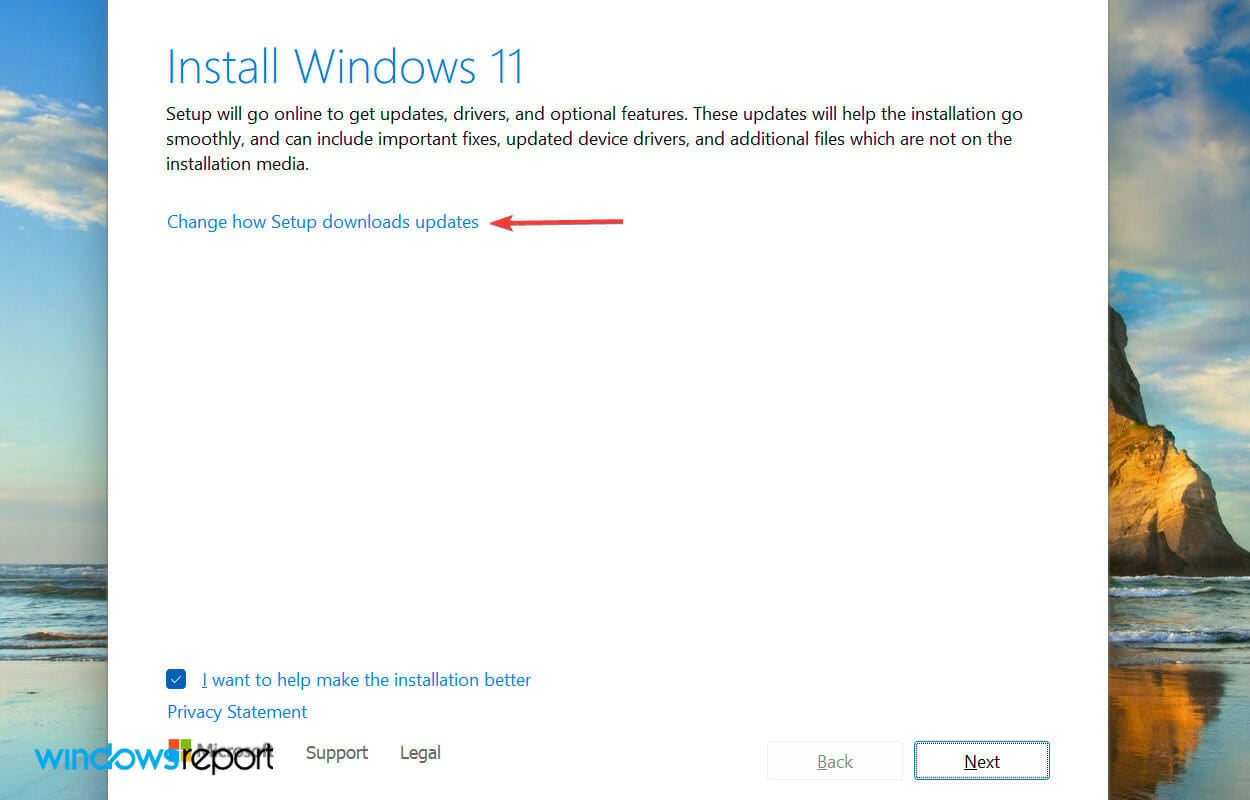
- Click on Change how Setup downloads updates.

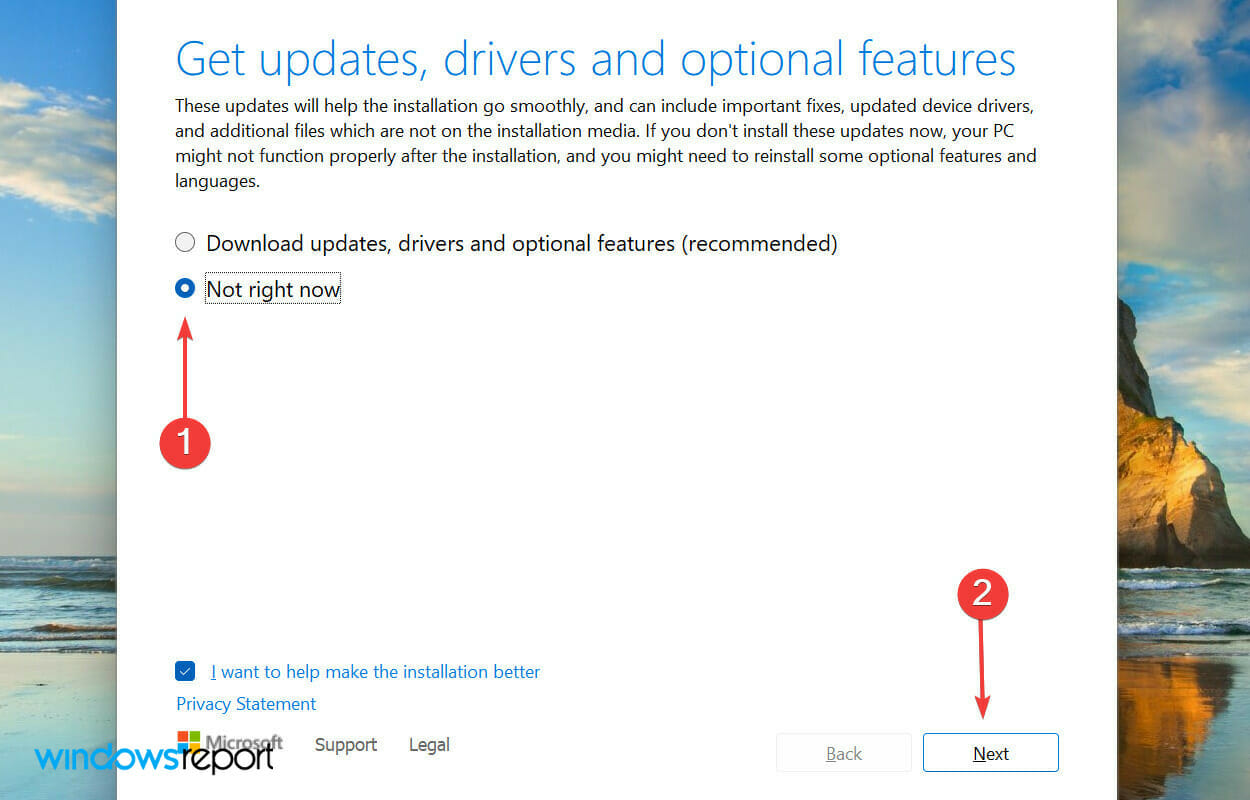
- Next, select Not right now and click on Next to keep the repair process simple and quick.

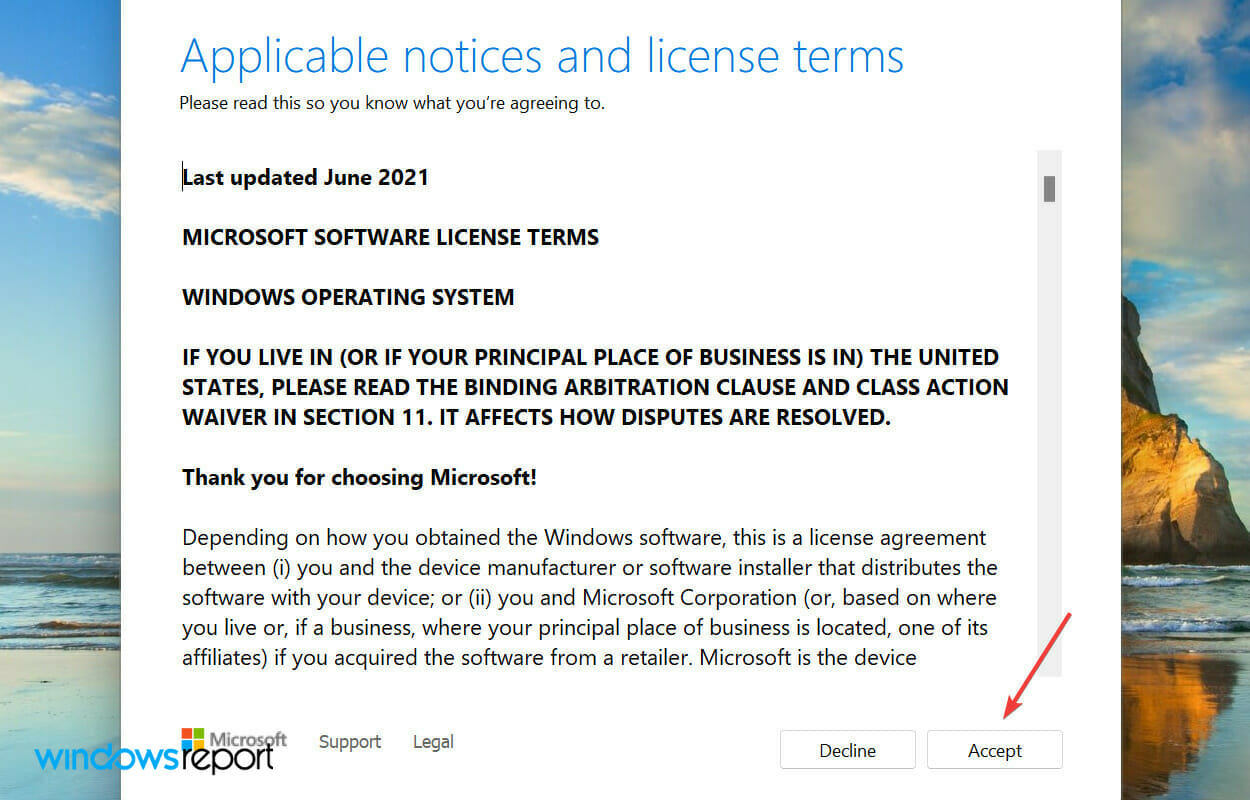
- Click Accept at the bottom.
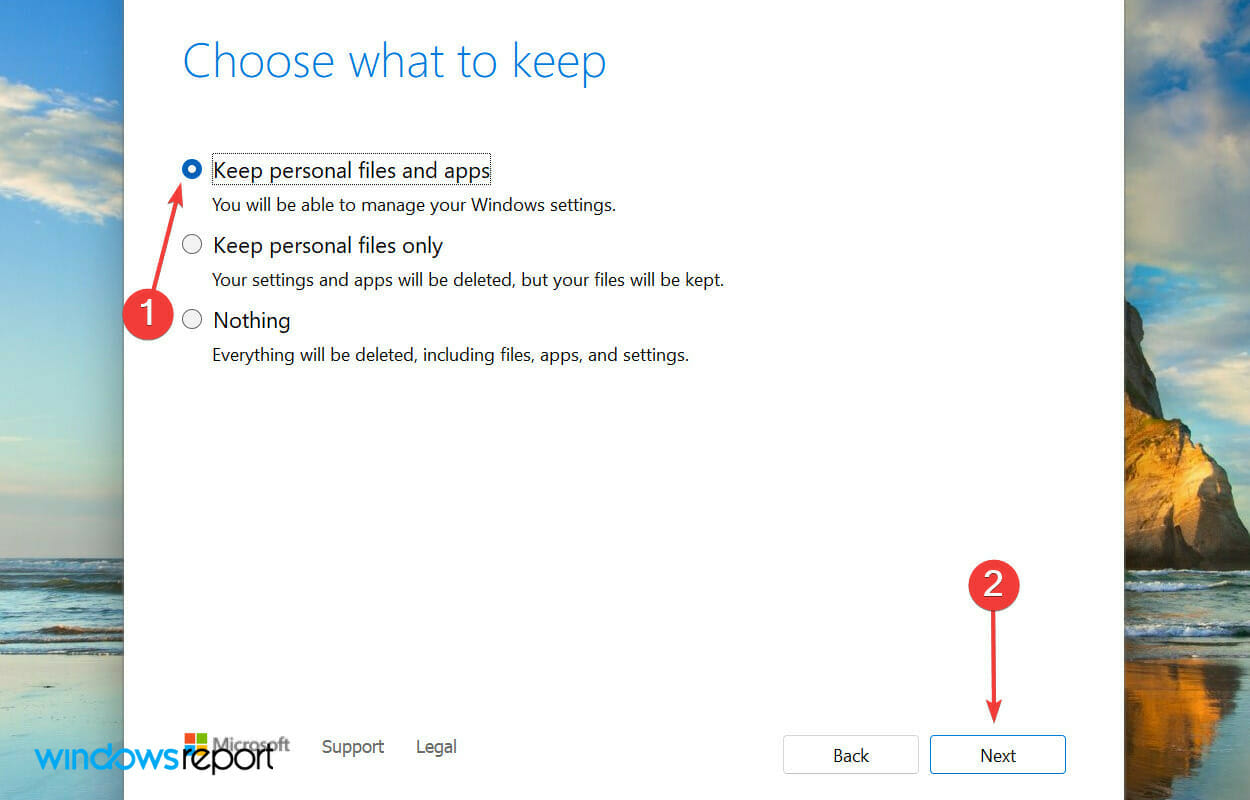
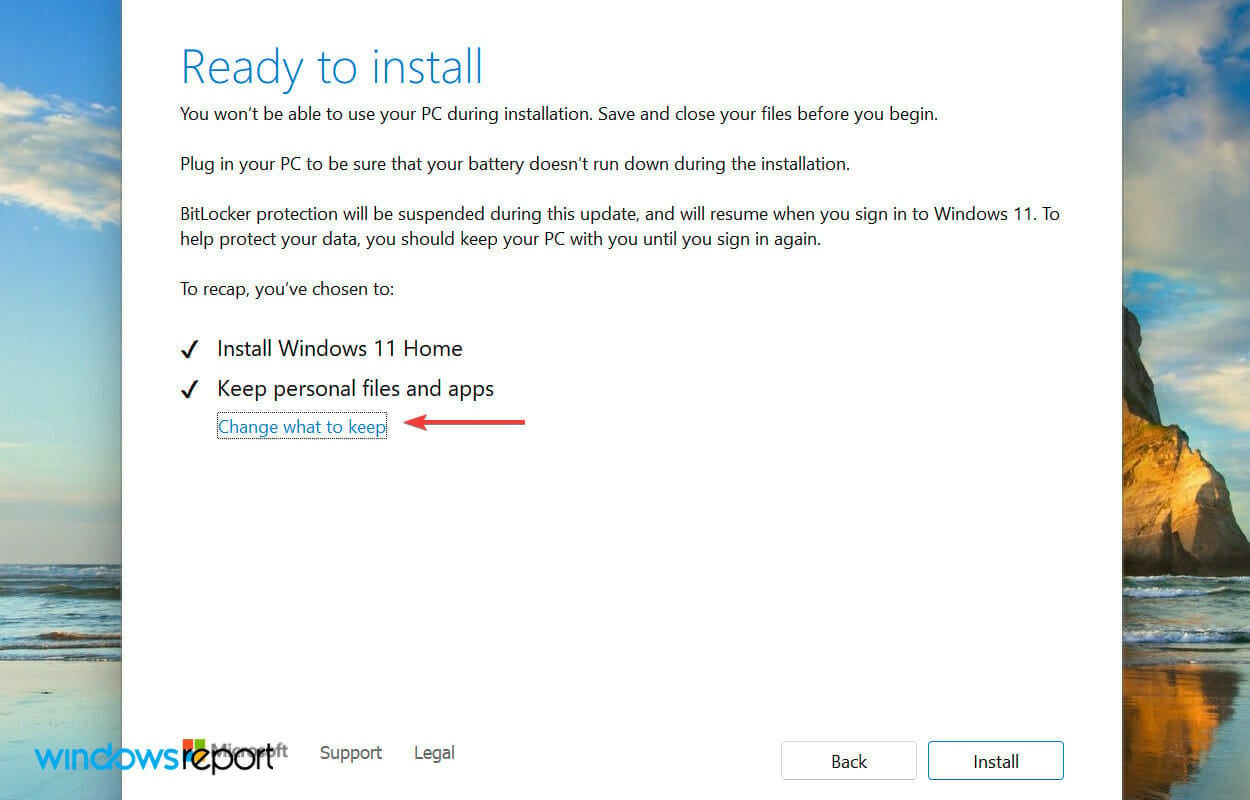
- Now, click on Change what to keep.

- Select the option to Keep personal files and apps and click on Next at the bottom.
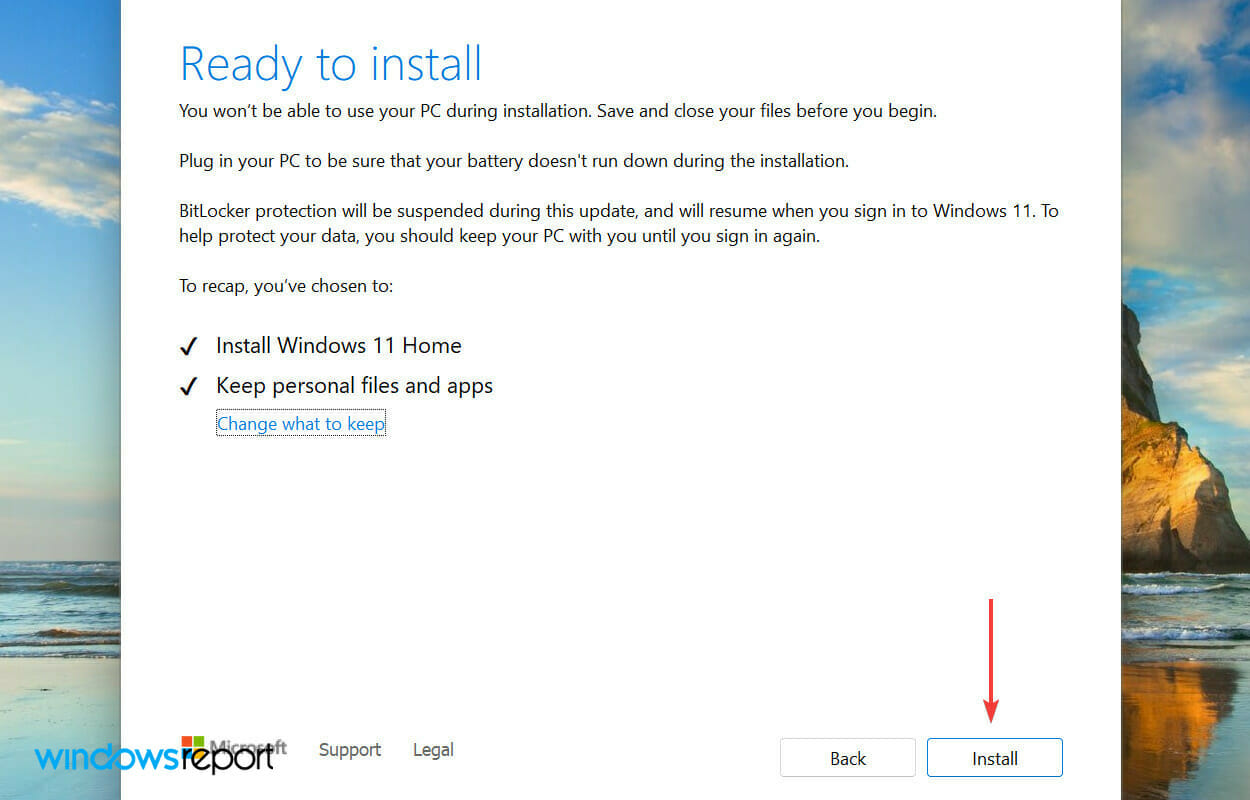
- The last step is to click on Install.


The in-place upgrade is an effective repair process that can be used to eliminate a wide variety of errors, including some of the most complex ones without affecting the files and apps stored on the system.
How does .NET Framework work?
The .NET Framework, in simple terms, is a collection of thousands of pieces of code that help developers create an application. Since the code is accessible to all, the developers can use this, wherever required, instead of writing it from scratch.
Apart from that, the .NET Framework also provides a runtime environment to developers in order to test their applications. It’s called the Common Language Runtime or CLR, which compiles and executes the code.
We can go for hours just discussing the .NET Framework, but to eliminate the error at hand, a basic understanding of it would suffice.
If you have an application that requires these codes or the .NET Framework, it’s time you install it.
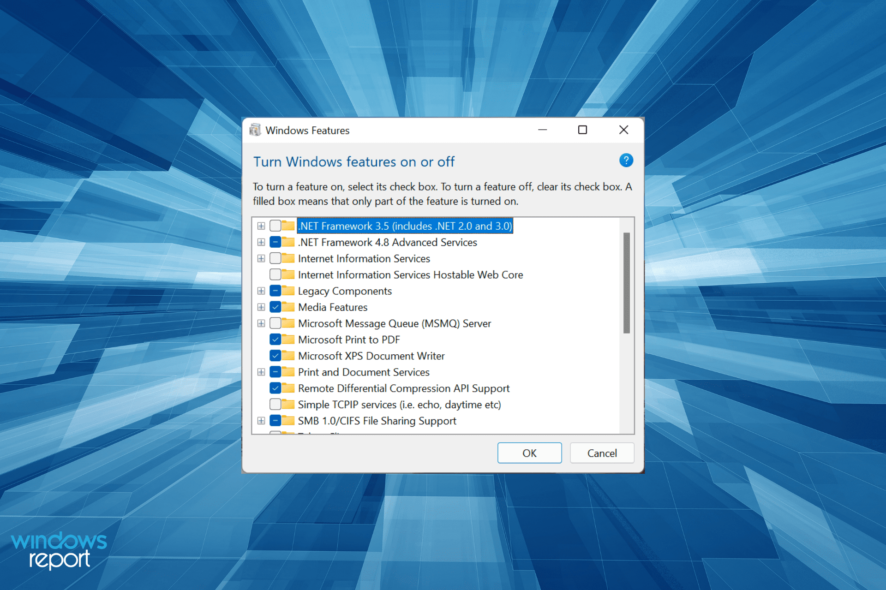
How can I install/download .NET Framework 3.5 in Windows 11?
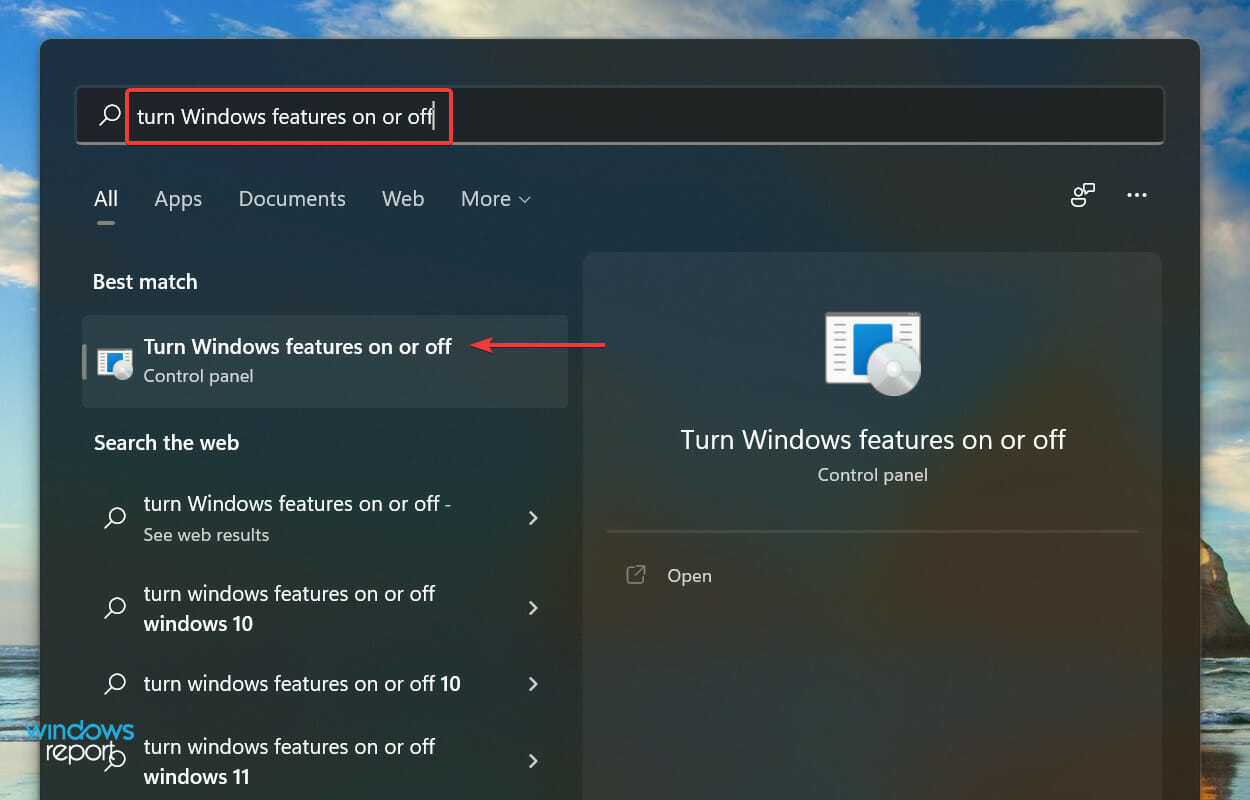
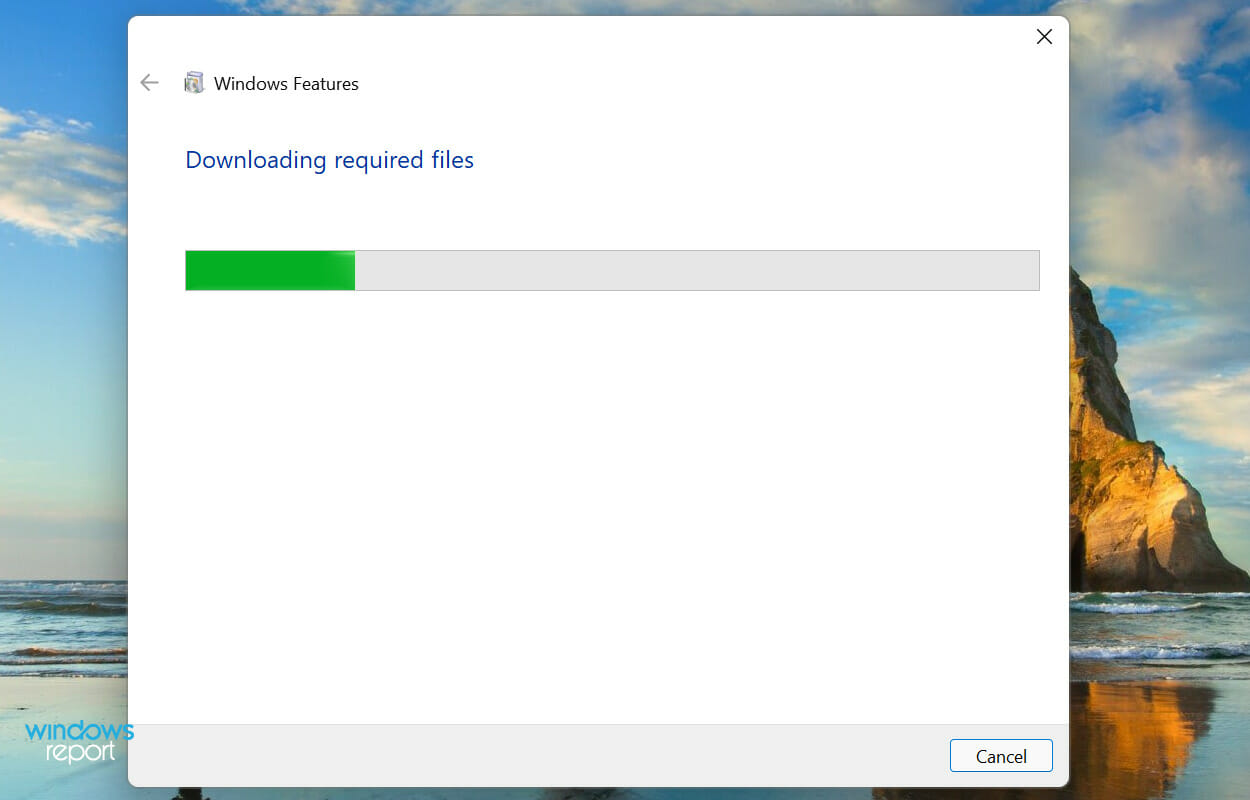
- Press Windows + S to launch the Search menu, enter Turn Windows features on or off in the text field at the top, and click on the relevant search result.
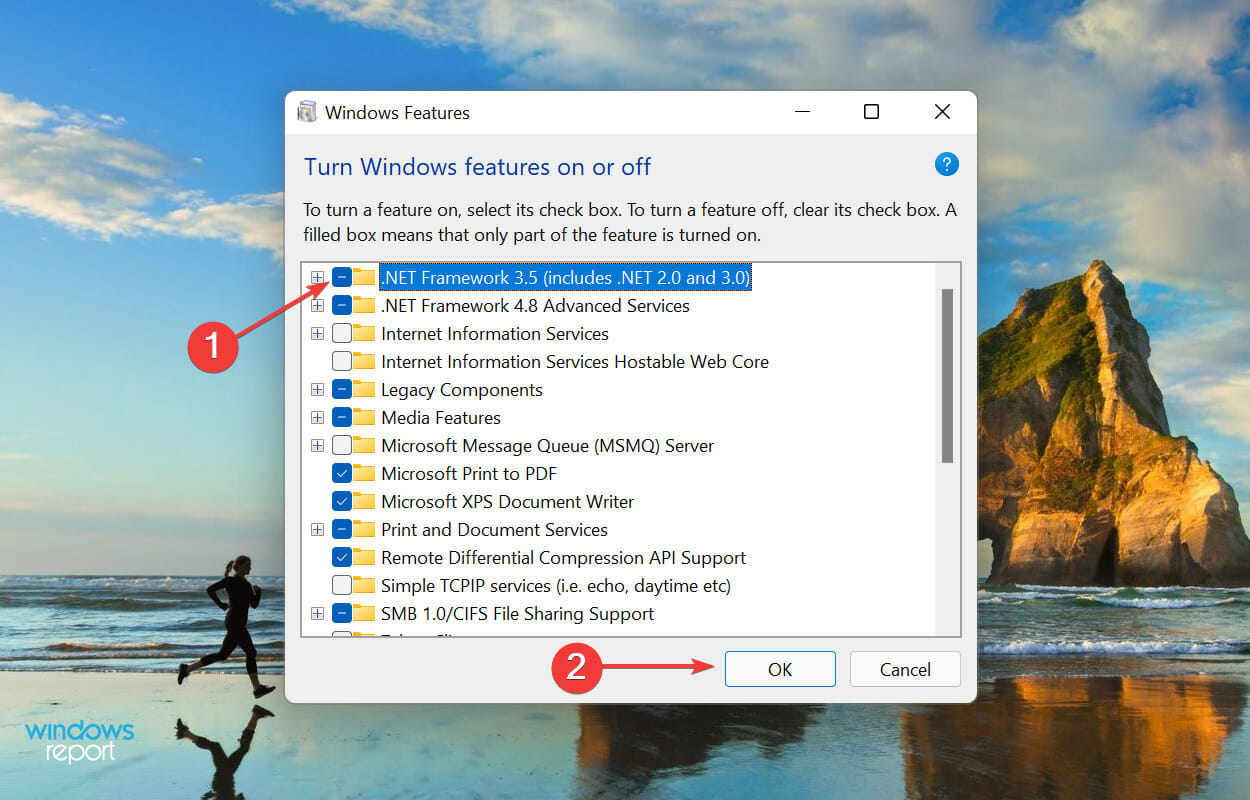
- Tick the checkbox for .NET Framework 3.5 and click on OK at the bottom.
- Next, select Let Windows Update download the files for you from the two options listed here.
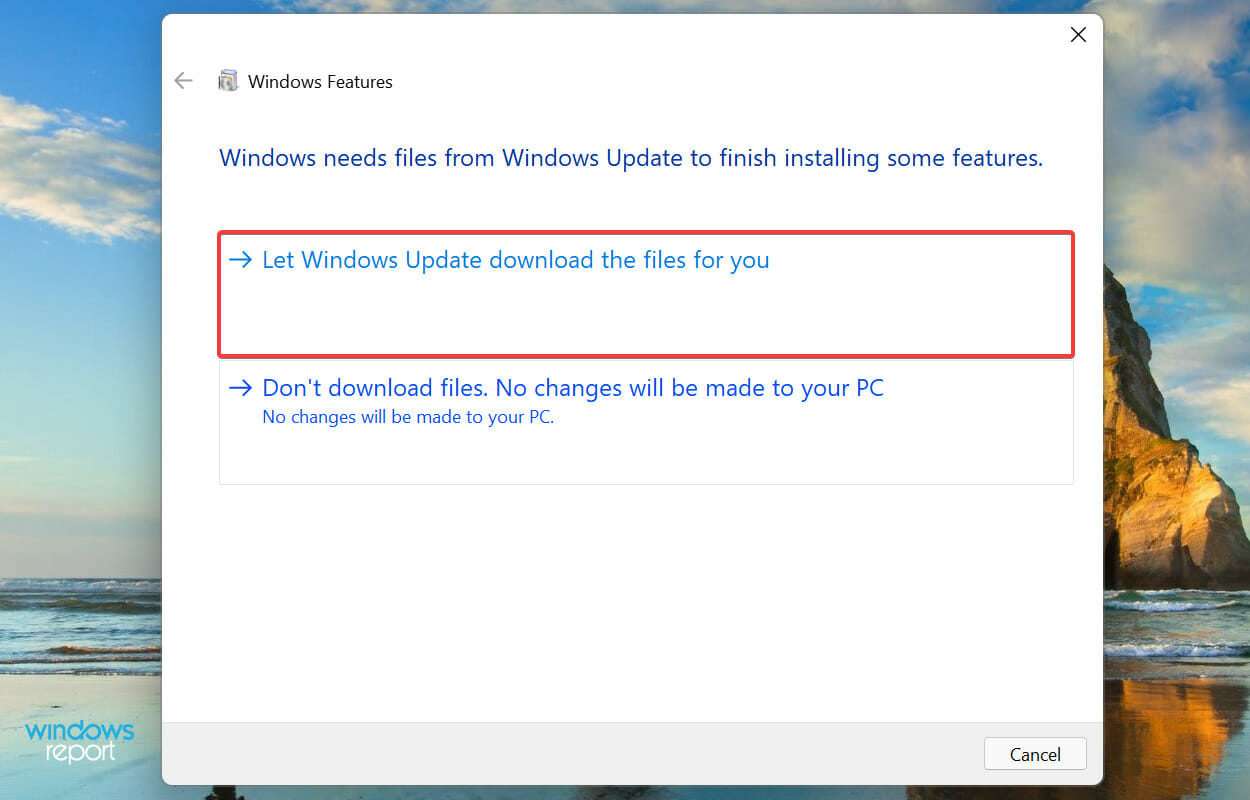
- Wait for the required files to be downloaded, and once done, restart the computer to effectively apply the changes.


That’s how you can install .NET Framework 3.5 in Windows 11 in easy steps within no time. Also, check out how to fix some of the common .NET Framework 3.5 errors. Though the article is for Windows 10, the methods work just as fine on the latest iteration as well.
These are all the ways you can fix the 0x80071AB1 error in Windows 11, and get the .NET Framework installed to eliminate problems in running applications.
In case the .NET Framework 3.5 is missing from your Windows 10 PC, check how to install it.
Do not hesitate to tell us which fix worked to solve the Windows Update error 0x80071ab1 and your experience of Windows 11 thus far, in the comments section below.
Read our disclosure page to find out how can you help Windows Report sustain the editorial team. Read more


Improve this guide


User forum
0 messages