Windows Update Error 0x80242016: 5 Ways to Fix it
Explore the expert-recommended methods to resolve the issue
4 min. read
Updated on
Read our disclosure page to find out how can you help Windows Report sustain the editorial team. Read more
Key notes
- This common error might happen due to registry errors, incompatible hardware, or corrupted system files.
- This guide will discuss all possible reasons and the available fixes to eliminate this update error.
![Windows Update Error 0x80242016 [Solved] 5 Ways to Fix It](https://cdn.windowsreport.com/wp-content/uploads/2022/12/Windows-Update-Error-0x80242016-Solved-5-Ways-to-Fix-It-886x590.png)
If you fail to install 0x80242016, then you are not alone. Users often get such update errors while installing Windows updates on their computers. Luckily the issue can be fixed using simple methods.
This guide will walk you through the steps to fix the issue right after discussing the causes. Let’s get started!
What causes the failed to install 0x80242016 error?
There are a few reasons for the installation error to happen. Some of the popular ones are mentioned here:
- Wrong Registry values – If the values on your Registry Editor are corrupt, your computer might not work correctly. Hence you get an installation error when updating.
- Damaged system files – You can get this error if your system files are damaged or corrupt. To fix it, you need to run an SFC scan.
- Corrupt update component files – If the Windows update component is missing files or becomes corrupt, then it might trigger the error.
- Corrupted temp files – Whenever you install updates, some temporary files are created on your PC. If these files get damaged, then you might see the error.
- Computer infected with virus or malware – If your computer is infected with malware or virus, it might interfere with the update process, hence the issue.
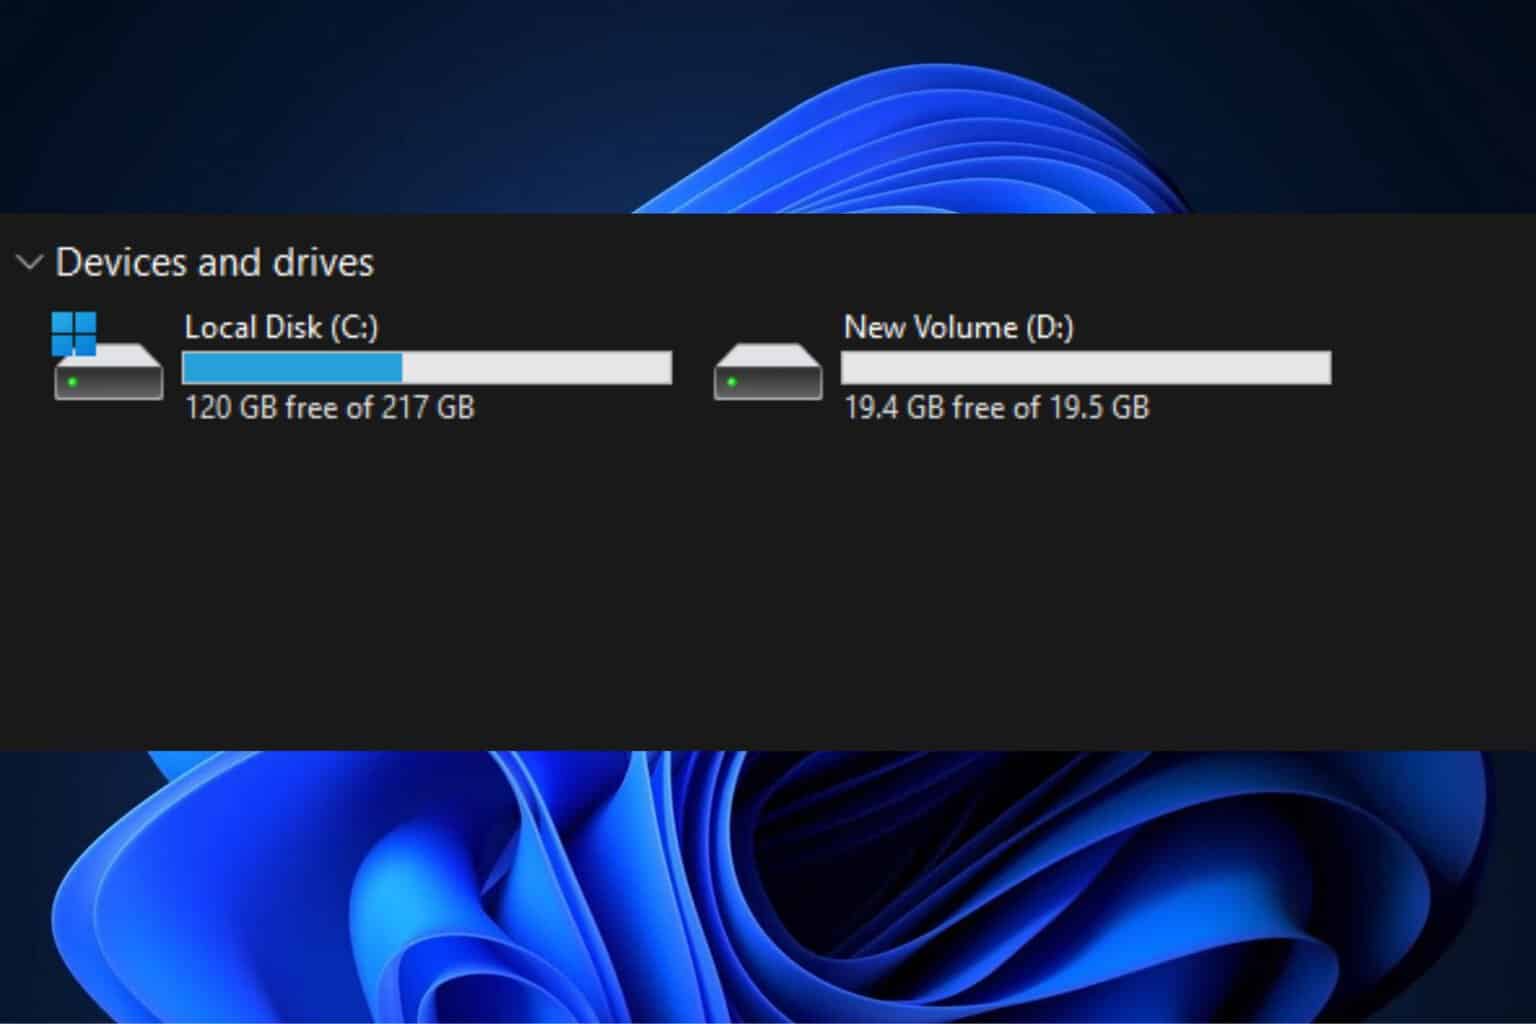
- Not enough disk space – Before installing the update, you must check for sufficient hard disk space, as insufficient space could result in an error.
What can I do to fix Windows Update error 0x80242016?
Before engaging in advanced troubleshooting steps, you should consider performing the following checks:
- Remove all the peripherals except the essential ones.
- Disable Firewall.
- Ensure you have a stable internet connection.
- Check the date and time mentioned on the computer because an incorrect date and time can cause this issue.
1. Rename the Software Distribution folder & reset Windows Update components
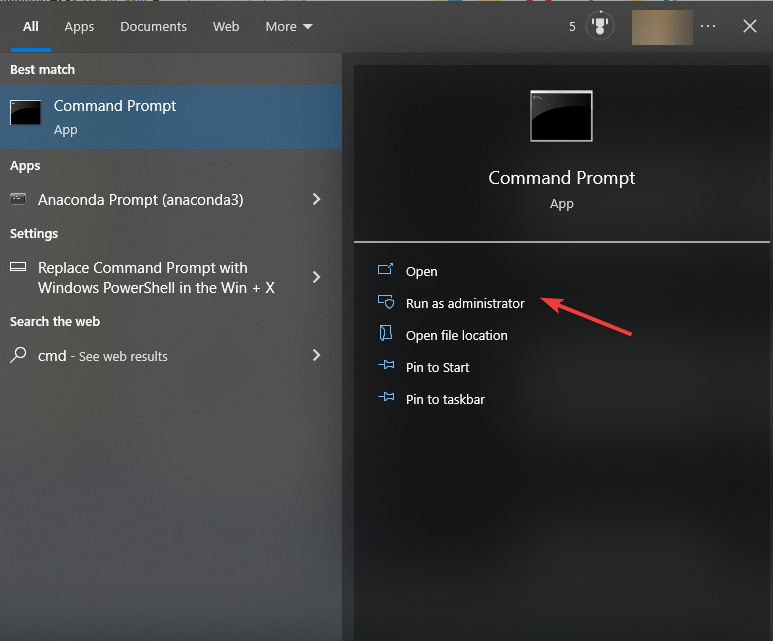
- Go to the Search bar, type CMD and click Run as administrator.
- Copy and paste the following command to stop the Windows Update service and press Enter. You might have to do it a couple of times to ensure it is not running:
taskkill /f /fi "SERVICES eq wuauserv" - Type the following commands one after the other and press Enter after each command:
net stop cryptSvcnet stop bitsnet stop appidsvcnet stop msiservernet stop wuauservren C:\Windows\SoftwareDistribution SoftwareDistribution.oldrmdir C:\Windows\SoftwareDistribution\DataStorermdir C:\Windows\SoftwareDistribution\DownloadRen C:\Windows\System32\catroot2 Catroot2.oldnet start wuauservnet start cryptSvcnet start appidsvcnet start bitsnet start msiserver - Close the Command Prompt window and restart your PC when the process is complete.
2. Run Windows Update troubleshooter
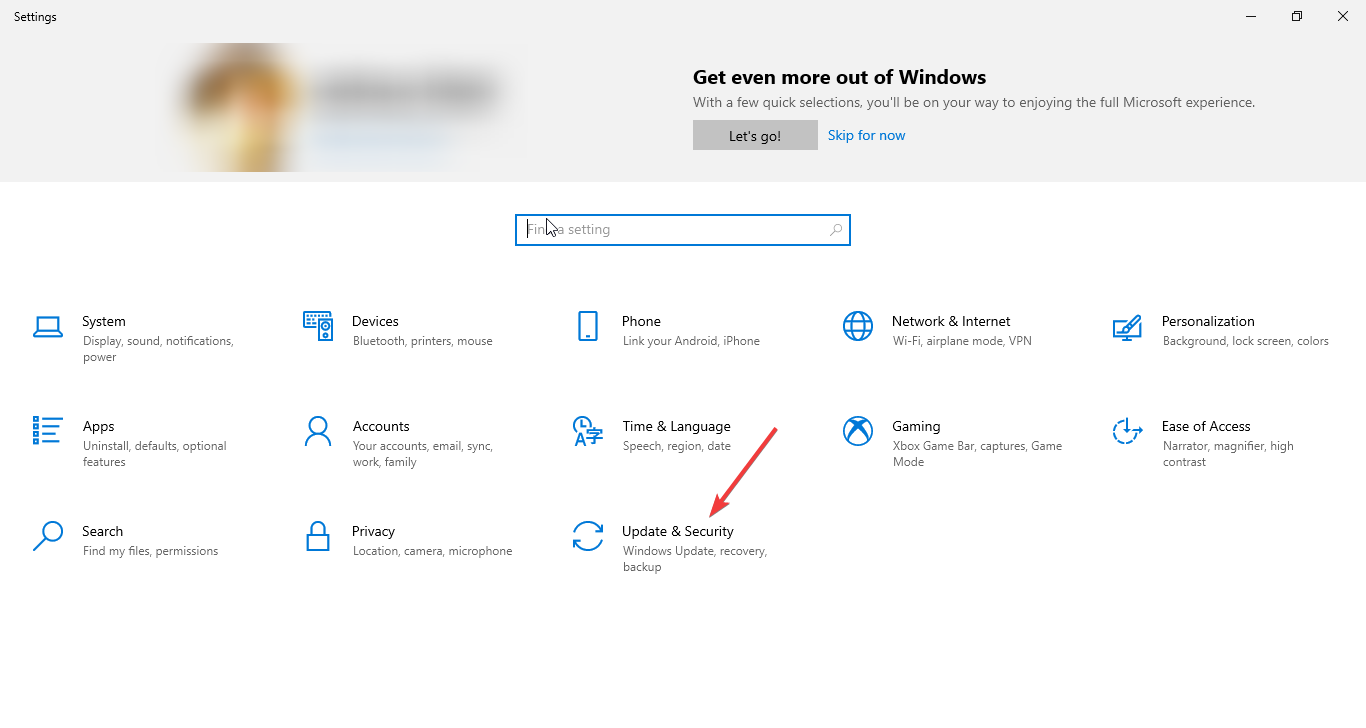
- Press Windows + I to open Settings.
- Go to Update & Security.
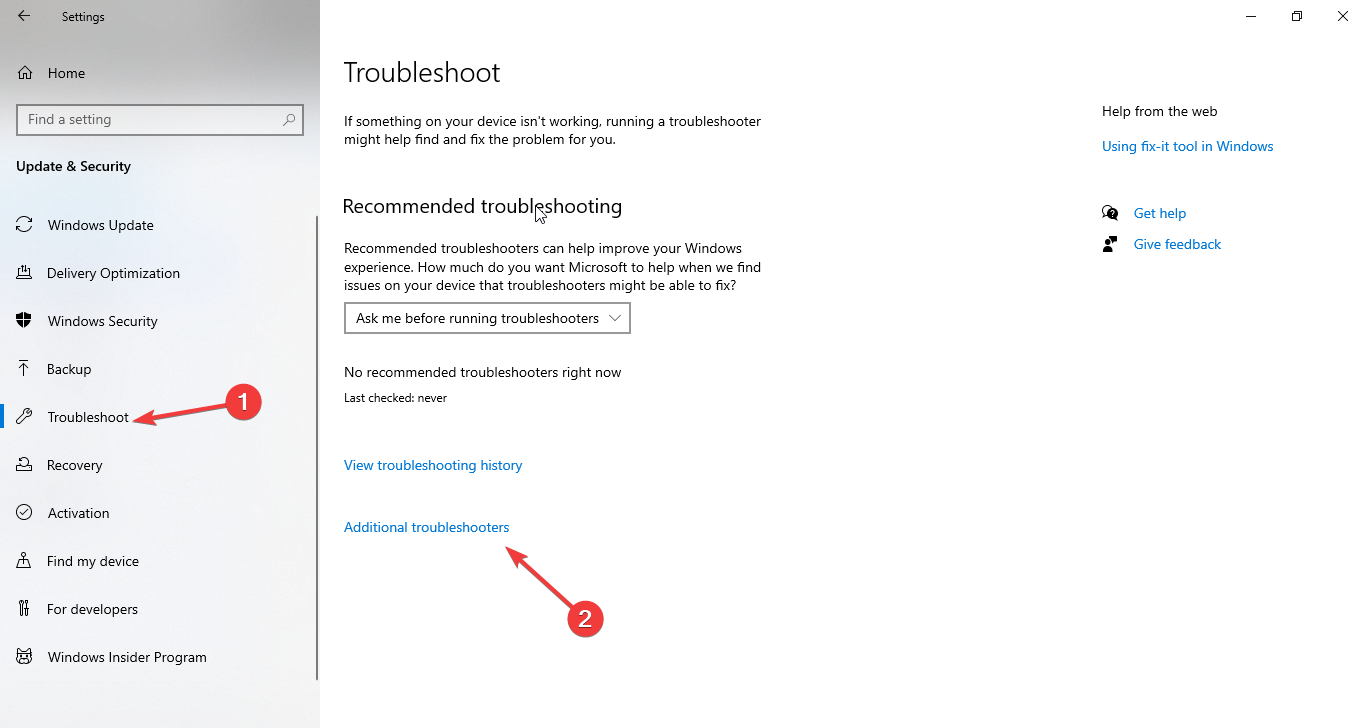
- Now go to Troubleshoot from the left pane, and click the Additional troubleshooters link.
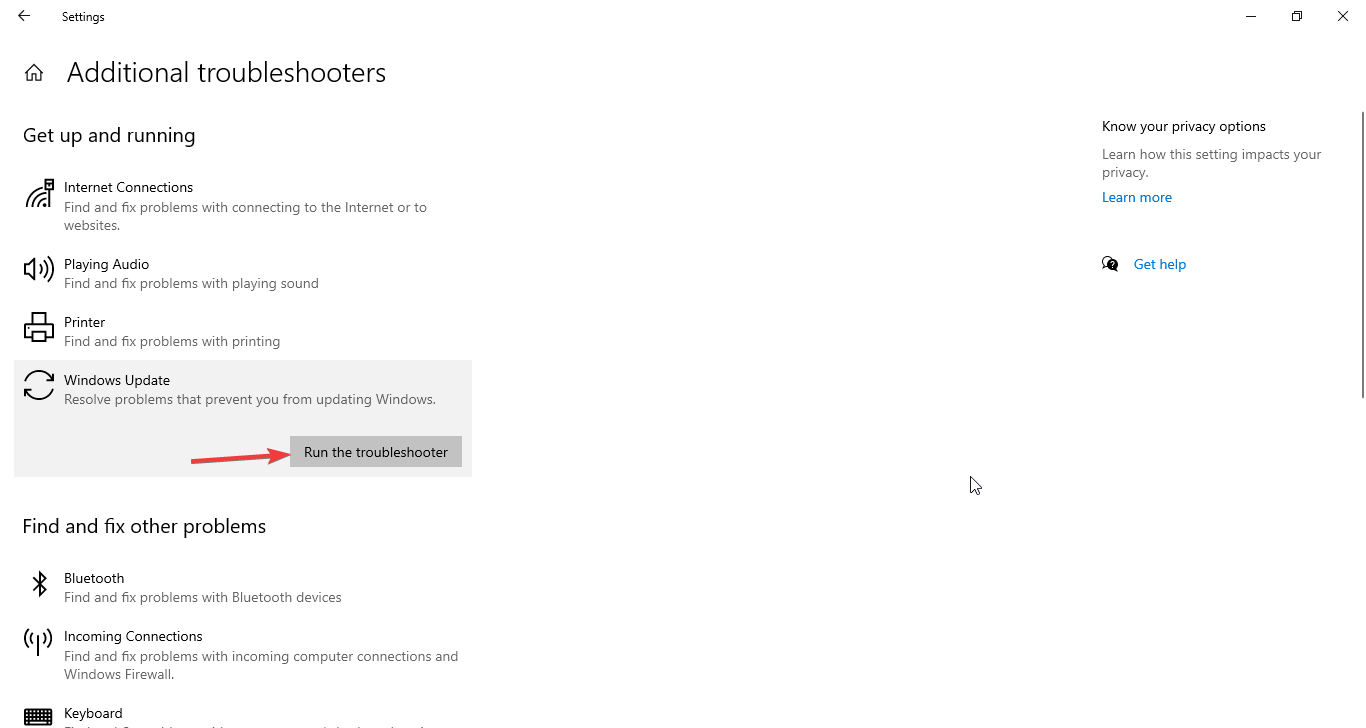
- On the next page, select Windows Update and click Run the troubleshooter button.
- Follow the on-screen instructions to complete the process.
3. Run the SFC and DISM commands
- Open Command Prompt using the steps mentioned in Method 1.
- Type the following commands and press Enter after every command:
sfc/scannowdism /online /cleanup-image /scanhealthdism /online /cleanup-image /checkhealthdism /online /cleanup-image /restorehealth - Once complete, reboot your computer.
4. Disable the Windows Search service
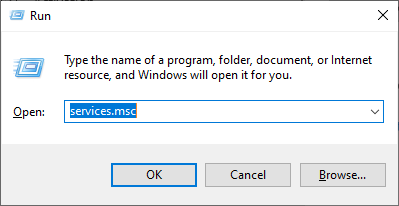
- Press Windows + R to open the Run window.
- Type services.msc and press Enter to open Services.
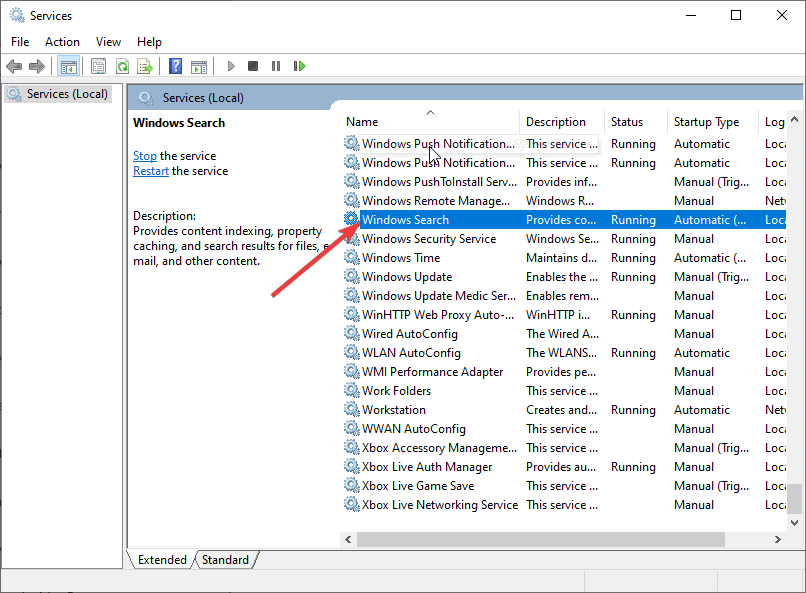
- Locate and double-click the Windows Search service.
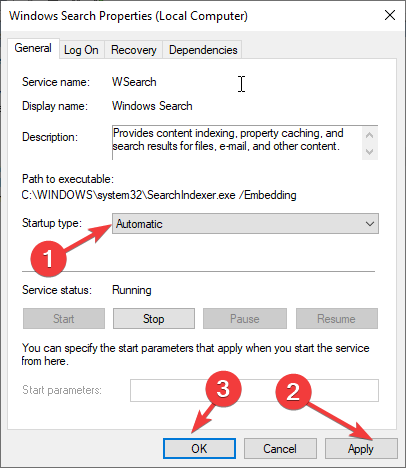
- Select Startup type as Automatic.
- Click Apply and OK to confirm the changes.
5. Run Windows in a Clean boot environment
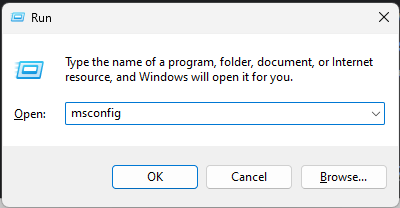
- Press Windows + R to open the Run window.
- Type msconfig and press Enter.
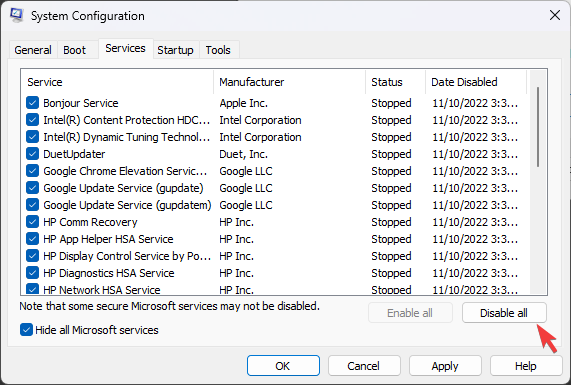
- On the System Configuration window, go to the Services tab, place a checkmark next to Hide all Microsoft services, then click Disable all.
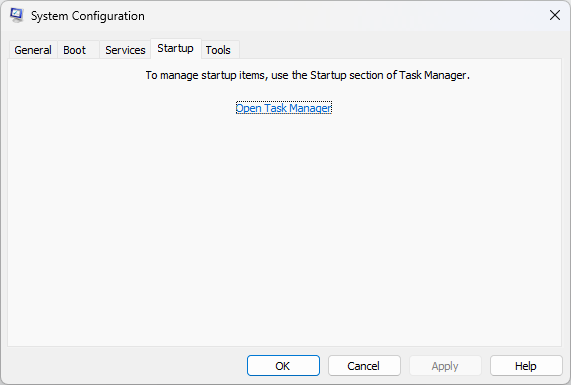
- Go to the Startup tab, and click Open in Task Manager.
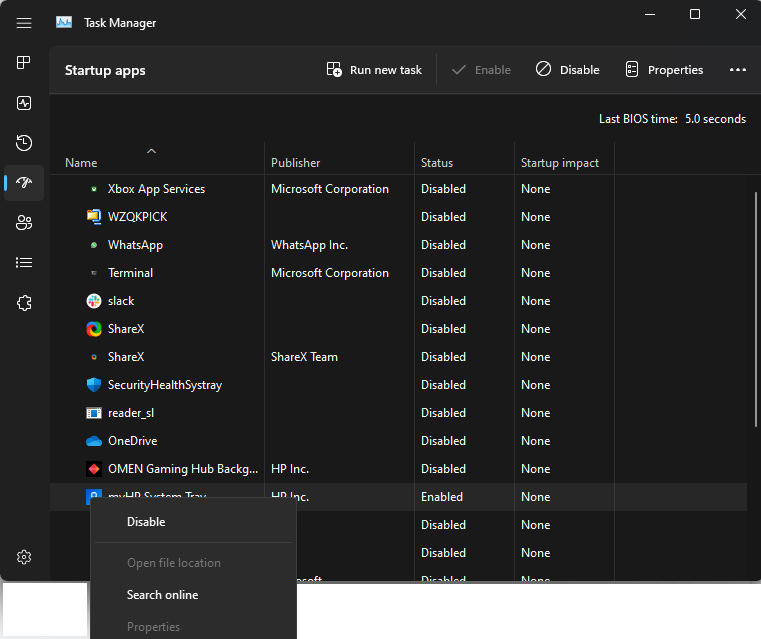
- Right-click on all Enabled items one by one and select Disable.
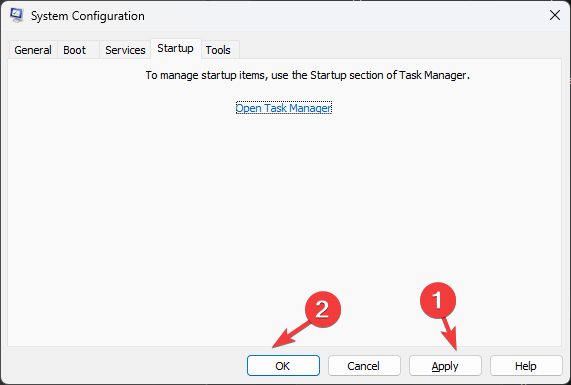
- Click Apply and OK to confirm.
- Select Restart. Once restarted, try to install updates again.
So, these are methods that you can use to fix installation error code 0x80242016. If nothing has helped you, you must consider resetting Windows to resolve the issue.
If you have any questions or concerns about the process, feel free to let us know in the comments section below.




User forum
0 messages