Your PC Can't Project to Another Screen: 5 Ways to Fix it
Get the power of projection back with these simple fixes

Your PC can’t project to a second screen. Try reinstalling the driver or using a different video card error is usually caused by outdated drivers. Also, the problem might be with the connection between your PC and the second screen, or broken files.
Here’s how to fix it:
What to do if your PC can’t project to another screen?
1. Reinstall your video drivers
- Press the Windows key + X and select Device Manager.

- Double-click the Display adapters option to expand it.

- Right-click on your display driver and select Uninstall device.

- Now, click the Uninstall button to confirm the action.

- Finally, click on the Scan for hardware changes icon.

You can also try automatic driver updater software to complete this process easier. This tool will detect all outdated or missing drivers and find the latest versions from a massive vault.
⇒ Get PC HelpSoft Driver Updater
2. Run the hardware troubleshooter
- Press the Windows key + I to open Settings.
- Go to System.

- Select Troubleshoot.

- Click on Other troubleshooters.

- Under the Find and fix problems section, select Hardware and Devices or Display.
- Click on Run the troubleshooter and follow the on-screen instructions.
You should also check the cables you are using for establishing your connection with your external monitors.
So, before moving to other sophisticated solutions, ensure all parts are correctly connected.
3. Run an SFC scan
- Press the Windows key and type cmd.
- Select the Run as administrator option under Command Prompt.

- Type the command below and hit Enter.
sfc /scannow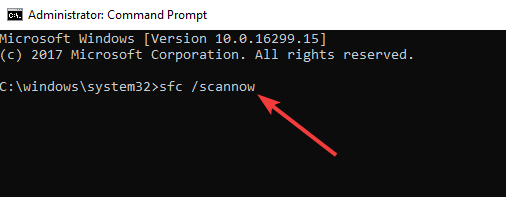
- Wait for the scanning process to complete, and then restart your computer.
Your PC can’t project to another screen issue might be due to corrupt system files. To fix this problem, you need to run an SFC scan. The System File Checker utility quickly analyzes and repairs system file issues.
Alternatively, you can use a dedicated system repair tool to perform a deep scan and fix all faulty files. This tool not only fixes broken and corrupt files but also ensures your PC is in perfect condition.
4. Clean boot your computer
- Press the Windows key and type msconfig.
- Select System Configuration.

- Select the Services tab at the top.

- Check the Hide all Microsoft services check box, and click the Disable all button.

- Now, select the Startup tab and click Open Task Manager.

- Right-click each startup item, and select the Disable option.

- Now, go back to the Services tab and click the Apply button, followed by OK.

Sometimes, various apps and programs may interfere with your projector causing your laptop to show that your PC can’t project to another screen error message.
To fix this, you must start your computer using only a minimal set of drivers and programs by following the above steps.
If you want to know how to add or remove startup apps on Windows 10, check out our easy guide and solve this problem in no time.
5. Use a different user account
If you’re using a multiple account computer, keep in mind that not all the user accounts available on the respective machine may have access or permission to project to another screen.
Using a different user account may fix your problem, so try it out. Anyway, try the above troubleshooting solutions and see if you can fix your technical issues.
What to do if the PC can’t project to another screen on Windows 11?
Like on Windows 10, this issue is mainly caused by driver issues. To fix your PC that can’t project to another screen on Windows 11, try reinstalling the graphics driver.
Also, you can confidently apply all other solutions in this guide to solve this issue.
How do I project to another screen in Windows 10?
- Connect the displays you want to use.
- Press the Windows key + P to open the Project menu.
- Select the Extend option to project your screen on all available displays.

With this, the content of your Windows 10 screen will be shown on the other screens.
Also, check out our detailed guide on connecting a projector to your Windows 10 PC and holding your business meeting.
Our readers also reported screen-sharing issues like dual monitor not extending on Windows 10/11.
Your PC can’t project to another screen can be frustrating, as it takes away a vital screen-sharing feature. But we hope you can fix the issue with the solutions in this guide.
While still on screen sharing issues, check our detailed guide on fixing the second monitor not detected on Windows 10 if you have a similar problem.
We also have a guide on what to do if projecting to this PC is greyed out, so don’t miss it for more information.
Let us know if the issue persists by using the comments field below. Give us more details, and we will try to assist you as soon as possible.
Read our disclosure page to find out how can you help Windows Report sustain the editorial team. Read more


Improve this guide


User forum
6 messages