How to Manage Users and Groups in Windows 10
Windows 10 has a lot of options to manage the accounts and groups
4 min. read
Updated on
Read our disclosure page to find out how can you help Windows Report sustain the editorial team Read more
Key notes
- All you need in order to manage user accounts in Windows 10 is right in the Settings app.
- After reading this article, you will be able to add and delete accounts and change their settings.
You may customize your accounts very easily and in this guide, we’ll explain to you how you can manage users in Windows 10.
To start managing users in Windows 10, you need to open Settings and go to Accounts first. The first option in the Accounts group is Your account, which helps you manage your Microsoft account, customize your profile picture, your user name, etc.
We just have to mention that if you want to manage your Microsoft account, you must do it online.
How do I manage user accounts in Windows 10?
1. Use a local account
- Click the Start button and select Settings.
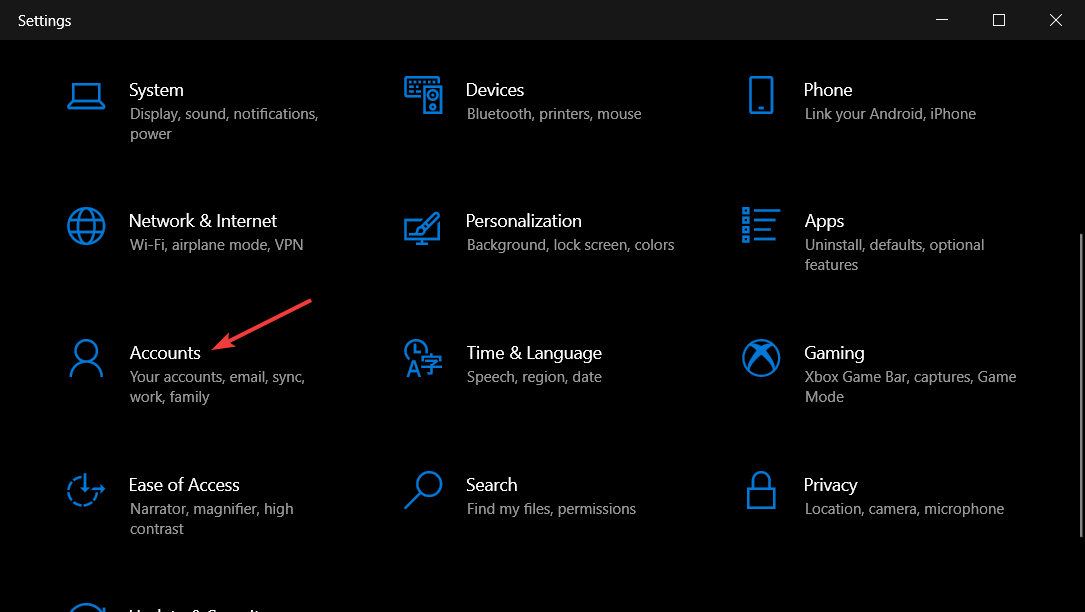
- Now, select Accounts.
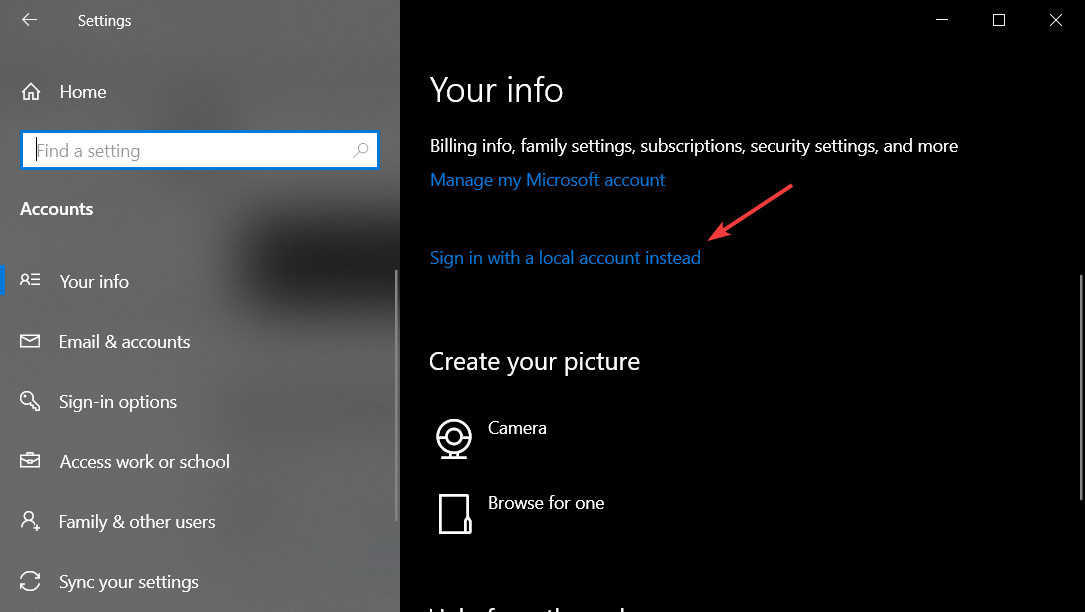
- Scroll down on the right pane and click on Sign in with a local account instead.
If you don’t want to use Microsoft’s account and sync your settings, you can just click Sign in with local account instead to create a local account.
You won’t need to enter email account or phone number, just enter your username and password and you’re good to go. In addition, if you have your camera attached you can create a new profile picture as well.
In addition, if you want to add more Microsoft accounts, for example for your work or school, you can create them using the link at the bottom of the Your account page.
2. Edit the sign-in options
- Press the Windows key and select Settings from the menu.
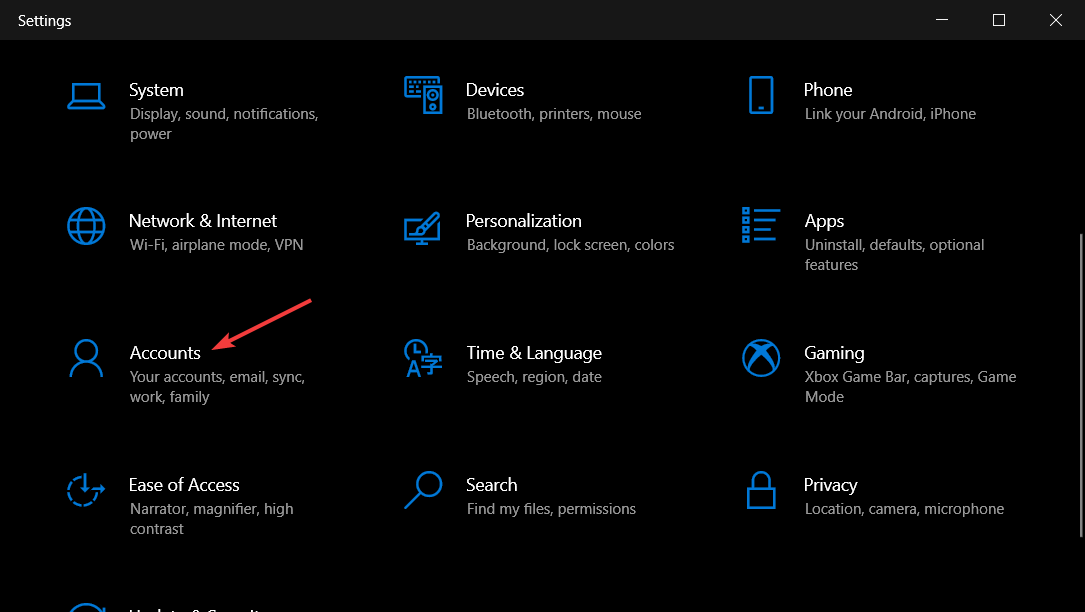
- Click on Accounts.
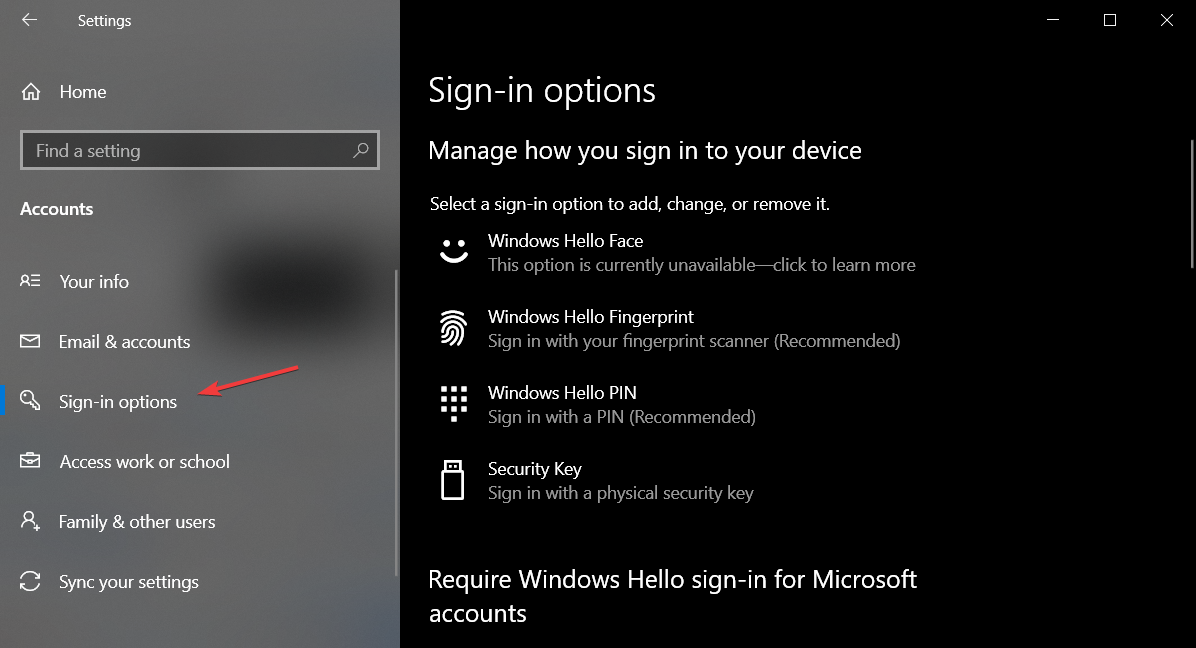
- Now, select Sign-in options from the left pane.
Next on our list are sign-in options, and from this section, you can set if Windows 10 will require a password when your computer wakes from sleep mode or not.
In addition, you can also change your account password here as well. From this section you can also add a PIN password that you can use to unlock your account.
If you want, you can also add a picture password and use your favorite picture along with a series of swipes and other gestures to unlock your PC. The second option is for a fingerprint or card reader, so if you want maximum security this is probably the way to go.
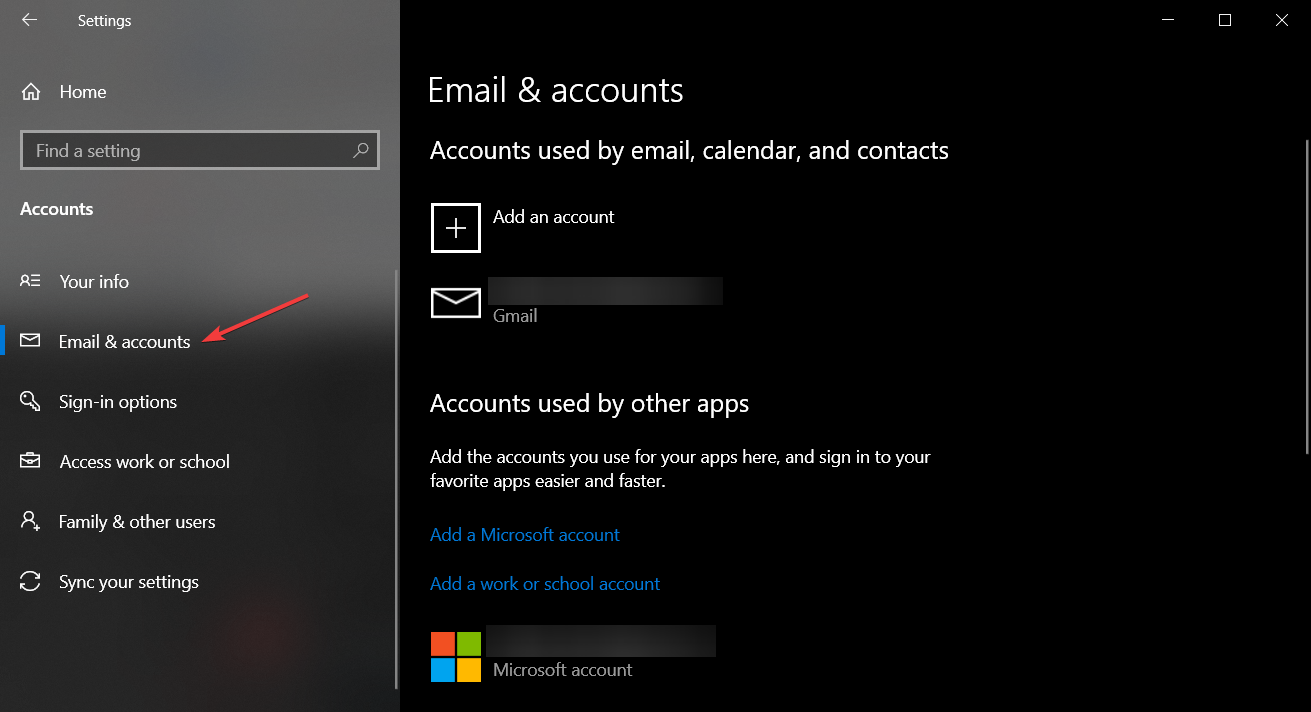
3. Sync your email and accounts
The Email & accounts feature allows you to customize your email, calendar, and contacts. You can add several email accounts for faster access and see what apps use your account information.
4. Set Work Access
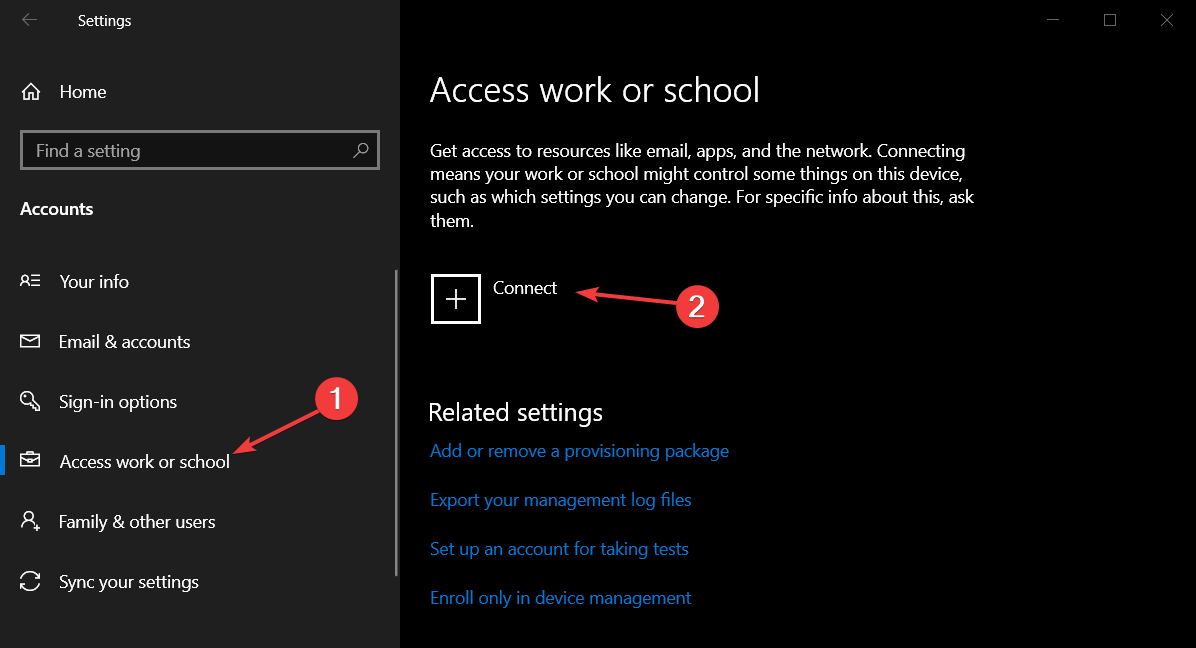
The next option is Access work or school, and this option allows you to connect to a computer at work and access its apps, network and email.
4. Manage the Family & Other Users accounts
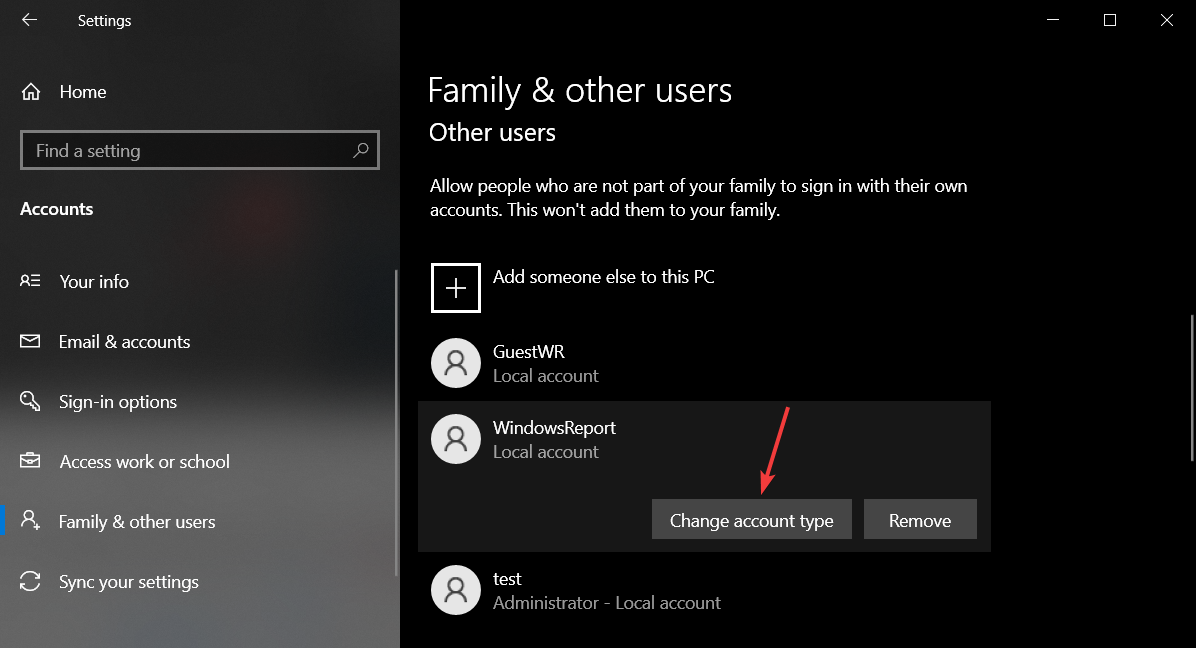
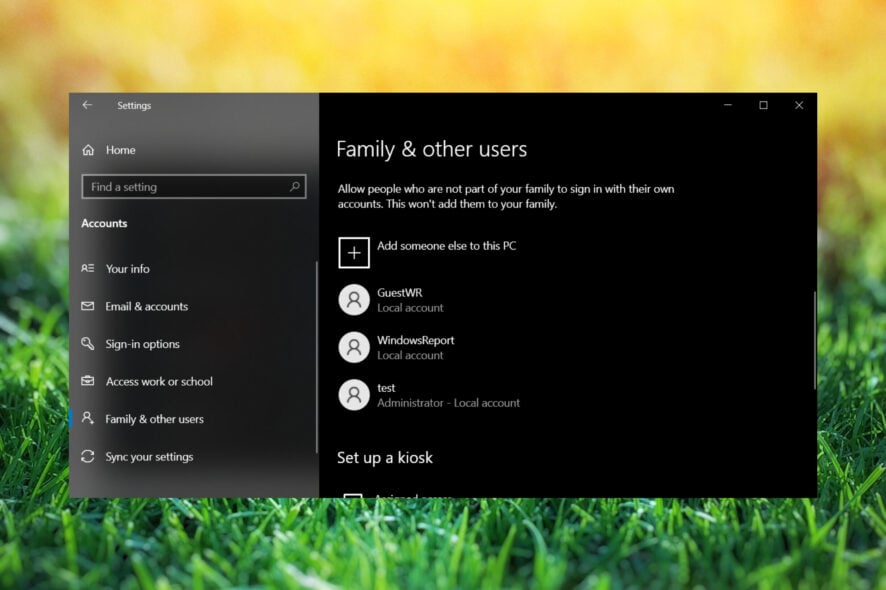
Next, we have Family & Other Users, and this section allows you to add new users. From this section you can create a user account for your child and monitor it using Microsoft Family Safety.
That way you can make sure that your child visits only appropriate websites and respects time limits. In addition, you can also add other users from this section. The last option here is Assigned access, and with this option, you can allow a user access to only one Windows Store app.
You may also delete local accounts or change their types in standard users or administrators.
How do I sync my Microsoft account settings?
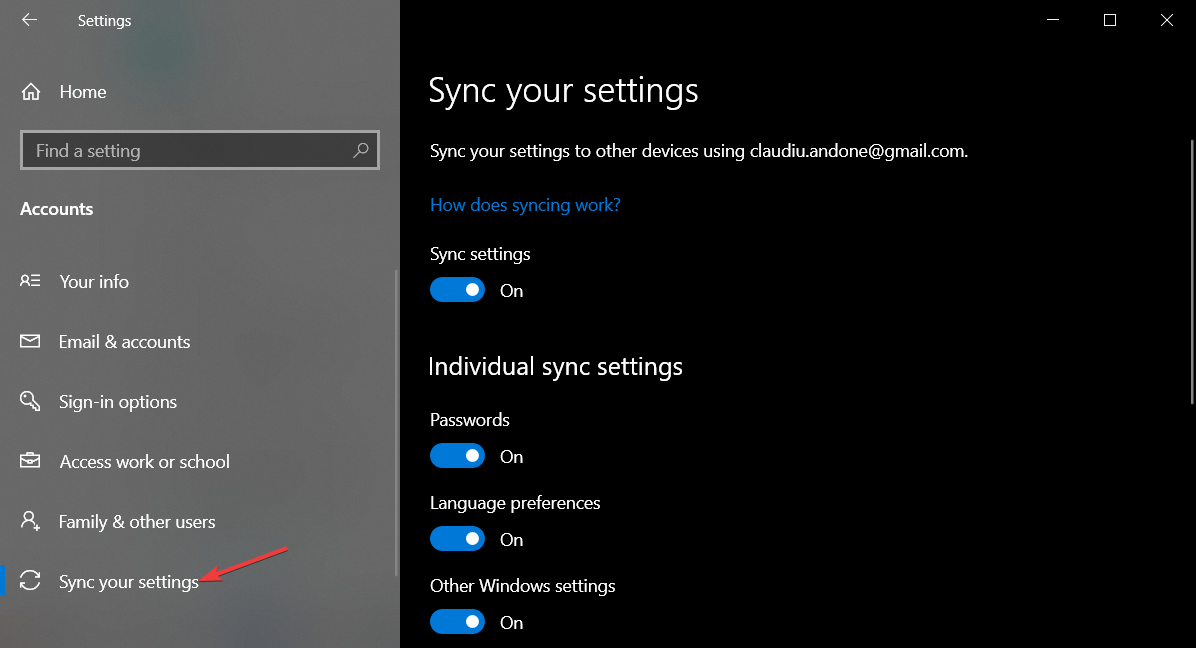
Last section is Sync your settings, and it does just that. It syncs your settings with your Microsoft account across all Windows 10 devices.
By default, this option is activated, and it will sync the passwords, language preferences, and other Windows settings. However, if you don’t want that, you can easily turn off syncing.
As you could notice, Windows brings a variety of options when it comes to managing users. We hope that managing users in Windows 10 is a bit more clear to you now. For effective management, you can enable Local Users and Groups on Windows 11 and use it.
You might also be interested in reading our guide on how to change the main account on Windows 10 or how to switch users on Windows 10.
To learn more about hidden accounts on your PC, don’t miss our What is WDAGUtilityAccount for more information.
If you have any additional questions, feel free to post them in the comment section.

