Windows Explorer Not Refreshing: How to Force it
Outdated Windows can prevent File Explorer from auto refreshing
5 min. read
Updated on
Read our disclosure page to find out how can you help Windows Report sustain the editorial team. Read more
Key notes
- Refreshing File Explorer helps it update the changes you make.
- Outdated Windows can cause Windows 11 auto-refresh problems.
- Cleaning the File Explorer’s history can help fix the issue in no time.
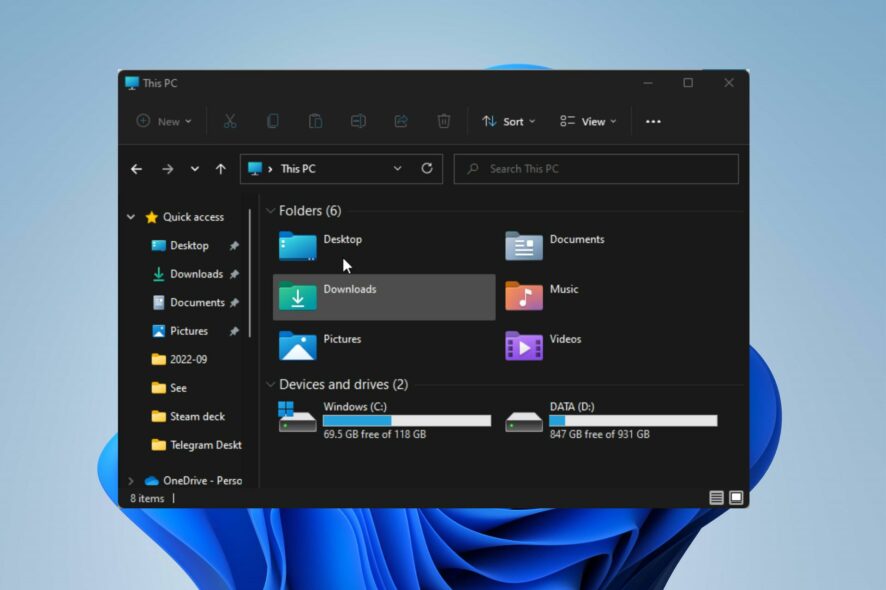
Windows File Explorer not refreshing is an annoying problem users may experience when using File Explorer. However, File Explorer is expected to automatically detect and update files whenever you download or make changes on your computer.
The auto refresh process allows the File Explorer to update changes such as creating a new folder, deleting, renaming, or moving a file or folder on your computer.
So, if the File Explorer stops auto-refresh, it’ll prevent it from incorporating the changes you make in the app.
Furthermore, there are other issues relating to the File Explorer, such as the File Explorer freezing after creating a new folder and the File Explorer crashing after right-clicking on your computer.
These issues may affect the entire app and cause Windows Explorer to stop refreshing automatically.
Moreover, the Windows File Explorer not refreshing issue is expected in almost all versions of Windows computers.
Hence, this article will discuss the best solutions for the problem that’ll work across all Windows computers.
Users also complain that File Explorer may become extremely slow on Windows for various reasons. You can read through our article for a guide on how to fix the problem.
Why is the File Explorer not refreshing?
- Outdated Windows: Users must understand that not keeping their computer’s operating system up-to-date makes it prone to many problems. It prevents your computer from accessing the patches and updates for fixing bugs that may affect it. So, outdated Windows affects how the system works and can impede the smooth functioning of your computer.
- Issues with the PC: The PC may encounter numerous problems if a component isn’t functioning correctly. Sometimes, the computer develops faults that can’t be detected on the surface of operations but need troubleshooting. Issues like these can result in Windows 11 auto-refresh problems.
- Boot/startup errors on your computer: How you power up your computer can determine how it functions. However, it may encounter errors during boot, preventing it from working as expected. Likewise, boot errors can cause the software to load halfway. It means it won’t be able to perform fully as it should.
- File Explorer history: Windows File Explorer records previously modified files and folders. However, this history may become corrupt or stocked up, thus causing some problems with the way File Explorer works. So, File Explorer history can cause the Windows 11 auto refresh problem.
What can I do if File Explorer does not refresh automatically?
1. Update your Windows OS
- Click the Start button.
- Select Setting and click on Windows update.
- On the Windows update page, select Check for updates.
If there’s an update available, Windows will automatically search for it and install it. We recommend you restart your PC to check if the issue persists.
You can also read how to enable the dark theme in file explorer for a more enjoyable experience.
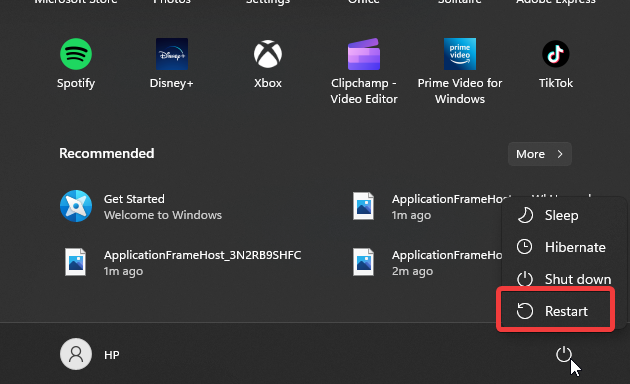
2. Restart your PC
Restarting your PC can fix any startup issues that may prompt the Windows 11 auto refresh problem or other issues affecting your computer.
3. Reboot the computer in Safe Mode
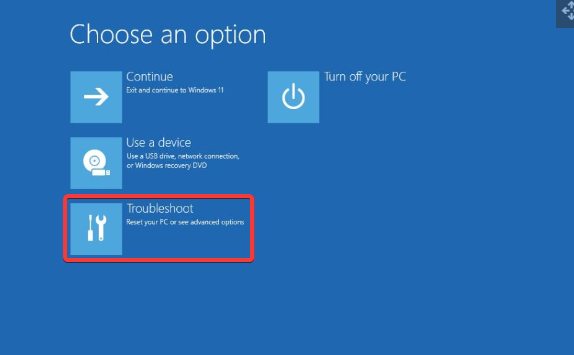
- On the sign-in screen, press Shift while clicking the Power button.
- Hold the shift key to prompt the Advanced Recovery Options window.
- Click on Troubleshoot and select the Advanced options.
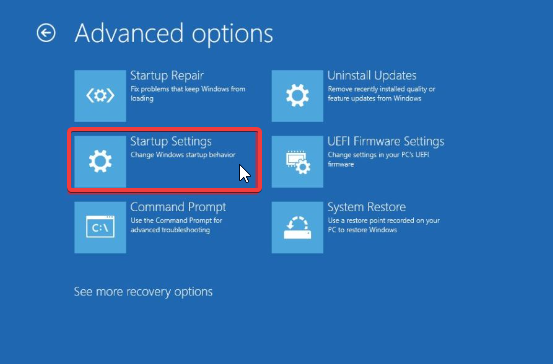
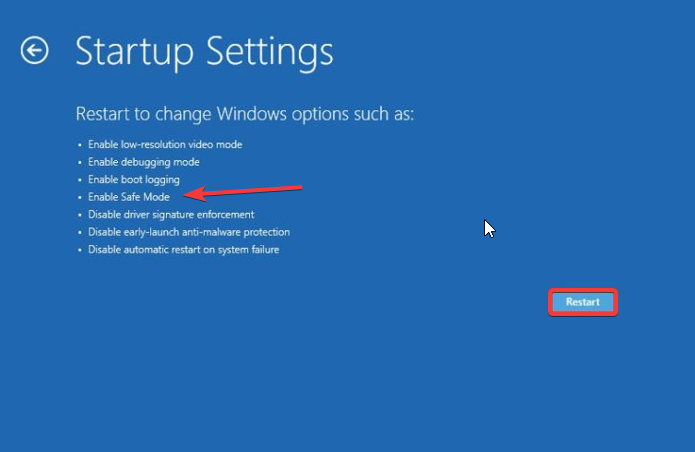
- Click on Startup Settings and select Restart.
- Press 4 to Enable Safe Mode.
The computer will restart in safe mode. Rebooting your PC safely will help you fix issues deep-rooted into the system that may affect it.
4. Update drivers
- Press on Windows + R simultaneously to launch the Run window.
- Type the following into the search space: devmgmt.msc, and click the OK button.
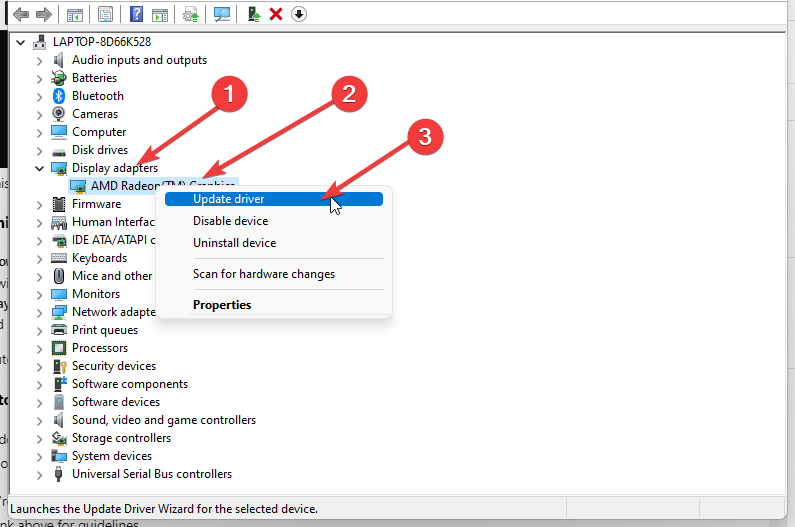
- Click on Display adapters from the search results and select the driver from the drop-down.
- Right-click and choose Update driver software and select Search automatically for drivers.
Restart your computer after the updating process is complete.
You can prevent these problems by using an automatic tool that will search and install the correct drivers on your computer with just a few clicks. That's why we recommend you use Outbyte Driver Updater. Here's how to do it:
- Download and install the Outbyte Driver Updater app.
- Launch the software.
- Wait for the app to detect all incompatible drivers.
- Afterward, it will show you a list of the drivers found to select the ones to Update or Ignore.
- Click on Update & Apply Selected to download and install the newest versions.
- Restart your PC to ensure the applied changes.

Outbyte Driver Updater
Use this software and solve all driver-related issues from your PC.5. Create a new user profile
- Press and hold down the Windows + X keys to open the quick menu.
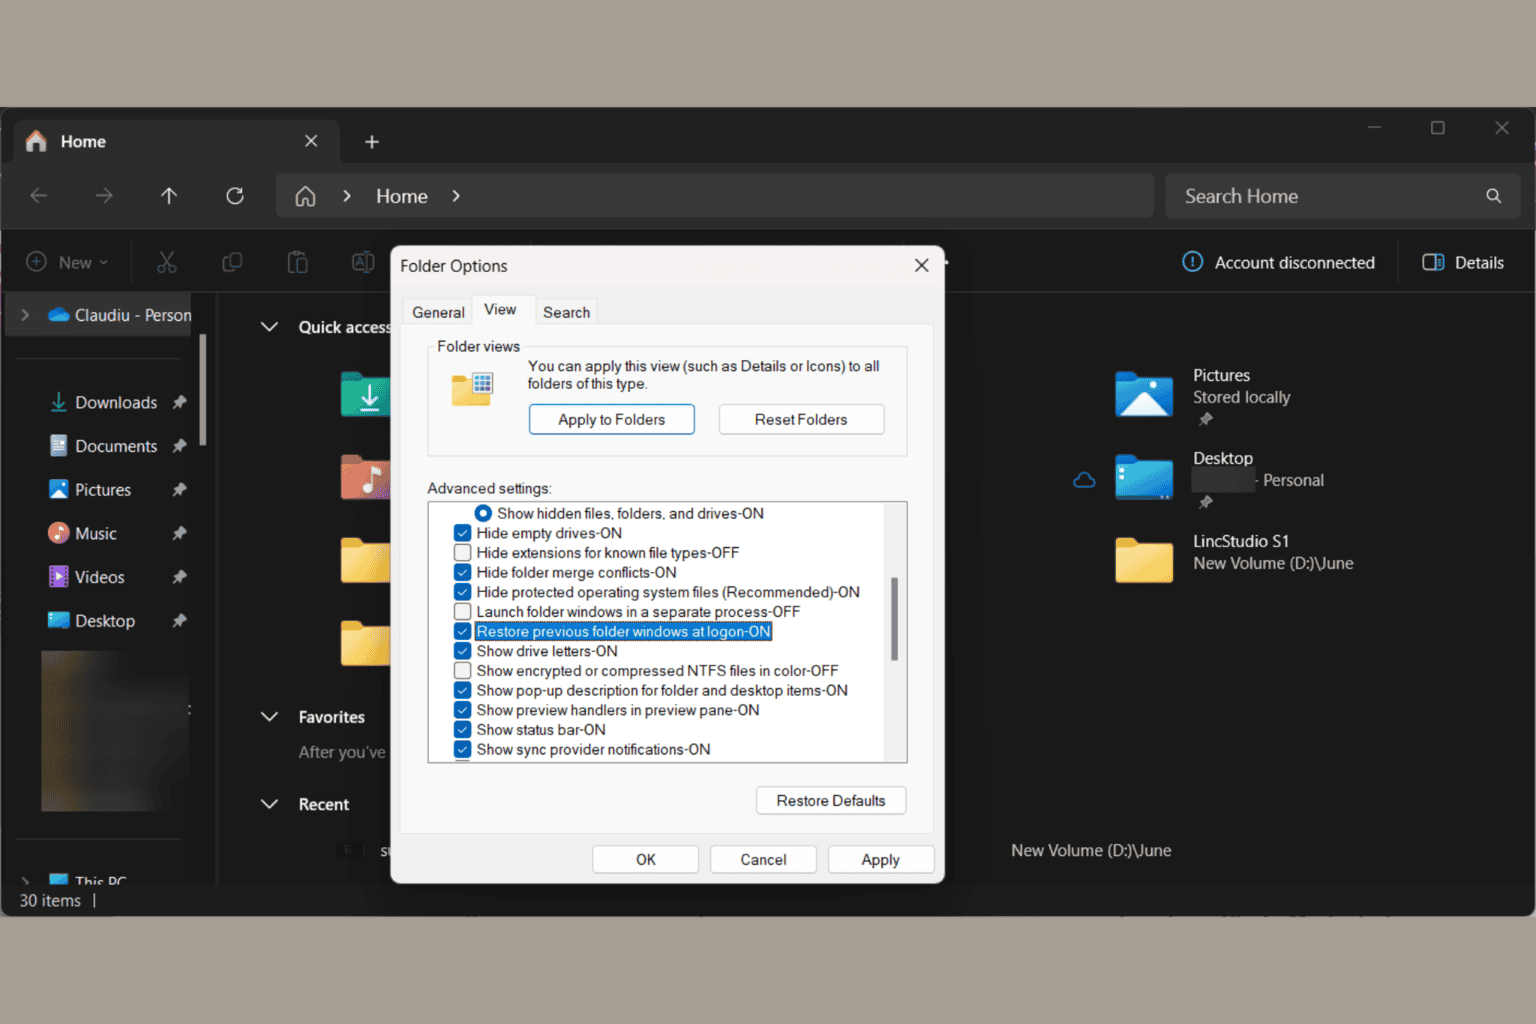
- Select File Explorer from the quick menu and click on the View tab.
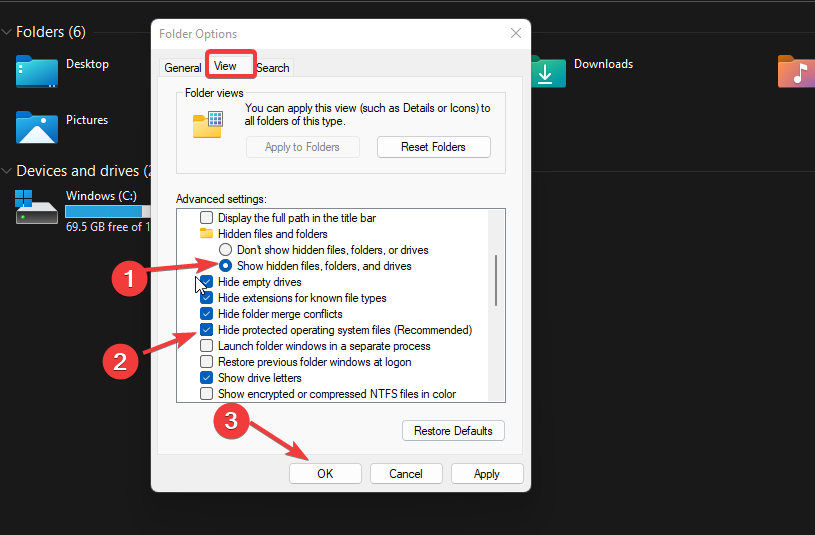
- Click on Options in the top-right corner of the screen and click the View option, then select Show hidden files, folders, and drives.
- Uncheck the box for the Hide protected operating system files option, then click Yes to confirm the action.
- Click OK.
- Navigate to the following folder and click on the Old_Username profile:
C: UsersOld_Username folder - Select all the files and folders in the Old_Username folder (except Ntuser.dat, Ntuser.dat.log, and Ntuser.ini) and press Ctrl + C to copy the selected folders.
- Navigate to this folder and click on New_Username:
C: UsersNew_Username - Press Ctrl + V to paste the files that you copied.
- Restart your PC and log in with your default profile.
6. Clean File Explorer history
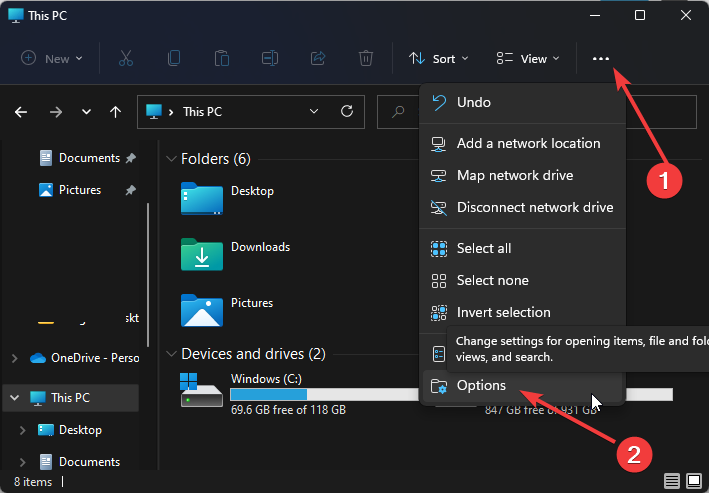
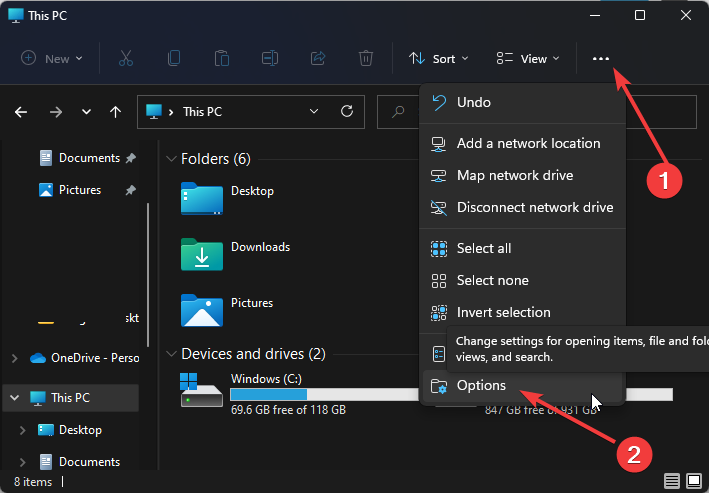
- Open File Explorer and click on the three horizontal dots.
- Click on the Options from the list.
- Go to Privacy under the General tab.
- Tap Clear and press OK.
This solution is also useful if the Windows 11 desktop is not refreshing but the highlighted guide will provide more solutions.
7. Run netsh and winsock reset
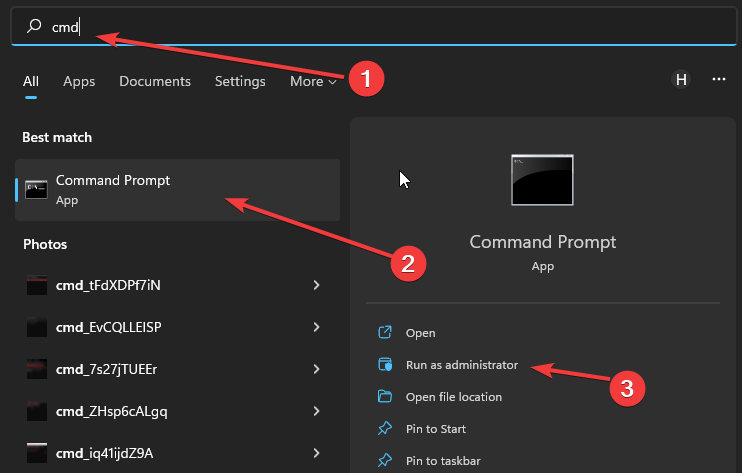
- Click Start and input cmd in the search space.
- Right-click on Command Prompt and select Run as administrator.
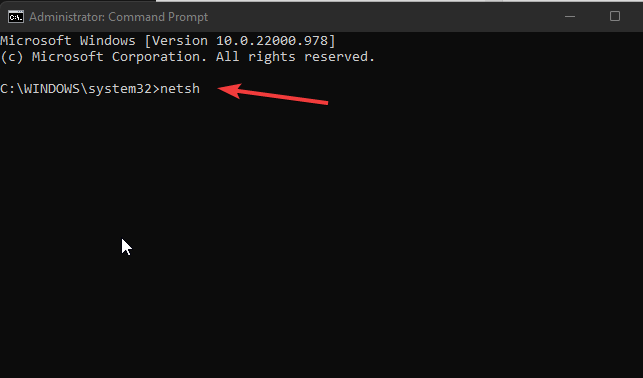
- Type the following and press Enter:
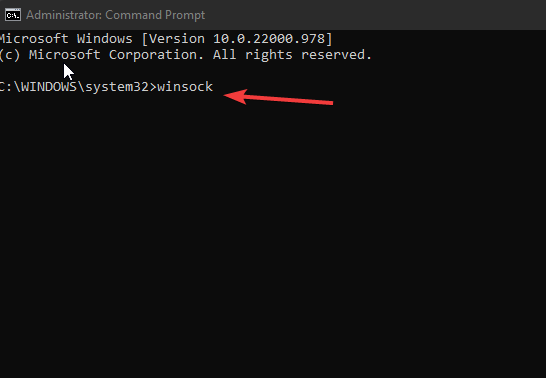
netsh - Input the following in Command Prompt and hit Enter:
winsock - Finally, type this and press Enter:
reset
Why do I need to refresh Windows Explorer?
Refreshing the Window File Explorer allows you to verify the new changes in your files and folders. It updates and incorporates the changes you make into the computer.
Nonetheless, if you’re interested in how to fix the no permissions to save in this location error in File Explorer, our detailed guide is what you’re looking for.
Likewise, we recommend you check our article on how to recover missing tabs in Windows 11 File Explorer for solutions.
If this guide has been helpful, kindly leave suggestions or feedback in the comments section. We’d like to hear from you.





User forum
0 messages