How to Use ReadyBoost on Windows 11 to Speed Up Your PC
This feature only works on slower hard drives
3 min. read
Updated on
Read our disclosure page to find out how can you help Windows Report sustain the editorial team. Read more
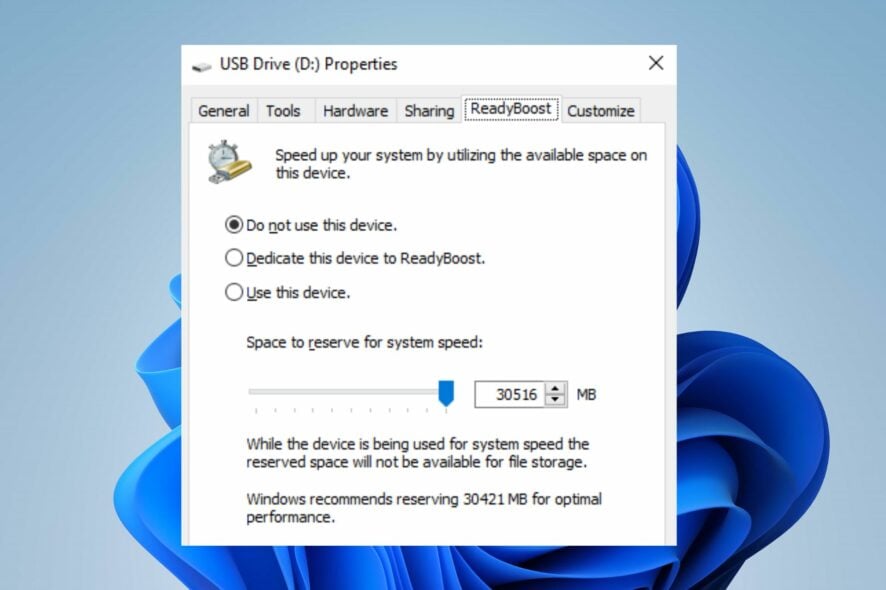
ReadyBoost on Windows 11 can speed up your hard drive by caching data on your flash drive or SD card, and in this guide, we’ll show you how to enable it, so let’s get started.
It is available on Windows 11, and it works, but you need a slow hard drive and a compatible flash drive to use it.
How to activate and use ReadyBoost on Windows 11
1. Run the SuperFetch or SysMain service on your PC
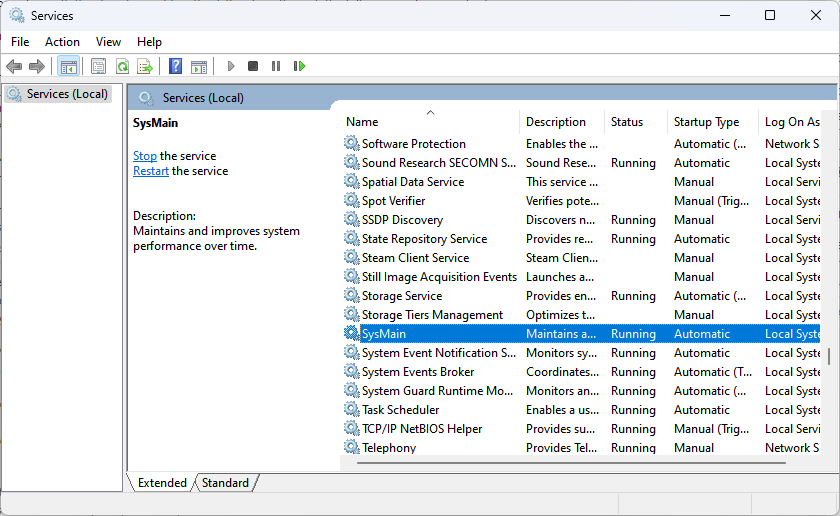
- Press Windows + R key to open the Run dialog box, type services.msc, and press Enter to open the Service Manager.
- Find the SuperFetch or SysMain from the list of services, then check if it is running.
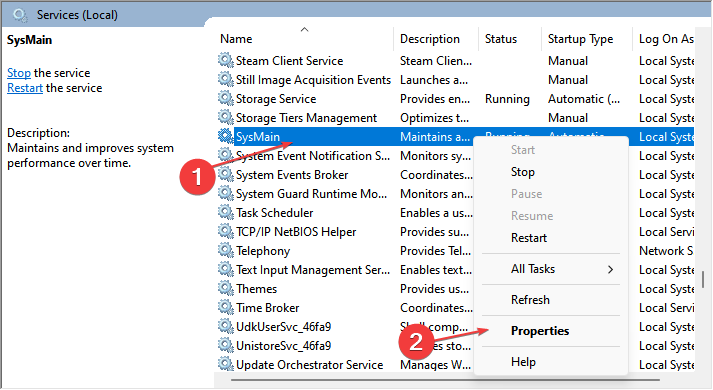
- If the SuperFetch / SysMain service is not running, right-click it, then click on Properties.
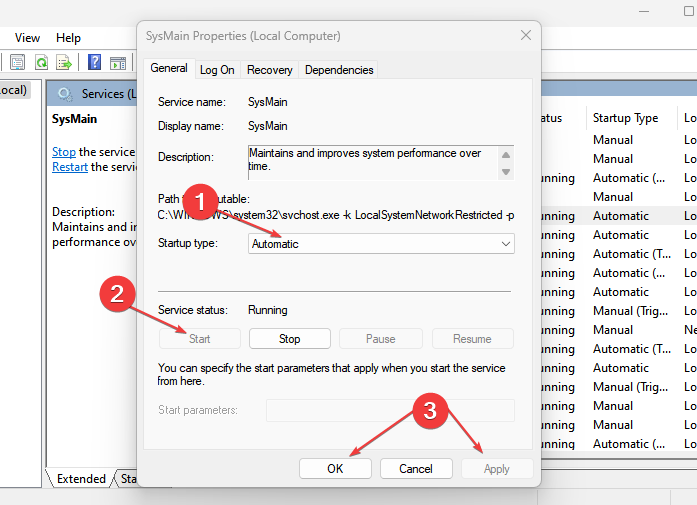
- Change the Startup type to Automatic, click on the Start button, then click OK and Apply to save the changes.
2. Enable ReadyBoost on Windows 11
- Plug your USB flash drive or memory card into the appropriate port and check if it appears on your desktop.
- Press Windows + E key to open File Explorer.
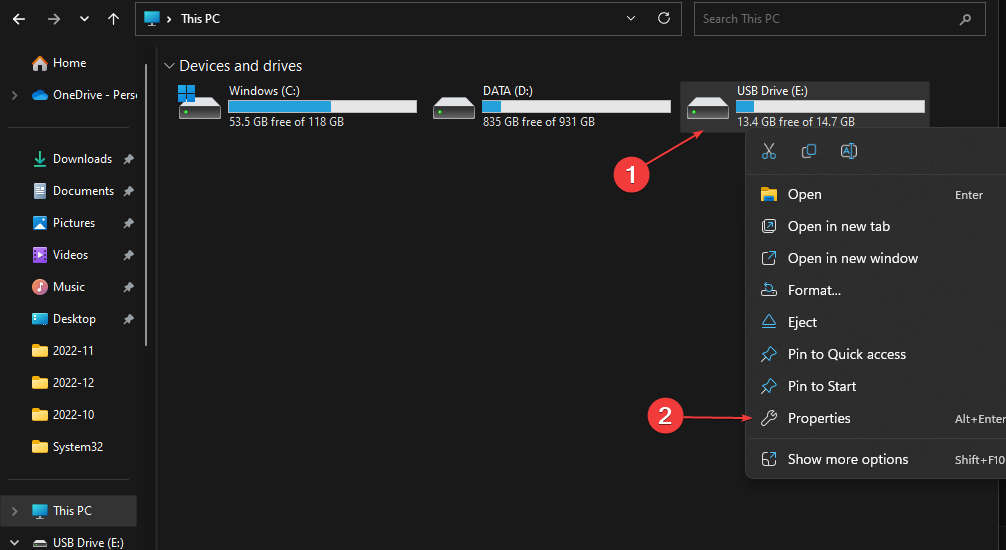
- Click on This PC from the left pane, right-click the USB flash drive and click Properties from the drop-down.
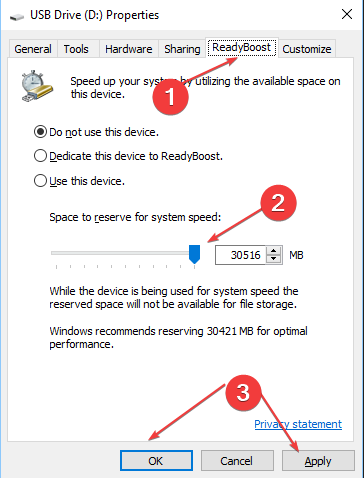
- Go to the ReadyBoost tab, then wait for Windows to check if your drive is compatible with ReadyBoost.
- Click the radio button for Use this device option, go to the slider for Space to reserve for system speed, and move it to the right end.
- Click the OK button, and click Apply to imitate the ReadyBoost feature.
How do I make my USB ReadyBoost compatible?
To avoid RedbyBoost compatibility issues like This device cannot be used:
- Ensure your USB flash drive or memory card has a free storage capacity of at least 500 MB and a high data transfer rate.
- The USB port key must be at least USB 2.0.
- Ensure the USB device can do 3.5 MB/s for 4 KB random reads across the system and 2.5 MB/s for 512 KB random writes across the device.
Why is there no option for ReadyBoost in Windows 11?
Many users reported that ReadyBoost isn’t available on their PCs, which is no surprise. If you have an SSD, you won’t gain any performance boost with the ReadyBoost feature.
If that’s the case, the ReadyBoost tab will be missing on Windows 11, so you’ll have to use ReadyBoost alternatives instead.
ReadyBoost should run on your device without running into any errors. If Windows 11 is not recognizing the USB device, check how to fix it.
If you want to make Windows 11 faster, using ReadyBoost isn’t the best option, and instead you should change these Windows 11 performance settings.
Before we go, you should know that this feature isn’t new, and has been a part of Windows for a while. We also have a great guide on how to use ReadyBoost on Windows 7, so don’t miss it.
Do not hesitate to leave your suggestions or questions in the comments section.



User forum
0 messages