ReadyBoost Tab Missing in Windows 11: How to Bring It Back
Try these quick fixes if ReadyBoost tab is missing
5 min. read
Updated on
Read our disclosure page to find out how can you help Windows Report sustain the editorial team Read more
Key notes
- The ReadyBoost tab missing on Windows 11 is due to compatibility issues with the USB device.
- Corrupt system files on the PC can impede its ability to read the USB device correctly, resulting in the ReadyBoost tab not appearing.
- Updating the USB drivers in the Device Manager can fix the problem in no time.
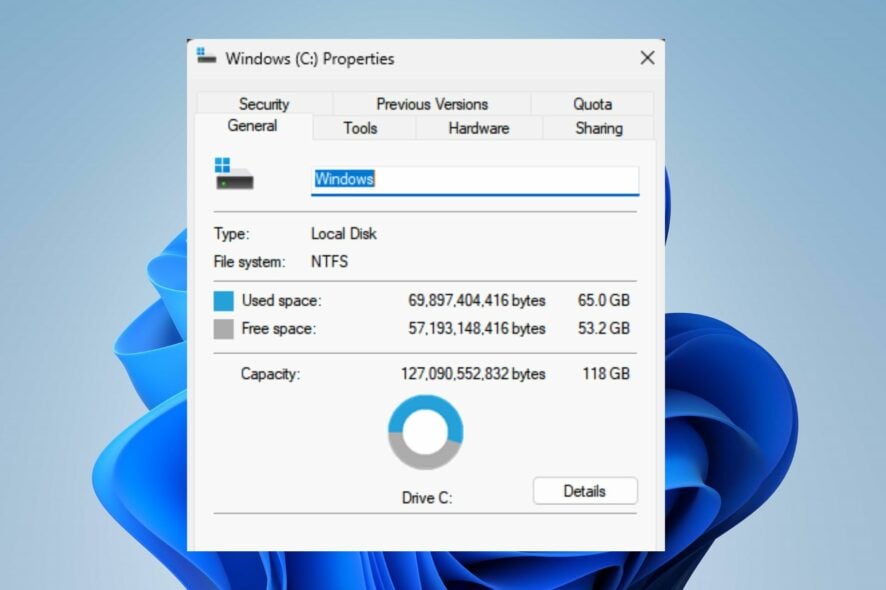
The ReadyBoost feature helps increase system speed when Windows access the HDD. The feature is available on most Windows versions. However, some users report the ReadyBoost tab is missing on Windows 11.
Also, the missing feature will prevent you from improving your PC performance on Windows 11.
Why is the ReadyBoost tab missing on Windows 11?
The ReadyBoost tab may be missing on Windows 11 for many reasons ranging from issues with the USB device to problems with Windows.
However, the device compatibility issue is one of the most common factors. If the USB device plugged into your PC doesn’t meet the requirements for ReadyBoost, the tab will not be available.
Other factors that can cause the ReadyBoost tab to be missing on Windows 11 are:
- Recent Windows updates – Windows users can encounter problems with some services on their PCs if the recent update is not fully installed or corrupt. It can cause the ReadyBoost tab to be missing, even when the USB device is intact.
- Corrupt system files – It is common for Windows to malfunction when a corrupt system file is blocking its functionality. It can cause its services to fail and not respond when initiated. So, ReadyBoost missing on your PC can be due to corrupt system files.
- Outdated drivers – When the driver responsible for the USB drive is outdated, it can cause issues with its activities, such as using ReadyBoost. Also, outdated drivers can expose your computer to bugs that affect its performance.
Fortunately, you can fix these causes by troubleshooting your PC. Hence, we’ll take you through some fixes for the issue.
What can I do if the ReadyBoost tab is missing on Windows 11?
Go through the following before proceeding with any advanced troubleshooting:
- Temporarily disable antivirus software on your PC.
- Turn off background apps running on your computer.
- Restart Windows in Safe Mode and check if the ReadyBoost tab is still missing.
- Check if the USB driver or SD card plugged into the computer is compatible with ReadyBoost. The ReadyBoost tab won’t show under its properties when the drive isn’t supported.
- You should check the requirements below and see if your drive meets up with them: a USB flash drive or a memory card with a free storage capacity of at least 500 MB; a high data transfer rate; it must be in an NTFS drive or card format.
If the problem persists, try the solutions below.
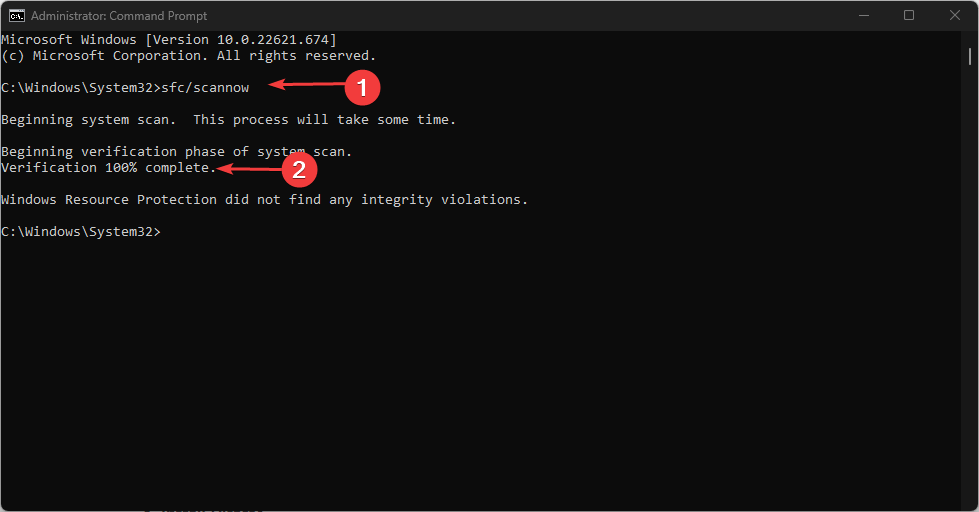
1. Run an SFC scan
- Left-click the Start button, type command prompt, and click Run as administrator.
- Click Yes on the User Account Control prompt.
- Type the following and press Enter:
SFC /scannow - Restart your PC and check if the ReadyBoost tab appears.
The System File Checker (SFC) scan will detect possible corrupt or missing system files that can be responsible for the ReadyBoost tab missing.
You can check how to fix the run as administrator option if it’s not working on your PC.
If you are not sure about following the manual steps, you can also opt for automated repair software.
These tools help you run an extensive scan of your computer to find missing or corrupted files and then proceed to replace them with healthy, new files from their large databases.
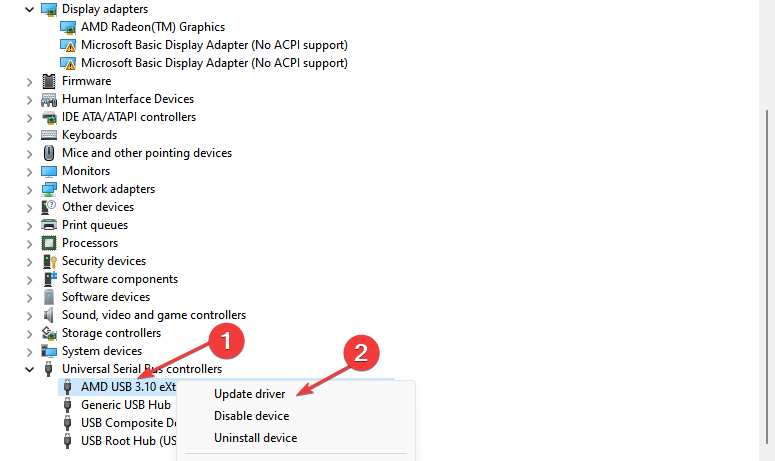
2. Update USB drivers
- Press Windows + X key to launch the Quick Link Menu and click on Device Manager.
- Right-click on all the USB devices, then select Update driver from the drop-down.
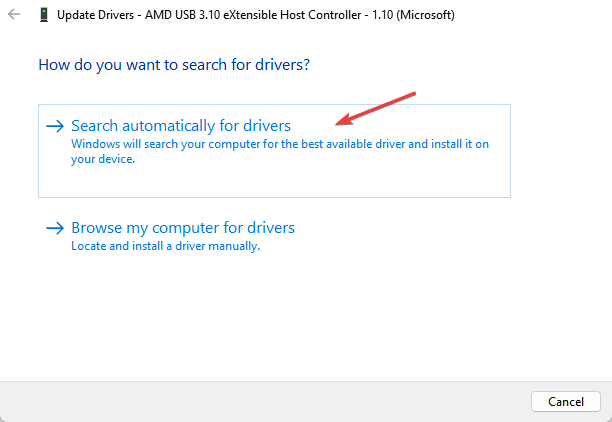
- Click on Search automatically for drivers.
- Restart your PC and check if the error persists.
The USB driver update will fix bugs preventing the system from interacting with the USB device.
You can check our article for other ways to update drivers on Windows 11 if you can’t get through with the steps above.
3. Uninstall the recent Windows update
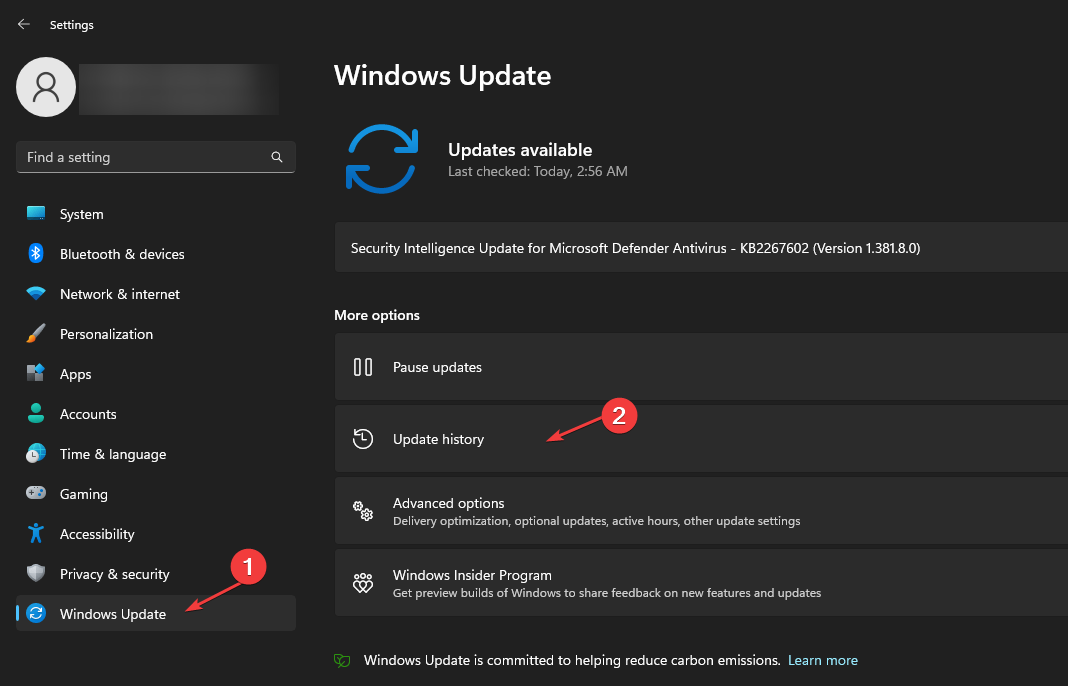
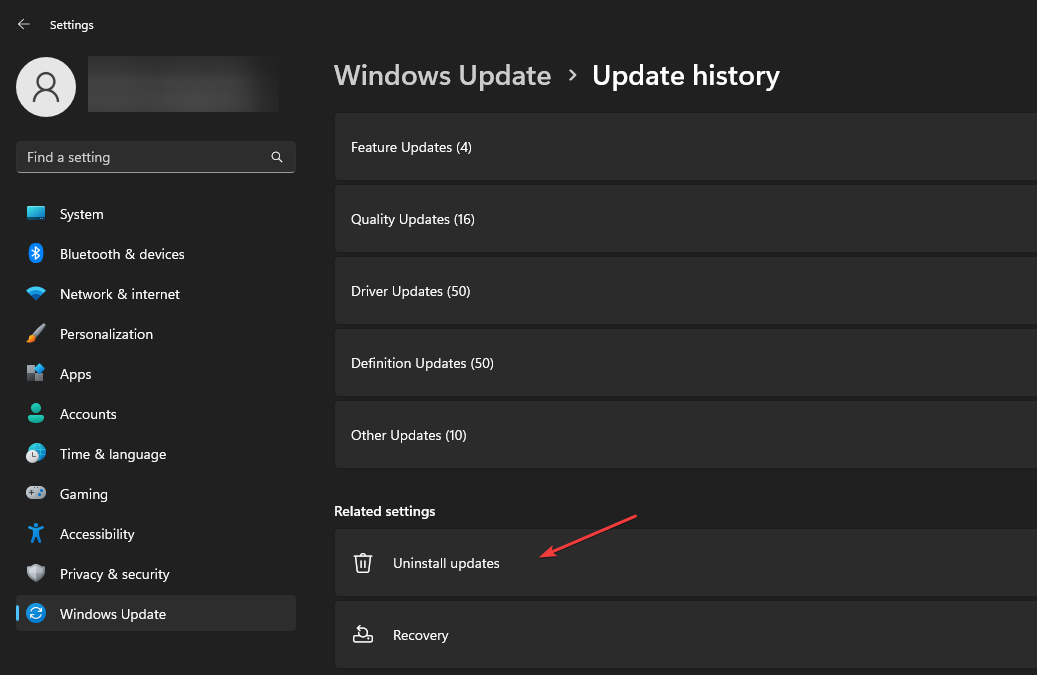
- Press Windows + I key to open the Settings app.
- Navigate to the Windows Update tab and select Update history.
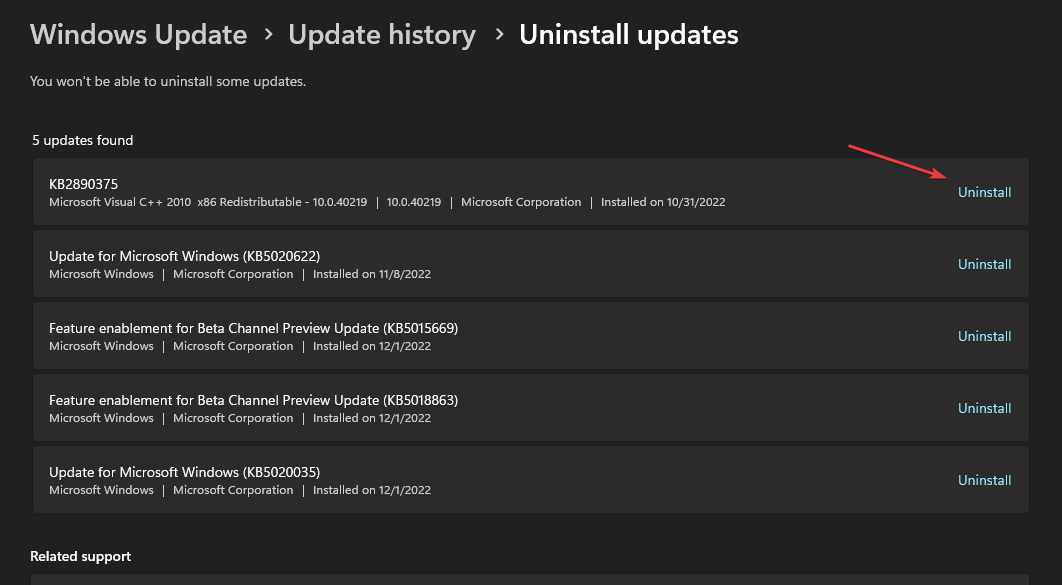
- Click on Uninstall updates and select the most recent update installed.
- Click on the Uninstall button.
Uninstalling the recent Windows update will fix issues caused by the bugs in the recent Windows updates and make the ReadyBoost tab available.
Conclusively, our readers can check our guide about Windows 11 not recognizing the USB device and some fixes.
Also, you can read our article on how to make Windows 11 faster by disabling processes you don’t need on your PC.
If you managed to fix this issue, we have a guide on how to enable ReadyBoost on Windows 11, so don’t miss it.
This feature is available on other versions of Windows, and to learn more, don’t miss our ReadyBoost on Windows 7 guide to see how to enable it.
You can leave your comments below if you have any questions or suggestions regarding this guide. Should you have other queries also, do not hesitate to drop them.

