How to Fix USB Device Not Recognized in Windows 11
In most cases, your power settings are responsible for this issue
4 min. read
Updated on
Read our disclosure page to find out how can you help Windows Report sustain the editorial team. Read more

If you’re getting a not recognized error when trying to access your USB device in Windows 11 or it’s simply not showing up in File Explorer, keep reading. We’ll show you how to fix it.
The reason why your USB is not showing up in Windows 11 is most likely related to device drivers or power settings. Follow along as we show you how to address these issues.
How do I fix USB device not recognized by Windows 11?
1. Disable the selective suspend option
- Enter the keyword edit power plan in the search box. Click Edit power plan to bring up the Edit Power Plan Control Panel applet.
- Next, click Change advanced power settings in that applet.
- Double-click USB settings on the Power Options window.
- Then double-click USB selective suspend to open the setting that you can see below: Select the Disabled option on the Setting drop-down menu.
- Press the Apply and OK button on the Power Options window.
2. Change the power management settings for USB root hubs
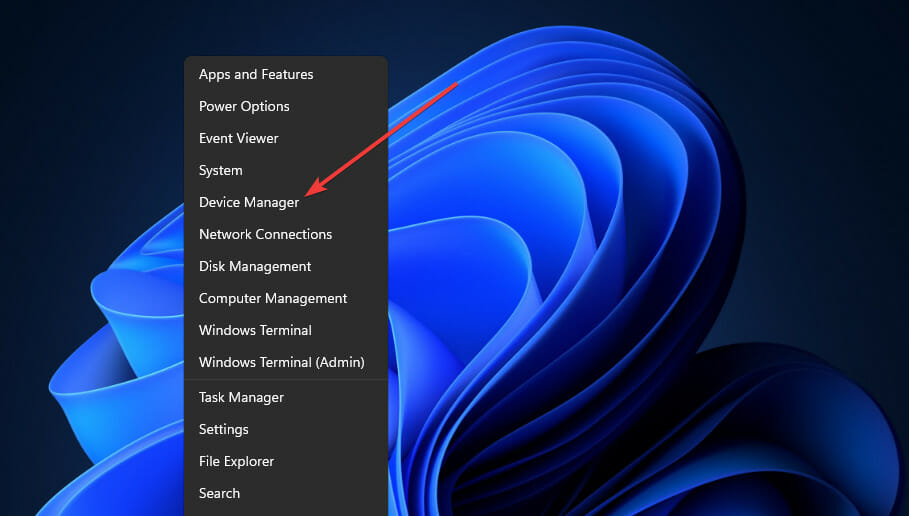
- Right-click Windows 11’s Start button to open a handy shortcuts menu.
- Select the Device Manager shortcut on that menu.
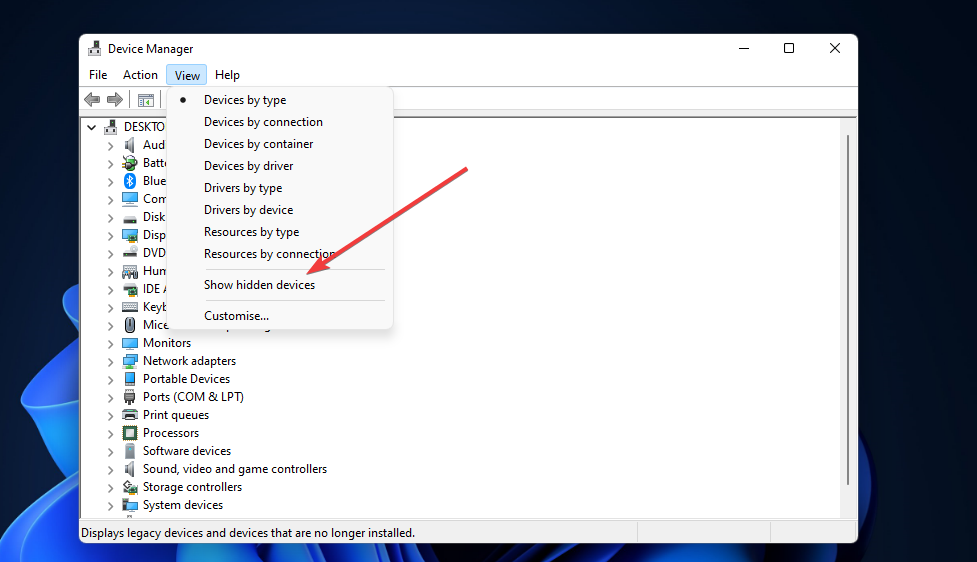
- Click the View menu.
- Select the Show hidden devices option on the menu.
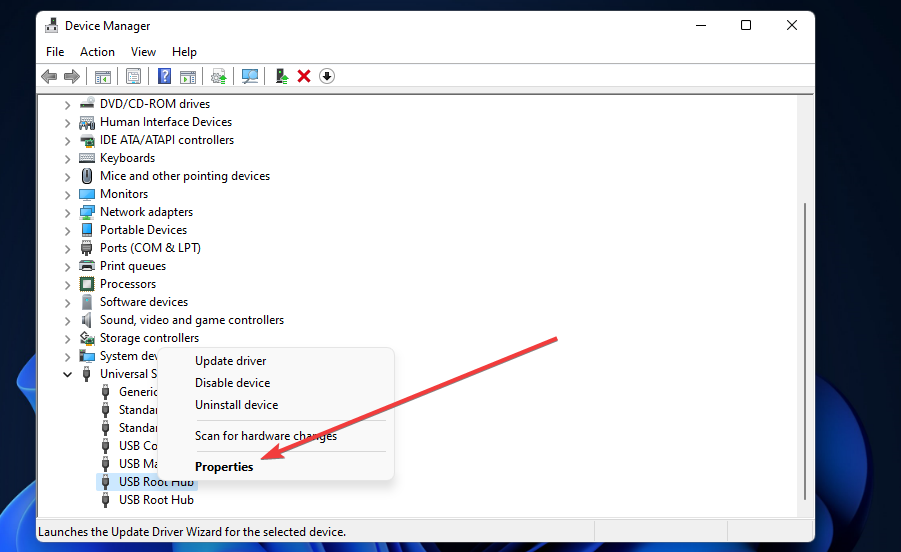
- Double-click the Universal Serial Bus controllers category.
- Right-click a USB Root Hub listed there and select Properties.
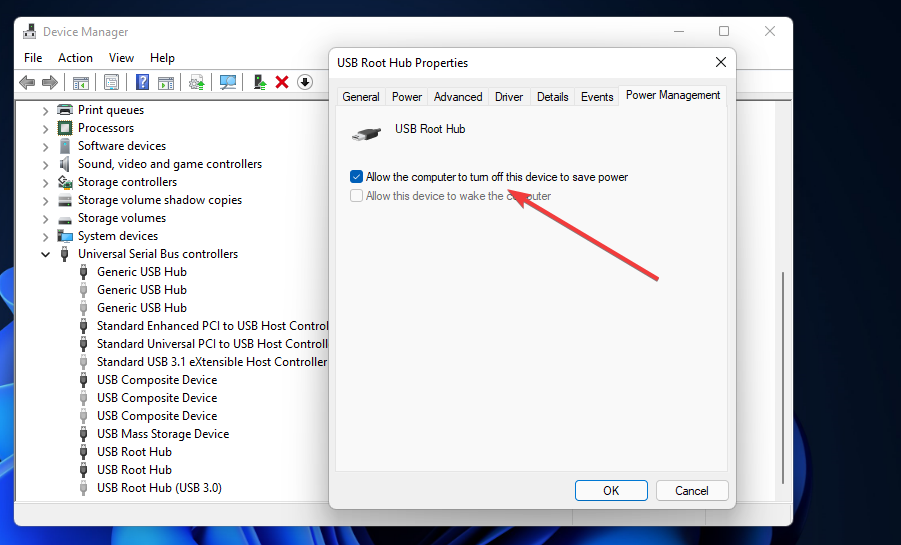
- Then select the Power Management tab.
- Uncheck the Allow this computer to turn off this device to save power checkbox to deselect that option.
- Click OK to close the USB Root Hub window.
- Repeat steps six to nine for all USB Root Hubs listed in Device Manager.
3. Assign a drive letter to the USB device
- Plug the USB storage drive into your PC.
- Right-click Start and select Disk Management.
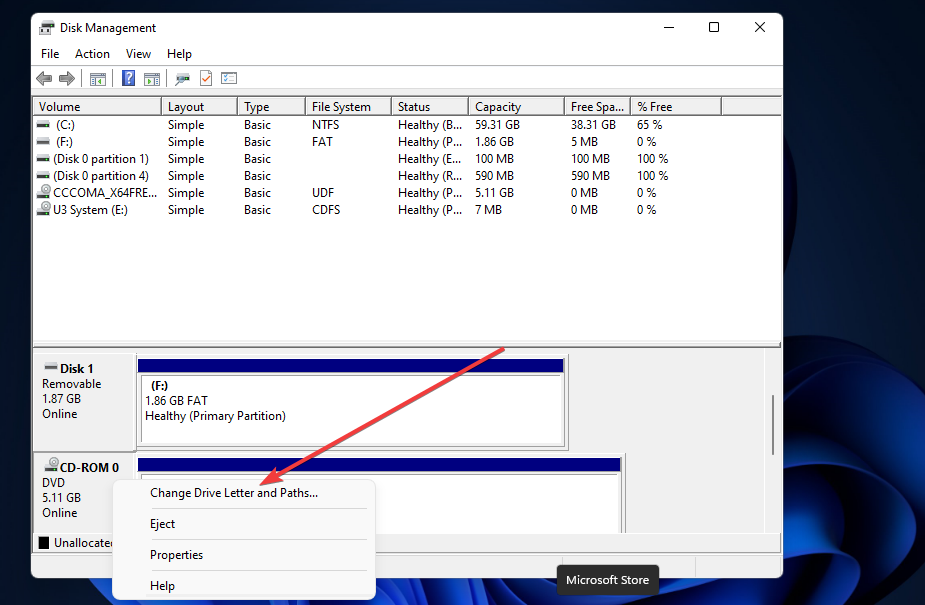
- Next, right-click the USB drive in Disk Management and select Change Drive Letter and Paths.
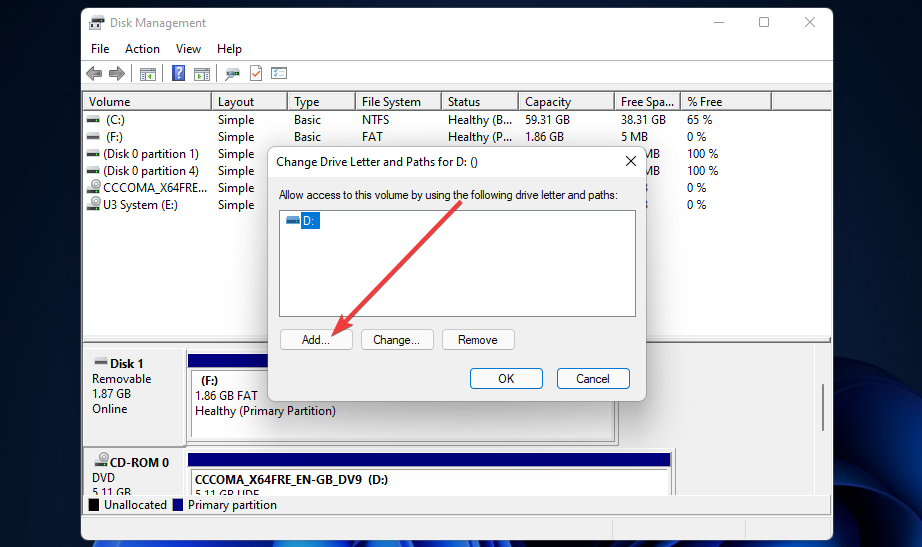
- Click the Add button on the Change Drive Letter and Path window that opens.
- Press the OK button on the Add Drive Letter or Path window.
4. Update drivers for USB root and generic hubs
- Open Device Manager as covered in the first couple of steps of the third resolution.
- Next, click View and Show hidden devices.
- Double-click Universal Serial Bus controllers to expand that category.
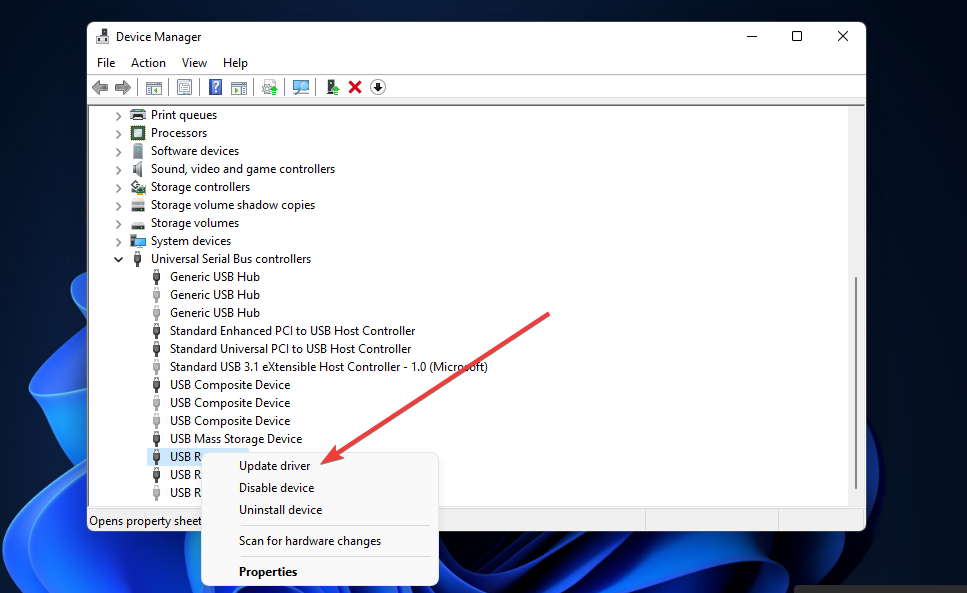
- Right-click a USB Root Hub to select its Update driver option.
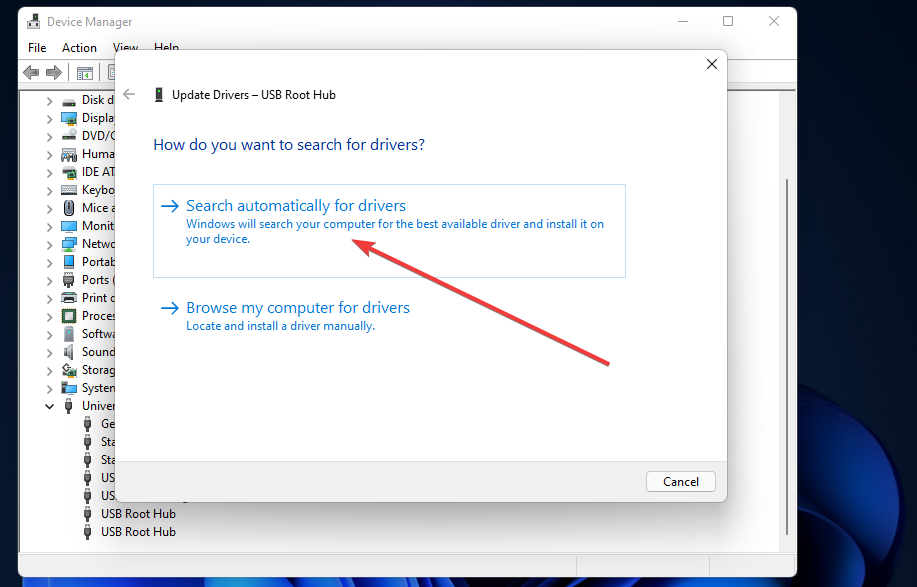
- Select Search automatically for drivers in the Update Drivers window that opens.
- Repeat steps four and five for all USB Root Hub and Generic USB Hub controller devices listed.
- Optional: Reinstall the USB root driver and upgrade the chipset drivers.
Alternatively, you can update USB controller drivers with third-party driver updater software. Scanning your PC with a driver updater utility will list all its devices that have outdated drivers.
Then you can select to download and install the latest drivers with the software, so don’t hesitate to check out the tool below in that regard.
⇒ Get PC HelpSoft Driver Updater
5. Reinstall drivers for the USB drive that isn’t recognized
- Insert your USB drive into your desktop or laptop.
- Bring up the Device Manager window as covered in resolution three.
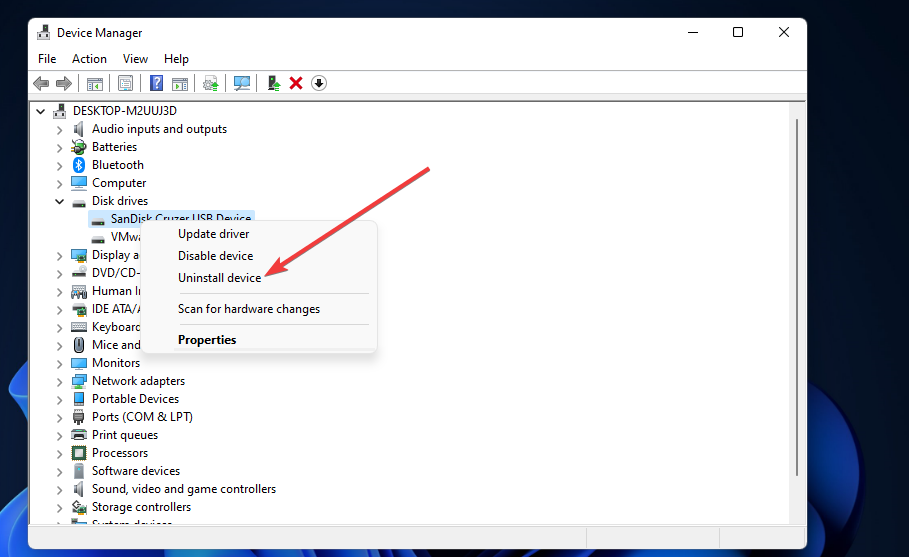
- Double-click Disk drives in Device Manager.
- Next, right-click the USB drive for which you need to fix the not recognized error to select Uninstall device.
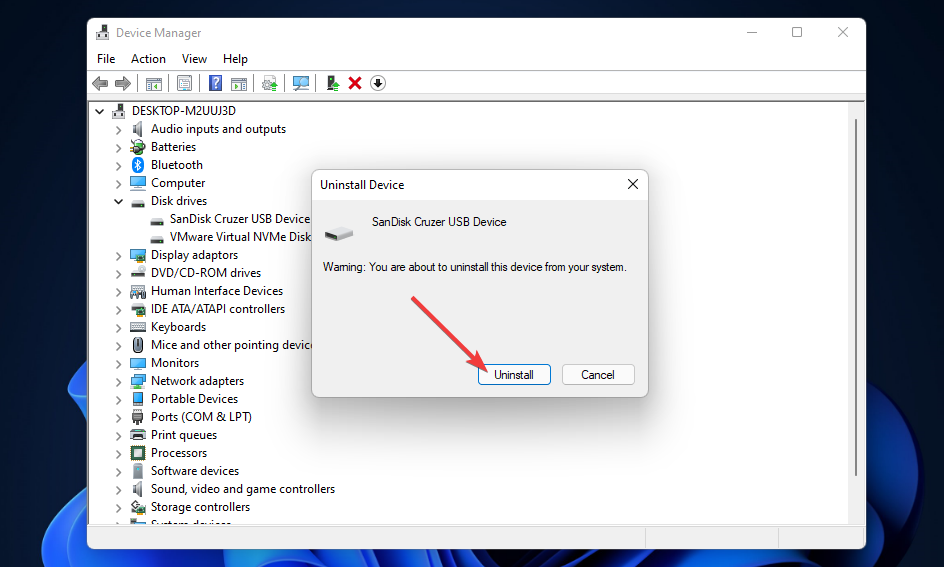
- Click the Uninstall button on the confirmation window that opens.
- Thereafter, unplug your USB device from the PC.
- Wait about one or two minutes, and then connect the USB drive with your PC again.
This error is often associated with USB device not recognized code 43 in Windows 11, but we have an entire guide dedicated to it, so don’t miss it.
Many also reported the last USB device malfunctioned error in Windows 11, however that issue can be easily fixed.
If you’re experiencing issues with USB ports on Windows 10, you can find detailed troubleshooting tips in this guide to fix USB not working on Windows 10.
For problems with a USB to HDMI adapter, check out these solutions to resolve USB to HDMI adapter issues. If your USB-C to DisplayPort cable isn’t functioning as expected, this troubleshooting guide can help.
Finally, if a USB port on your TV has stopped working, this article offers fixes for USB ports not working on TVs.
As you can see, it’s pretty simple to fix this error, but if you’re using an older version of Windows, we have a guide on how fix USB device not recognized error in Windows 10, so don’t miss it for more solutions.





User forum
1 messages