How to Copy Files to Remote Computer With Powershell
Easy file copy scripts on PowerShell
4 min. read
Updated on
Read our disclosure page to find out how can you help Windows Report sustain the editorial team. Read more
Key notes
- PowerShell is a robust Microsoft scripting terminal used to perform multiple operations.
- You can transfer single and multiple files to remote machines using the proper scripts.

You must have found this guide because you want to know how to copy a file to a remote computer using PowerShell.
The good news is that we understand the need for file sharing and have put together every detail you need to know in this article.
So without much ado, let us get to it.
Why should I transfer files using PowerShell?
PowerShell may be used to transfer files for a number of reasons:
- Speed: When uploading a lot of data across a network, PowerShell may be quicker than utilizing GUI-based solutions.
- Automation: You may transmit files automatically on a schedule or in reaction to certain circumstances by using PowerShell scripts that have been automated.
- Versatility: File transfers utilizing FTP, FTPS, SFTP, and SCP are all possible with PowerShell.
- Handling errors: PowerShell has strong error-handling features that might be helpful when transferring files to make sure the transfer went well.
- Reporting: PowerShell is capable of generating thorough reports on the transfer procedure, which include the total volume of data transferred, the number of files transferred, and any mistakes that had occurred.
In general, managing file transfers using PowerShell may be practical and effective, especially in a professional setting.
Now here is how to copy files to remote machines using the tool.
How do I copy a file to a remote computer using PowerShell?
1. Copy a file from a remote computer using PowerShell
1.1 Set up the remote connection
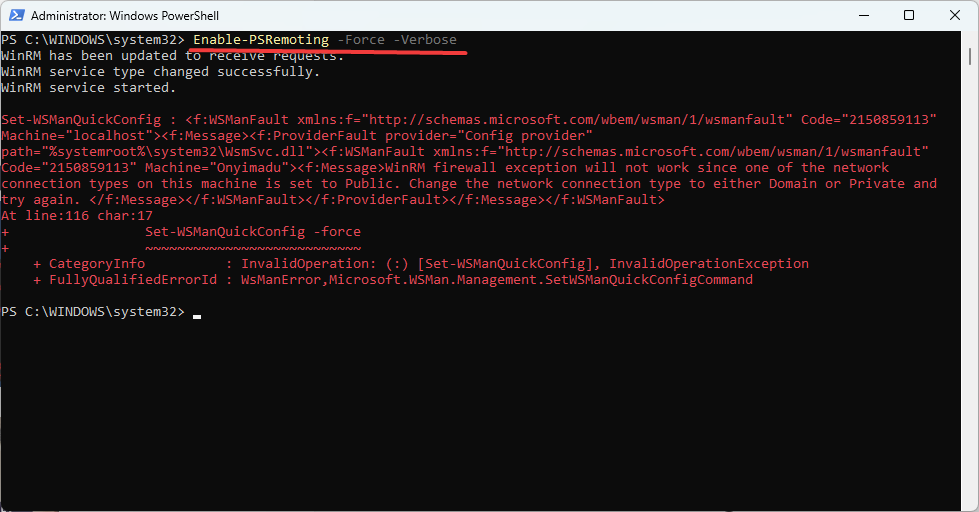
- Open PowerShell with admin rights, input the command below, and hit Enter.
Enable-PSRemoting -Force -Verbose - If you get the error as displayed in the image above, enter the following command; if not, skip this step:
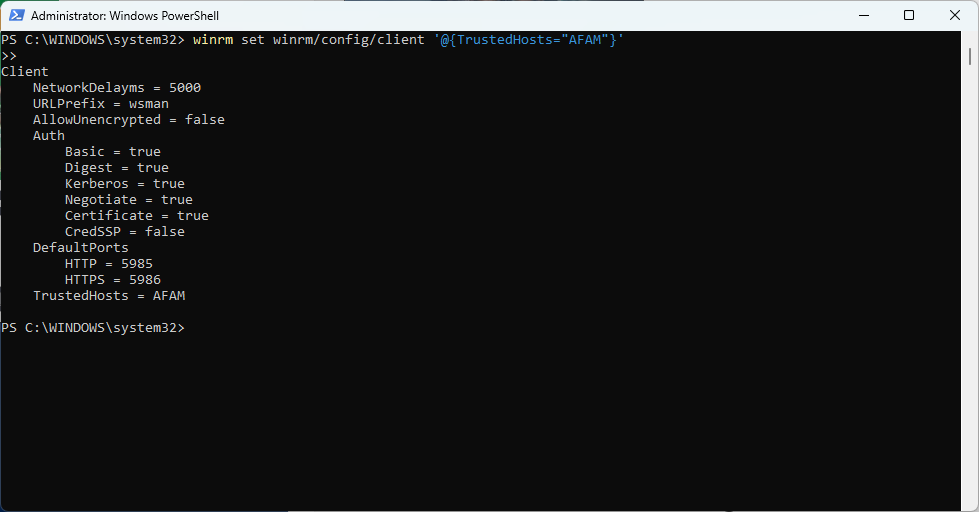
Set-WsManQuickConfig - Use the following command to configure your trusted host, substituting AFAM with the name of the computer:
winrm set winrm/config/client '@{TrustedHosts="AFAM"}' - Use these shell scripts to restart your WinRM service and test the remote computer name after you have added the remote machine name to the trusted host (remember to substitute AFAM for your computer name):
Restart-Service WinRMTest-WsMan @AFAM
A few actions to create a remote connection are listed above. One may copy files to distant machines after establishing the remote connection.
Note that on a remote system, PowerShell remoting must be enabled. To do this, use the steps highlighted above.
1.2 Use Copy-Item to copy the file
- Use the New-PSSession cmdlet to start a session using the command below (remember to replace AFAM with the PC name).
$SESSION= New-PSSession -Computer 'AFAM' -Cred $credential - Connect to the newly created session using the command below (note that you can use the cd command to change the directory if needed):
Enter-PSSession $SESSION - Copy the file using the command below (remember to replace initial and final location with the actual paths you need the file copied from and to):
Copy-Item –Path "initial location" –Destination "final location" - You may need to quit the shell from the remote machine access after interacting with the remote machine. To do this, you must terminate the session using the Exit-PSSession cmdlet as follows:
Exit-PSSession
2. Copy multiple files to a remote computer using PowerShell
- Follow all the steps mentioned in solution 1.1
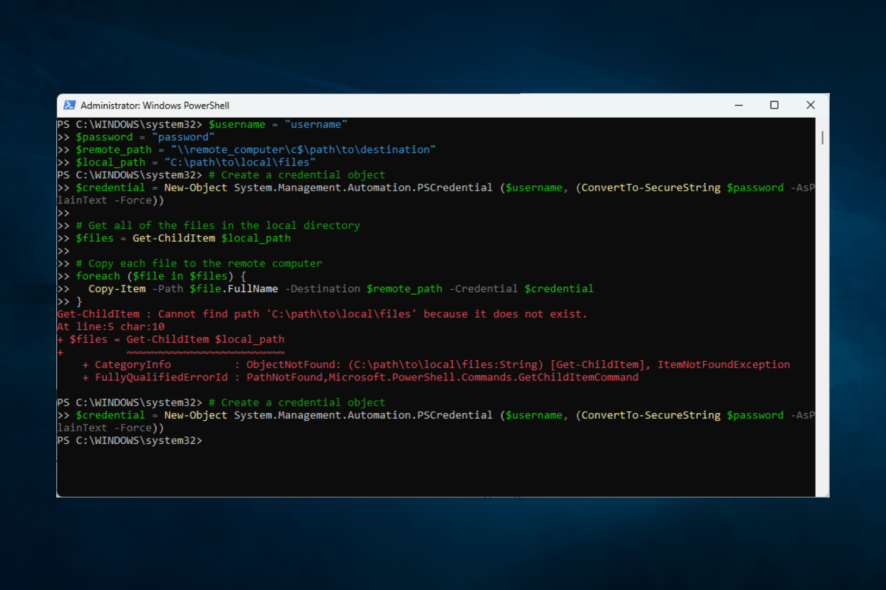
- Declare some variables using the script below (include actual values for the username, password, and both paths):
$username = "username"
$password = "password"
$remote_path = "\remote_computer\c$\path\to\destination"
$local_path = "C:\path\to\local\files" - Next, create a credential object using the script below:
$credential = New-Object System.Management.Automation.PSCredential ($username, (ConvertTo-SecureString $password -AsPlainText -Force)) - Use the script below to get the local path that has been declared:
$files = Get-ChildItem $local_path - Finally, copy each file to the remote computer using the foreach function:
foreach ($file in $files) {
Copy-Item -Path $file.FullName -Destination $remote_path -Credential $credential
}
This will copy all the files in the local directory specified by $local_path to the destination directory on the remote computer specified by $remote_path. You will need to provide the correct values for $username, $password, $remote_path, and $local_path.
There you have it. These are some of the best ways to copy files to a remote computer using MS PowerShell.
PowerShell is a very robust tool, and with some knowledge of scripting, there is a lot you may be able to achieve using the tool. You can copy files from and to remote computers using the tool.
Please let us know in the comments below if this guide has been helpful.


User forum
0 messages