How to Connect Windows 11 to A Projector?[Easy Setup]
A step-by-step guide to using a projector as a mirrored display
4 min. read
Updated on
Read our disclosure page to find out how can you help Windows Report sustain the editorial team. Read more
Key notes
- To do this, you can plug an HDMI cable into your computer/laptop and the projector and adjust the display settings per your preferences.
- In this guide, we have mentioned all the prerequisites to connect the projector.
You can connect your computer to a projector if you want to share your screen while giving a presentation at work or watching a movie on a big screen. Connecting Windows 11 computer to a projector is a simple process and can be done in a few steps.
This guide will discuss the steps to project the screen on Windows 11. Let’s get started!
How can I connect Windows 11 to a projector?
Before moving to the actual steps, make sure you go through these preliminary checks:
- It would be best if you had a compatible cable that could be used to connect the two devices. The standard wires used are USB-C, HDMI, and VGA.
- Check that your computer operating system and projector are compatible to accept the input from the cable.
- If you connect wirelessly, you must have a wireless adapter compatible with your computer and projector.
- Check if you have the latest drivers and software for the projector on your computer.
- Read the projector manual and the computer’s technical specifications so that both devices support the resolution and refresh rate for a smooth display.
1. Connect with a cable
1.1 Choose a suitable cable
You need to check if you have HDMI, VGA, or USB-C port on your computer and check the projector for HDMI, VGA, or USB-C input. Once established, choose the compatible cable and connect your computer to the projector.
1.2 Customize your projector display
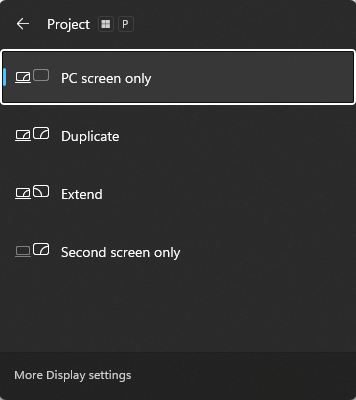
- Press Windows + P to get options for the projection menu of Windows.
- Select the projection settings from the following options:
- PC screen only -this option is not for the projector.
- Duplicate – It will show the same thing as your laptop screen.
- Extend – The projector will be the second monitor.
- Second screen only – Your computer screen will shut off, and the projector image will act as the main screen.
1.3 Change the display settings on your PC
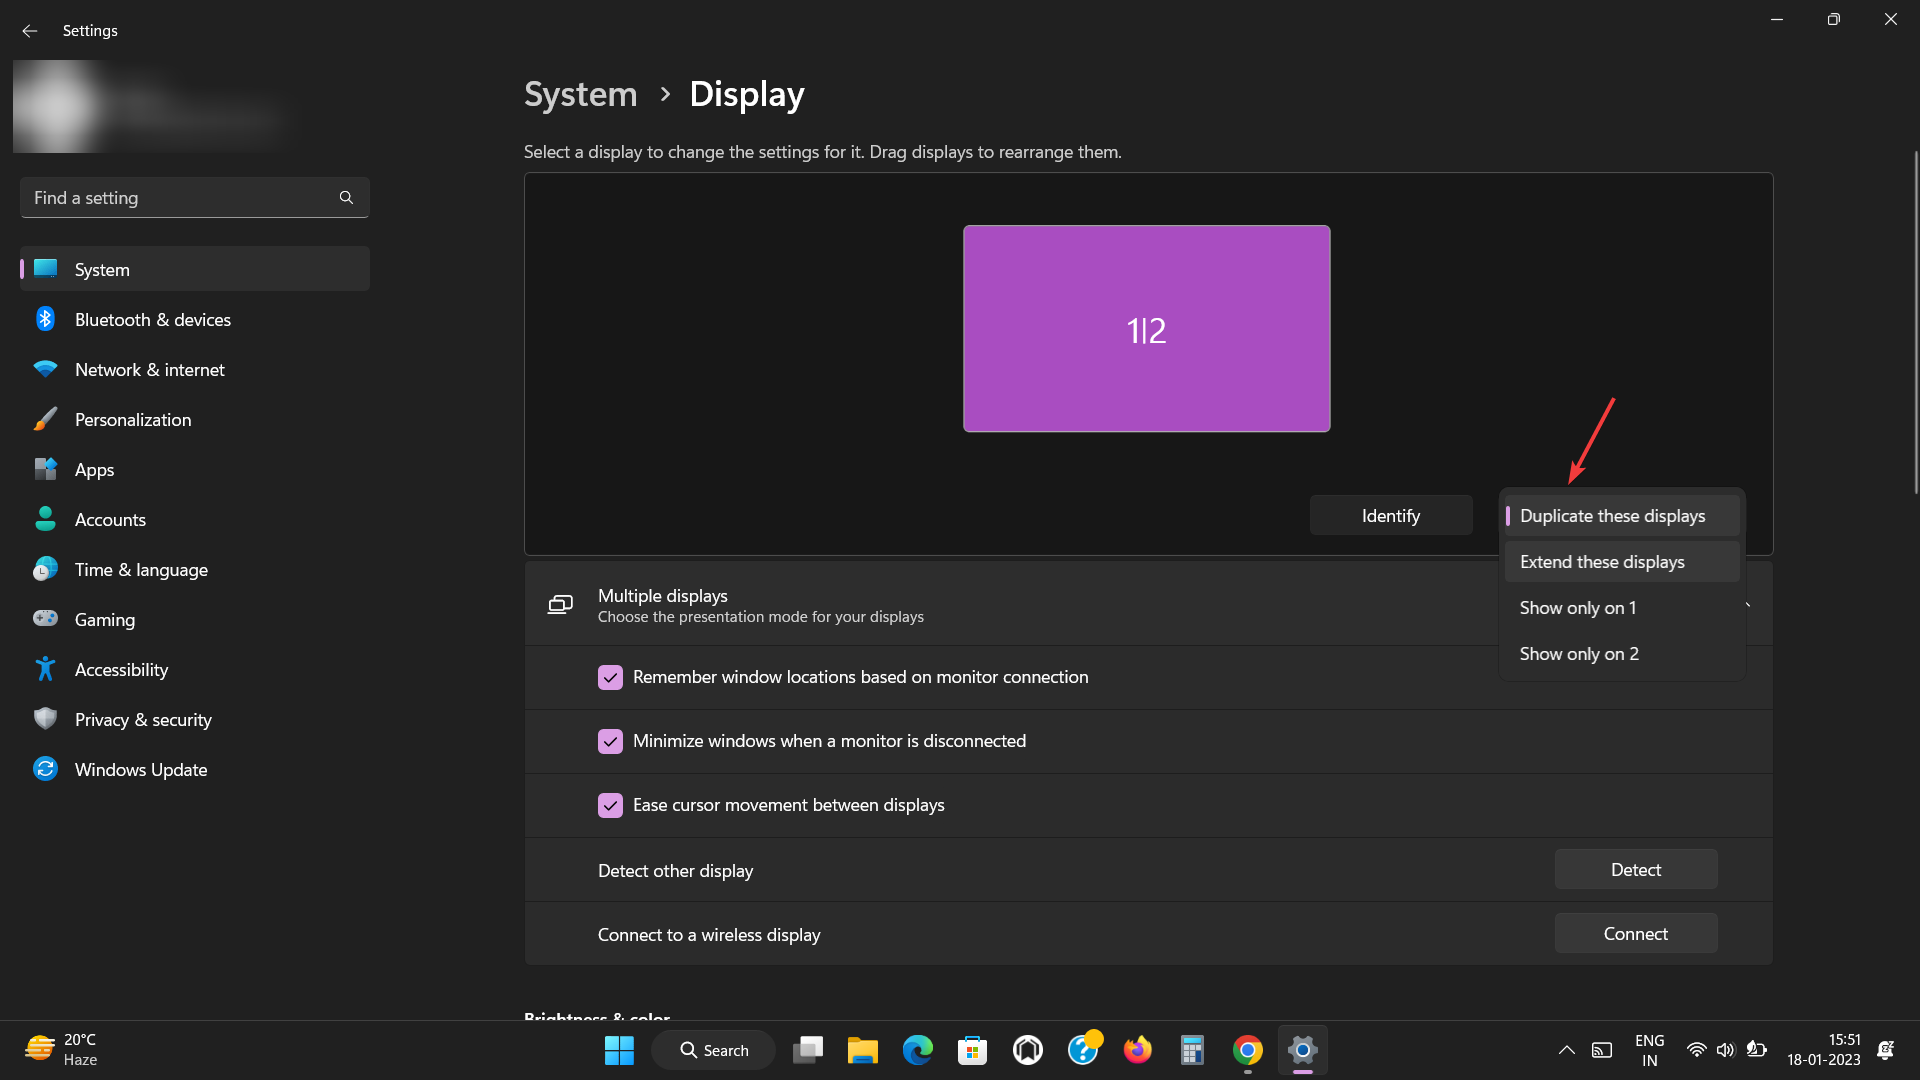
- Press Windows + I to open Settings.
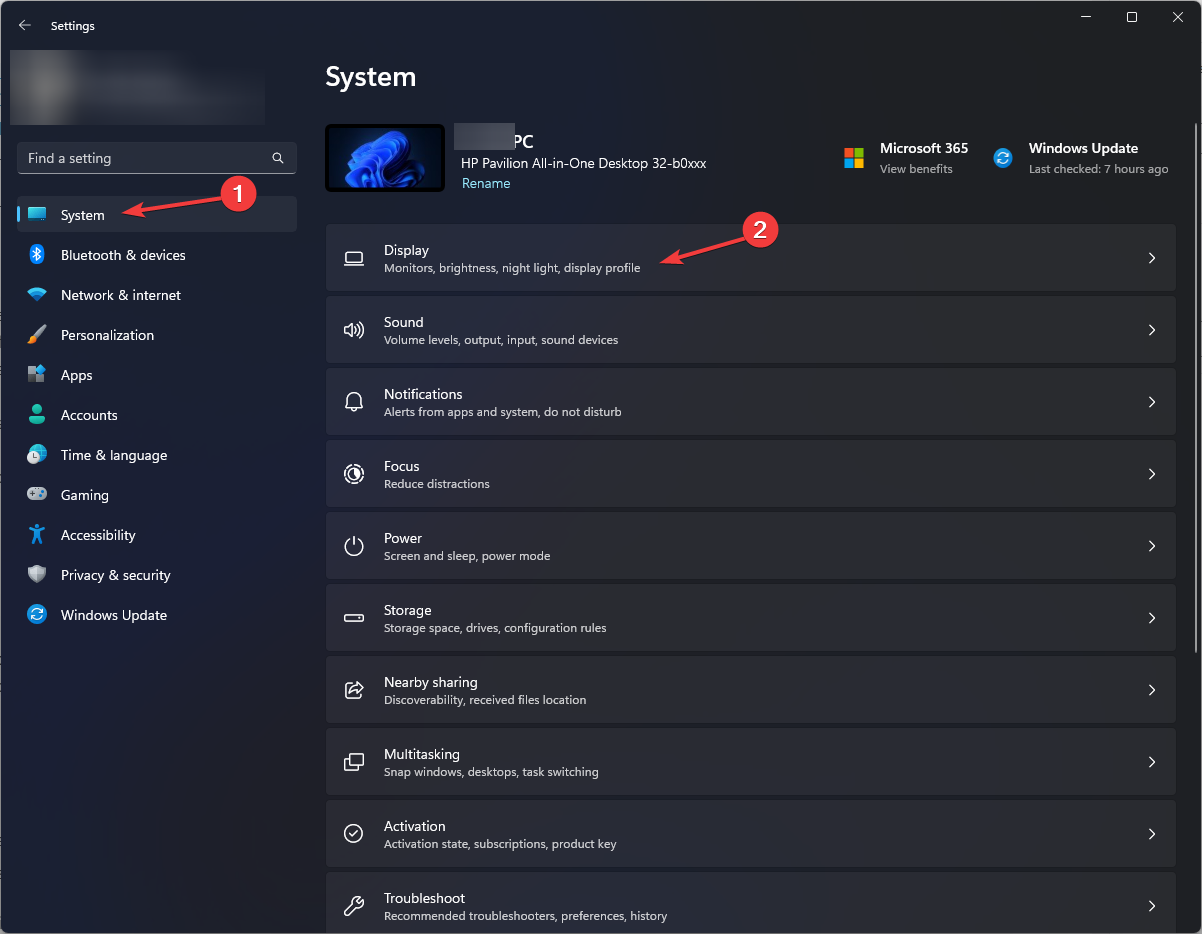
- Go to System, and click Display.
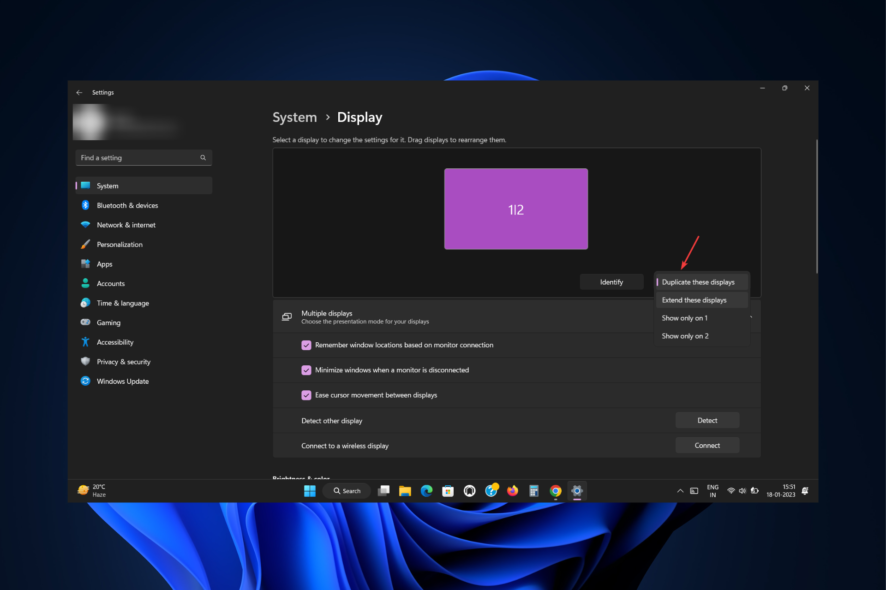
- Select any of the options from the drop-down.
- Duplicate these displays – Shows the same image on your laptop and projected screen.
- Extend these displays – Stretches Windows to fit across both laptop and projected screen.
- Show only on 1 – Choose this before you are ready to present, then switch to Duplicate these displays.
- Show only on 2 – This shows the second display, which is useful when you connect a tablet to a TV for watching movies.
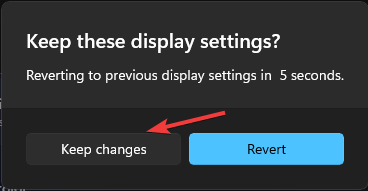
- On Keep these display settings window, click on Keep changes. You need to select the option in 15 seconds. Otherwise, the settings will revert.
1.4 Optimize the image quality
- Press Windows + I to open Settings.
- Click System, then click Display.
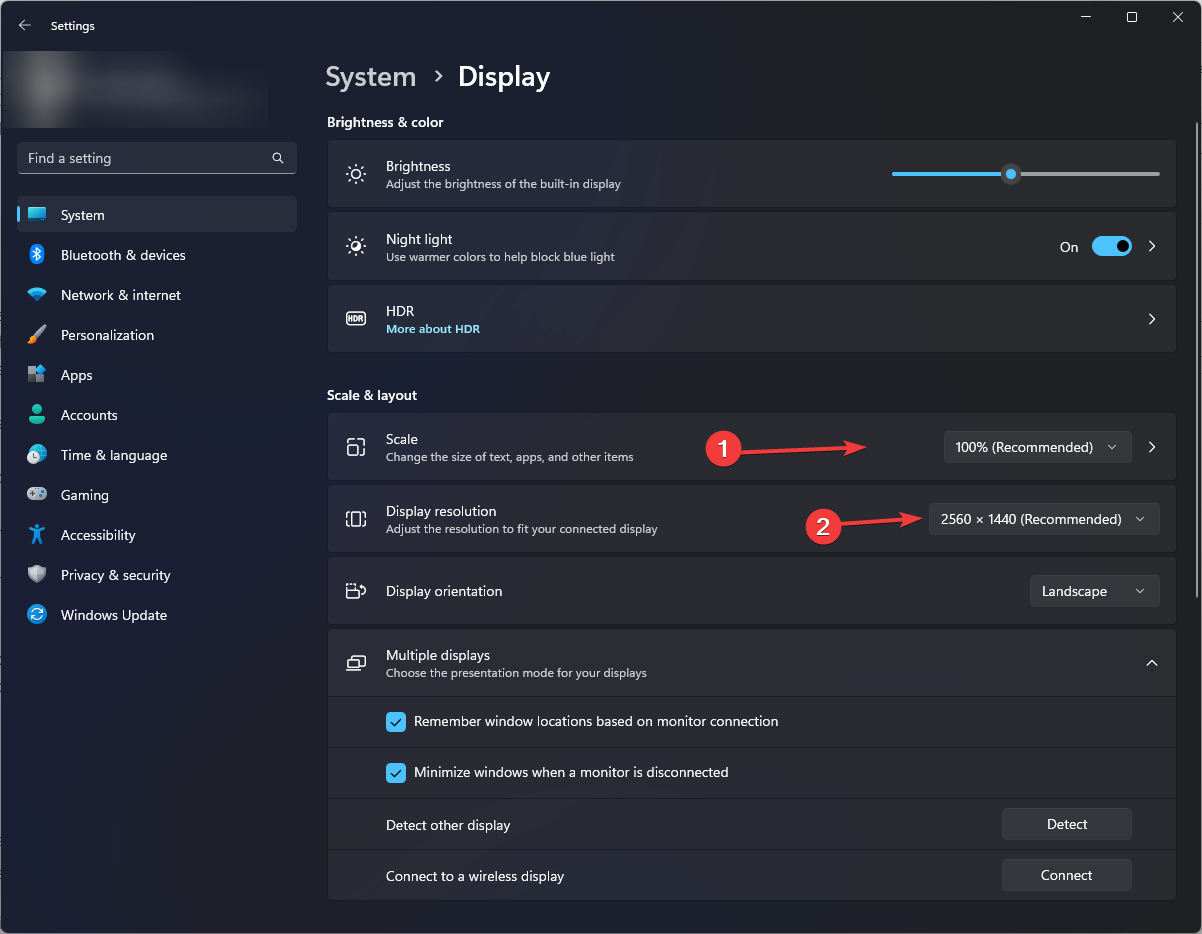
- Under Scale & layout, adjust Scale, Display resolution, and Display orientation.
- On Keep these display settings window, click on Keep changes.
2. Connect Wirelessly
2.1 Download the Wireless adapter feature
- Press Windows + I to open Settings.
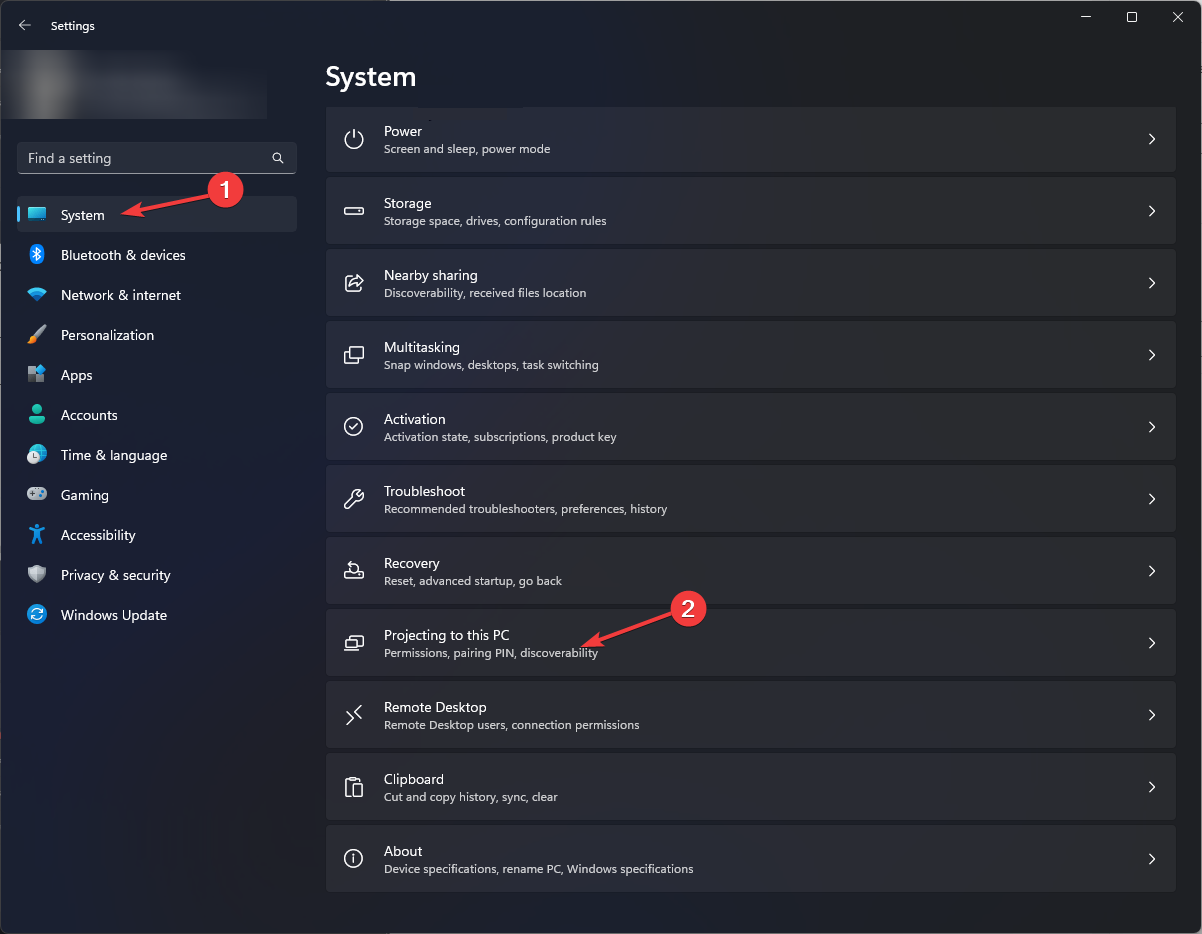
- Go to System, then click Projecting to this PC.
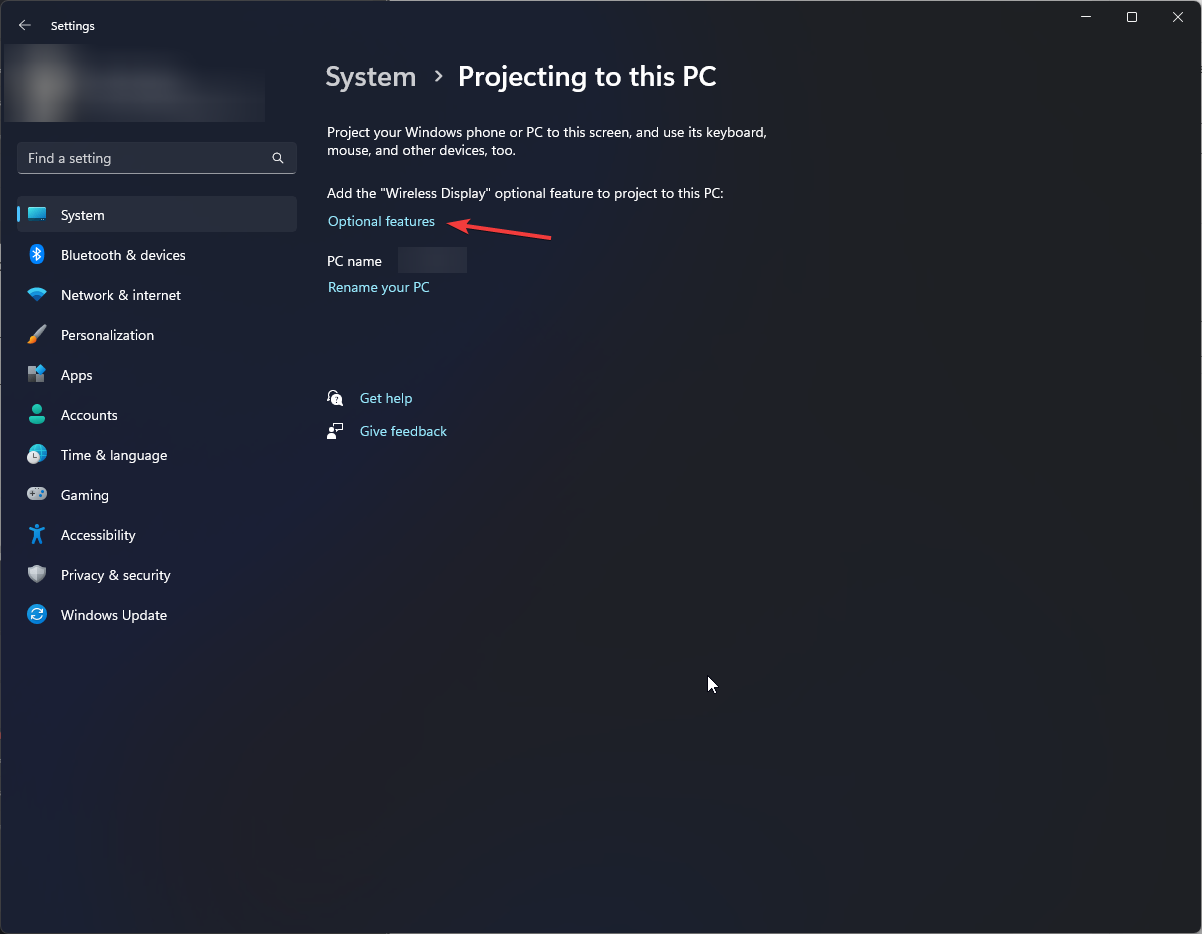
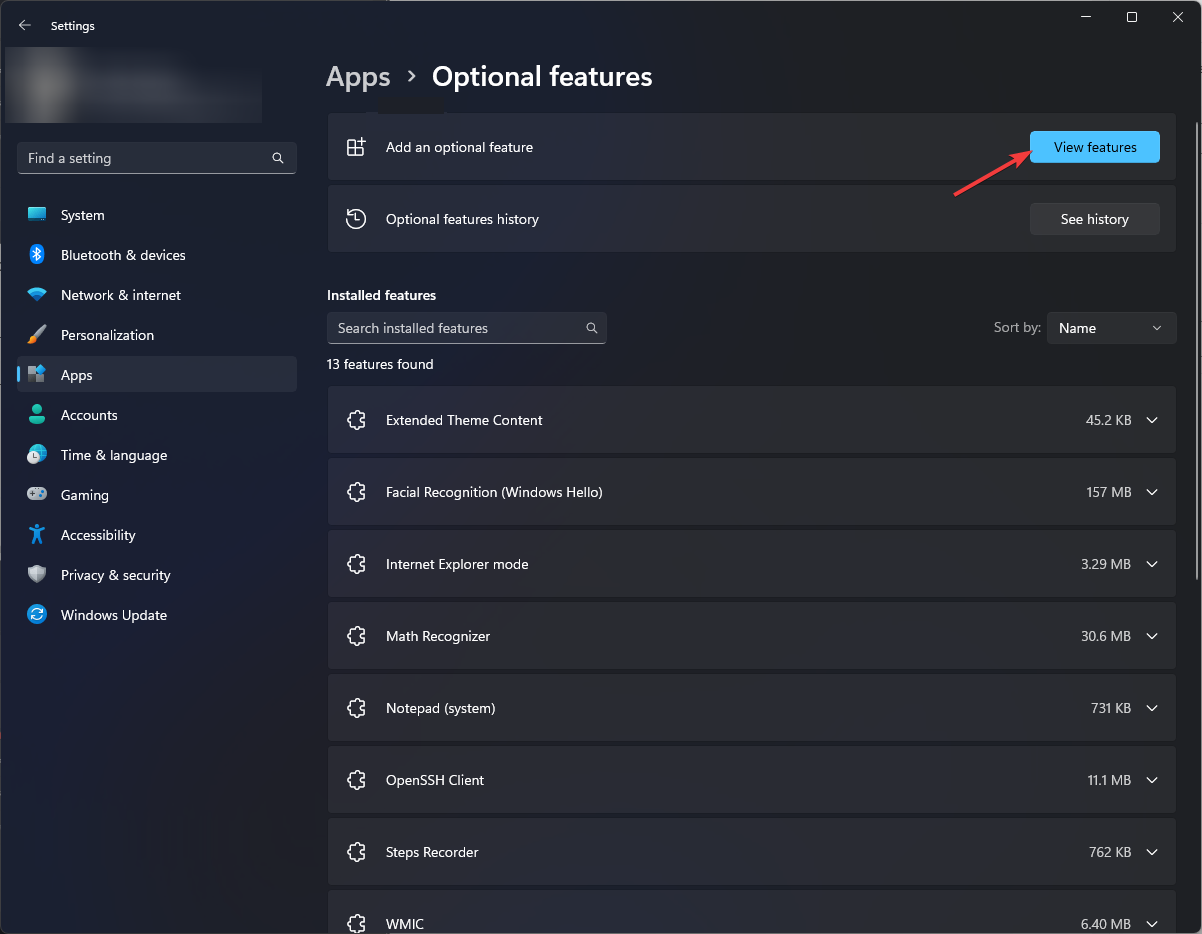
- Click Optional features.
- Next to Add an optional feature, click View features.
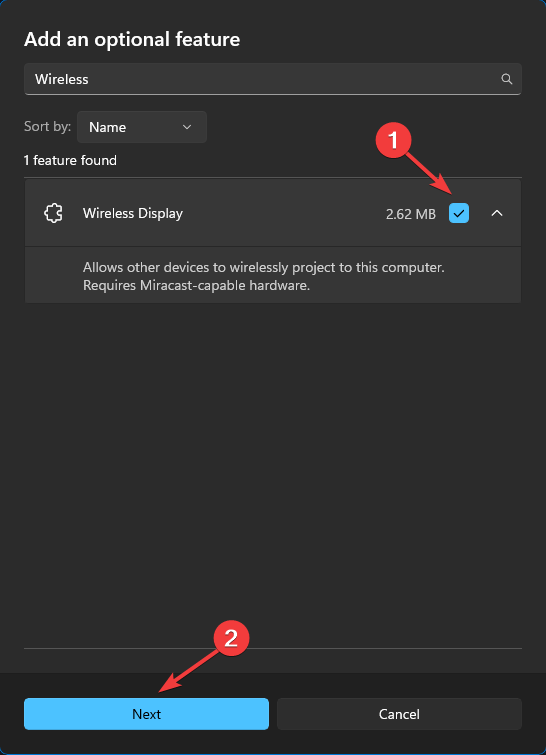
- On the Add an optional feature window, search Wireless Display. Select Wireless Display and click Next.
- Click Install and restart your PC.
2.2 Connect to the projector
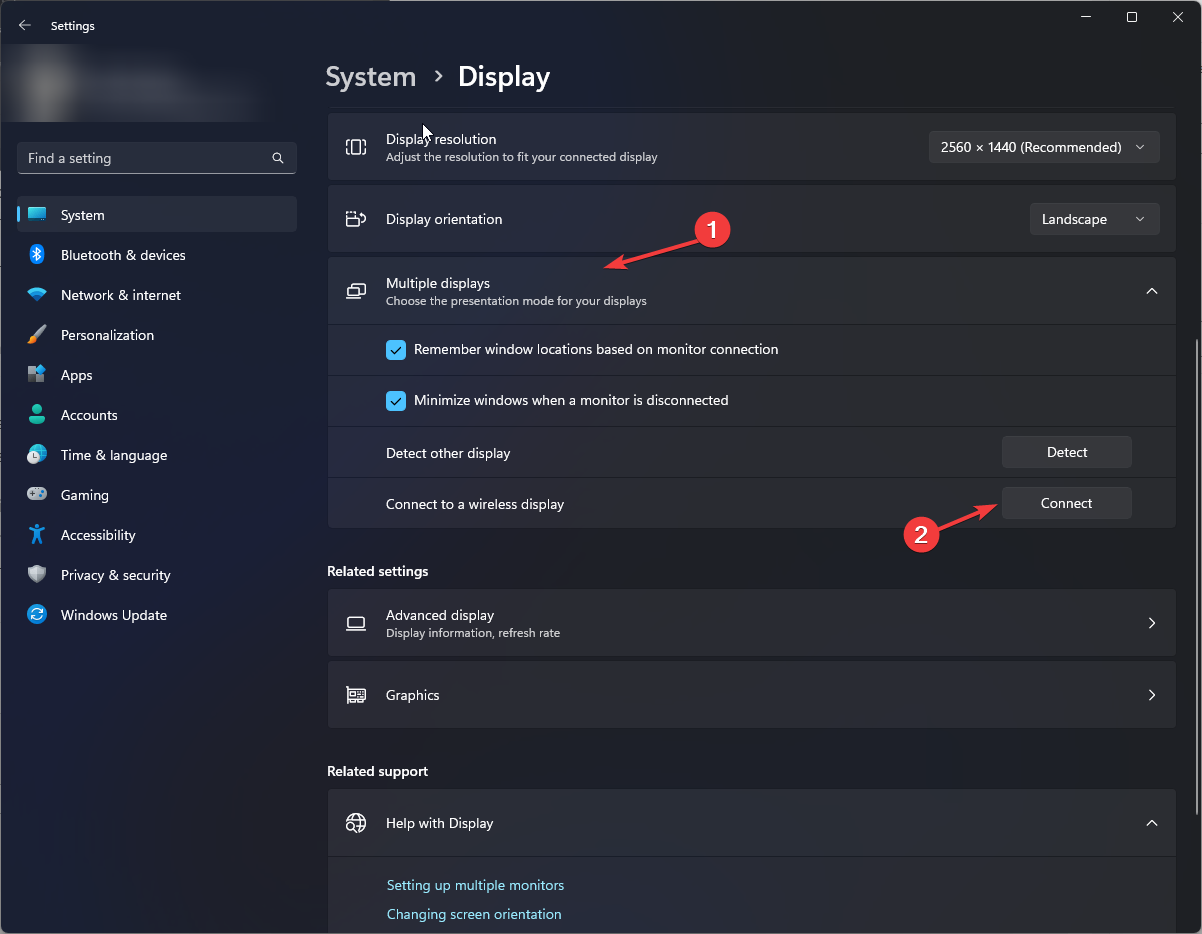
- On the Settings window, go to System, then click Display.
- Under Multiple displays, click Connect next to Connect to a wireless display option.
- It will search for the Available displays and click on the option to connect to your projector.
If both devices support Miracast, you can connect your PC and projector by pressing Windows + K and choosing the projector. You can adjust the display settings as mentioned in method 1. To stop projecting your screen, press Windows + K again and click Disconnect.
So, these are the steps you need to follow to connect Windows 11 to the projector to establish a successful connection and display the content on a larger screen. If you have questions or concerns, please mention them in the comments section below.



User forum
0 messages