Fix: Name Resolution for The Name Wpad Timed Out
Explore expert-recommended fixes to resolve the problem
4 min. read
Updated on
Read our disclosure page to find out how can you help Windows Report sustain the editorial team. Read more
Key notes
- This error occurs if the TCP/IP offload is enabled for a network adapter or has a corrupted network adapter driver.
- This guide will cover all the ways to fix the problem in no time.
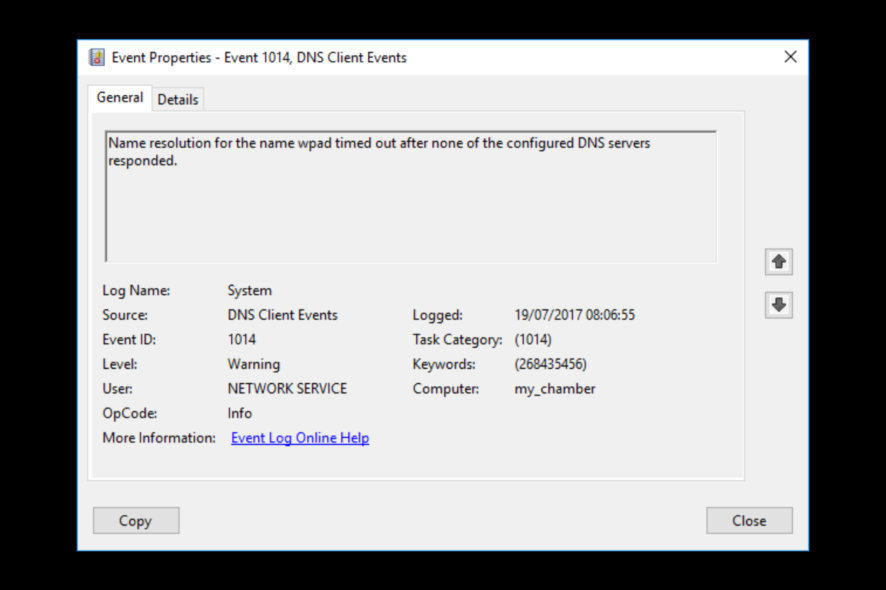
If you have encountered the name resolution for the name wpad timed out after none of the configured DNS servers responded error on Event Viewer, then this guide can help!
We will cover all the available methods to fix the issue right after discussing the causes. Let’s start!
What causes the name resolution for the name wpad time out issue?
There could be several reasons for this error message to appear in Event Viewer; some of the common ones are mentioned here:
- Badly installed network adapter – If there is a corrupted or incomplete installation of the Network adapter driver, you might get this error. Reinstalling the network adapter can help you fix this problem.
- Corrupted DNS cache – If the DNS cache is glitched, it could trigger false positives. To fix it, you can flush the DNS cache.
- DNS server is unstable – If the DNS server is unstable, you might get this error message. You can replace the DNS with Google DNS to fix the issue.
- Damaged TCP/IP connection – If TCP/IP instructions are corrupted or interrupted, you might see this error. To fix it, you can refer to the TCP/IP connection.
- TCP/IP Offload is enabled – If Autotuning, RSS, and Taskoffload are enabled, you could get this error message. You need to disable them to fix the issue.
- ISP does not support TCP/IP v6 – If your ISP does not support TCP/IPv6, you can encounter this error. To fix it, disable TCP/IP v6 from the Internet properties.
What can I do to fix the name resolution for the name wpad time out issue?
1. Run the Network adapter troubleshooter
- Press Windows + I to open the Settings app.
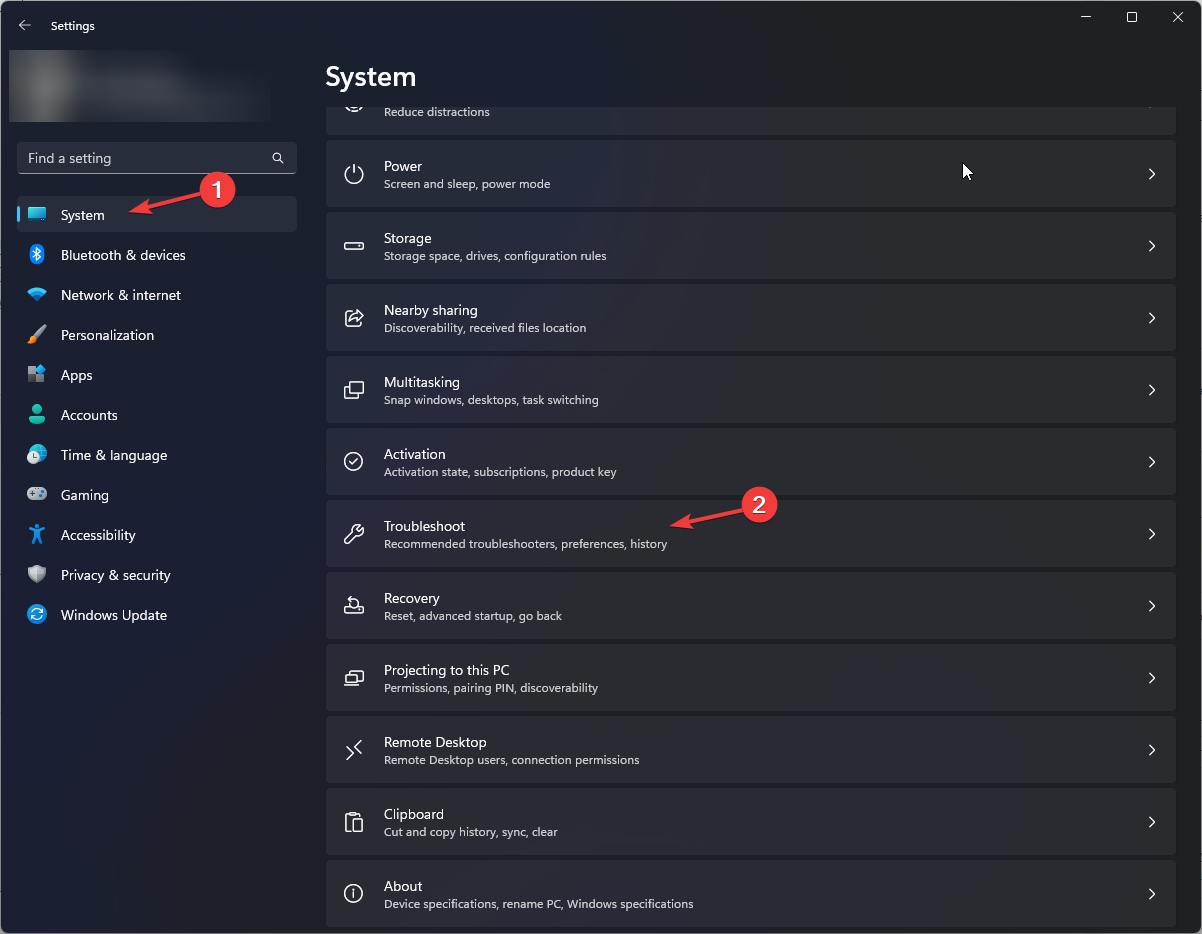
- Go to System, then click Troubleshoot.
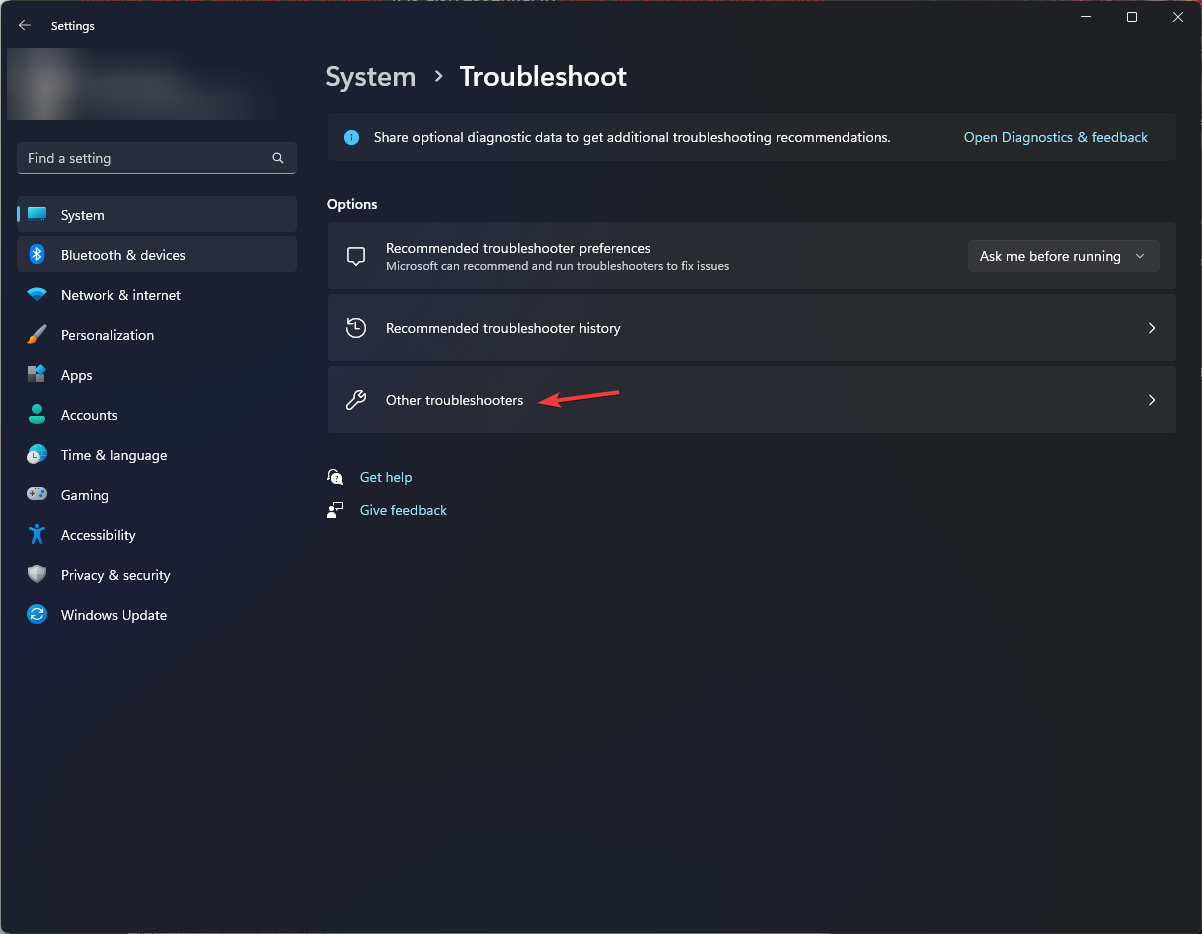
- Click Other troubleshooters.
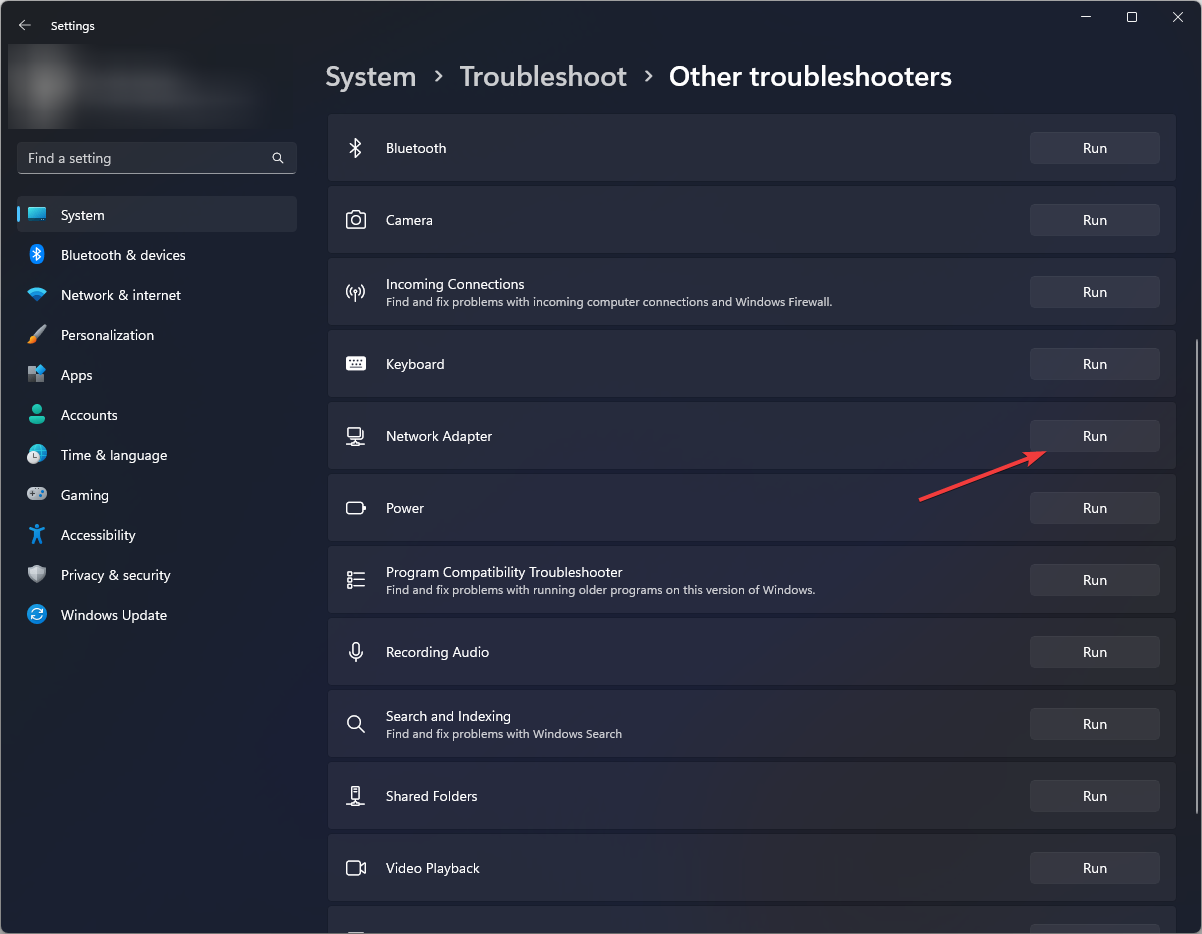
- Select Network Adapter and click Run.
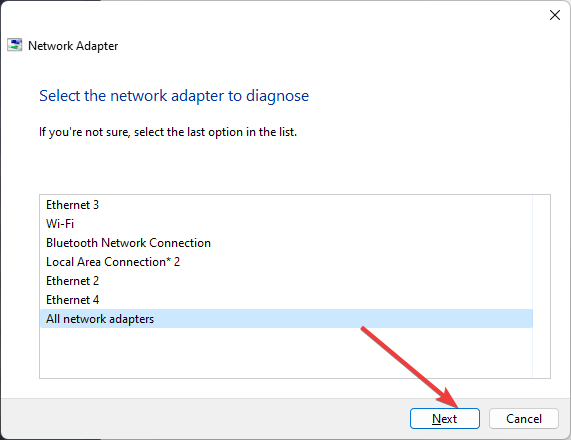
- After the scan, select the problematic network adapter and click Next.
- Follow the on-screen instructions to complete the process.
2. Reinstall the Network adapter
- Press Windows + R to open the Run dialog box.
- Type devmgmt.msc and click OK to open the Device Manager.
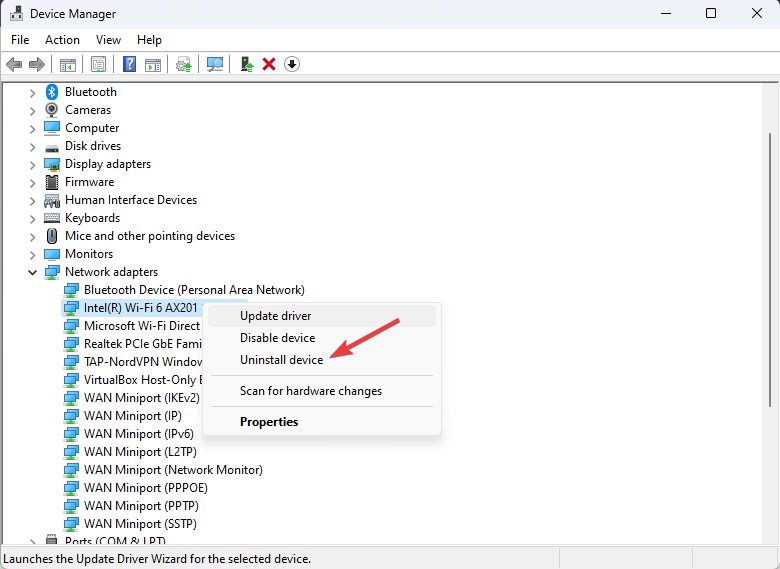
- Select and expand Network adapters.
- Right-click the problematic adapter, and click Uninstall device.
- Once uninstalled, close the Device Manager and restart your computer. Your computer will automatically install the best available driver.
3. Reset the TCP/IP connection
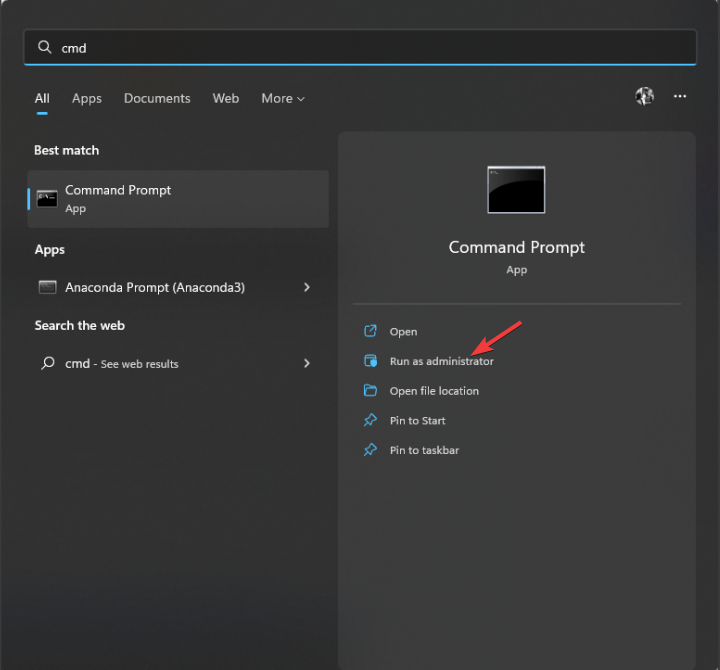
- Press the Windows key, type CMD, and click Run as administrator.
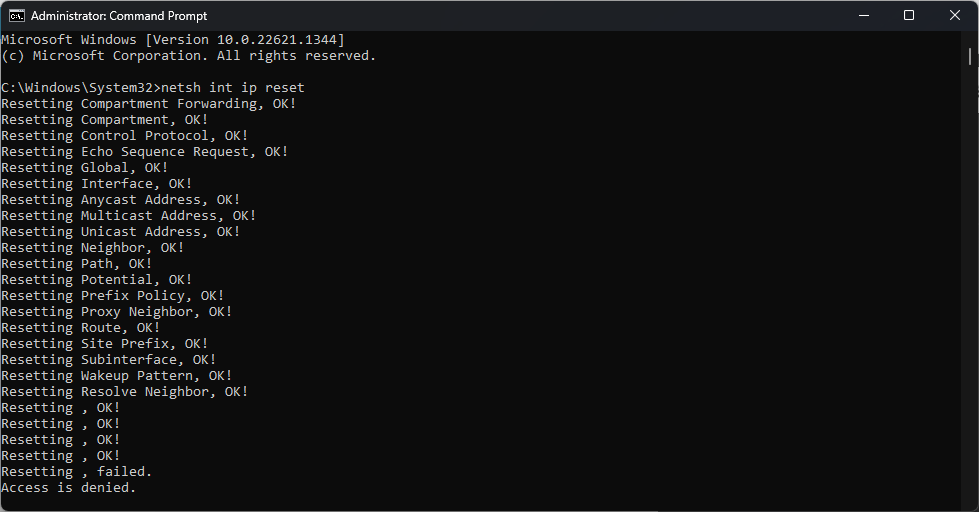
- Copy and paste the following command to reset TCP/IP and press Enter:
netsh int ip reset - Once the command is executed, restart your computer.
4. Flush the DNS cache
- Press the Windows key, type CMD, and click Run as administrator.
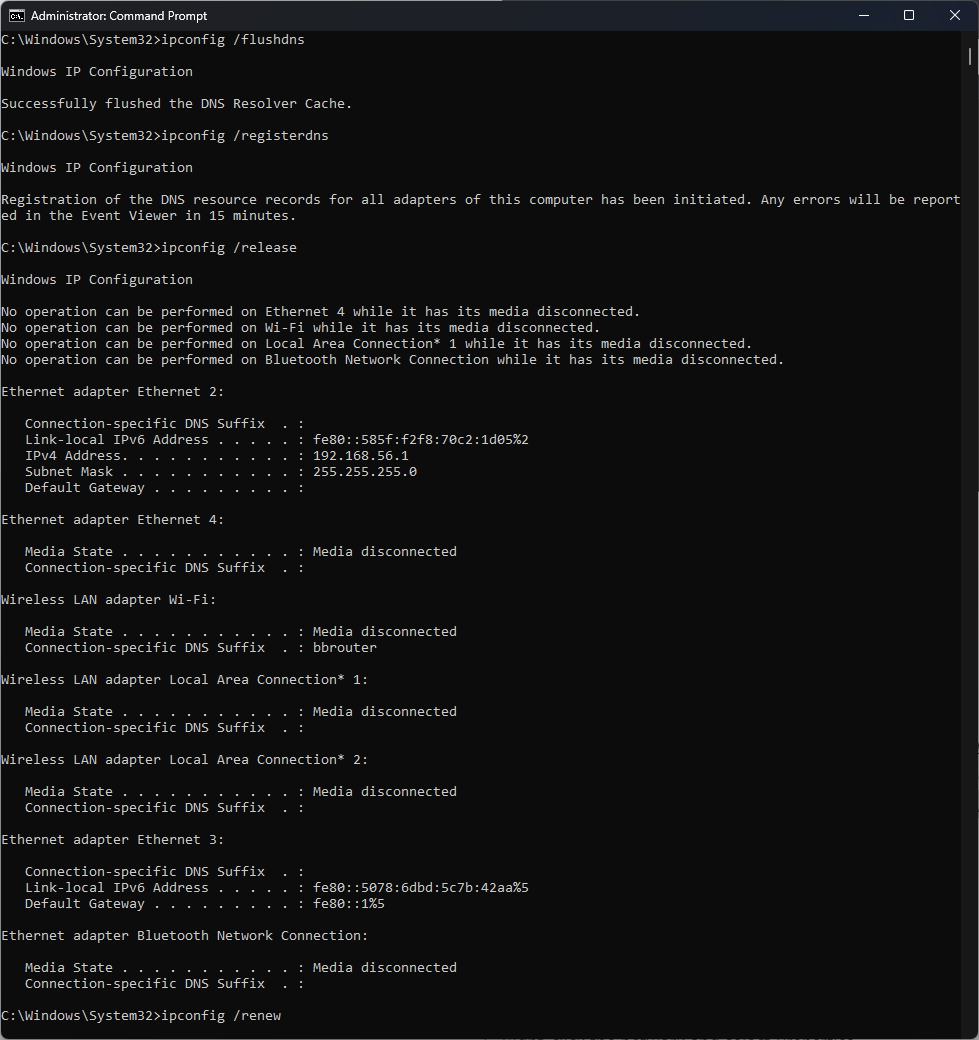
- Copy and paste the following commands one by one and press Enter after every command:
ipconfig /flushdnsipconfig /registerdnsipconfig /releaseipconfig /renew - Once the command is executed, restart your computer.
5. Change the DNS
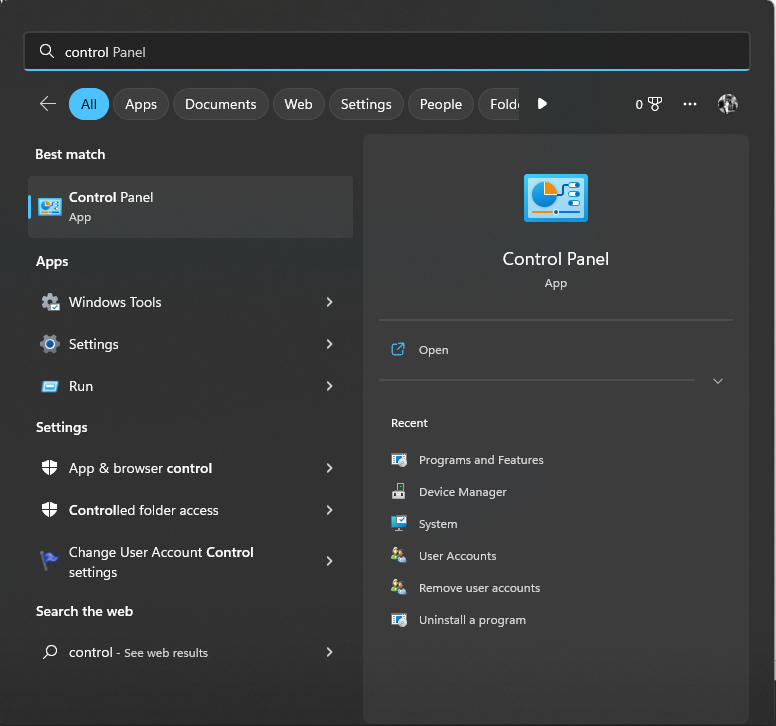
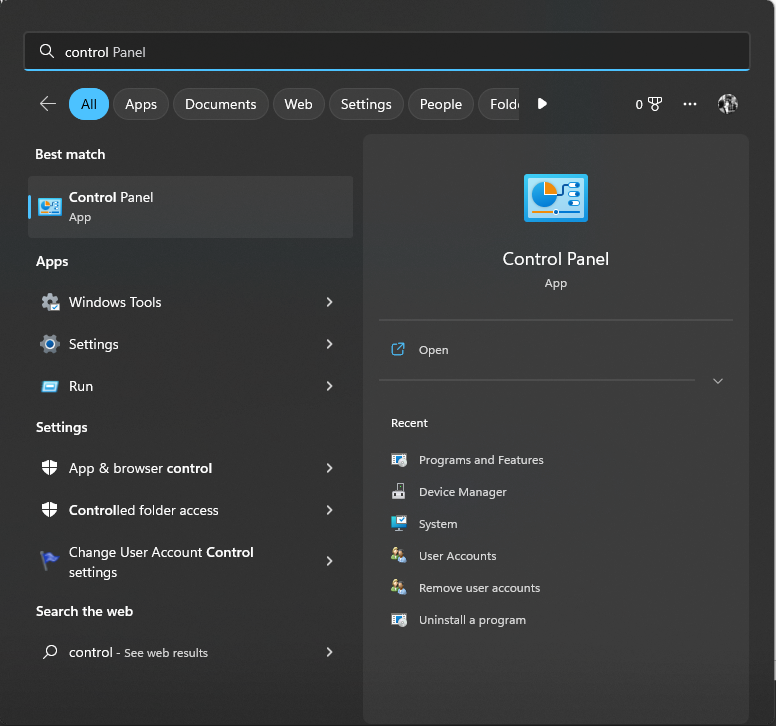
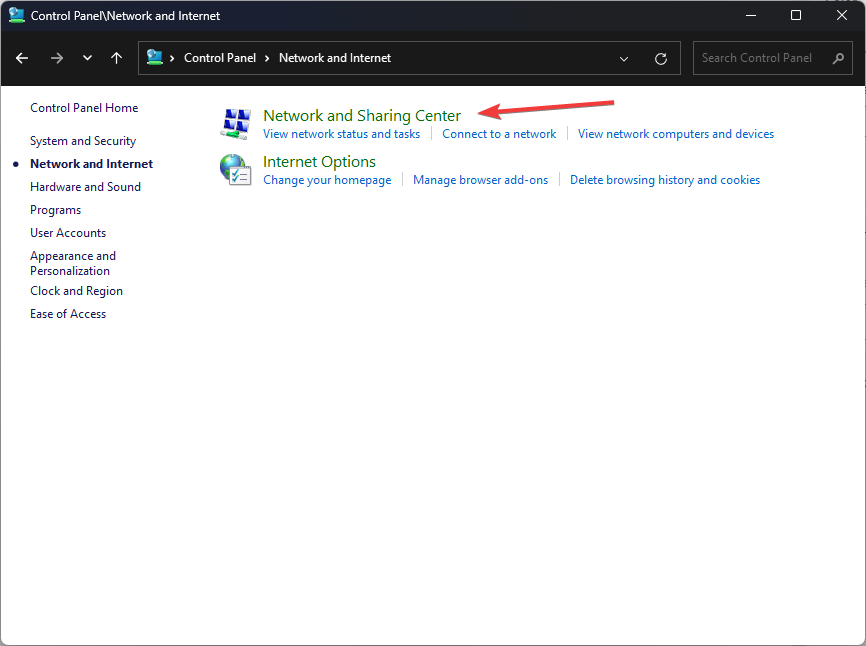
- Press the Windows key, type Control Panel, and click Open.
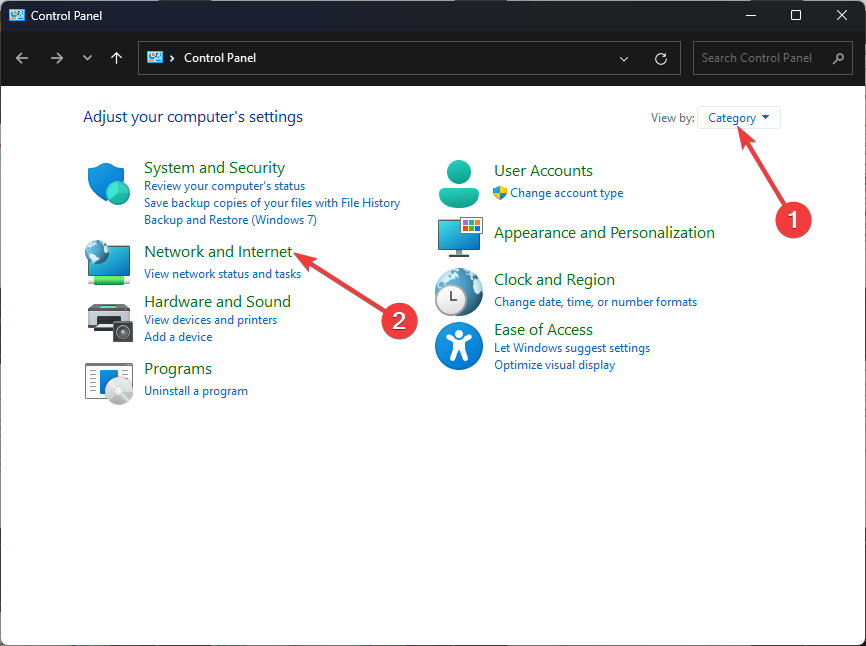
- Select Category as View by & click Network and Internet.
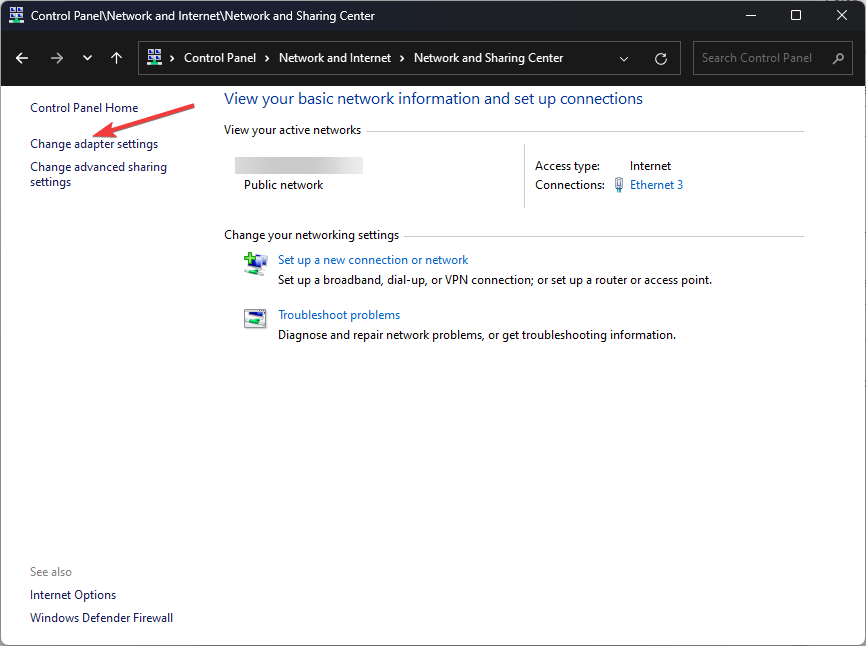
- Next, click Network and Sharing Center.
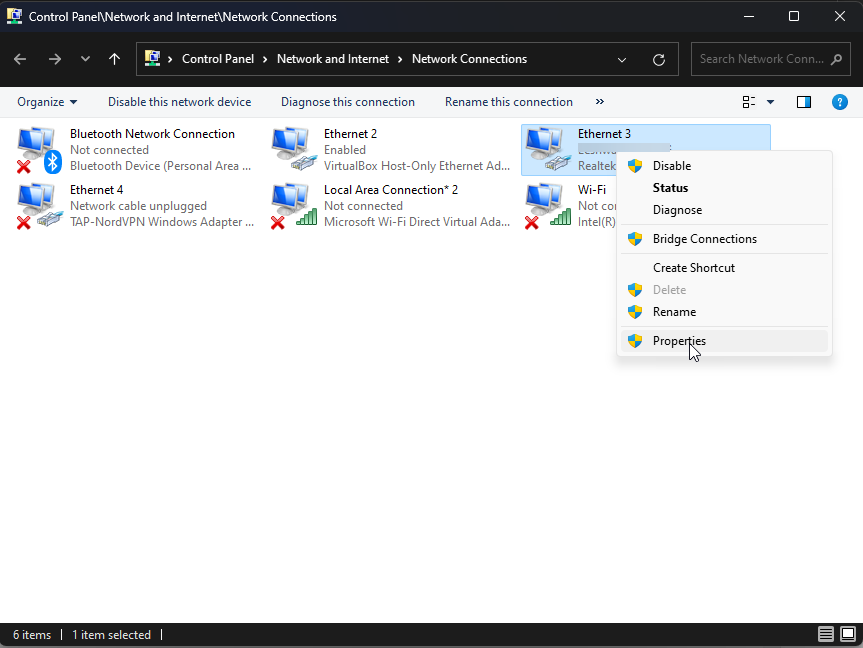
- Now click Change adapter settings.
- Right-click the network and select Properties.
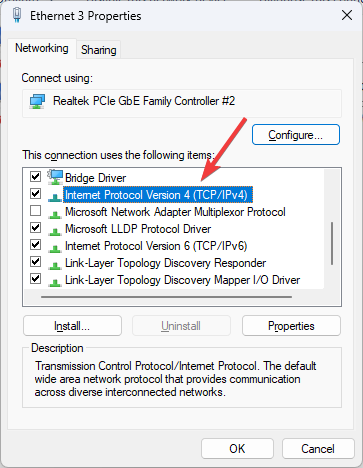
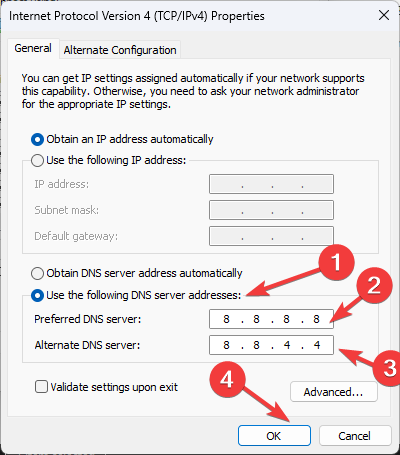
- On the Networking tab, double-click Protocol Version 4 (TCP / IPv4).
- Select Use the following DNS server addresses, choose Preferred DNS server as 8.8.8.8 and select Alternate DNS server – 8.8.4.4
- Click OK, then click OK.
6. Disable TCP/IP
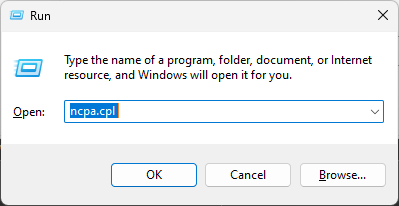
- Press Windows + R to open the Run dialog box.
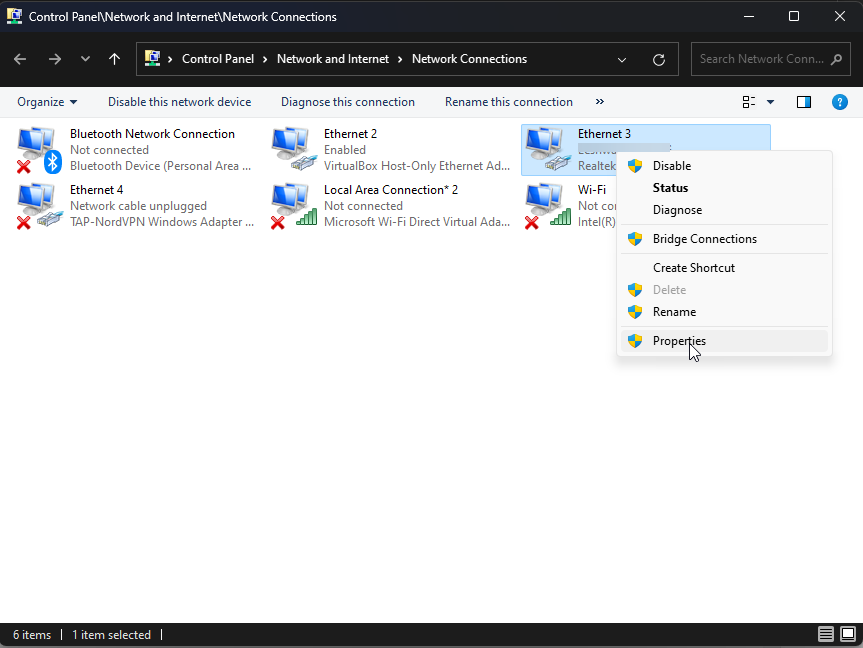
- Type ncpa.cpl and click OK to open Network Connections window.
- Click Network connection and choose Properties.
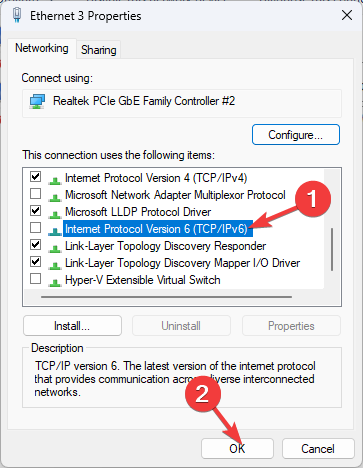
- Remove the checkmark next to Internet Protocol Version 6 (TCP / IPv6).
- Click OK to confirm the changes.
7. Disable Autotuning, RSS, and Taskoffload
7.1 Use the Command Prompt
- Press the Windows key, type CMD, and click Run as administrator.
- Type the following command one by one and press Enter after every command:
netsh interface tcp set global rss=disablednetsh interface tcp set global autotuninglevel=disablednetsh int ip set global taskoffload=disabled - Close the Command Prompt.
7.2 Use the Registry Editor
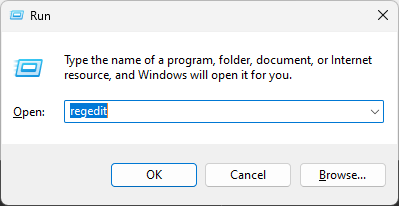
- Press Windows + R to open the Run dialog box.
- Type regedit and click OK to open Registry Editor.
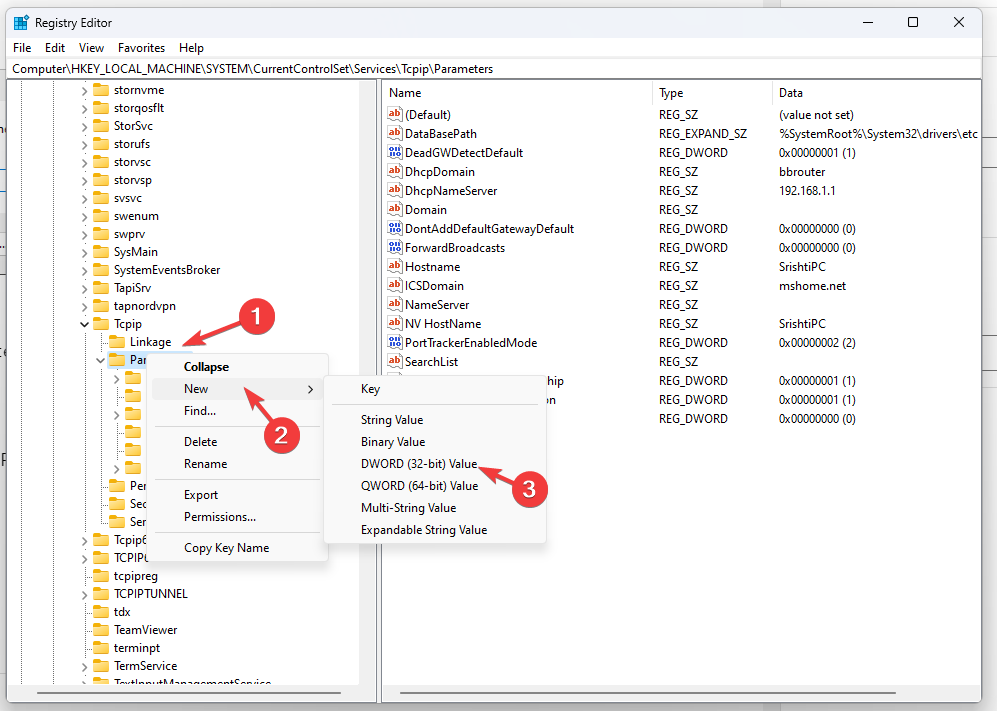
- Navigate to this path:
Computer\HKEY_LOCAL_MACHINE\SYSTEM\CurrentControlSet\Services\Tcpip\Parameters - Right-click on Parameters and select New, then DWORD.
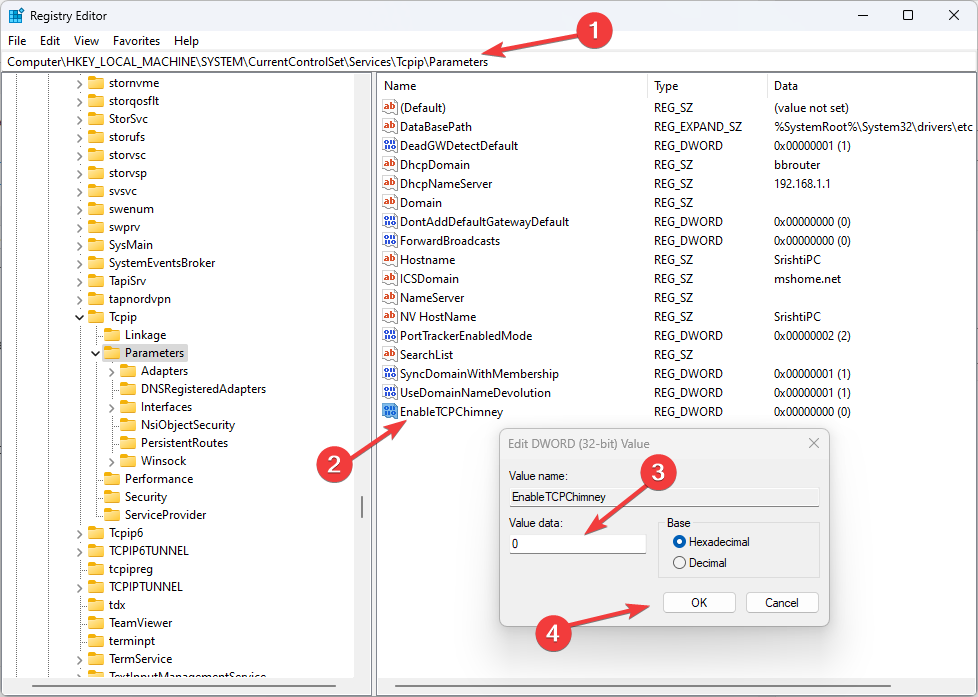
- Name the DWORD EnableTCPChimney.
- Double-click the DWORD and modify the Value data to 0.
- Follow the above three steps and create two more DWORD (32-bit) and name them EnableTCPA & EnableRSS, respectively. Finally, modify their Value data to 0.
- Close the Registry Editor and restart your computer.
So, these are methods to fix the name resolution for the name wpad timed out error. Try them and let us know what worked in the comments section below.


User forum
0 messages