0x800f0984: How to Fix This Windows Update Error
You can run SFC and DISM scan to fix it
4 min. read
Updated on
Read our disclosure page to find out how can you help Windows Report sustain the editorial team. Read more
Key notes
- The Windows update error could occur due to corrupted system files or damaged Windows update components.
- This guide will cover all the available fixes to resolve the issue.
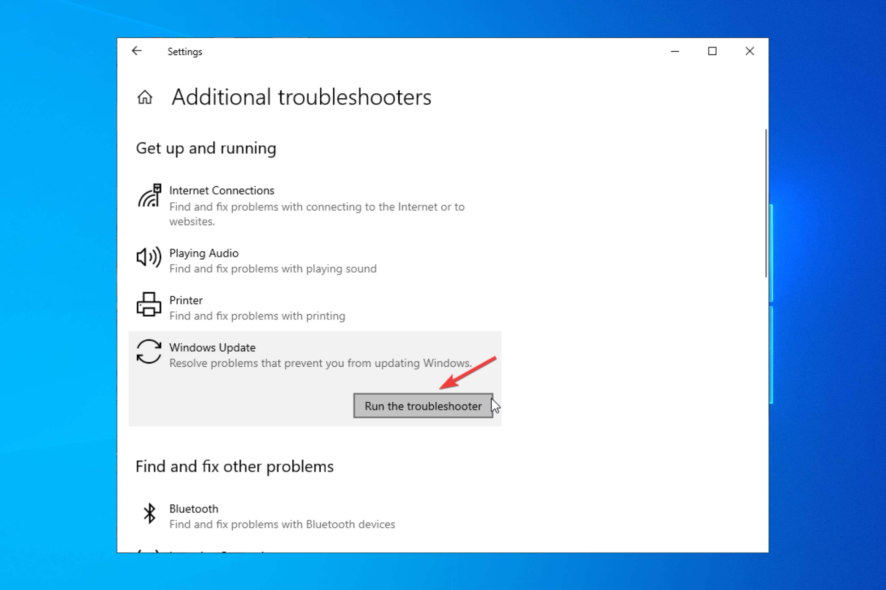
If you have encountered error code 0x800f0984 while updating your Windows 10 computer, this guide can help! We will discuss some available methods to resolve the problem right after examining the causes. Let’s start!
What causes the Windows update error 0x800f0984?
There could be several reasons for this update error; some of the common ones are mentioned here:
- Your PC is on a Power saving plan – If your computer is on a power-saving plan to conserve battery and timing, this could make some system components perform less.
- Corrupted system files – If the system files are missing, deleted, or damaged, you might get this update error. You need to repair system files using Command Prompt.
- Damaged Windows update components – If any of the Windows update folders, including Catroot2, and Software Distribution, you might not be able to update Windows.
What can I do to fix the Windows update error 0x800f0984?
1. Run a Windows troubleshooter
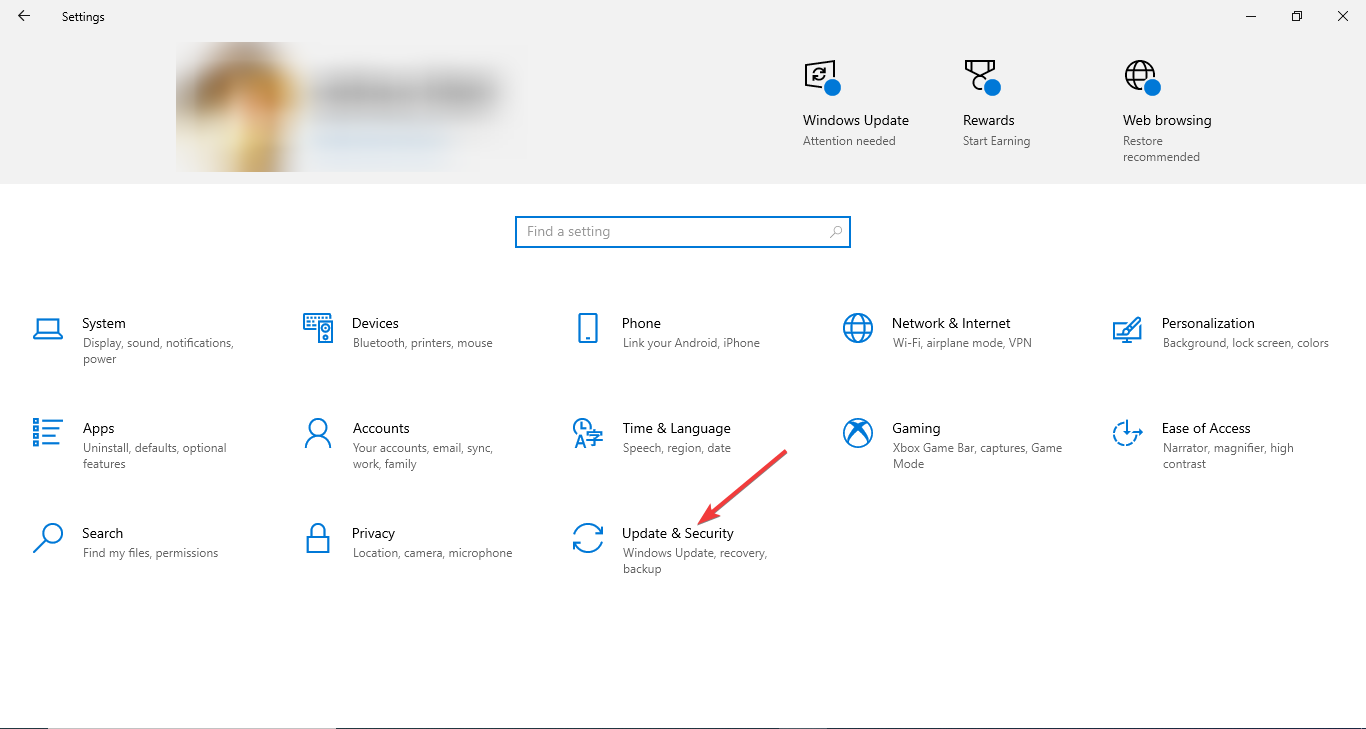
- Press Windows + I to open the Settings app.
- Go to Update & Security.
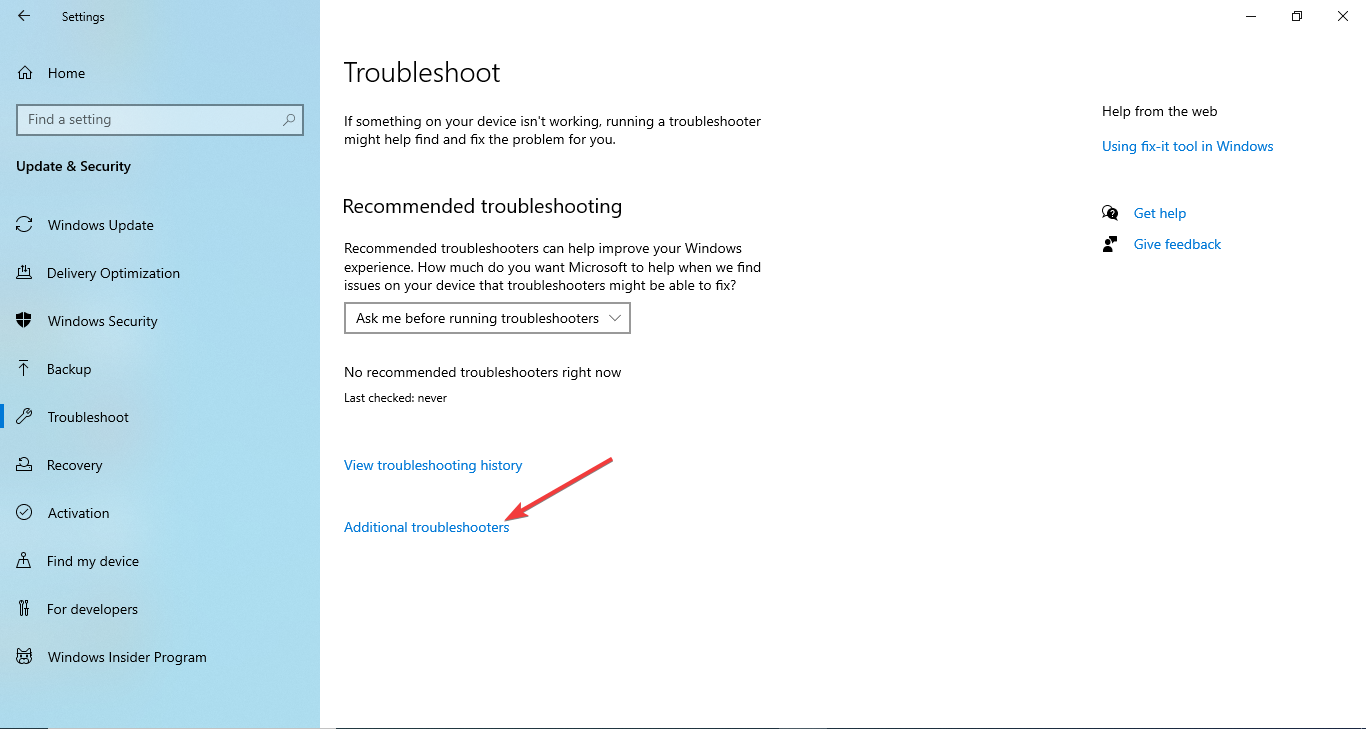
- Select Troubleshoot from the left pane and click Additional troubleshooters.
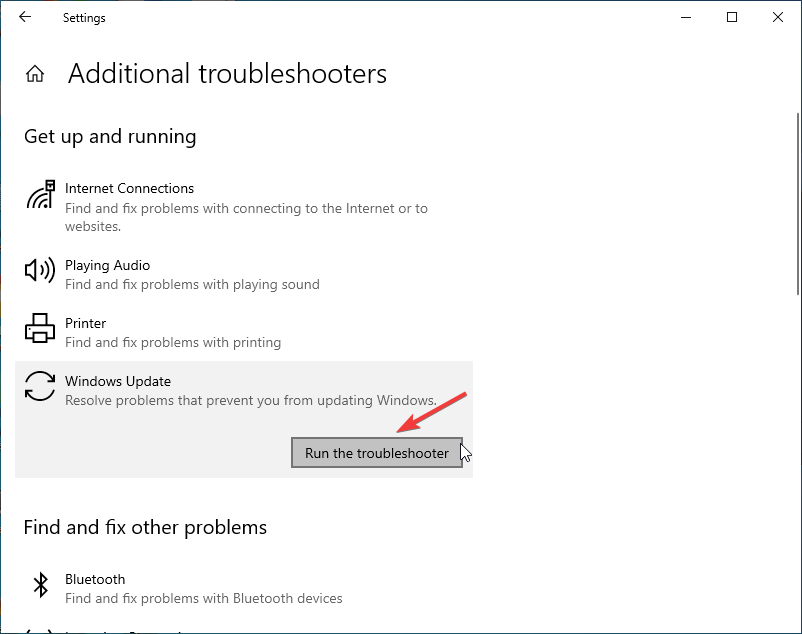
- Now select Windows update and click Run the troubleshooter.
- Follow the on-screen instructions to complete the process.
2. Install update manually
- Open the preferred browser and visit the Microsoft website Windows 10 section.
- Go to the latest Windows update section and click Update now.
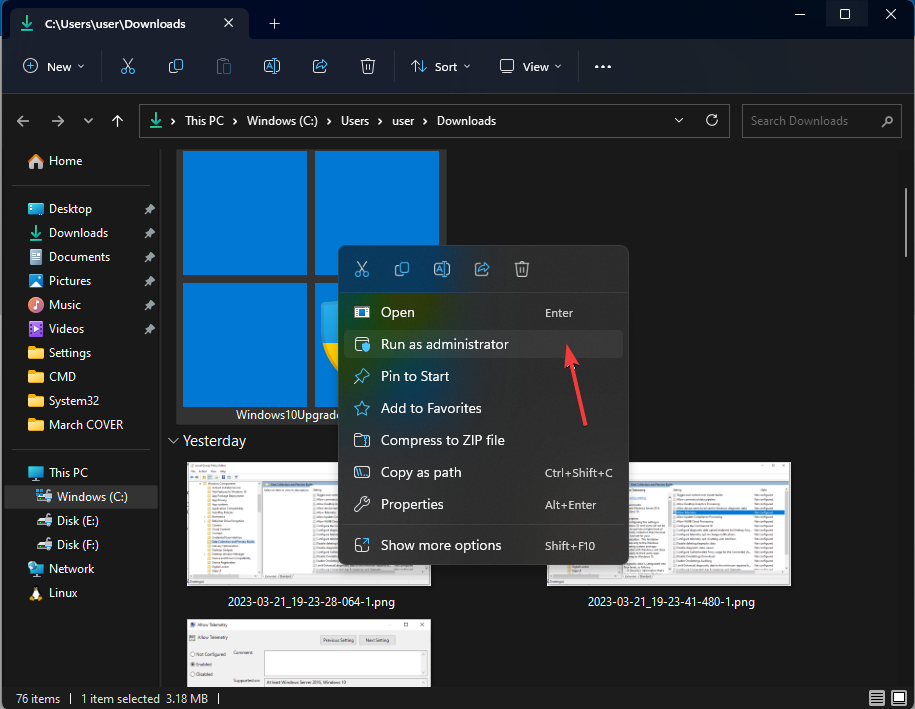
- The update will get downloaded. Once done, right-click the file and select Run as administrator.
- Now follow the on-screen instructions to install the update.
3. Modify the power plan
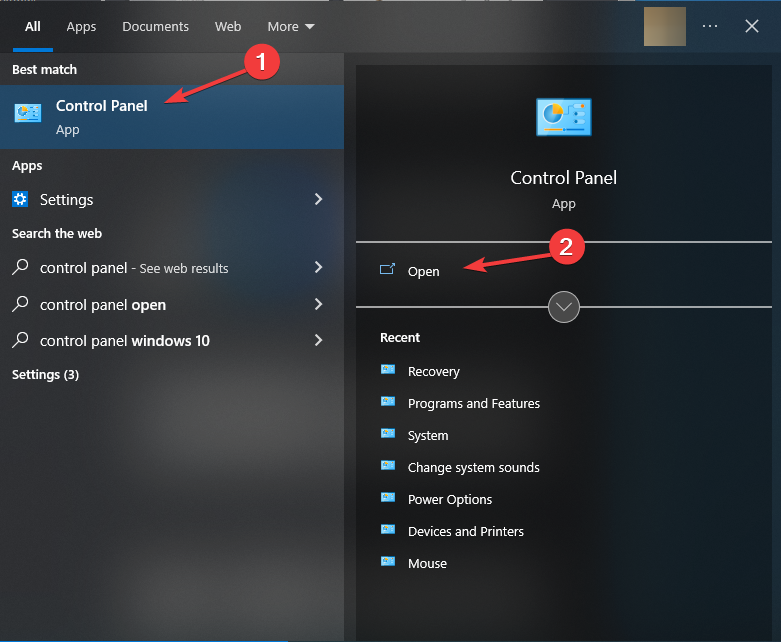
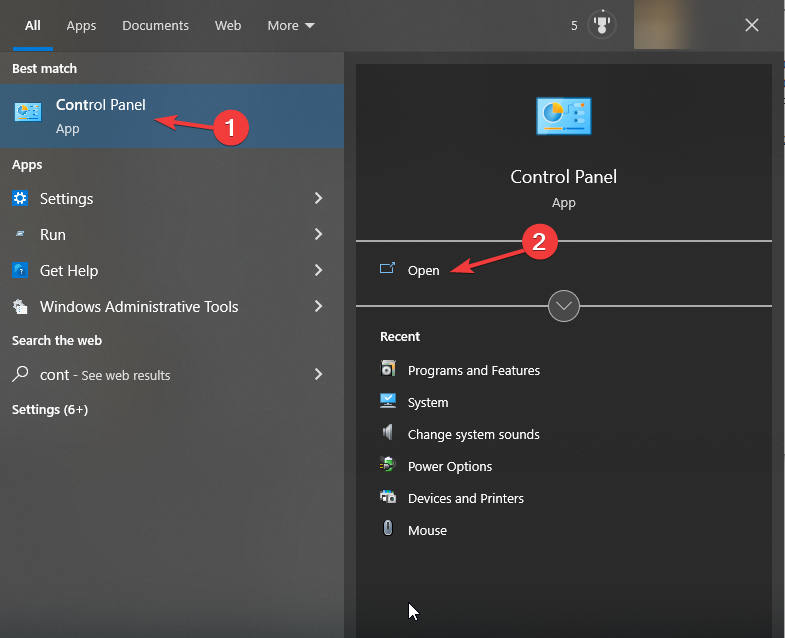
- Go to the Search bar, type Control Panel, and click Open.
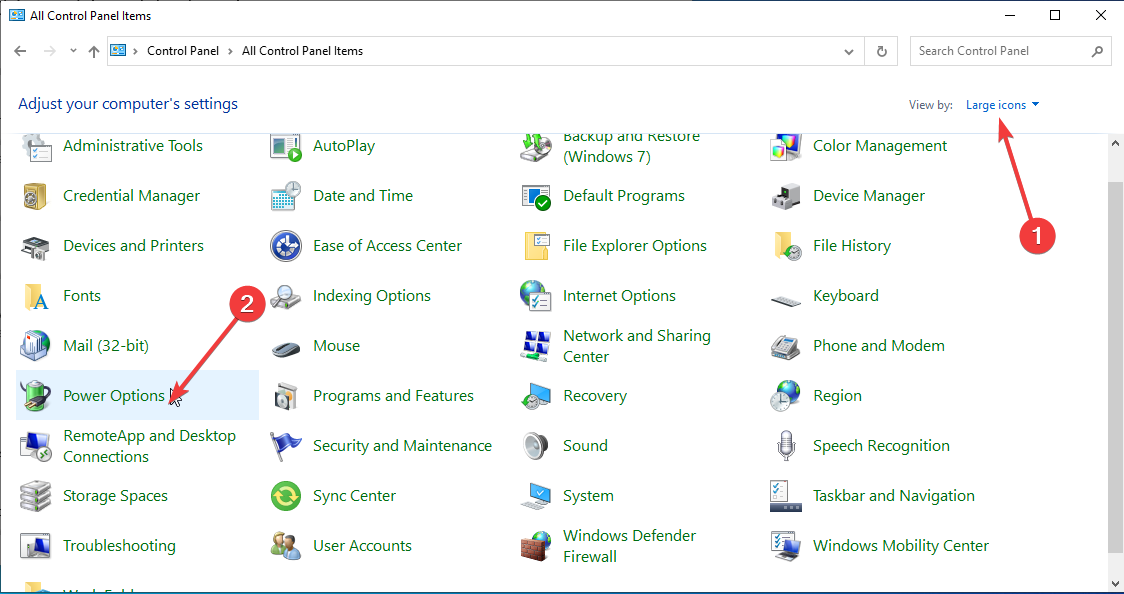
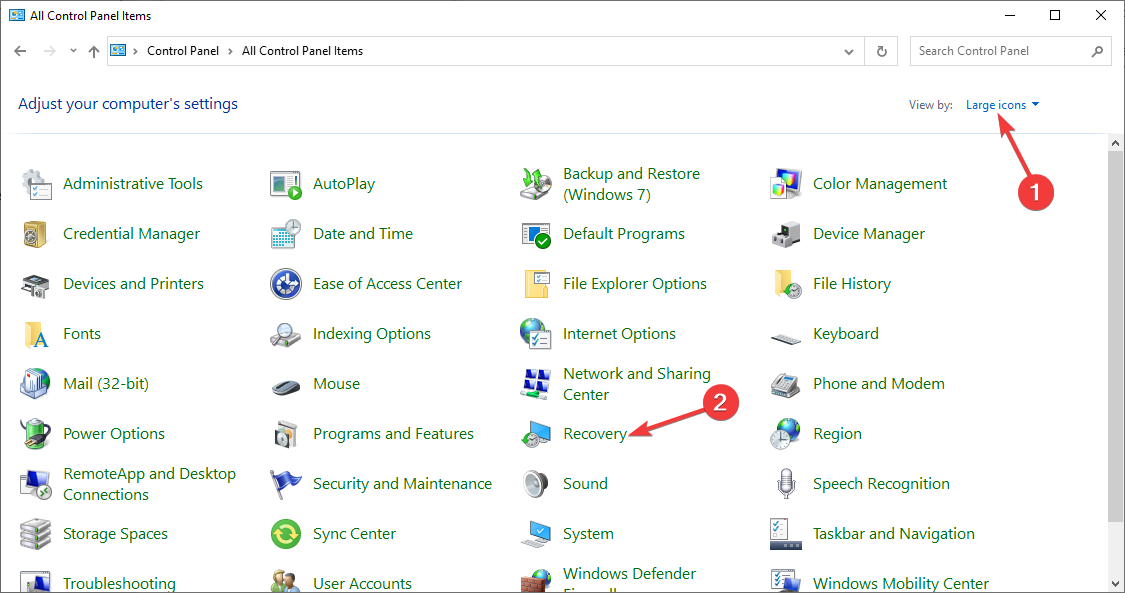
- Select Large icons as View by and click Power options.
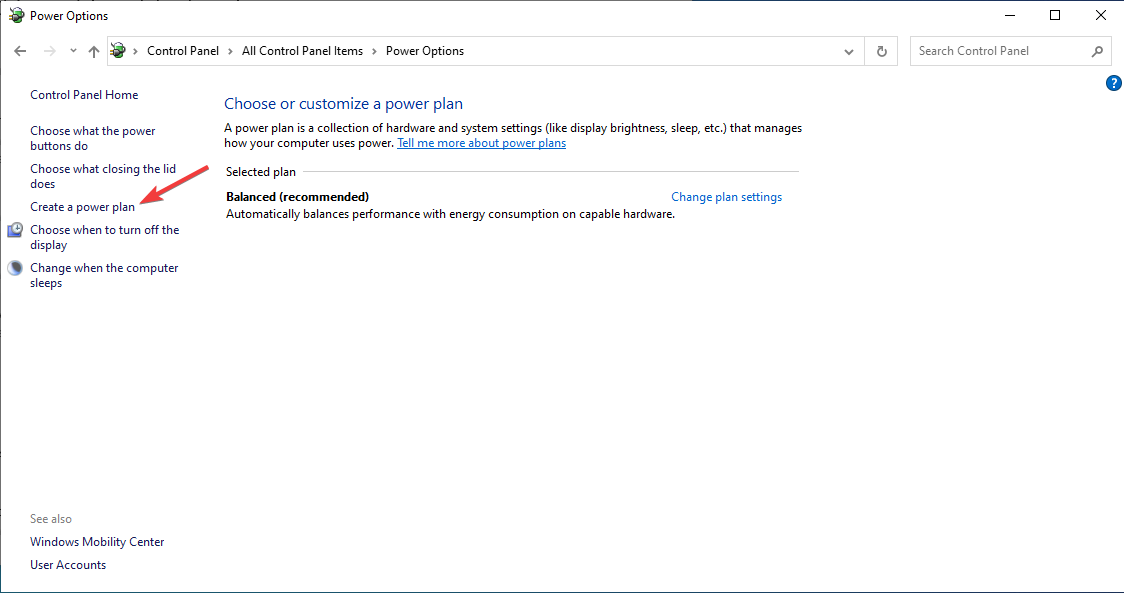
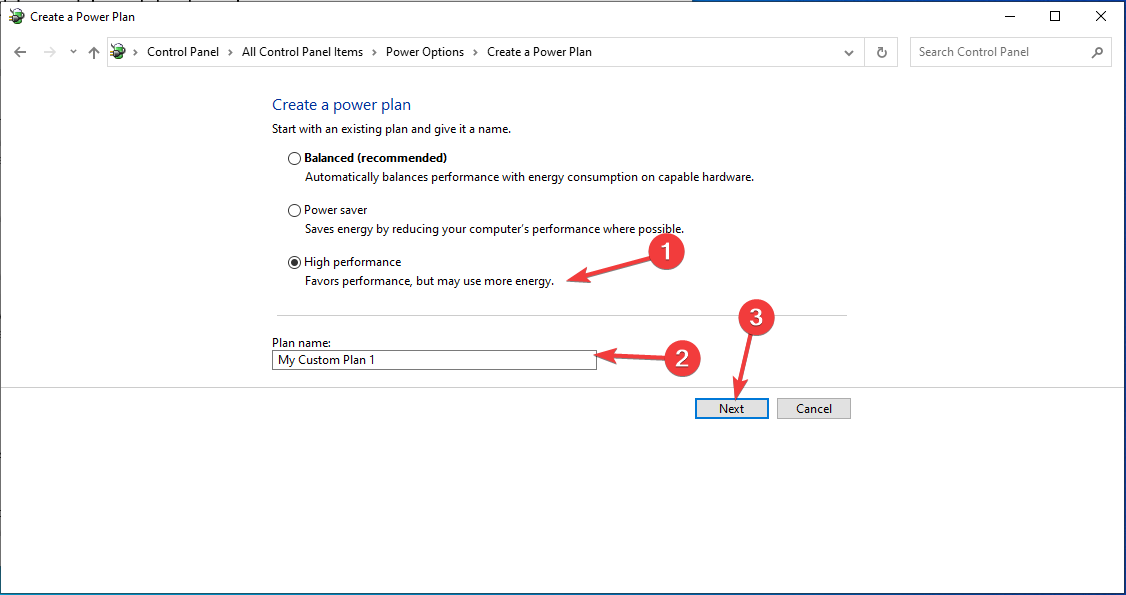
- Click Create a power plan.
- Next, choose High Performance; under Plan name, enter a name if you want and click Next.
- Now click Create, and you will have a new power plan. Try to update Windows now.
4. Use the Command Prompt
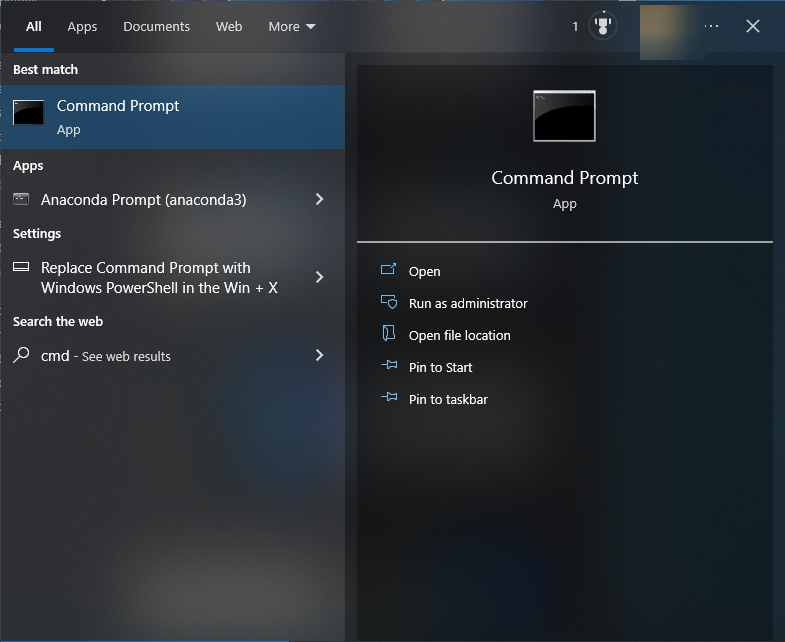
- Go to the Search bar, type CMD, and click Run as administrator.
- Type the following command to repair system files and press Enter:
sfc\scannow - Next, copy and paste the following commands one by one to repair your Windows image, and press Enter after every command:
DISM /Online /Cleanup-Image /CheckHealthDISM /Online /Cleanup-Image /ScanHealthDISM /Online /Cleanup-Image /RestoreHealth - Restart your computer.
5. Reset Windows components
- Go to the Search bar, type CMD, and click Run as administrator.
- Copy and paste the following commands one by one and press Enter after every command:
net stop bitsnet stop wuauservnet stop appidsvcnet stop cryptsvcDel "%ALLUSERSPROFILE%\Application Data\Microsoft\Network\Downloader*.*"rmdir %systemroot%\SoftwareDistribution /S /Qrmdir %systemroot%\system32\catroot2 /S /Qregsvr32.exe /s atl.dllregsvr32.exe /s urlmon.dllregsvr32.exe /s mshtml.dllnetsh winsock resetnetsh winsock reset proxynet start bitsnet start wuauservnet start appidsvcnet start cryptsvc - Restart your computer to let the changes take effect.
6. Perform System Restore
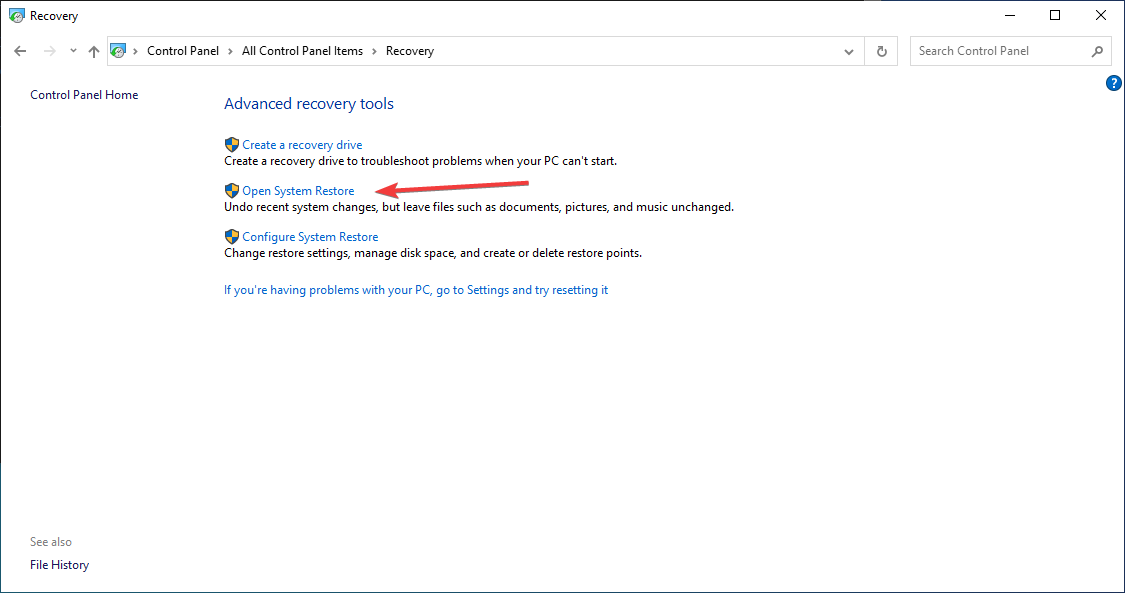
- Press the Windows key, type Control Panel, and click Open.
- Select Category as View by and click Recovery.
- Click Open System Restore.
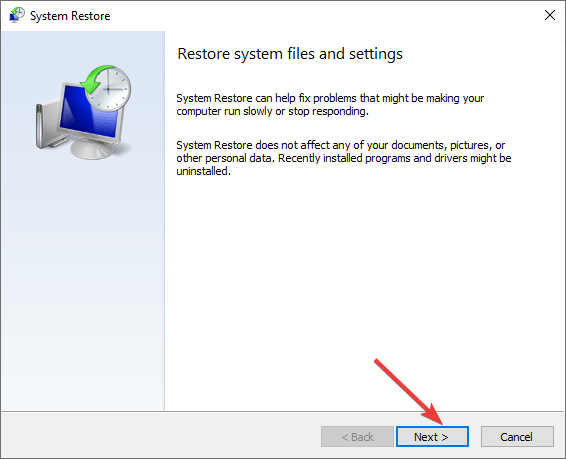
- On the System Restore window, click Next.
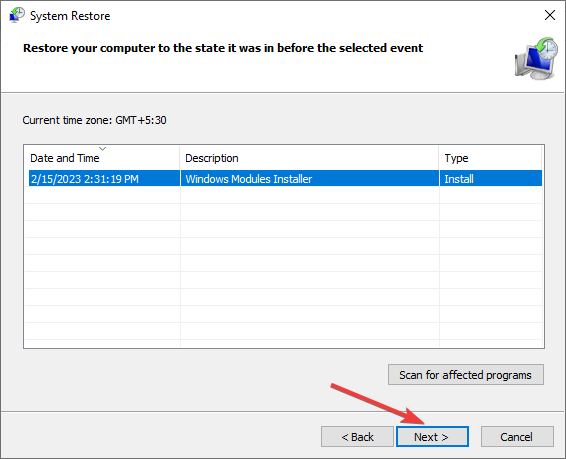
- Select the restore point and click Next.
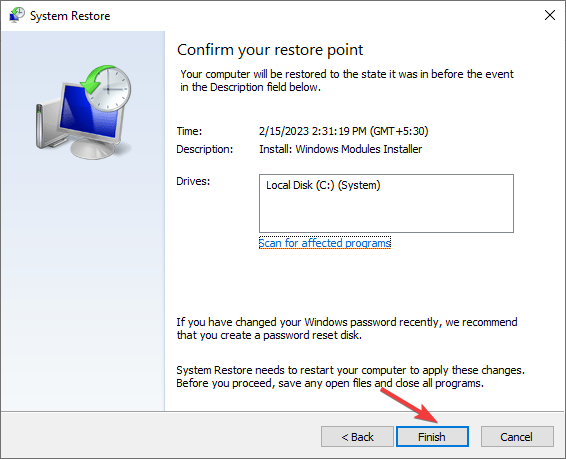
- Click Finish, and your computer will be restored to the chosen point.
7. Perform in-place upgrade
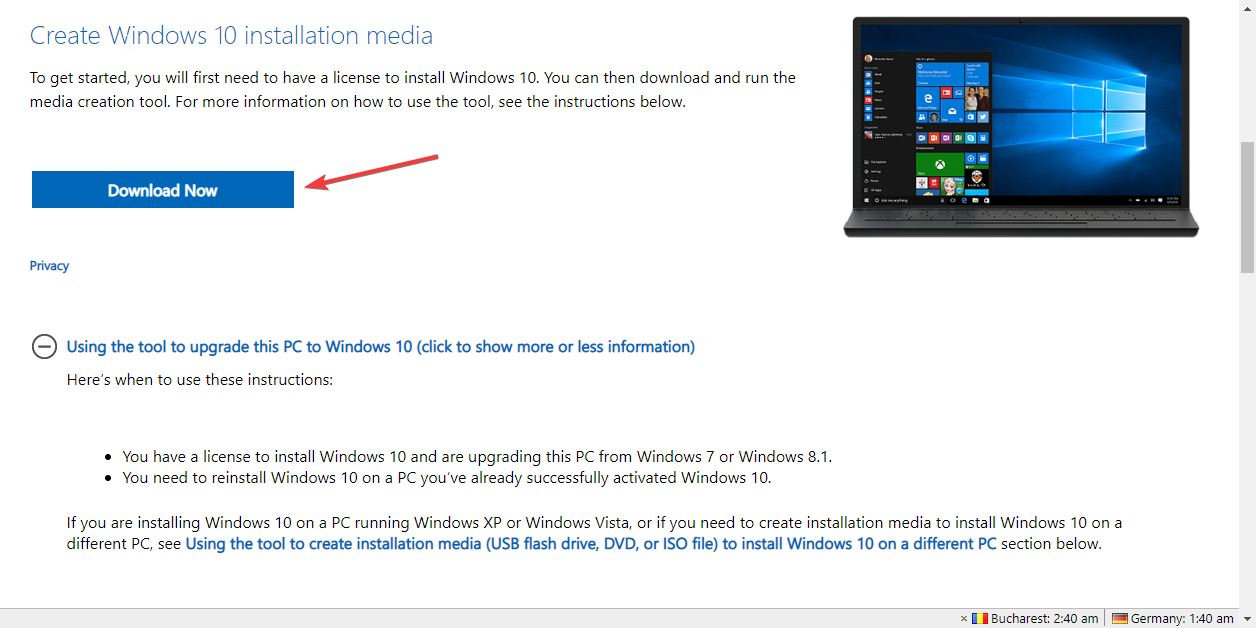
- Go to the Windows 10 website.
- Under Create Windows 10 installation media, select Download tool now.
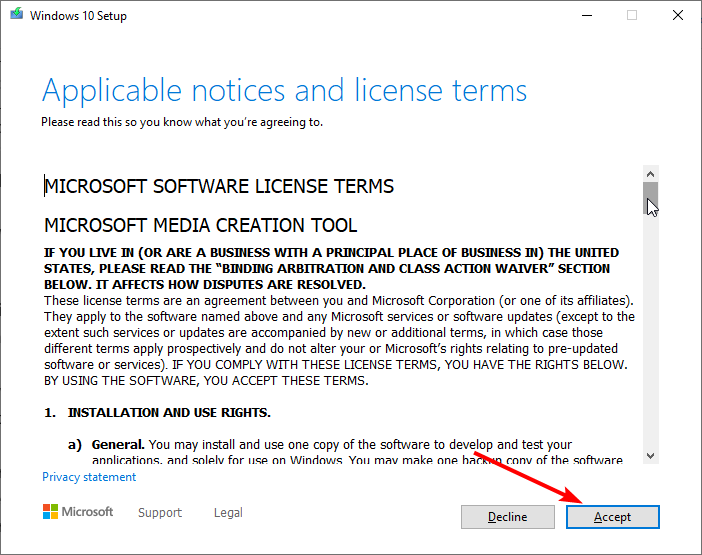
- Right-click the setup file that you downloaded, and select Run as administrator. On the setup page, click the Accept button on the license.
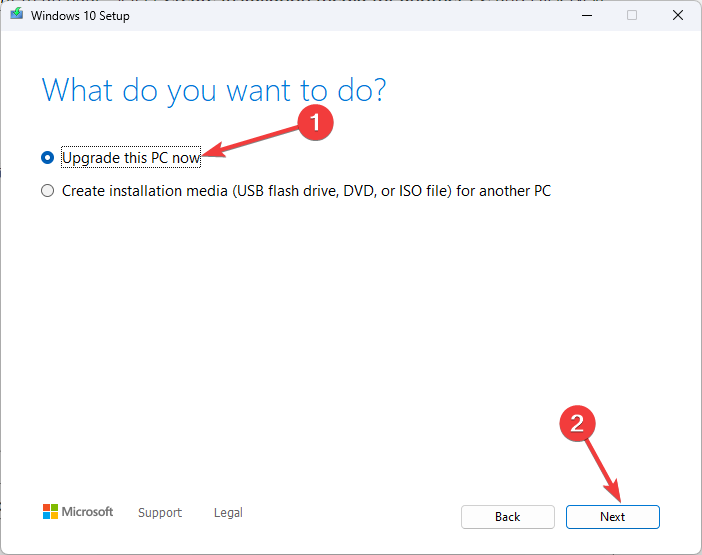
- On the What do you want to do page, select Upgrade this PC now and click Next.
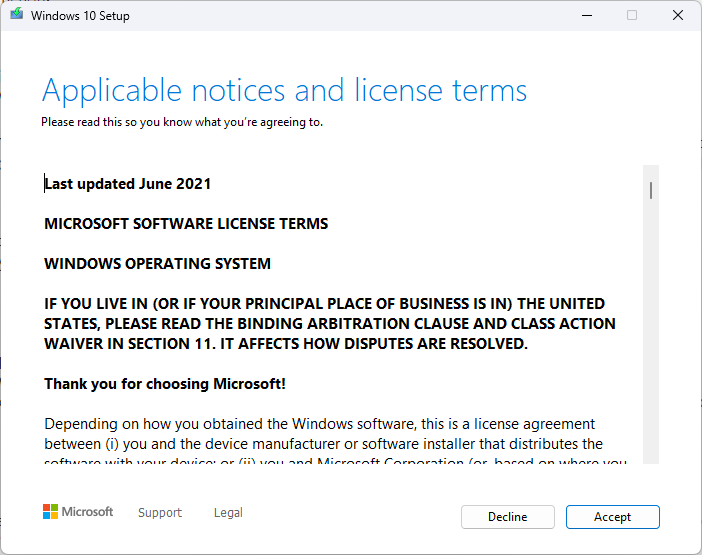
- Now setup will download Windows 10. On the next page, click Accept.
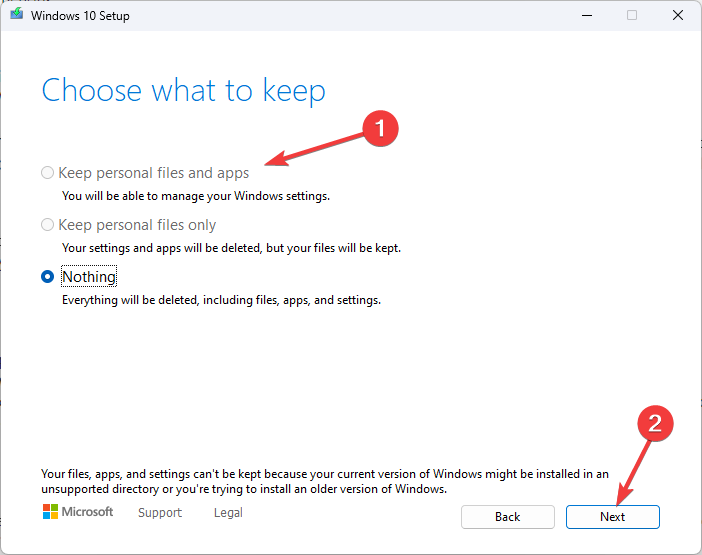
- Select the Keep personal files and apps option and click Next.
- Now, save and close any open apps and files you may be running, and when you’re ready, select Install.
So, these are methods you need to follow to fix the Windows update error 0x800f0984. Try them and let us know what worked for you in the comments section below.






User forum
0 messages