How to fix poor Wi-Fi signal on Windows 10/11
Rest assured that our tested solutions won't disappoint you
![]() 5 min. read
5 min. read
![]() Updated on
Updated on
Share this article
Improve this guide
Read our disclosure page to find out how can you help Windows Report sustain the editorial team. Read more
Every Windows 10 user relies on his/her computer to surf the internet. Nowadays, this is a necessity either for work or for home entertainment. Having a Wi-Fi internet connection makes things a lot easier, and we no longer need to connect through an Ethernet cable to access the internet.
Usually, we find that it isn’t always an easy job to connect to the internet via Wi-Fi on your Windows 10 computer, tablet, or phone.
After hearing more and more users having issues with their Wi-Fi internet connection on Windows 10, we have decided to explain exactly how you can troubleshoot your Windows 10 PC for any problems you might encounter trying to connect to Wi-Fi.
How can I fix a weak Wi-Fi signal on Windows 10?
1. Reset the TCP/IP Stack and Autotuning for Windows 10
- Hover the mouse over the right of the screen.
- When the Charms Bar appears click (left click) on the “Search” icon.
- In the search box you have opened type “Command Prompt”.
- Click (right click) on the search result and select from the menu “Run as administrator”
- In the “Command Prompt” window you opened, type “NETSH INT IP RESET C:RESTLOG.TXT”
- Press “Enter” on your keyboard.
- In the “Command Prompt” window, type “NETSH INT TCP SET HEURISTICS DISABLED”
- Press “Enter” on your keyboard.
- In the “Command Prompt” window, type “NETSH INT TCP SET GLOBAL AUTOTUNINGLEVEL=DISABLED”
- Press “Enter” on your keyboard.
- In the “Command Prompt” window, type “NETSH INT TCP SET GLOBAL RSS=ENABLED”
- Press “Enter” on your keyboard.
- Try rebooting the PC and see if you can pick up the wifi.
2. Prevent the Wi-Fi adapter from turning off while idle
- Press and hold the “Windows” button + the “W” button.
- Type “Network and sharing center “ in the search box
- Press “Enter” on the keyboard.
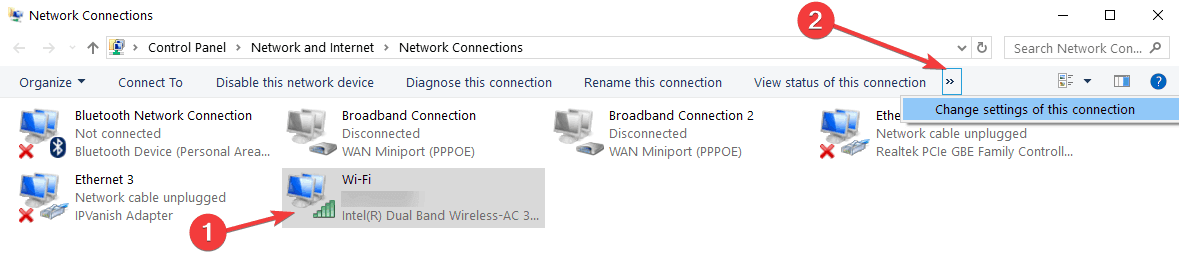
- Click on your Wi-Fi network
- The “wifi status” windows should now open.
- Click (left click) on the Properties button in the lower left of the “WiFi status/ Change settings of this connection” option.

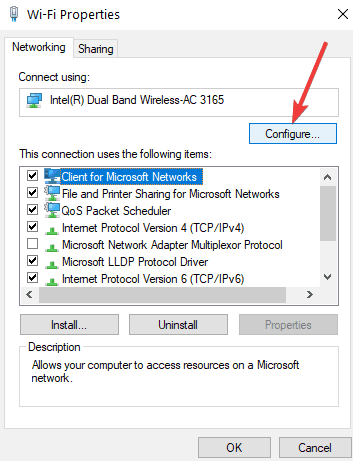
- In the new windows that opened lets click(left click) on “Configure” button.

- Let’s go to “Power Management” tab in the upper side of the window and verify if the option “Allow the computer to turn off this device to save power” is unchecked. If it isn’t, then uncheck it.

- Click (left click) on “OK” button in the lower side of the window.
- Reboot the PC.

3. Revert Network adapters
- In the search box on the start screen we need to type “Device Manager”
- Press “Enter” button on the keyboard.
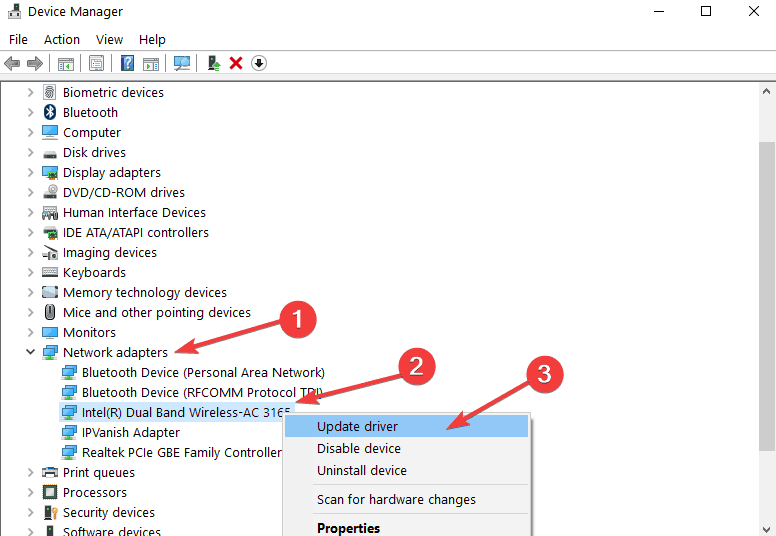
- In the “Device Manager” window that pops up double click (left click) the “Network Adapters”.
- Click (right click) on “Wireless Connection” and click (left click) on “Update Driver Software”.

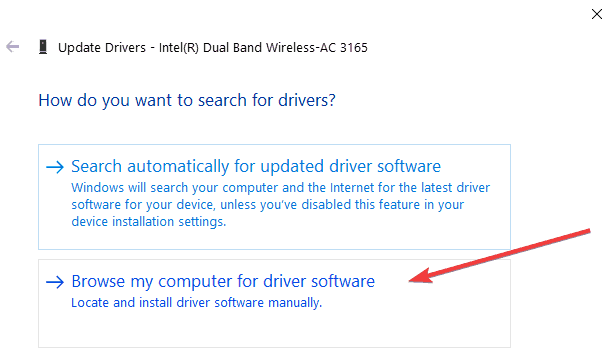
- Click (left click) the “Browse my computer for driver software”.

- On the new window that pops up click (left click) on “Let me pick from a list of device drivers on my computer”.
- On the window that says “Select Network adapter” choose the adapter that starts with the Manufacturers name not the one starting with Microsoft. The installation will begin.
- After the installation is completed reboot the PC.
4. Reinstall the network adapters
- In the search box on the start screen we need to type “Device Manager”
- Press “Enter” button on the keyboard.
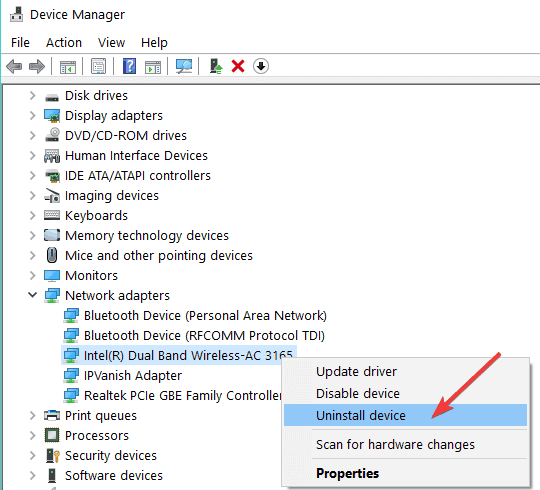
- In the “Device Manager” window that pops up double click (left click) the “Network Adapters”.
- Click (right click) on “Wireless Connection” and click (left click) on “Uninstall”

- Restart the PC in order to make your Windows 10, Windows 8 or Windows 8.1 automatically install the driver.
- If the system won’t install the driver automatically, then follow the steps below:
- In the search box on the start screen we need to type “Device Manager”
- Press “Enter” button on the keyboard.
- Click(right click) the username on the top of the “Device Manager” window.
- Click (left click) on “Scan for hardware changes”, Windows 10 will automatically identify which driver is missing and will install it.
- Reboot the PC.
5. Get Wi-Fi signal repeater software
If the problem persists, you may need a Wi-Fi signal repeater. We have already compiled a list of the best Wi-Fi repeater software you can install on your computer, so go ahead and check out our list and install the tool that best suits your needs and your network configuration.
6. Buy a Wi-Fi extender
There are also many hardware devices that you can use to boost your Wi-Fi signal. These devices are called Wi-Fi extenders. So, with the help of a Wi-Fi signal repeater software and a Wi-Fi extender, you should be able to fix the weak Wi-Fi signal issues that you’re experiencing, including your Wi-Fi slowing down when you connect a Bluetooth device.
So, these are some workarounds you can use if your computer won’t pick up the Wi-Fi connection. Let us know which off these methods helped you fix your Wi-Fi internet connection problems.


User forum
1 messages