How to Fix The DirectX Error on Modern Warfare 3?
Ensure your Windows is updated to the latest version
5 min. read
Updated on
Read our disclosure page to find out how can you help Windows Report sustain the editorial team. Read more
Key notes
- To fix the DirectX error on MW3, verify the game files on Steam or Battle.net, change the compatibility settings of the exe file, or update your graphics driver.
- Continue reading to learn more about the solutions.
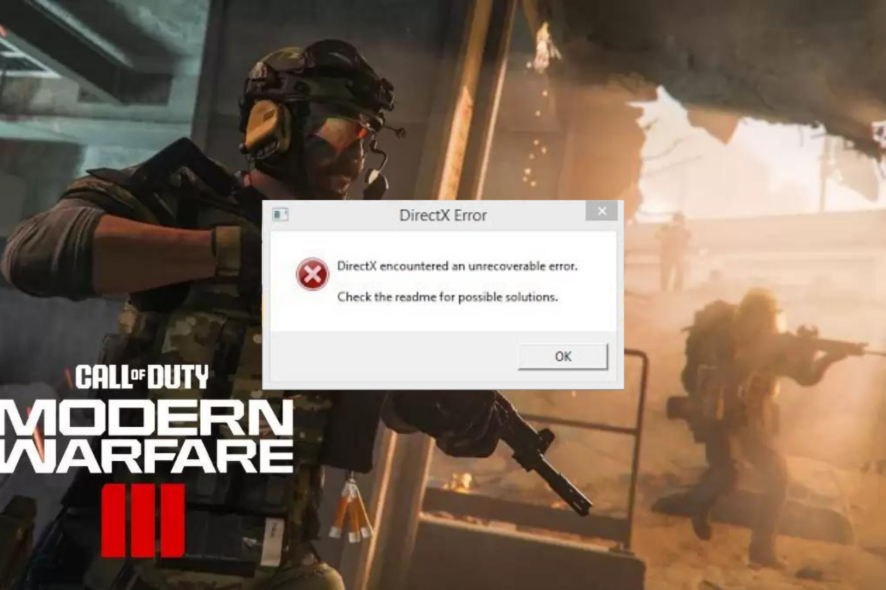
Many users have complained about getting the DirectX error while playing Call of Duty: Modern Warfare, a popular first-person shooter game.
In this guide, we will discuss the probable causes and explain various WR experts-tested solutions to ensure you access the game without interruption.
What causes the DirectX error on MW3?
- Outdated graphics driver.
- Corrupted game files or cache files.
- Unstable internet connection.
How do I fix the DirectX error on Modern Warfare 3?
Before we go to the advanced fixes to resolve the DirectX error on MW3, here are a few preliminary checks you should do:
- Restart your computer & router to refresh the connection.
- If using a PC, check the cabinet to ensure the GPU is properly seated.
- Make sure your Windows OS is updated to the latest version.
1. Update the DirectX tool
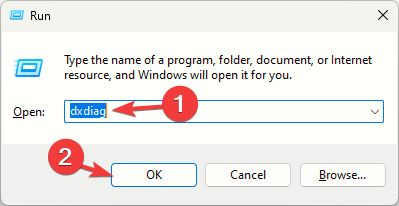
- Press Windows + R to open the Run window.
- Type dxdiag and click OK to open the DirectX Diagnostic Tool.
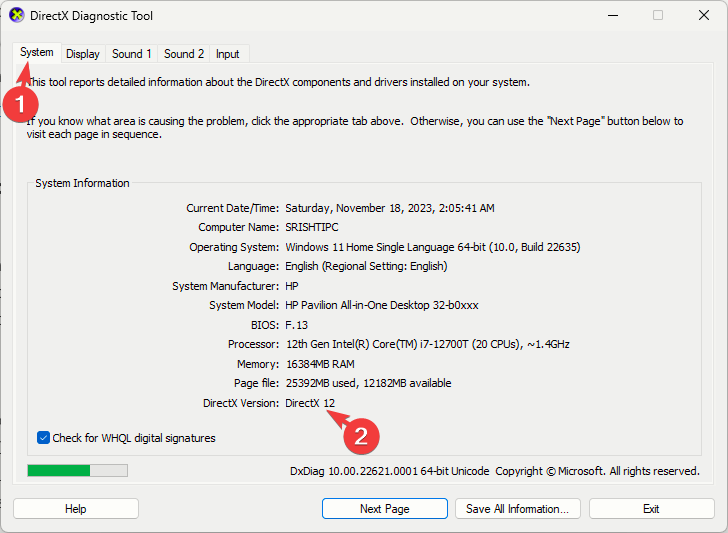
- Go to the System tab and locate the DirectX Version; it should be the latest one, i.e., DirectX12.
- If not, download DirectX and double-click the installation file to install the updated version.
2. Verify the integrity of game files
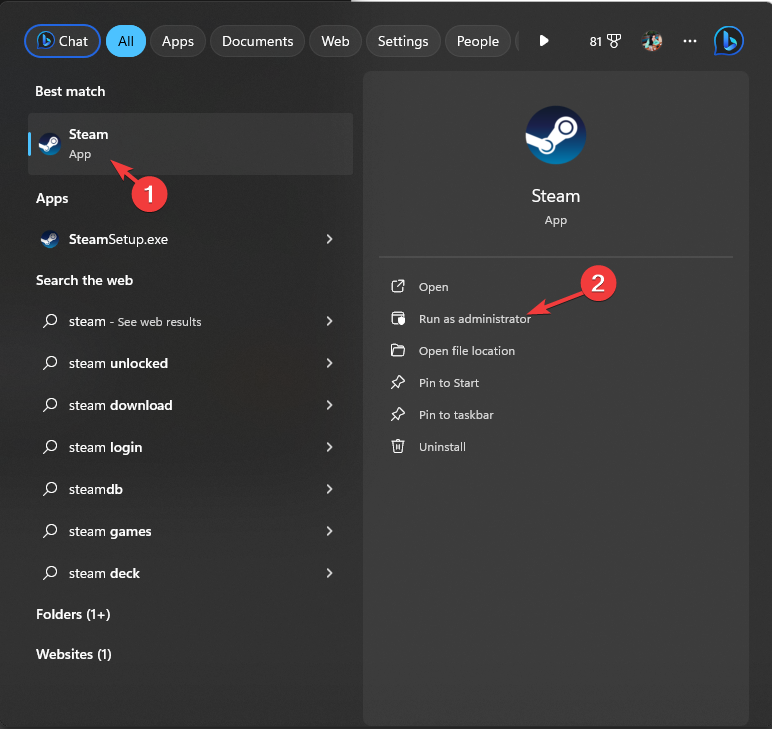
- Press the Windows key, type steam, and click Open.
- Go to Library, locate the game, right-click it, and choose Properties.
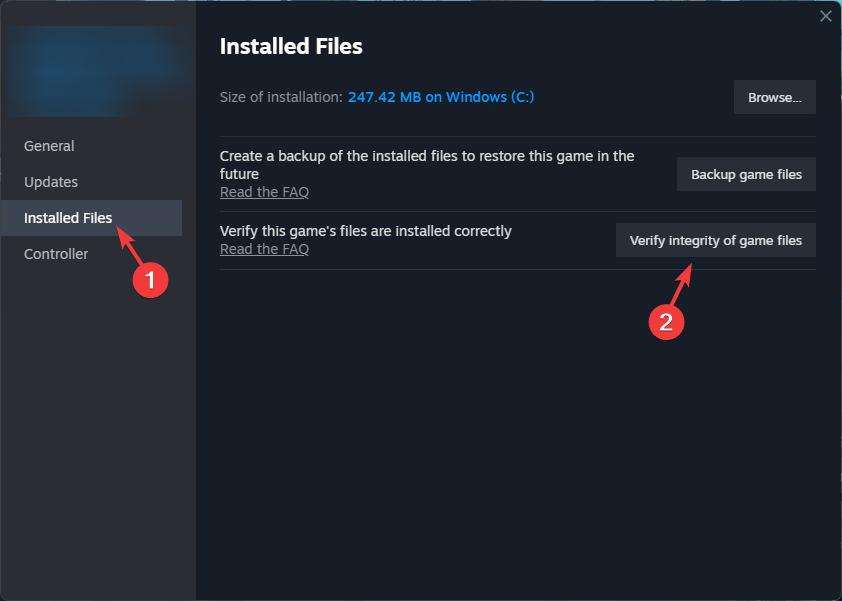
- Click the Installed files option from the left pane, and click the Verify integrity of game files.
- Once done, the files would be repaired if found corrupted.
3. Update the driver
- Press Windows + R to open the Run dialog box.
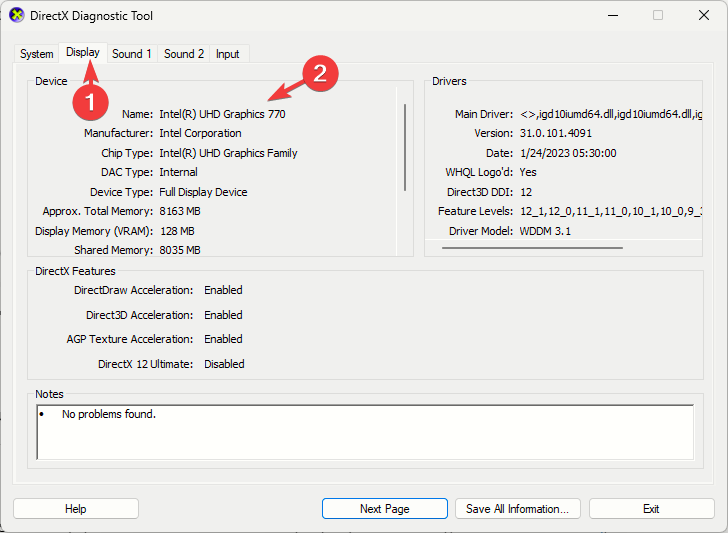
- Type dxdiag and click OK to open the DirectX Diagnostic Tool.
- Go to the Display tab; under Device, you will see the graphics driver name and manufacturer.
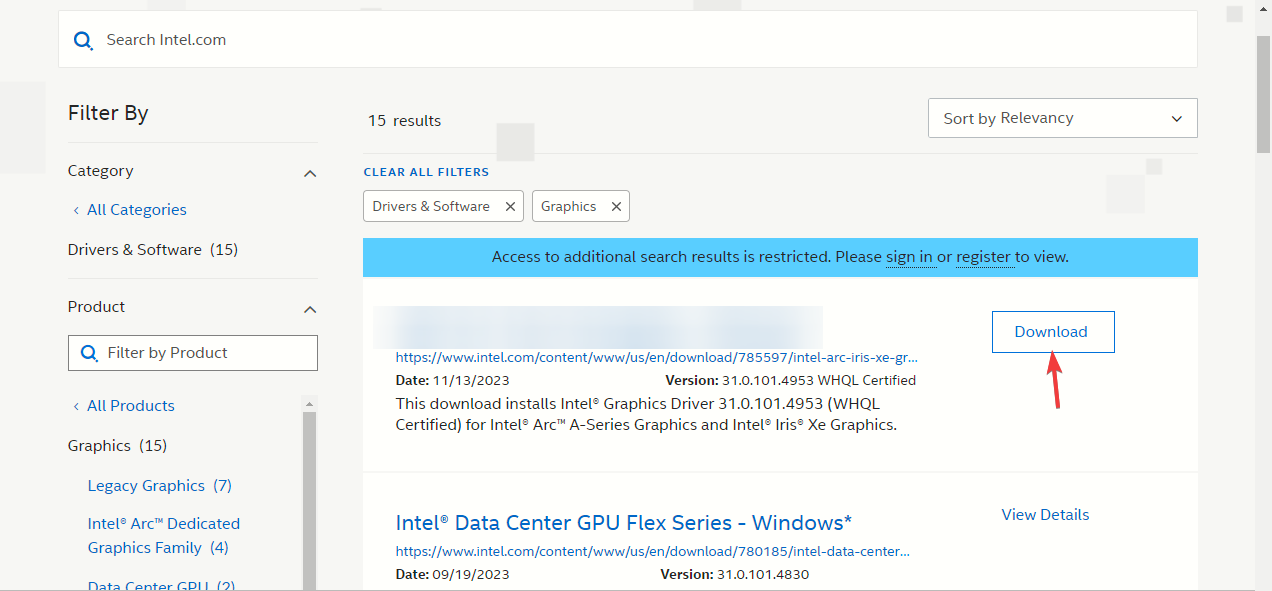
- Visit the manufacturer’s website; it could be Intel, Nvidia, or AMD, and go to the driver download page.
- Locate the graphics card driver’s latest version and click Download.
- Double-click the executable file and follow the on-screen instructions to install the latest driver.
- Restart your computer to let the changes take effect.
Updating your device drivers can help prevent other issues while playing Call of Duty, such as mouse lag; read this guide to learn more.
Updating your drivers can be done much more easily by using dedicated software, such as Outbyte Driver Updater. This tool allows you to scan and replace any broken or outdated driver within just a few minutes.
4. Edit a registry entry
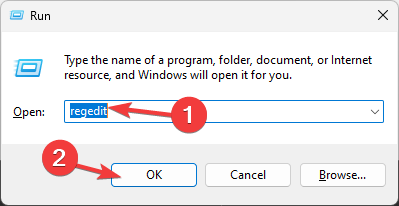
- Press Windows + R to open the Run window.
- Type regedit and click OK to open the Registry Editor.
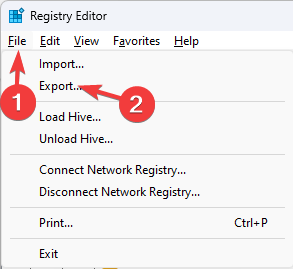
- Go to File, then click Export. Save the .reg file to an accessible location on your computer, preferably on the Desktop.
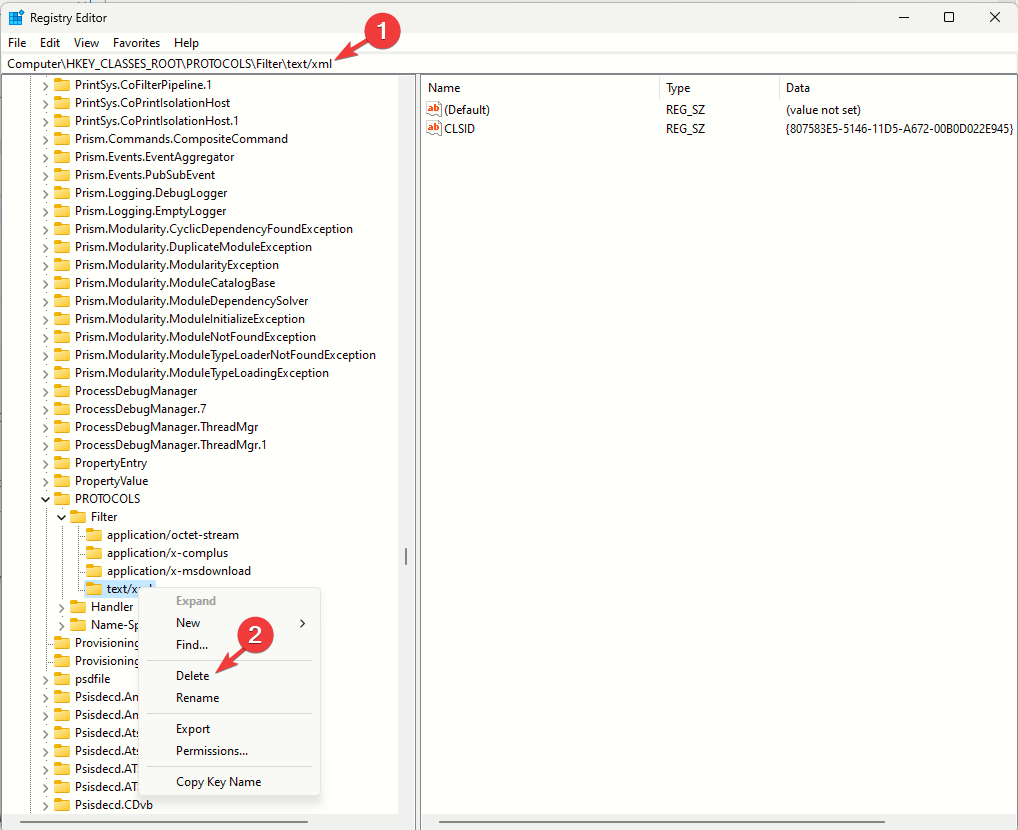
- Navigate to this path:
Computer\HKEY_CLASSES_ROOT\PROTOCOLS\Filter\text/xml - Right-click the text/xml from the left pane and select Delete from the context menu.
- Click OK to confirm the action.
- Close Registry Editor and reboot your computer to save the changes.
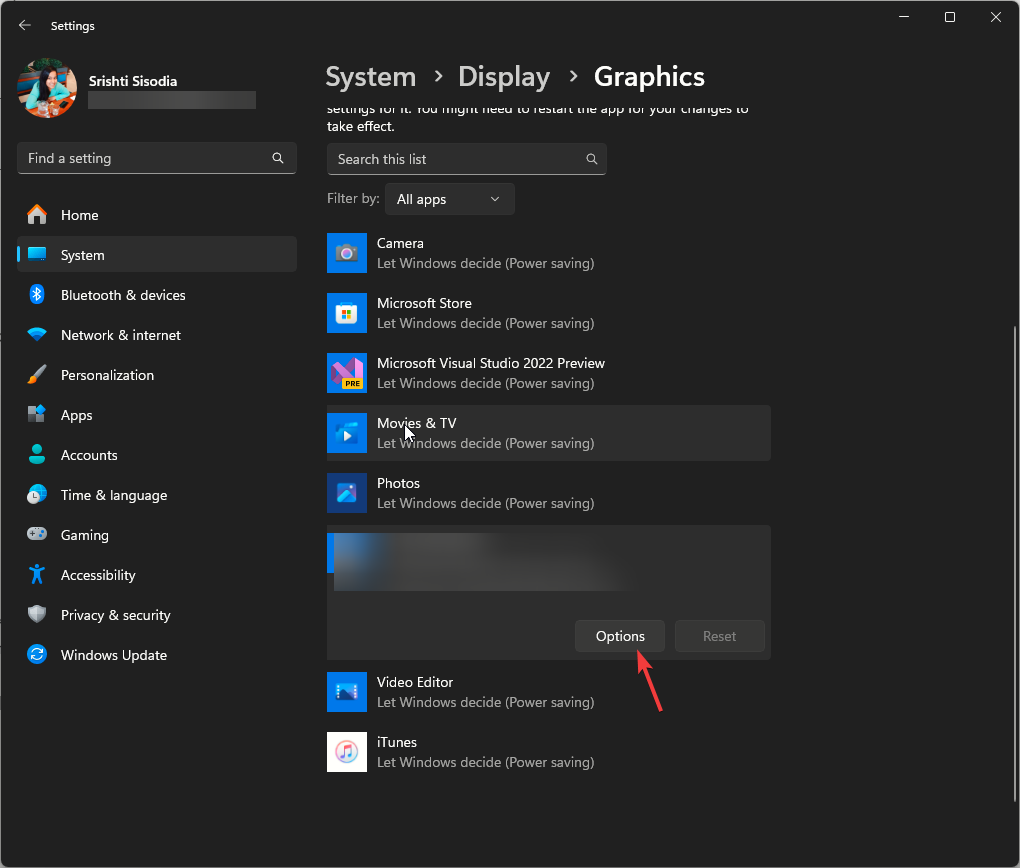
5. Modify the graphics preferences
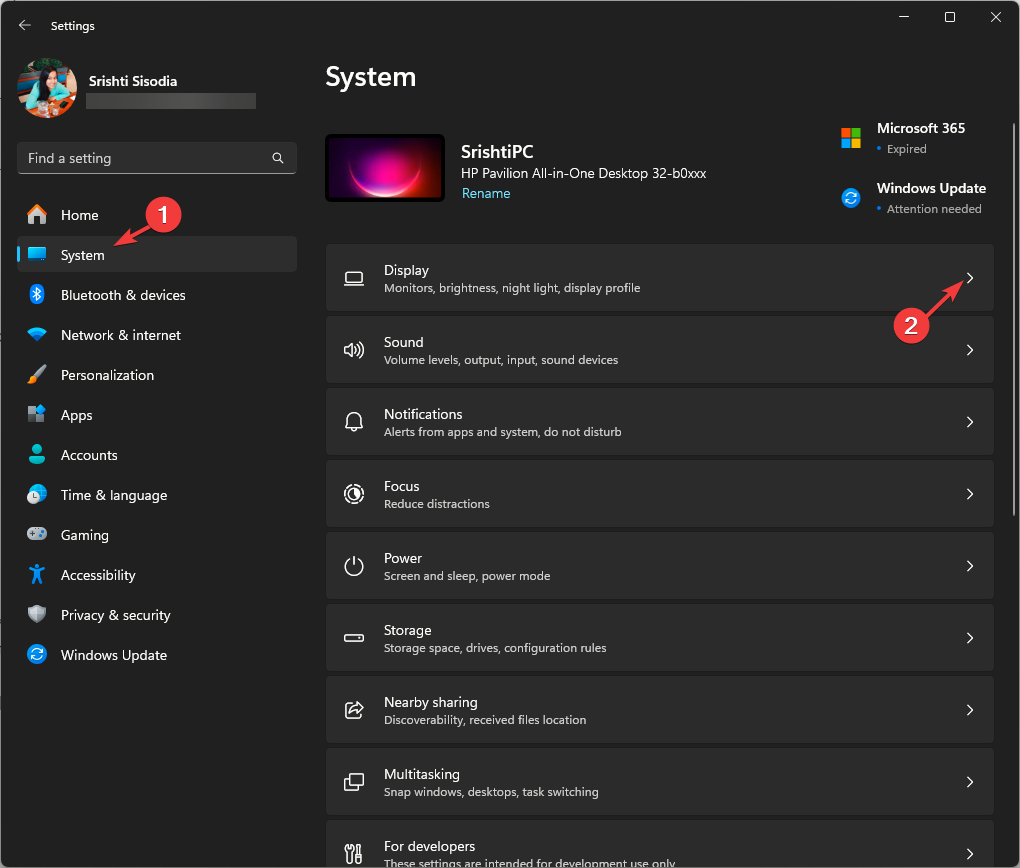
- Press Windows + I to open the Settings app.
- Go to System, then click Display.
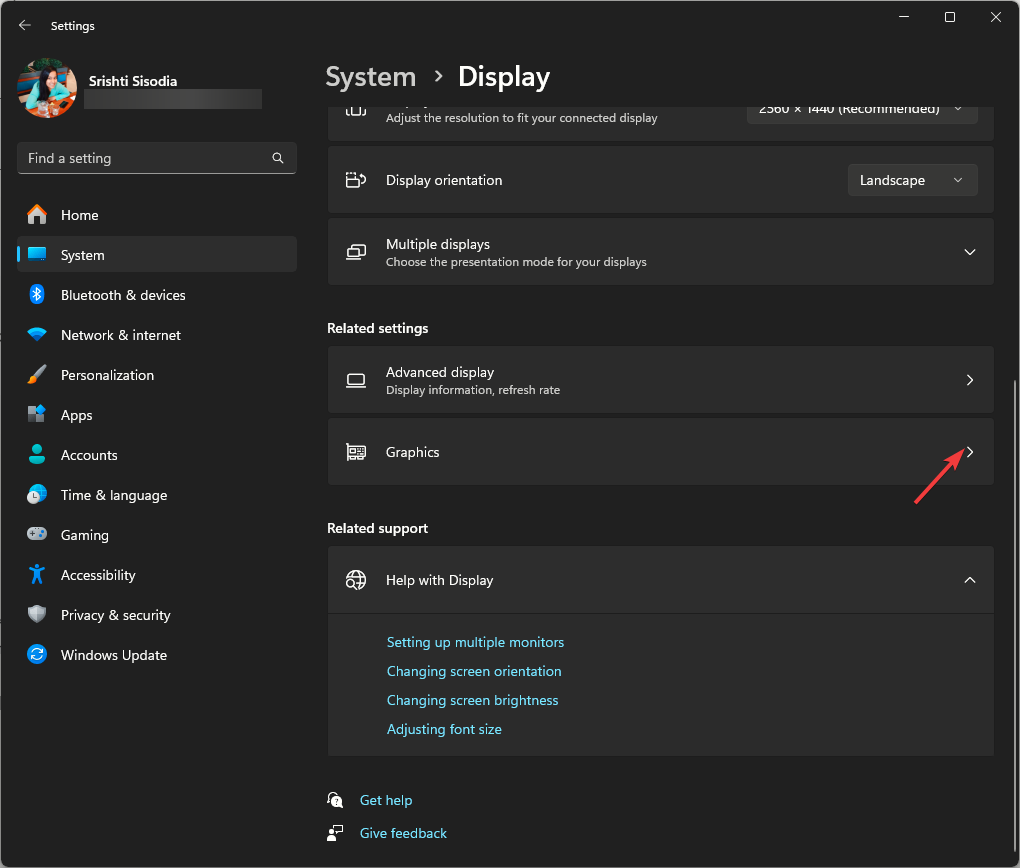
- Next, click Graphics.
- Locate the game from the list, click it, then select Options.
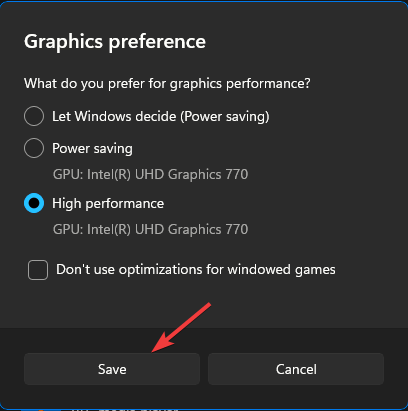
- Click the radio button next to High Performance, then click Save.
6. Reset the in-game settings
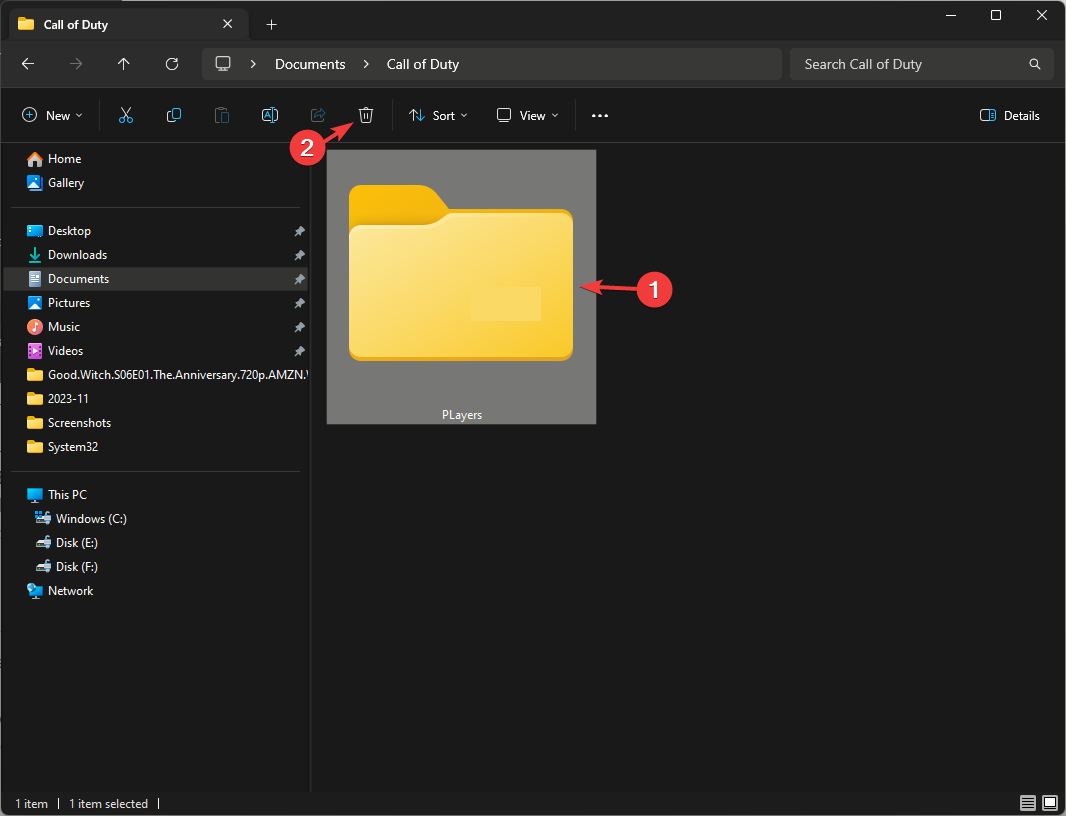
- Press Windows + E to open the File Explorer window.
- Go to Documents, locate, and double-click the Call of Duty folder to open it.
- Next, locate the Players folder, select it, and click the Delete icon to remove it.
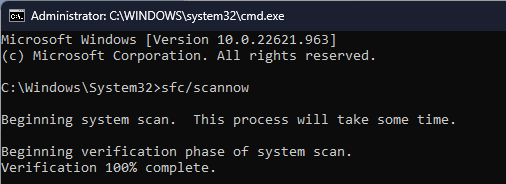
7. Run SFC & DISM scans
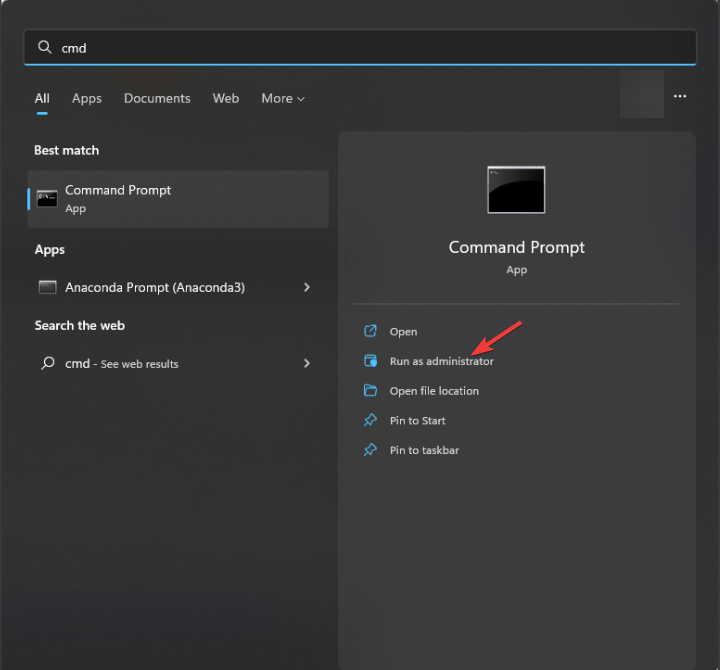
- Press the Windows key, type cmd in the search bar, and click Run as administrator.
- Type the following command to repair the corrupted files on Windows, and hit Enter:
sfc / scannow - Wait for the process to complete, then copy & paste the following command and press Enter:
Dism /Online /Cleanup-Image /RestoreHealth - Restart your computer to let the changes take effect.
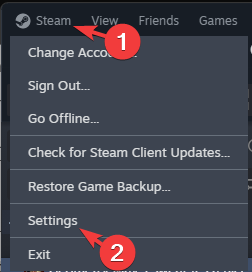
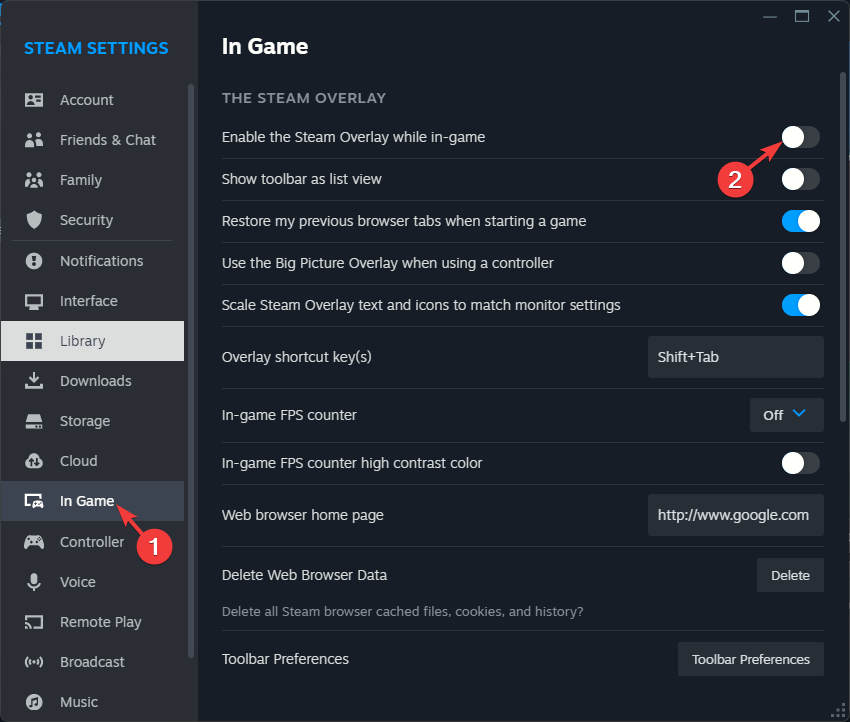
8. Disable the Steam overlay
- Press the Windows key, type steam, and click Open.
- Click Steam from the top-left corner and select Settings from the drop-down menu.
- Under Steam Settings, go to In Game, toggle off the switch next to Enable the Steam Overlay while in-game.
You can also try disabling the overlay of Steam, Battle.net, or Nvidia to fix the DirectX error and others like the Warzone Dev error 5523.
If nothing has worked for you and you face other performance issues on your computer, you need to reinstall Windows to fix the problem.
Remember to avoid any performance issues while playing MW3; ensure you have the recommended DirectX version, the latest graphics driver, the game set to high performance, and your computer shouldn’t have corrupted files.
If Modern Warfare Remastered is not launching for you, check the system requirements and ensure your computer is not overheated and drivers are updated.
Did we miss a step that helped you fix the DirectX error on MW3? Don’t hesitate to mention it in the comments section below. We will happily add it to the list.


User forum
0 messages