McAfee VPN Not Connecting - Tried and Tested Solutions
![]() 5 min. read
5 min. read
![]() Updated on
Updated on
Share this article
Improve this guide
Read our disclosure page to find out how can you help Windows Report sustain the editorial team. Read more
Is McAfee VPN not connecting properly? Don’t panic, I also had the problem and I fixed it.
Connectivity issues can be caused by several factors related to the network, the servers, PC settings, etc. However, they’re easily solvable. First, you should try out these basic fixes:
- Check your internet connection or connect to a different network.
- Update or reinstall your McAfee VPN app.
- Restart your PC.
- Check device limit.
- Add the right login credentials.
- Contact McAfee support.
If these don’t work, you can proceed to the more detailed solutions below. Let’s get into it!
How To Fix McAfee VPN Not Connecting
Follow these tips in the order in which they appear:
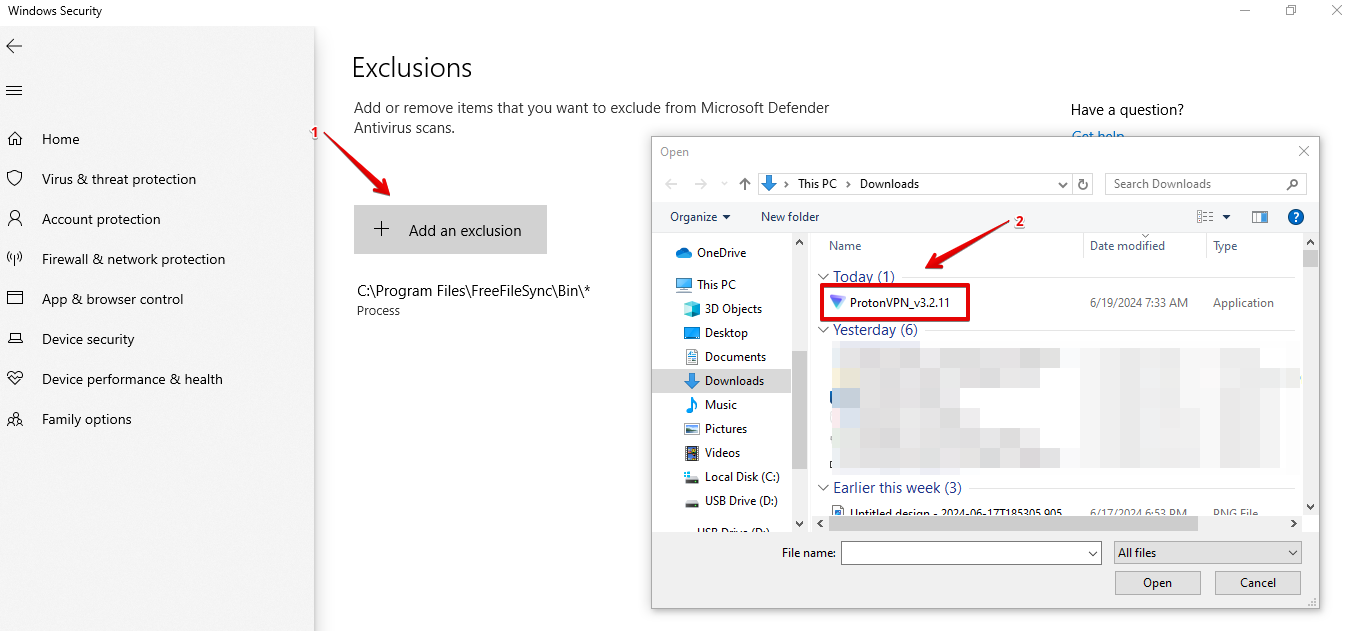
Add an Exception for McAfee VPN to Your Antivirus
Your PC’s antivirus might detect McAfee as a threat and block it. Since it’s an important tool, I recommend you don’t disable it. The best solution is to add exceptions to it through the settings:
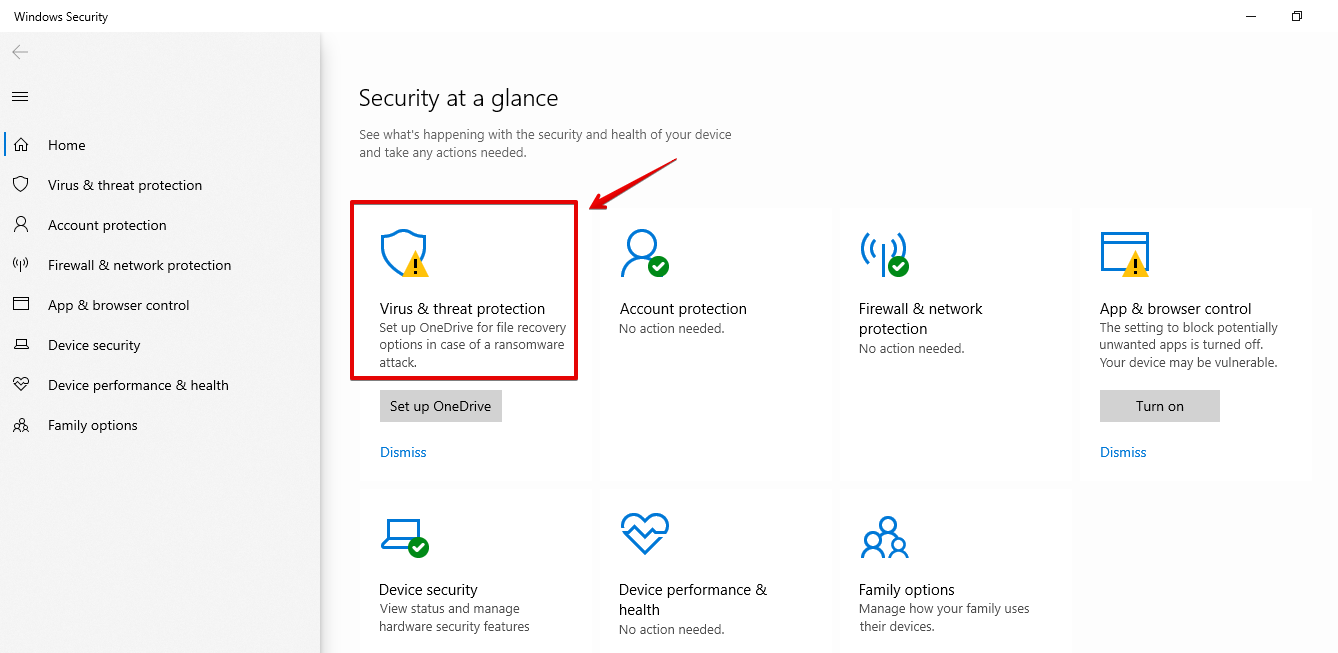
- Press the Windows Icon, type “Windows Security,” then press Enter.
- Select “Virus & threat protection.”
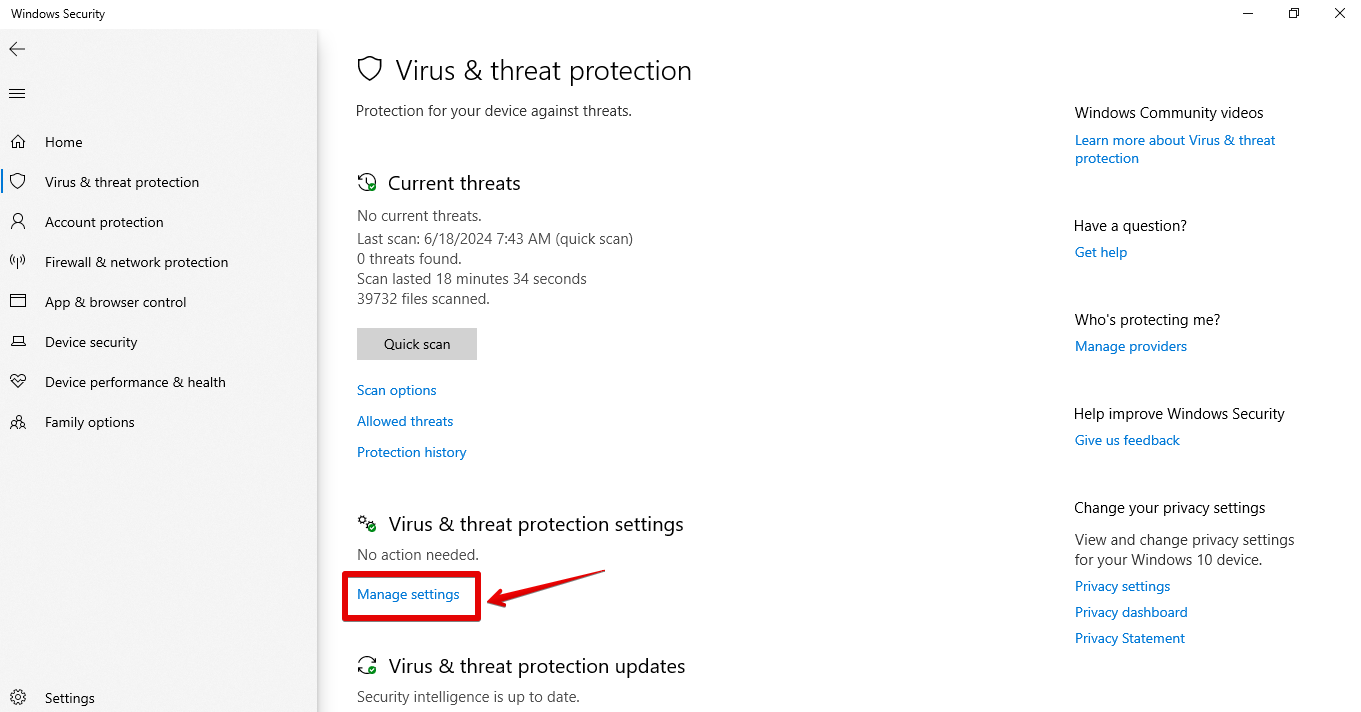
- Tap “Manage settings.”
- Scroll down and tap “Add or remove exclusions” under “Exclusions.” If your computer asks to make changes, click “Yes.”
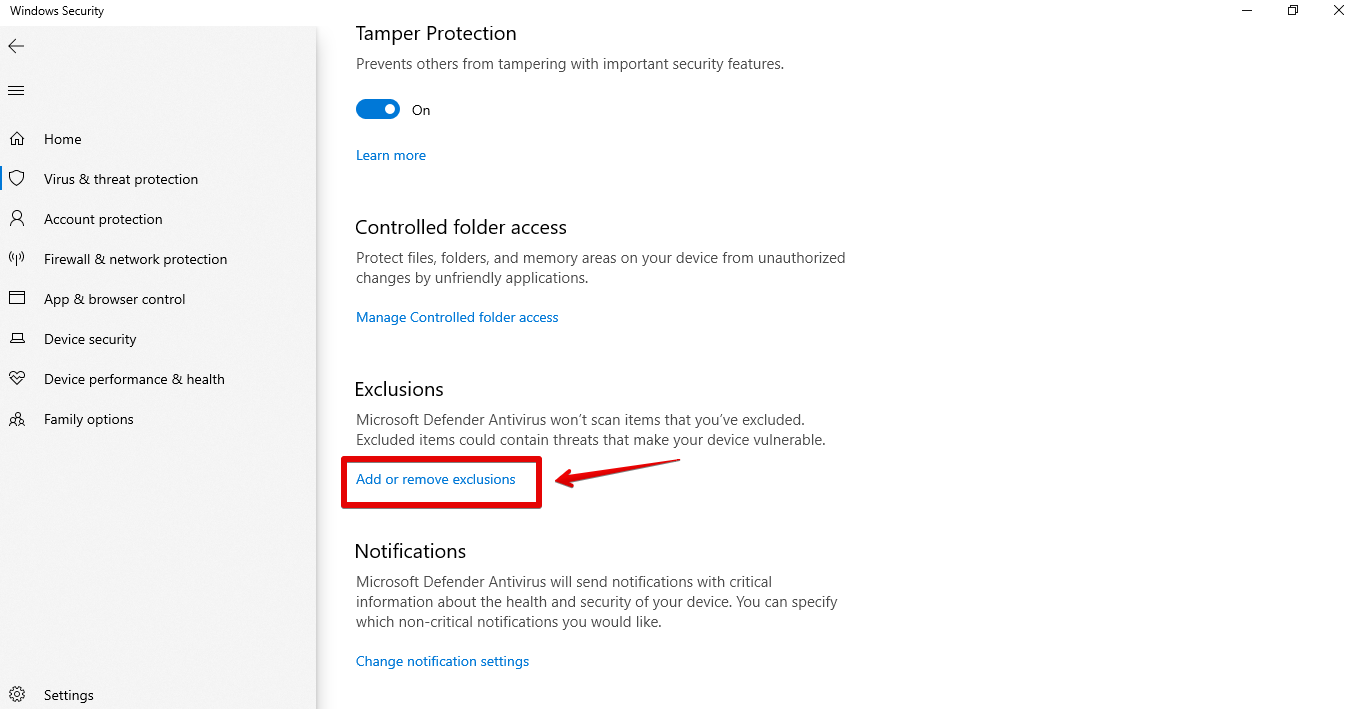
- Tap “Add an exclusion,” then pick “McAfee” from the list.
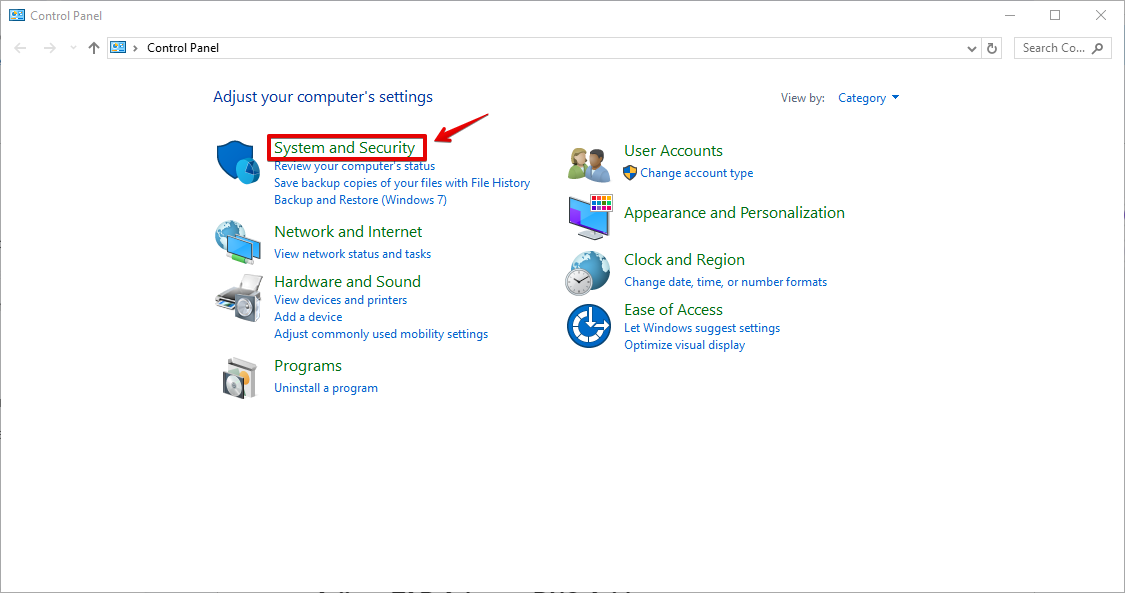
Add an Exception for McAfee VPN to Your Firewall
Your PC’s Firewall could also block VPN usage leading to connectivity issues. Likewise, you shouldn’t disable it. You should add an exception instead. It protects your device from risks like malware and viruses.
Follow the below steps:
- Tap the Windows Icon, type “Control Panel” and press Enter.
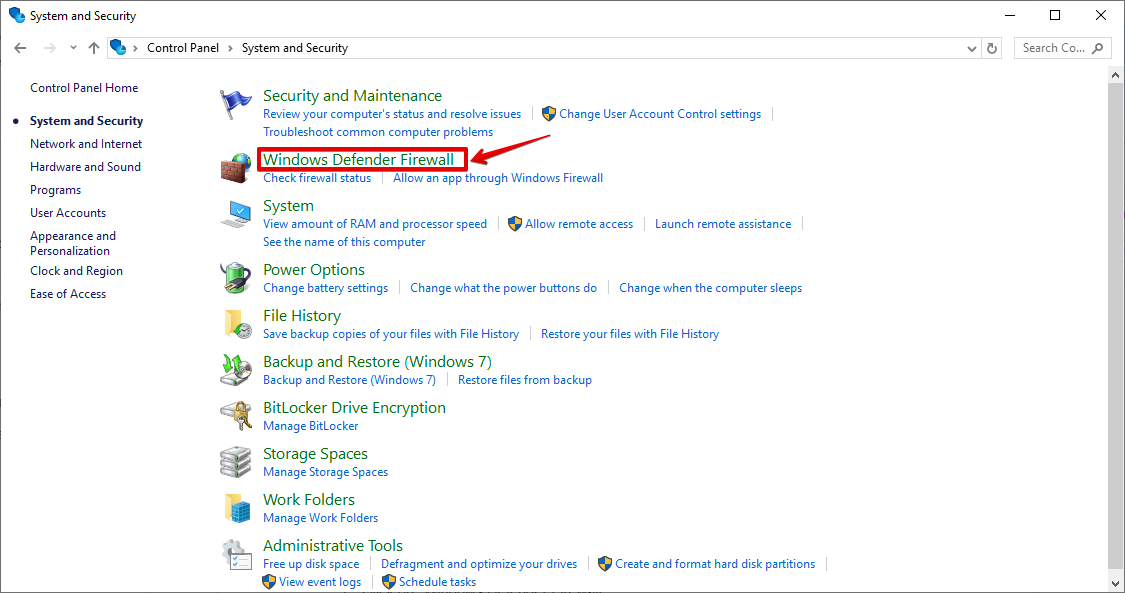
- Click “System and Security.”
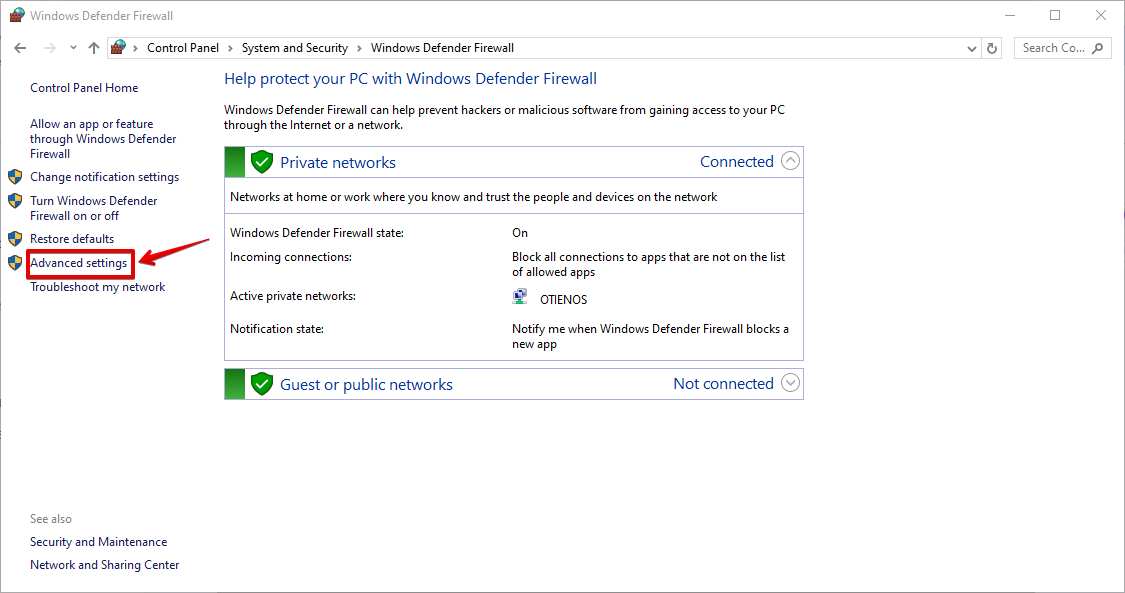
- Select “Windows Defender Firewall.”
- Click “Advanced Settings.”
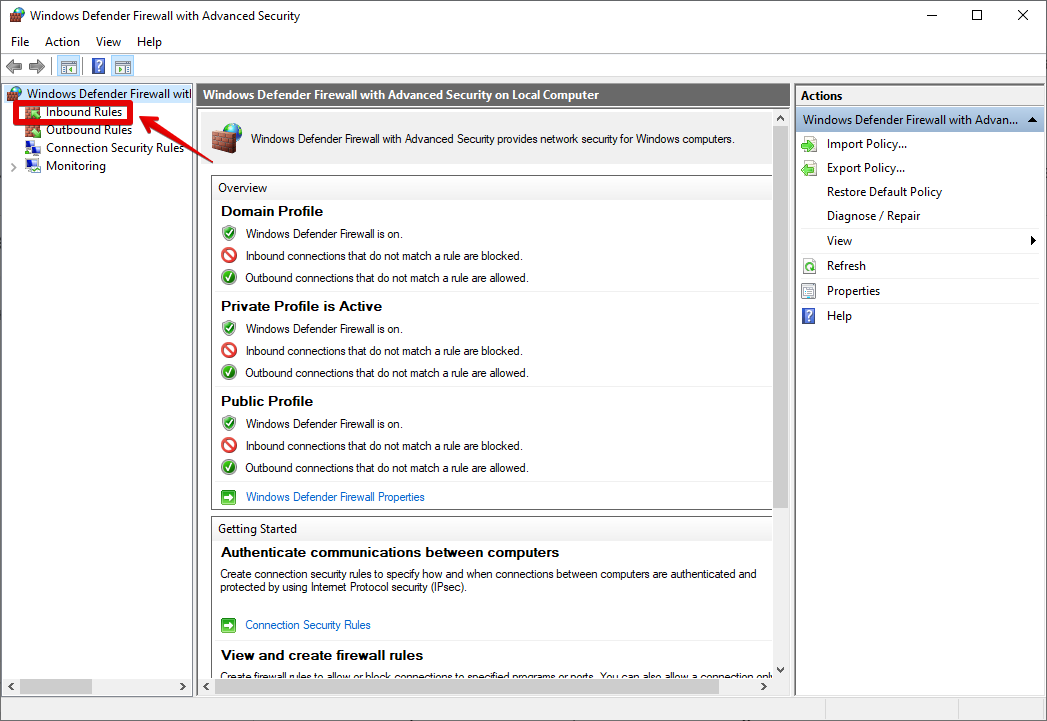
- Tap “Inbound Rules.”
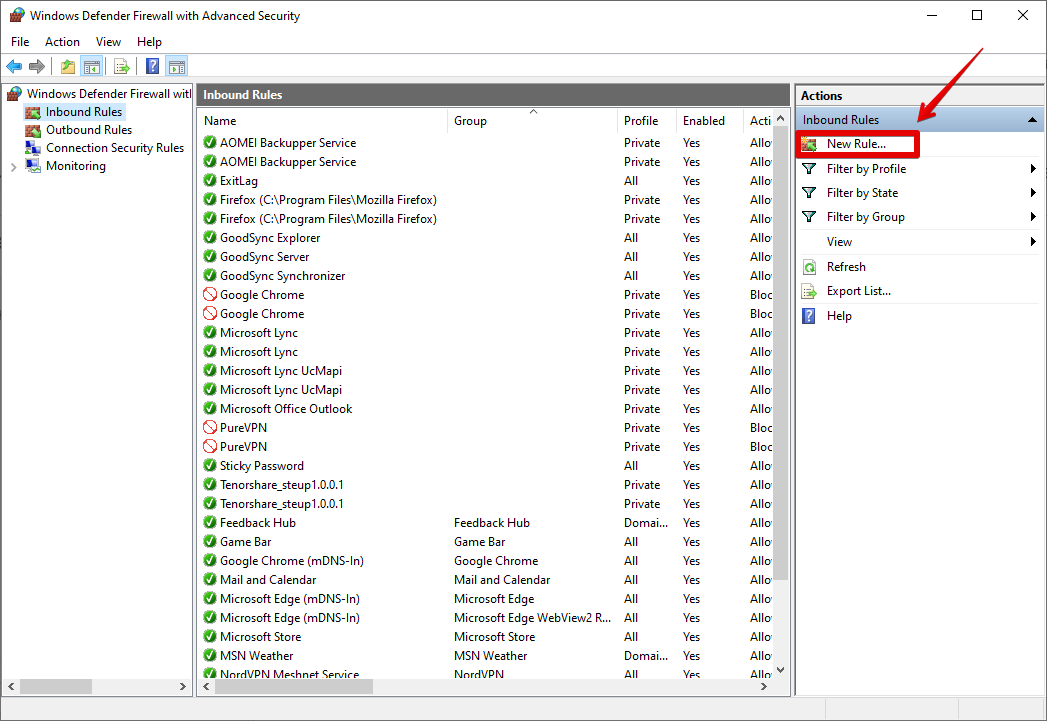
- Select “New Rule.”
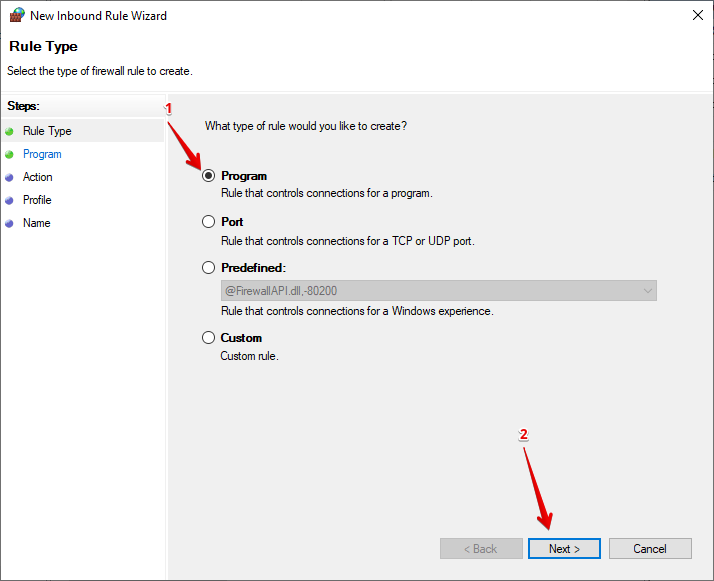
- Pick “Program” and then press “Next.”
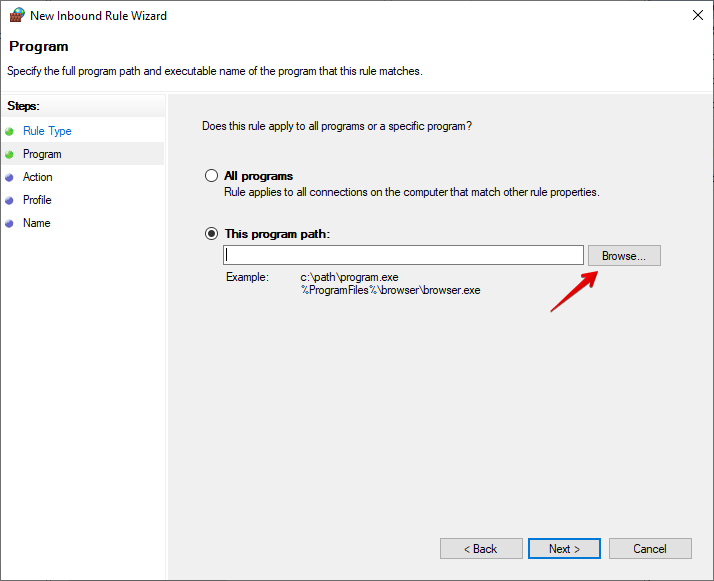
- Click “Browse,” pick the McAfee app, then hit “Next.”
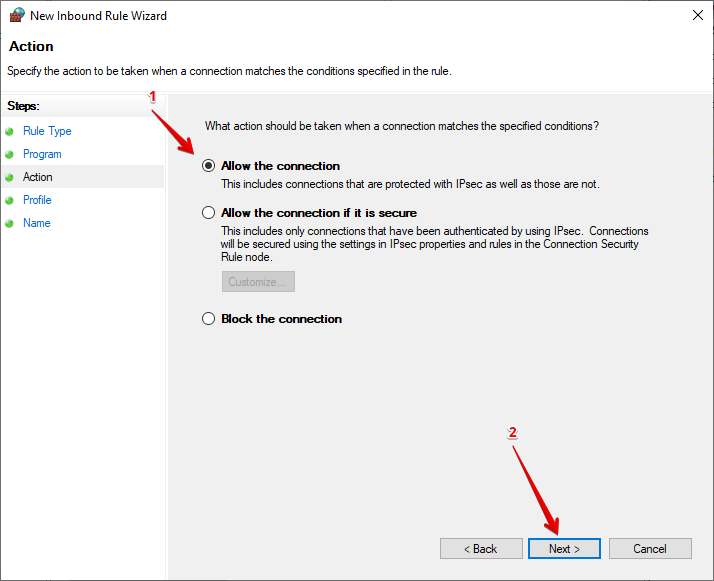
- Select “Allow the connection” and tap “Next.”
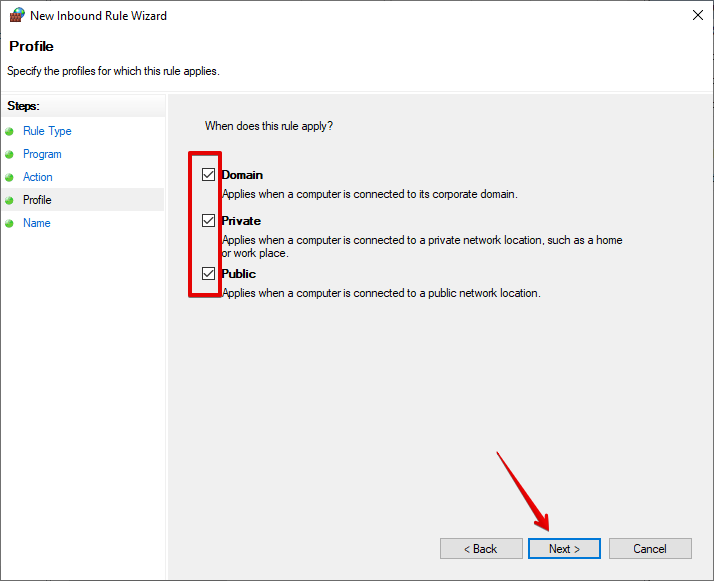
- Tick “Domain,” “Private,” or “Public,” or select all to decide when to apply the rule, then tap “Next.”
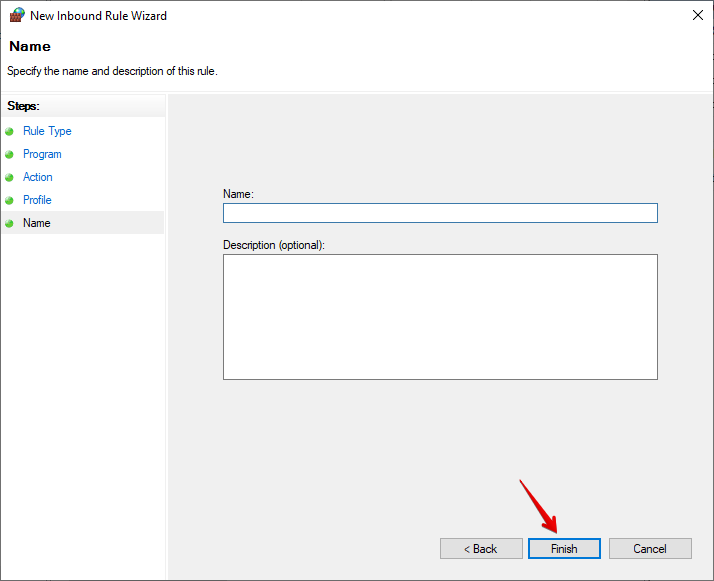
- Include a name and description for the rule, then tap “Finish.”
Confirm if McAfee is connecting. If it’s not working, try the next fix.
Switch Servers
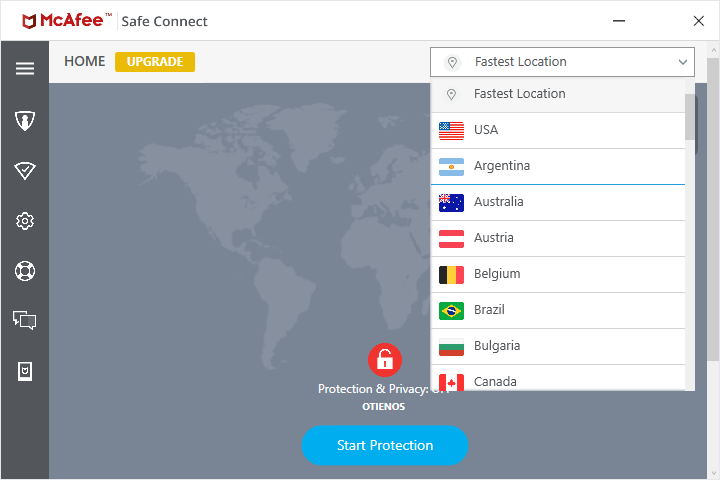
Server congestion or ban will lead to connectivity issues. Changing them will help solve the problem. McAfee VPN has over 2,000 servers so you can easily pick another one. Here’s what to do:
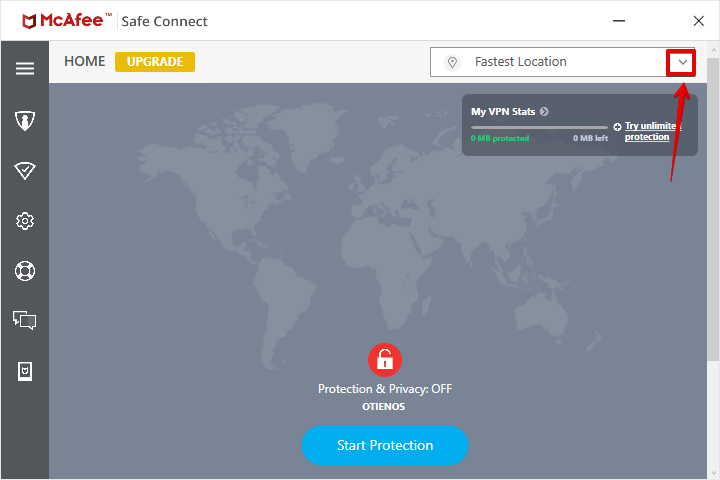
- Log into your McAfee VPN account and tap the drop-down menu in the top right corner.
- You’ll see a list of servers, so select one by tapping on it.
- Confirm you want to connect to the server by clicking “Connect.”
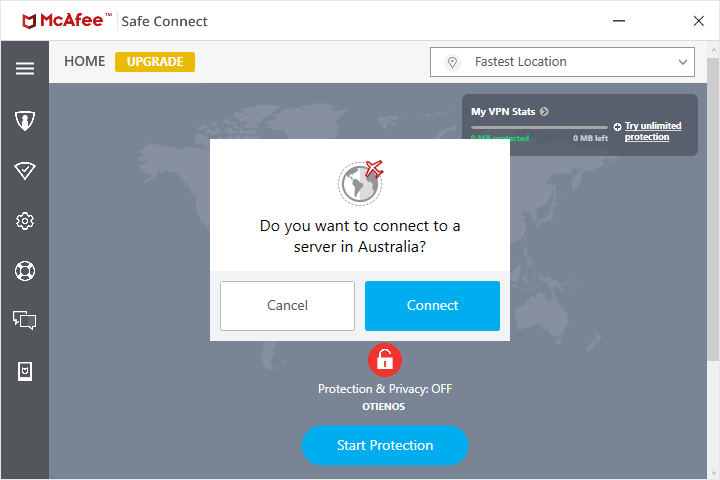
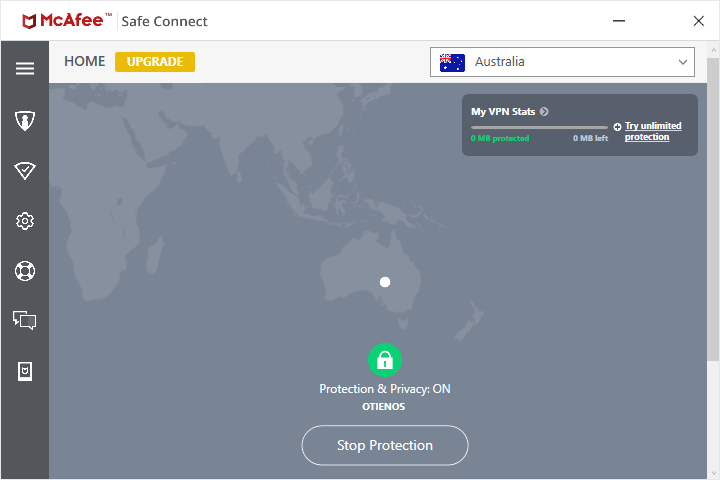
- You’ll be connected automatically.
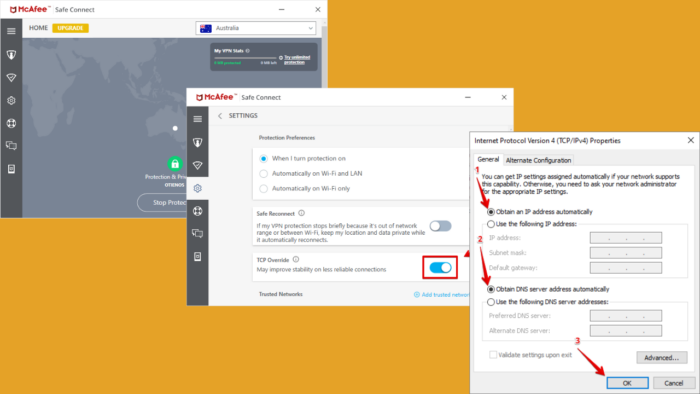
Turn on TCP Override
McAfee’s TCP Override helps to improve stability on less reliable connections. You can enable it on the app like this:
- Log into your McAfee account and tap on the Settings button.
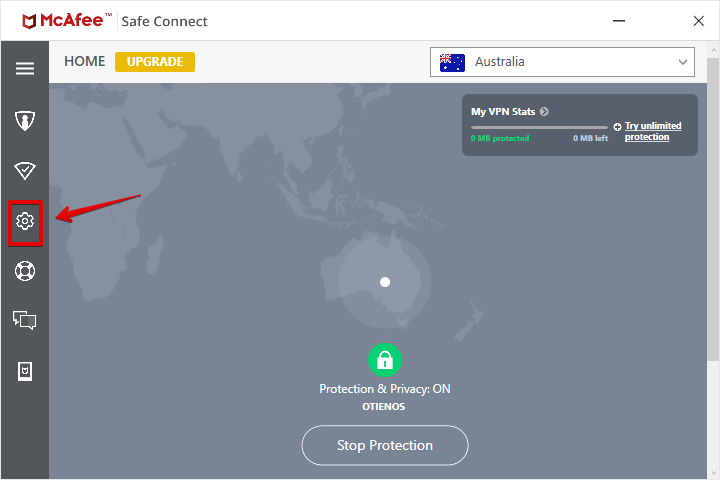
- Toggle the TCP Override button.
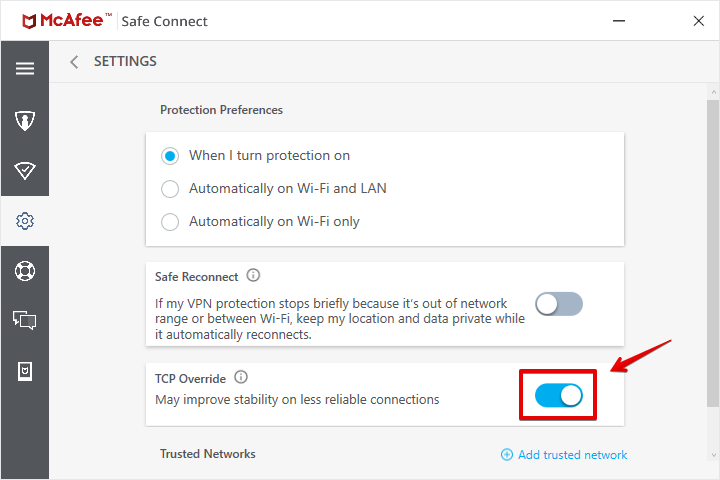
That’s it! You should now have a smooth connection.
Flush the DNS
Flushing the DNS will remove outdated or corrupted DNS entries. It ensures that your system retrieves the most current website address information, leading to faster browsing experiences.
Here’s how to do it:
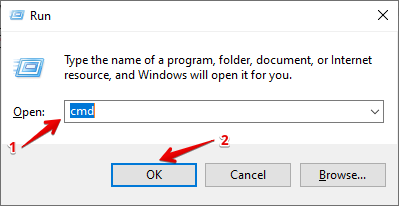
- Open the Command Prompt by pressing Window + R, typing “cmd,” and pressing Enter.
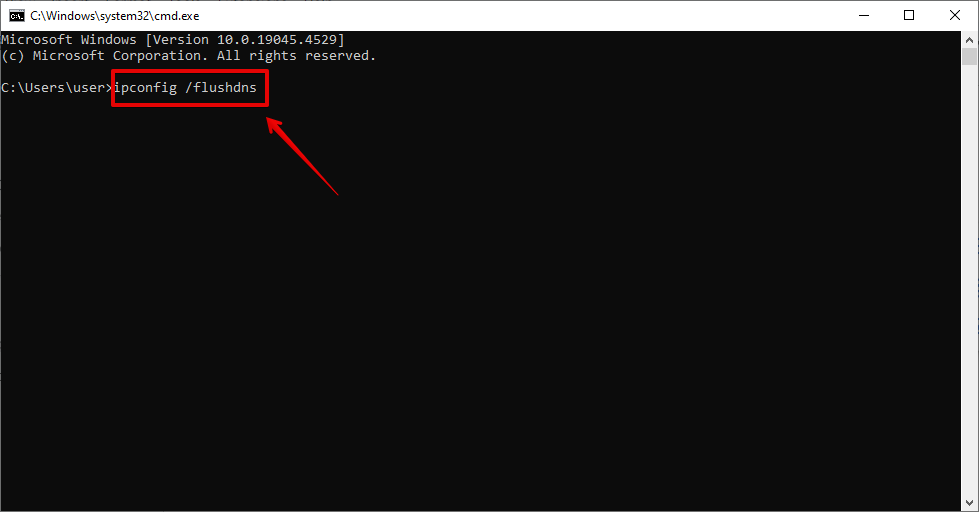
- Write “ipconfig /flushdns” and hit the Enter button.
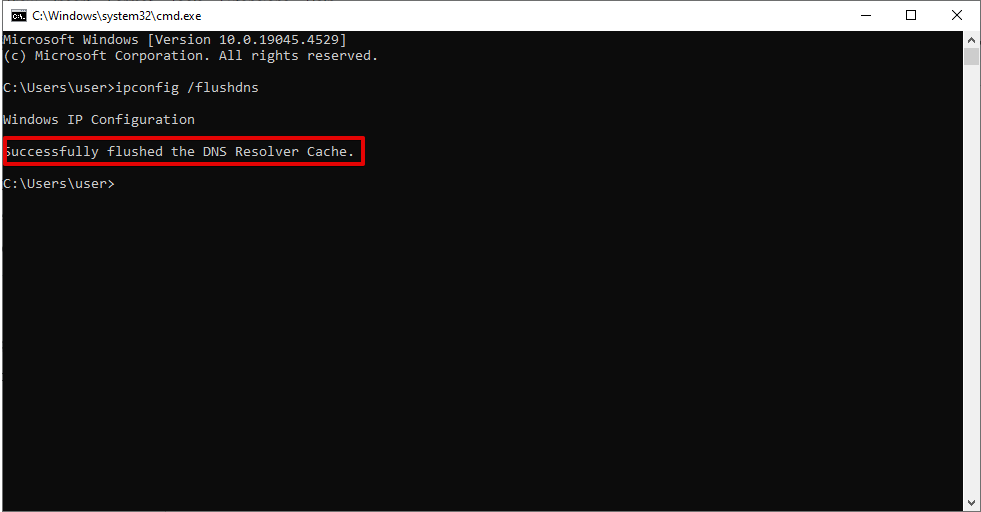
- You’ll receive a confirmation message that your DNS resolve cache is successfully flushed.
Restart your PC and check if McAfee VPN connects smoothly.
Modify Adapter Settings
- Click the Windows Icon + X and tap “Network Connections.”
- Select “Change adapter options.”
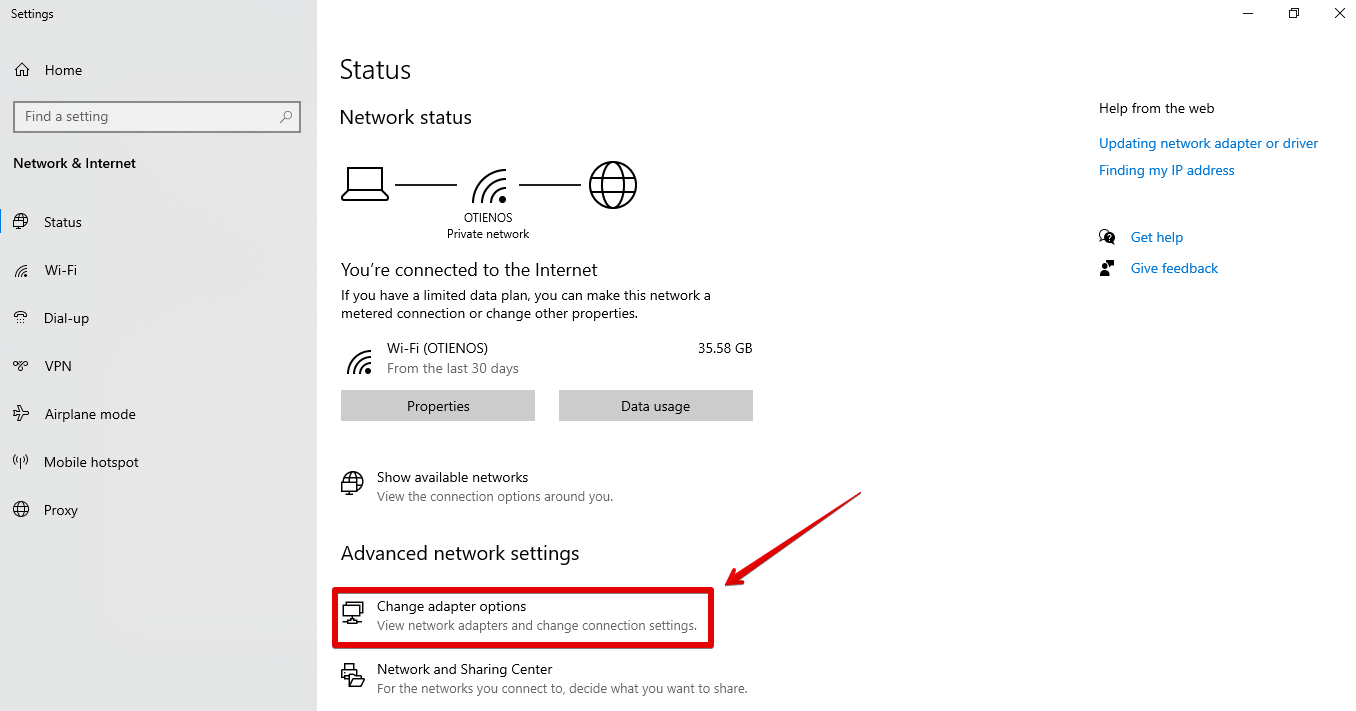
- Identify your active network adapter and right-click on it. Select “Properties.”

- Click “Internet Protocol Version 4 (TCP/IPv4)” and tap “Properties.”
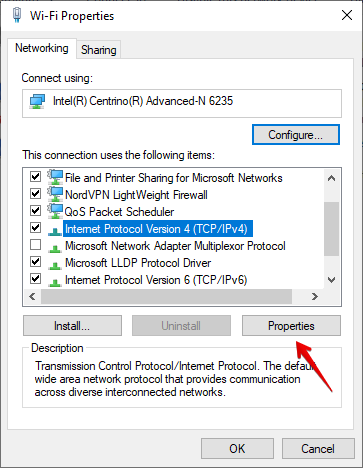
- Select “Obtain an IP address automatically” and “Obtain DNS server address automatically” then tap “OK.”

Reboot your computer and confirm if the VPN is working.
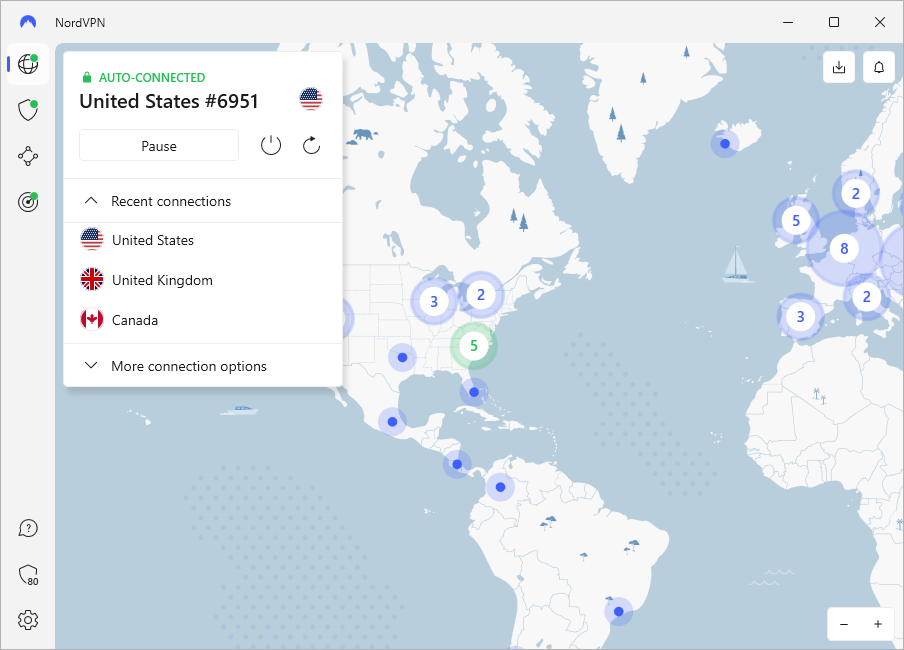
Try an Alternative VPN Provider
If you tried all the fixes and none worked, consider using another provider. NordVPN is one of the most reliable services you can try out. It has over 6,000 servers to ensure minimal server congestion and bans. It’s also among the fastest VPNs thanks to its NordLynx Protocol.
Here’s how to set it up on your PC:
- Go to the official NordVPN website and sign up for an account.
- Tap “Download VPN” and select an app that’s compatible with your Operating System.
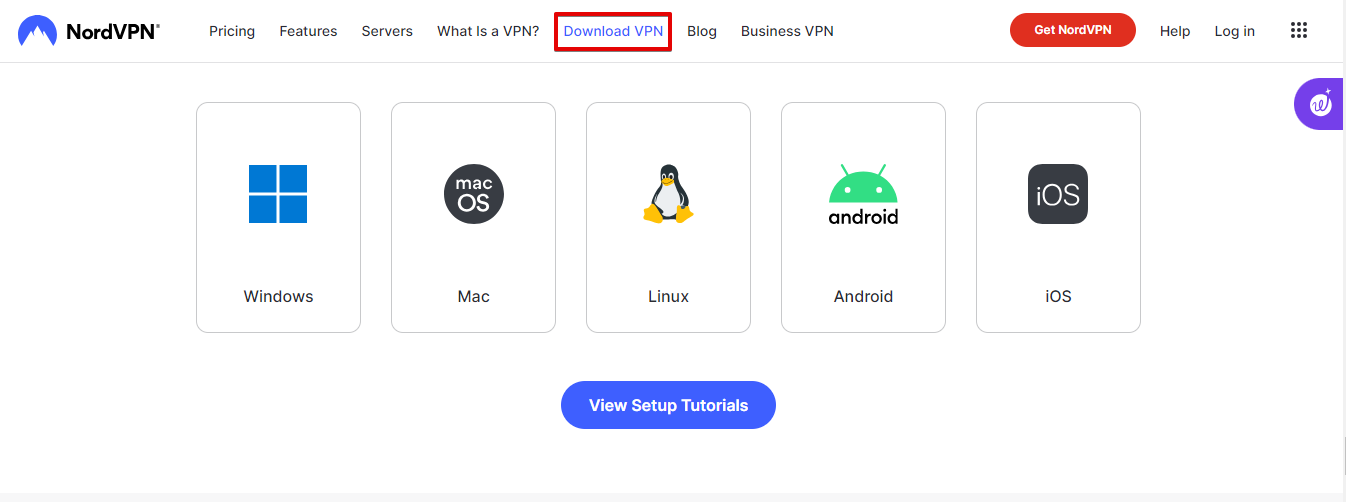
- Open the file to install the NordVPN app and log in with your account details.

- Pick any server from the list or click “Quick Connect” to find the nearest and fastest one.
Apart from high connection speeds, NordVPN is known for strong security and privacy features such as a Double VPN, dedicated IPs, Obfuscated servers, CyberSec, and more.
So, now you know how to deal with McAfee VPN not connecting. The issue is easy to fix with the above solutions. Moreover, if you’re having similar trouble with VyprVPN and Proton VPN, I’ve got you covered. If nothing else works, don’t hesitate to try an alternative like NordVPN.


User forum
0 messages