Solved: PC Crashes After Closing Game
First, ensure your Windows is up to date
5 min. read
Published on
Read our disclosure page to find out how can you help Windows Report sustain the editorial team. Read more
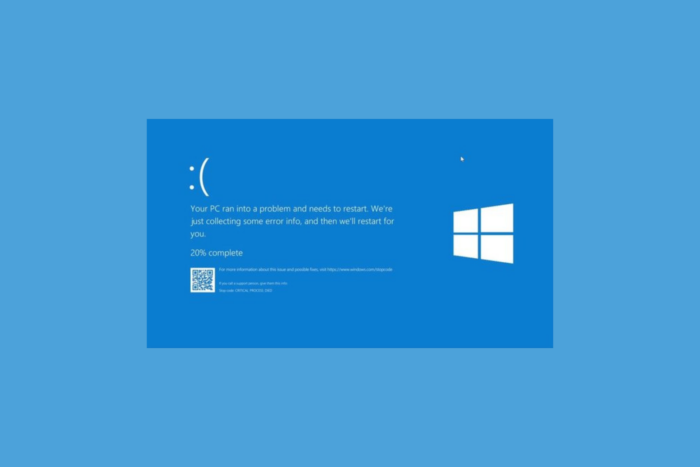
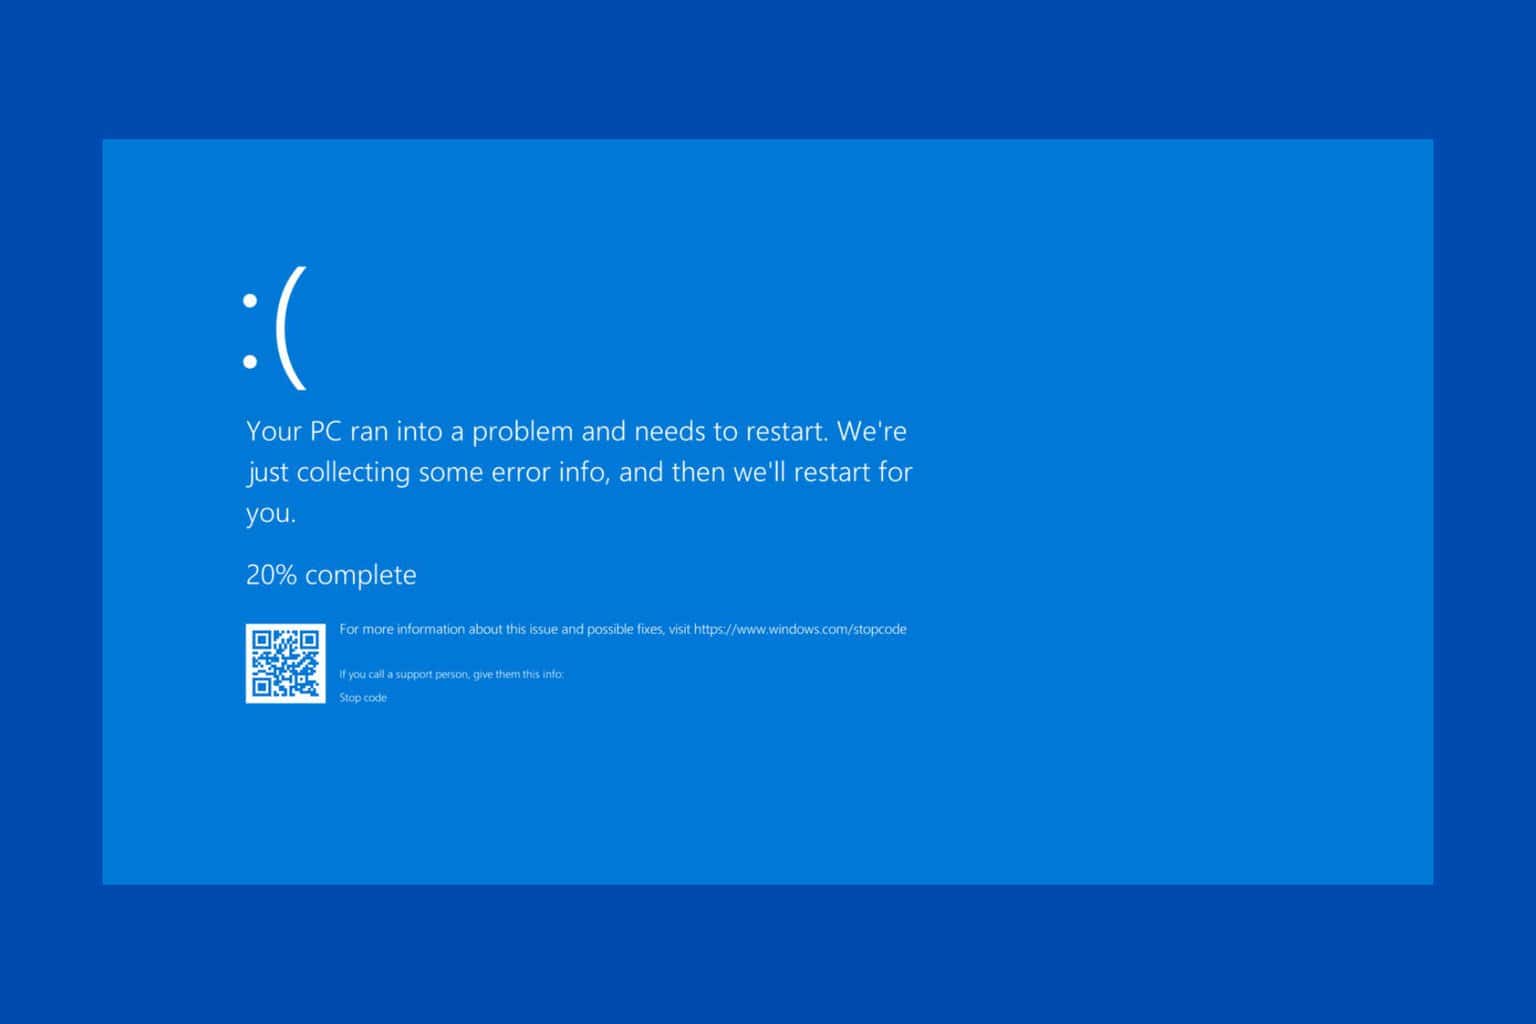
Many users reported random PC crashes after closing games. Sometimes, it occurs within minutes of closing the game; other times, it takes an hour or so. This issue could occur due to an incompatible video driver, corrupted system file, outdated Windows, or a third-party antivirus.
To fix it, first, check your PC cabinet for dust and debris, replace the CMOS battery, ensure all the connections are in place, and then restart your computer and check for a Windows update.
How can I fix the PC crashes after closing game issue?
1. Turn off game mode
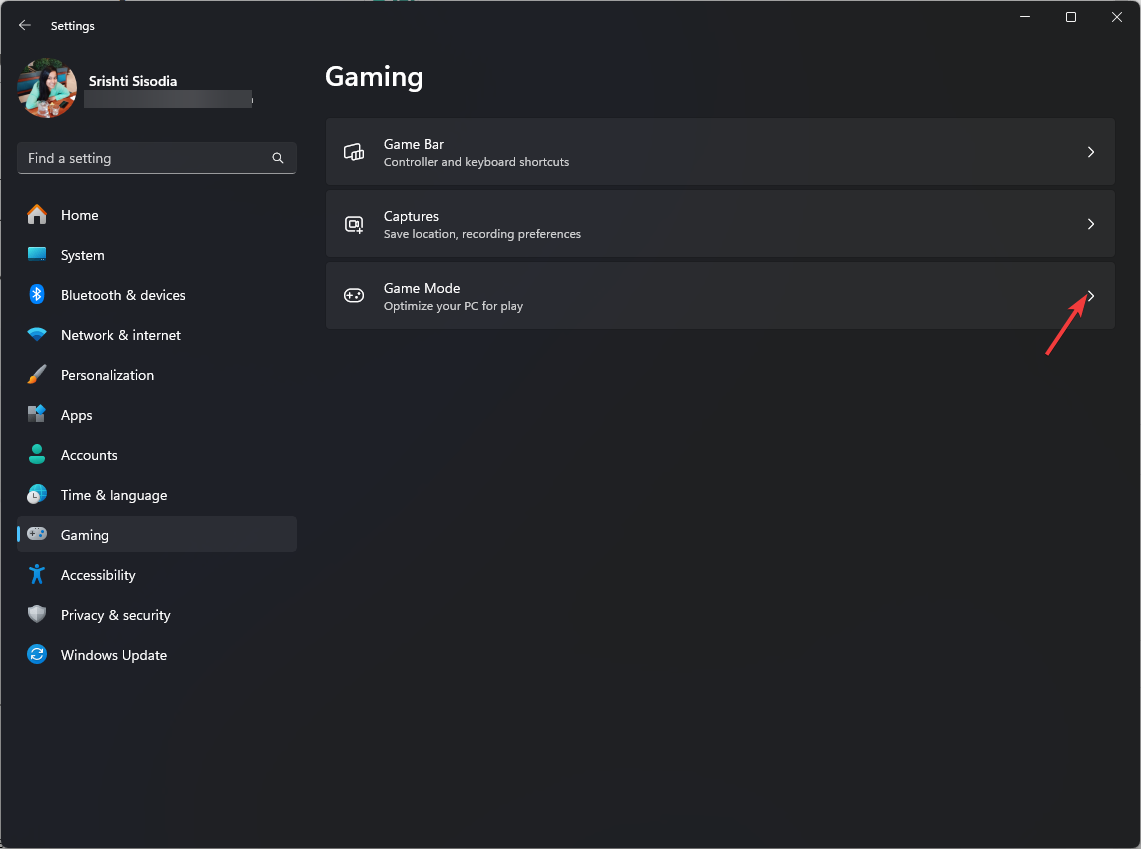
- Press Windows + I to open the Settings app.
- From the left pane, click Gaming.
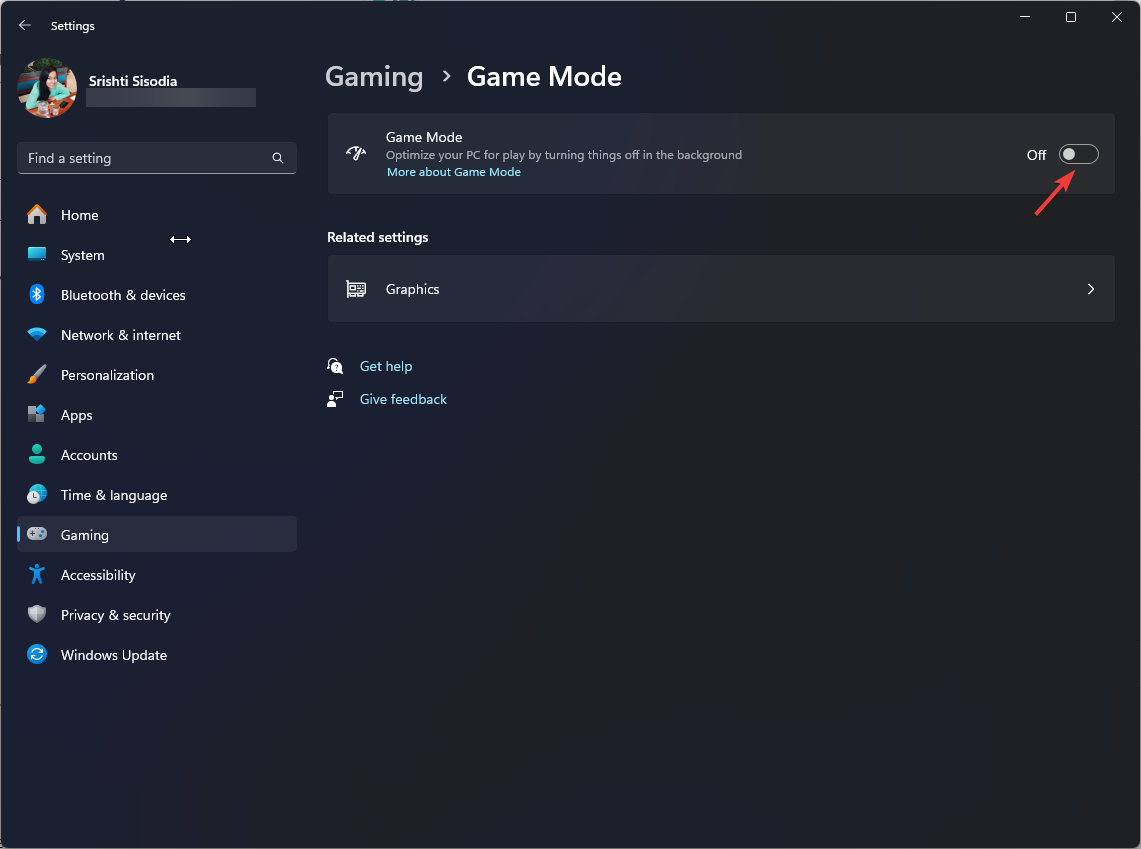
- Click Game Mode.
- On the next page, toggle off the switch next to Game Mode.
2. Disable Background Programs
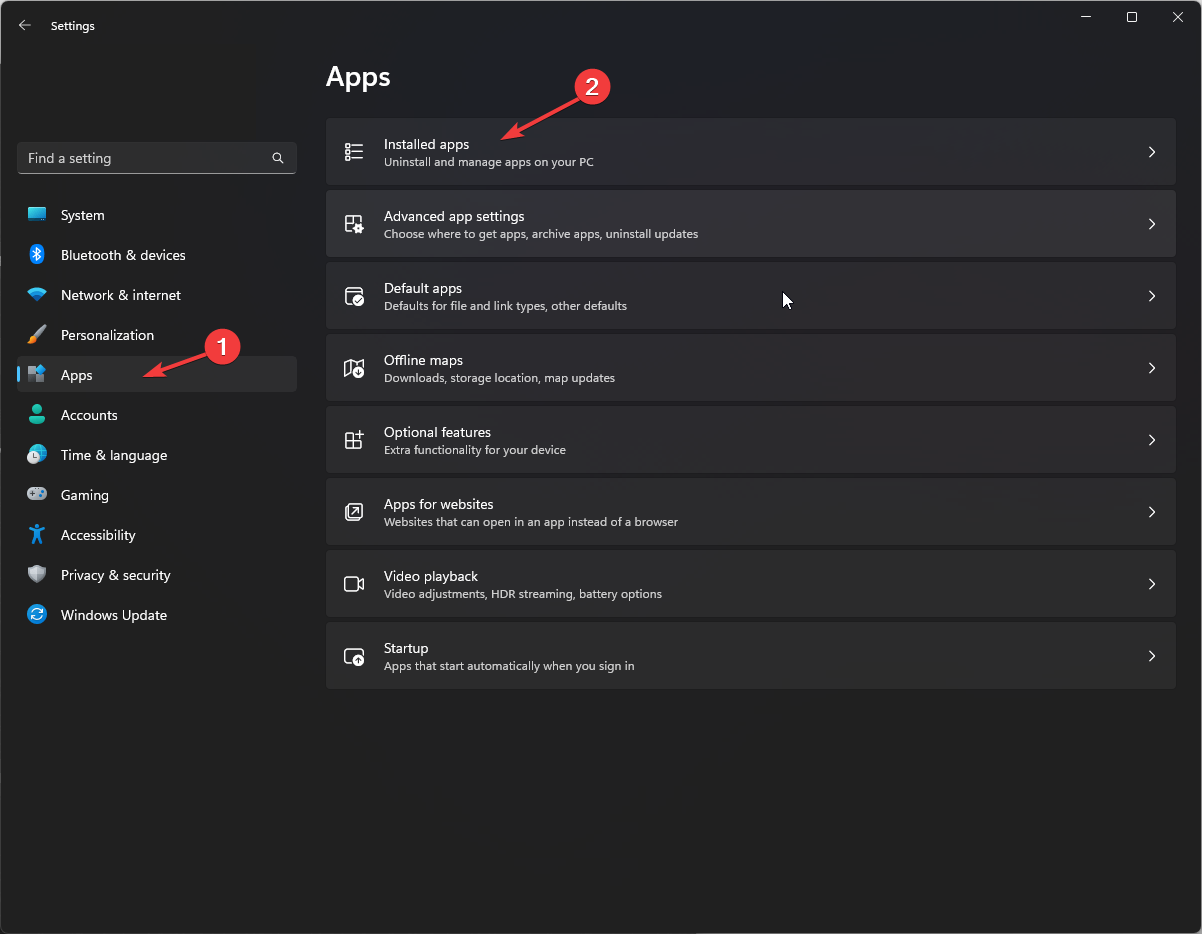
- Press Windows + I to open the Settings app.
- Go to Apps, then click Installed apps.
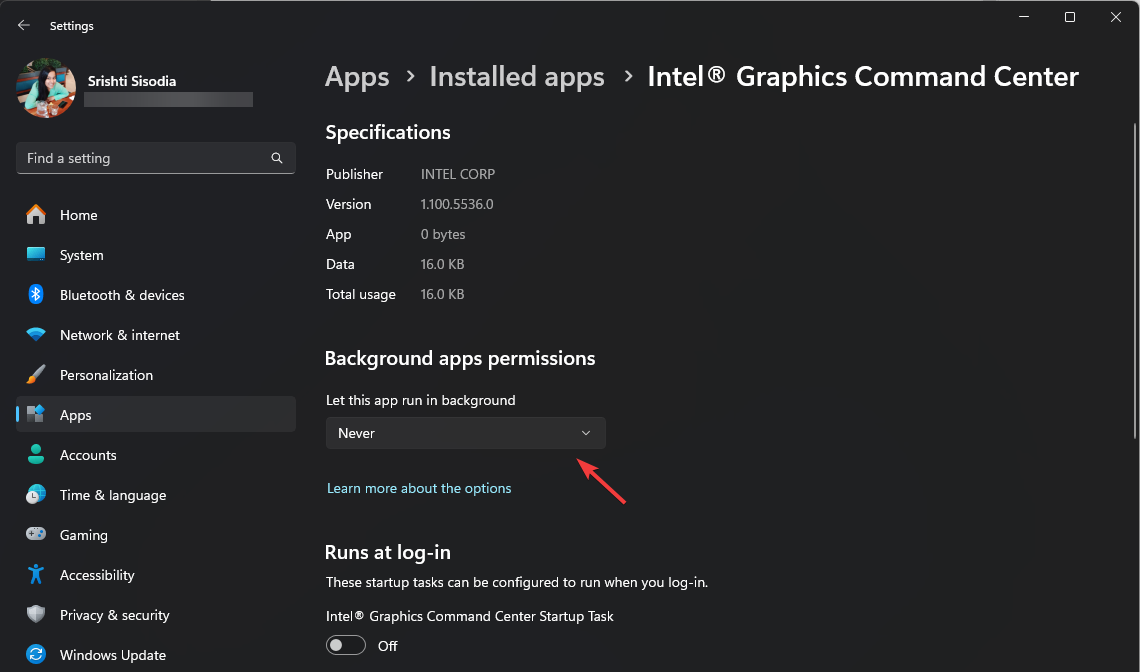
- Click the app from the list of apps, then look for the Background apps permissions option. For the Let this app run in background option, select Never.
- Do the same for all the resource-hungry apps.
3. Turn off fast startup
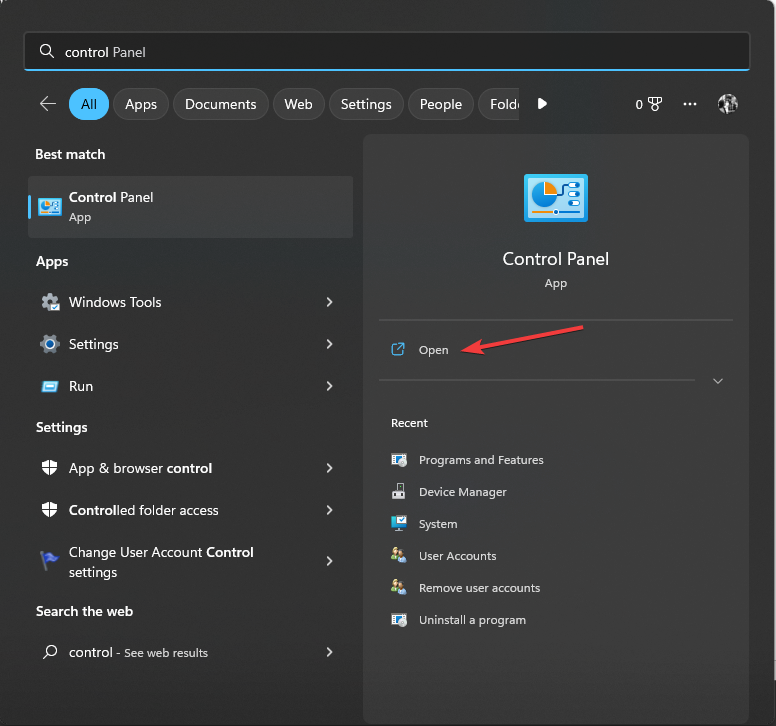
- Press the Windows key, type control panel, and select Control Panel to launch it.
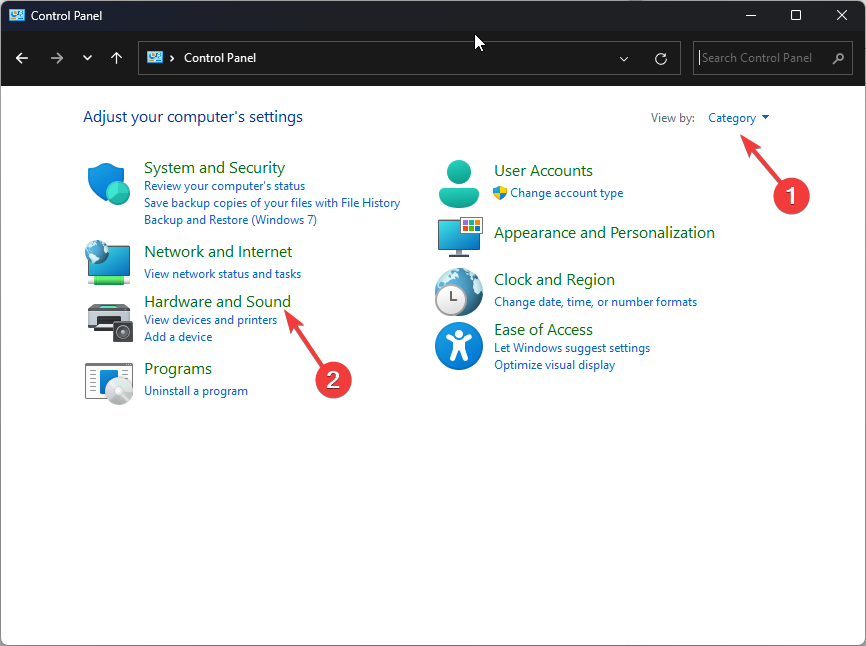
- Select View by as Category, then click Hardware and Sound.
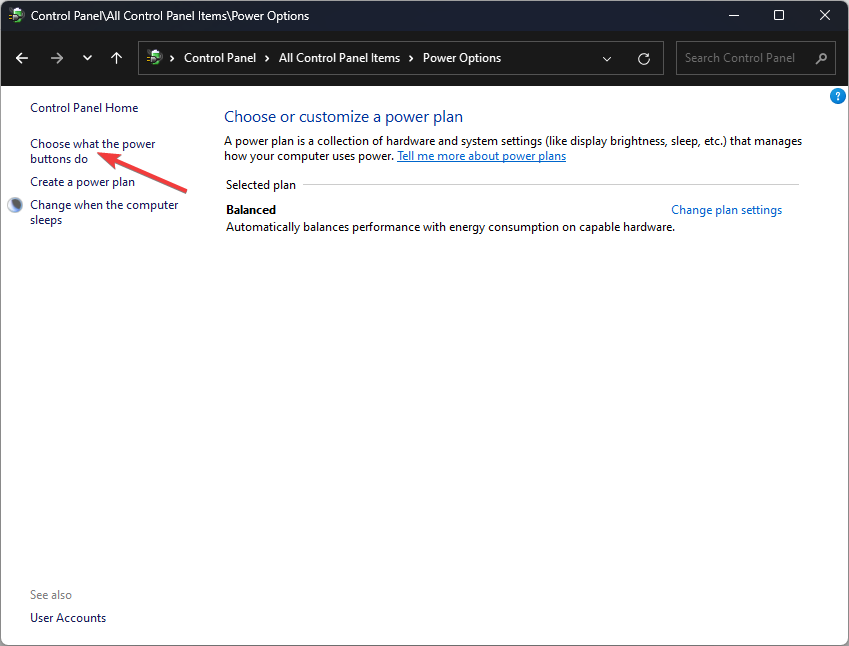
- Under Power Options, then select Choose what the power buttons do.
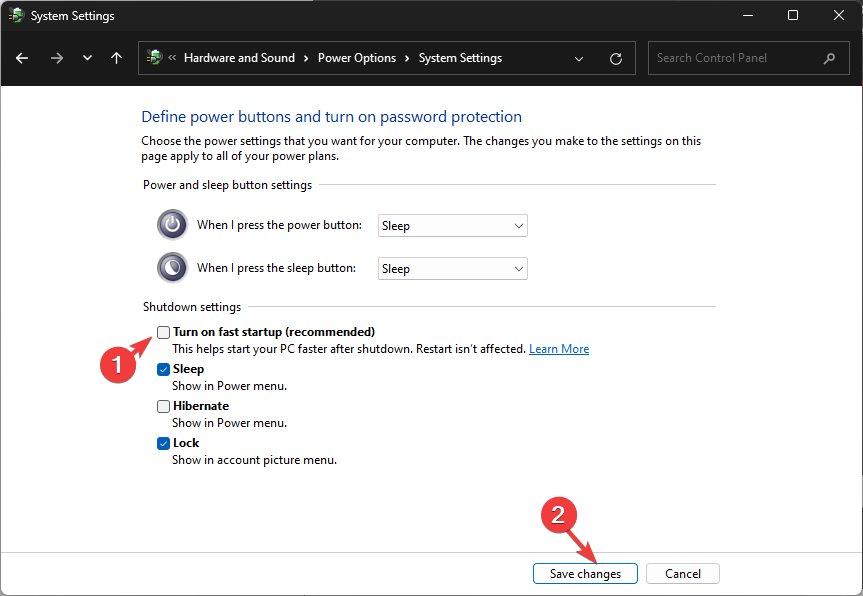
- Locate the Shutdown settings and remove the checkmark next to Turn on fast startup.
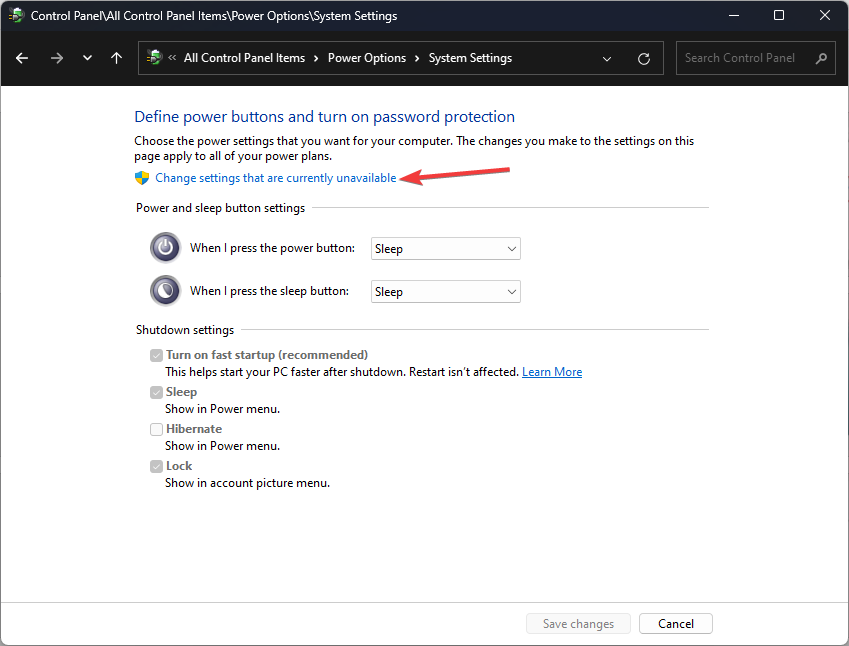
- If the option is greyed out for you, click Change settings that are currently unavailable.
- Now remove the checkmark and click Save changes.
3. Reinstall the graphics driver
- Press Windows + R to open the Run window.
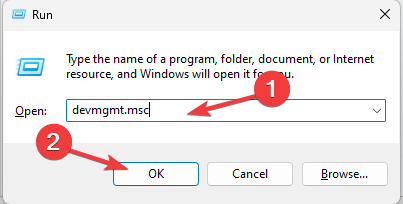
- Type devmgmt.msc and click OK to open the Device Manager app.
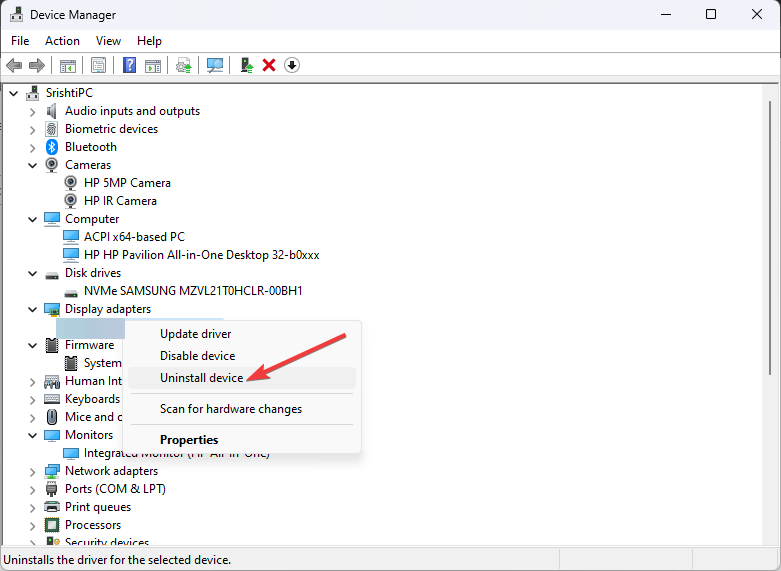
- Locate Display adapters and click it to expand the category.
- Next, right-click the graphics driver and select Uninstall device from the context menu.
- Now, restart your computer to reinstall the driver.
However, if you want to install the driver from the manufacturer, you need to head to their official website, whether NVIDIA, AMD, or Intel, to download the driver and install it like any other software on your computer.
If this doesn’t help, you need to roll back the driver to the previous working version; follow these steps to do that.
- First, open Device Manager using the steps above.
- Now locate Display adapters, then click it to expand the category.
- Right-click the graphics driver and select Properties from the context menu.
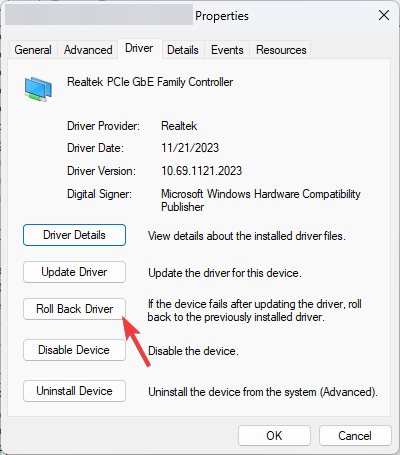
- Go to the Driver tab, then select Roll Back Driver.
- Select a reason on the Driver Package rollback page and click Yes to continue.
- Follow the onscreen instructions, if any, and save your work before proceeding, as your PC may shut down when you apply changes.
4. Run the SFC scan
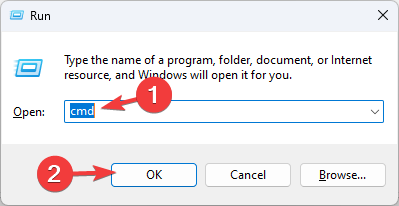
- Press Windows + R to open the Run window.
- Type cmd and press Shift + Enter to open Command Prompt with admin privileges.
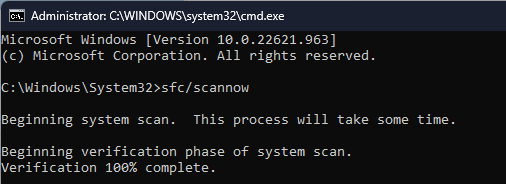
- Type the following command and hit Enter to initiate the SFC scan to repair or download the missing files:
sfc/scannow - The process may take some time, and you may have to restart the computer to let the changes take effect.
5. Perform a clean boot
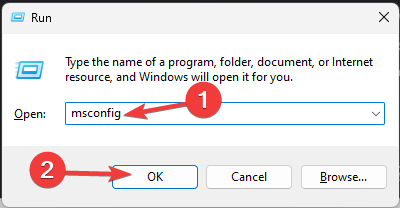
- Press Windows + R to open the Run dialog box.
- Type msconfig and click OK to open the System Configuration window.
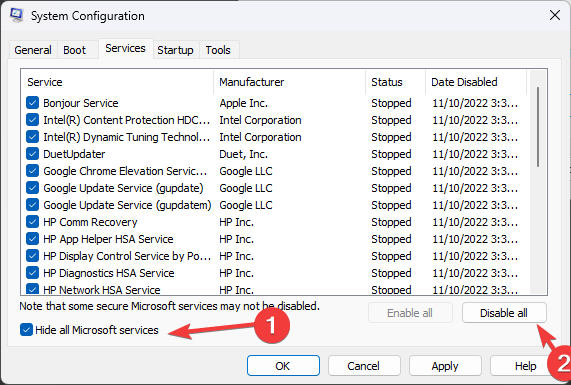
- On the System Configuration page, go to the Services tab, place a checkmark next to Hide all Microsoft services, and click the Disable all button. This will ensure only non-Microsoft services are disabled.
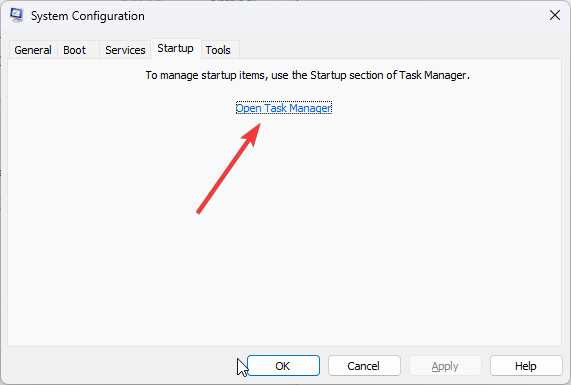
- Switch to the Startup tab and click the Open Task Manager link.
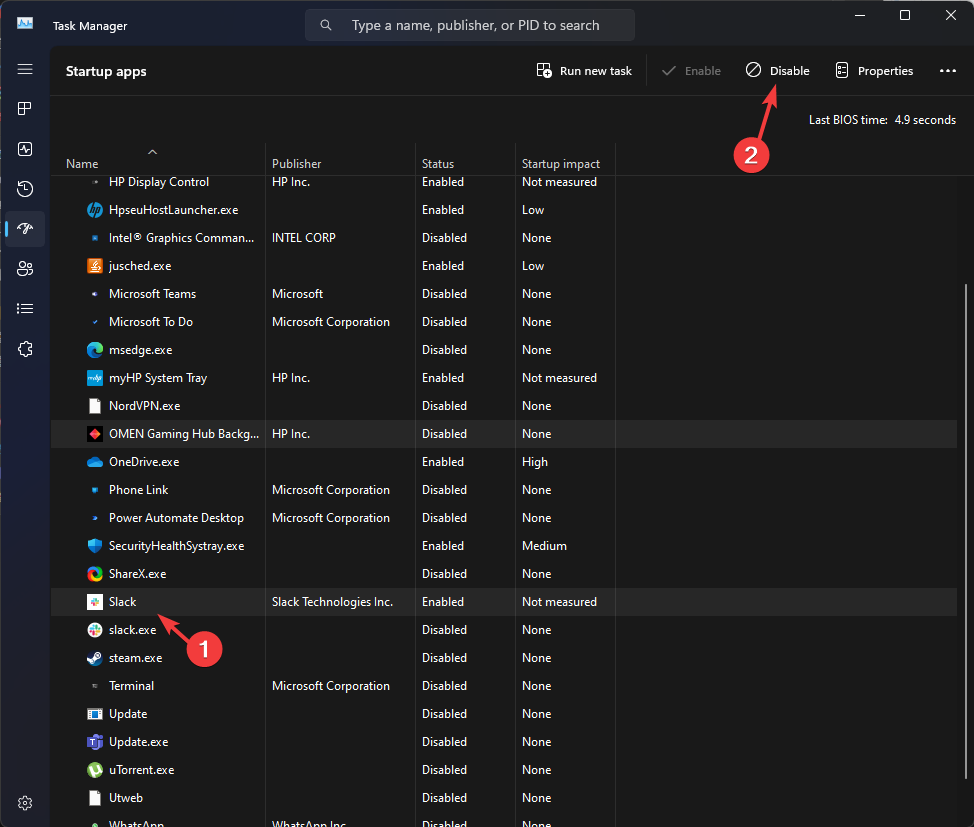
- On the Task Manager window, for each Enabled item, select them and click Disable, then close Task Manager.
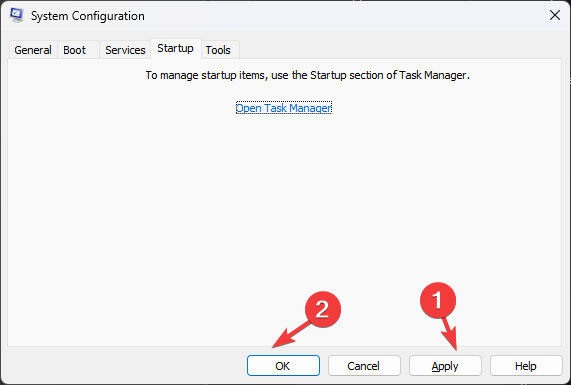
- On the System Configuration window, click Apply, then OK.
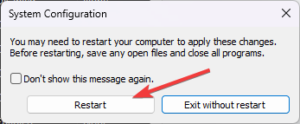
- Click Restart to reboot your PC.
6. Run a memory diagnostic tool
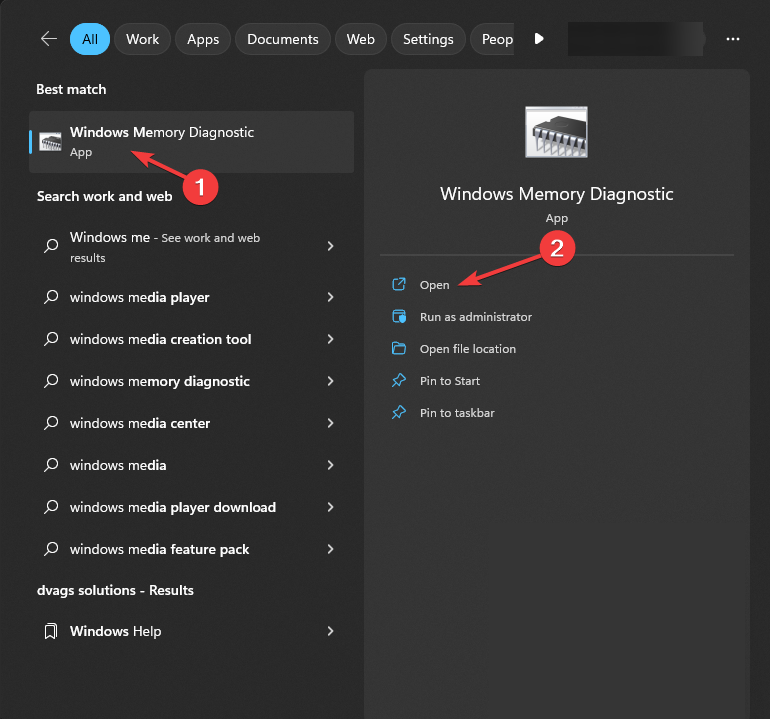
- Press Windows, type Windows memory diagnostic, and click the first result.
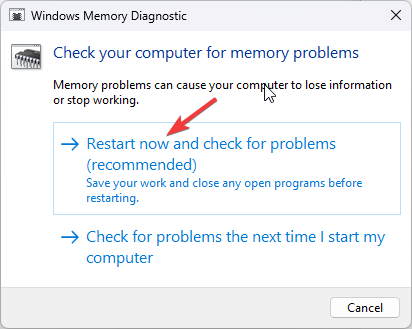
- Select Restart now and check for problems.
- Wait for the process to finish. When it is done, your PC will reboot automatically.
- The scan will now start, so wait for it to finish.
During the scan, you can press F1 and configure the type of scan you wish to run. You can switch between sections with the Tab key and use F10 to apply changes. The recommended settings are Standard or Extended scan with at least 5 passes.
Once the scan is complete, your computer will restart, and you will get the scan results on the screen.
7. Run a malware scan
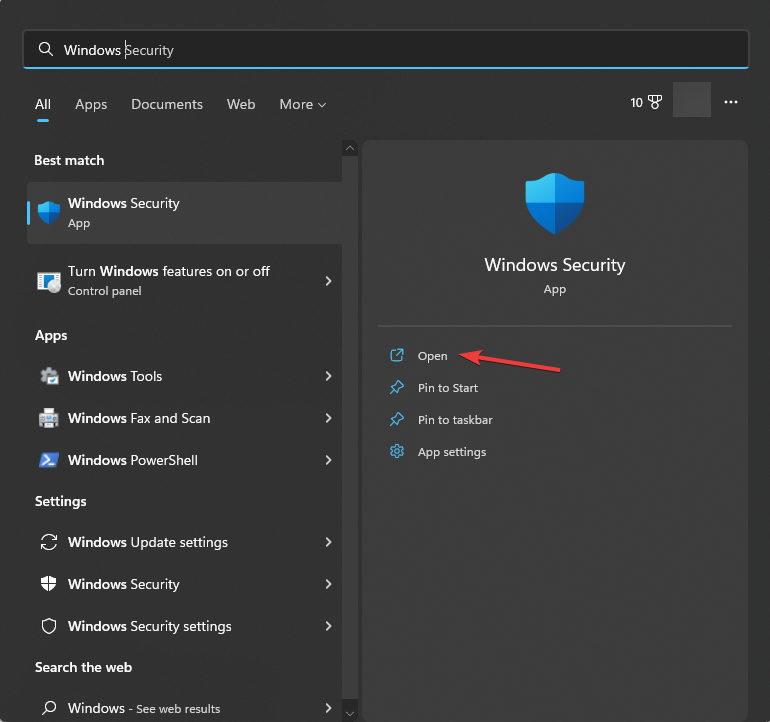
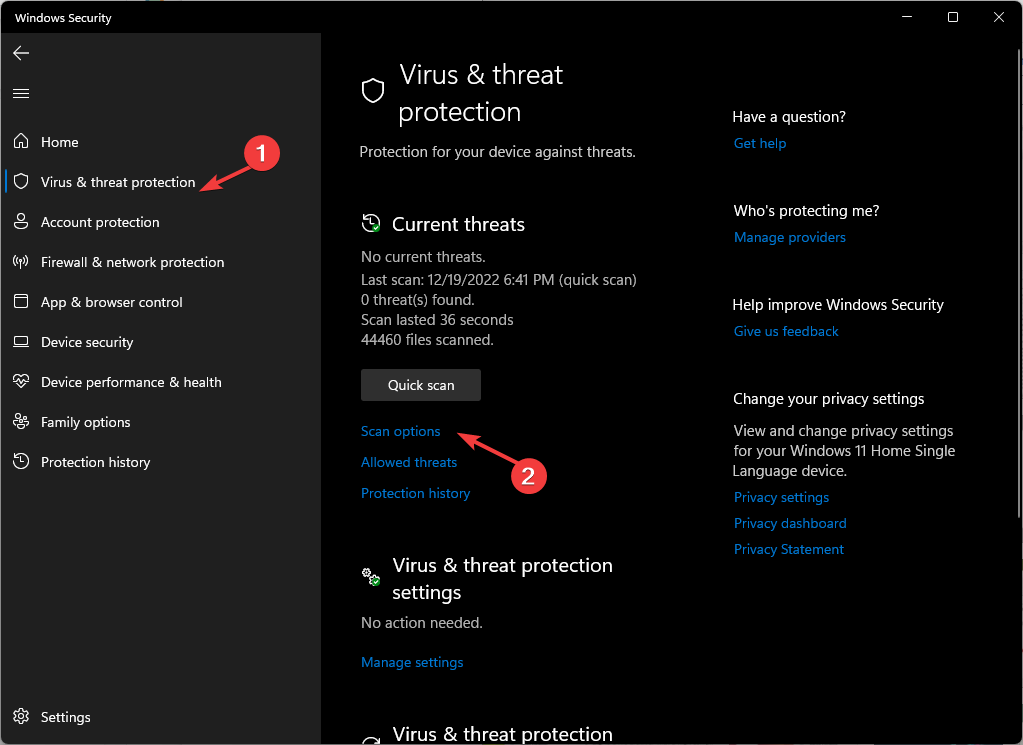
- Press the Windows key, type windows security, and click Open for the first result.
- Select Virus & threat protection.
- Click the Scan options link.
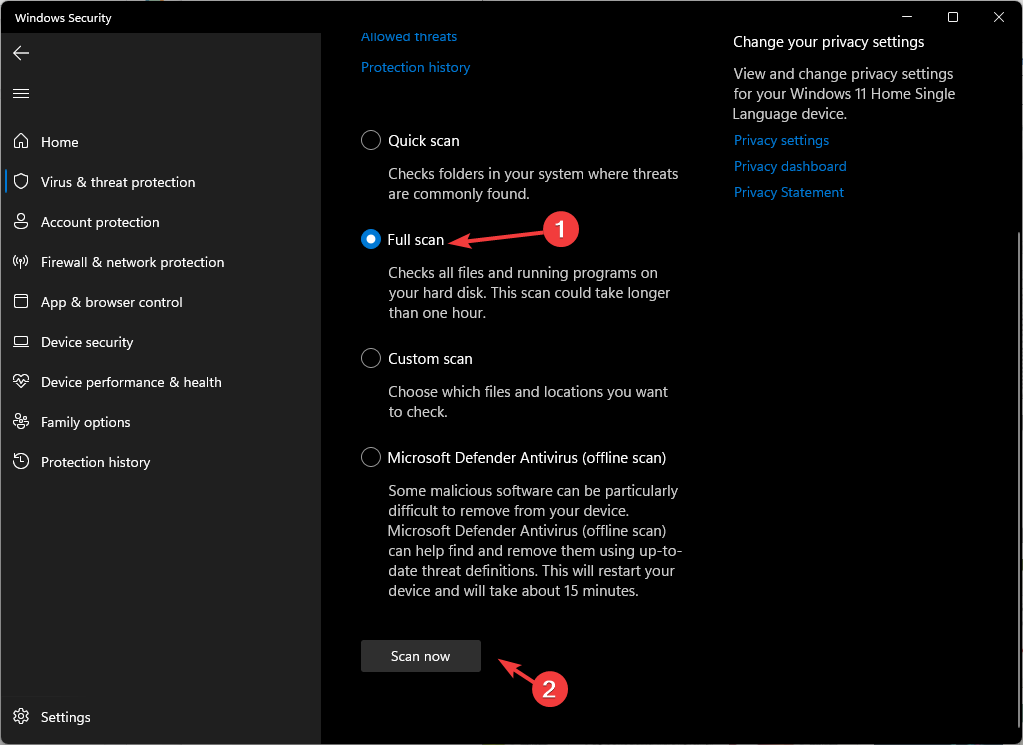
- Choose Full scan and click Scan now.
The process will take some time to finish, and if it flags any file, make sure you delete it from your computer.
You can also try uninstalling game optimizers like Razer Cortex, as sometimes they may not work well with your processor, and ensure your BIOS is up to date. If the issue happens only with a specific game, you can reinstall it and check if it persists.
In case nothing works, you need to perform a clean install of Windows to fix the problem once and for all.
Were you able to solve the PC crashes after closing game issue with these fixes? If not, mention your problem in the comments below, and we will try to help you.
User forum
0 messages