Valorant Error Code VAL 62 [Solved]
A VPN and Cloudflare's WARP app seems to be doing the trick for most
5 min. read
Published on
Read our disclosure page to find out how can you help Windows Report sustain the editorial team. Read more
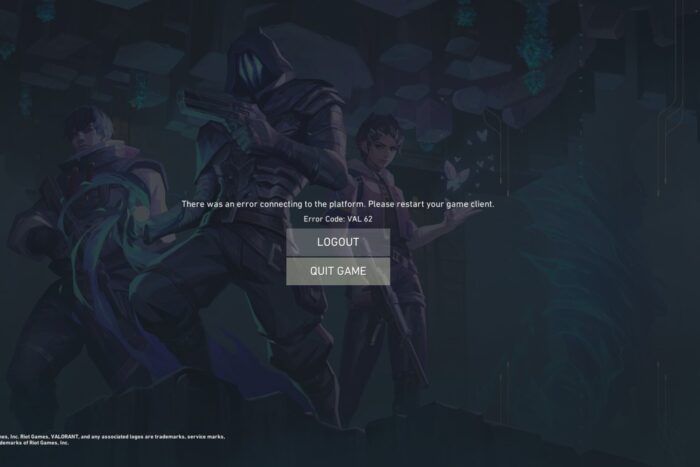
Every few weeks, we have a spate of reports about Valorant’s VAL 62 error code, with a message that reads, There was an error connecting to the platform. Please restart your game client. This has been going on for years, and there’s no single solution that works for all. It all comes down to the underlying cause!
As for the causes of Valorant error 62, it’s usually issues with the Internet/network connection, misconfigured firewall settings, missing services, or a corrupt DNS cache to blame.
Before you start with the solutions, check Valoran’t server status and make sure it’s not down. Also, you can switch to Ethernet if currently on Wi-Fi, and vice versa, to fix Valorant’s Error Code 62 on Xbox, PS5, and PC. For many, connecting to a mobile hotspot did the trick. Besides, restart the router, and if that doesn’t work, reset it, and then check for improvements!
How can I fix the VAL 62 error in Valorant?
1. Use a VPN to play Valorant
The easiest way of bypassing Valorant error 62 is to use an effective VPN solution like ExpressVPN while playing the game. This will allow you to get rid of any localized restrictions blocking access to the game’s servers.
With ExpressVPN you’ll get fast, reliable, and secure connections, as it runs servers at 163 locations in 105 countries around the world.
2. Set the VGC service to run automatically
- Press Windows + R to open Run, type services.msc in the text field, and hit Enter.
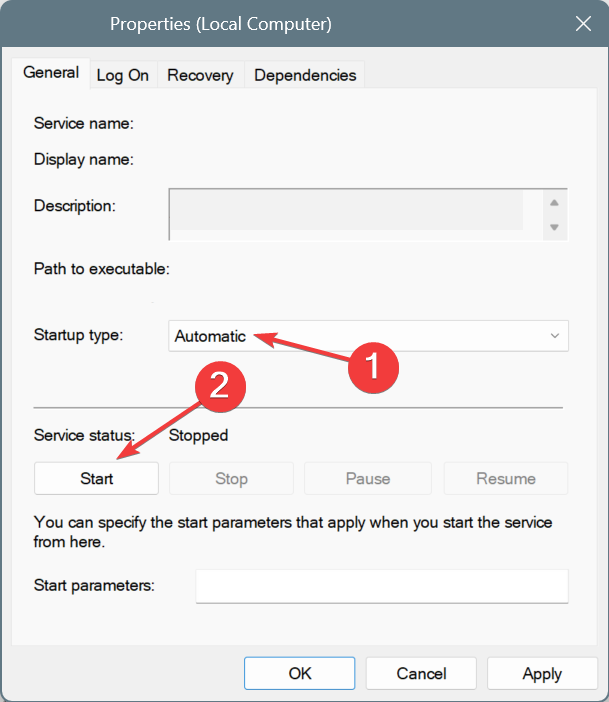
- Scroll down, right-click on the VGC service, and select Properties.
- Choose Automatic from the Startup type dropdown menu, and then click the Start button under Service status if it’s not already running.
- Click on Apply and OK to save the changes.
One of the common reasons you are getting Valorant Error Code: VAL 62 is that the VGC service is not running. Once you set the service’s startup type to Automatic, Valorant should launch, and you should be able to play the game!
3. Clear the DNS cache
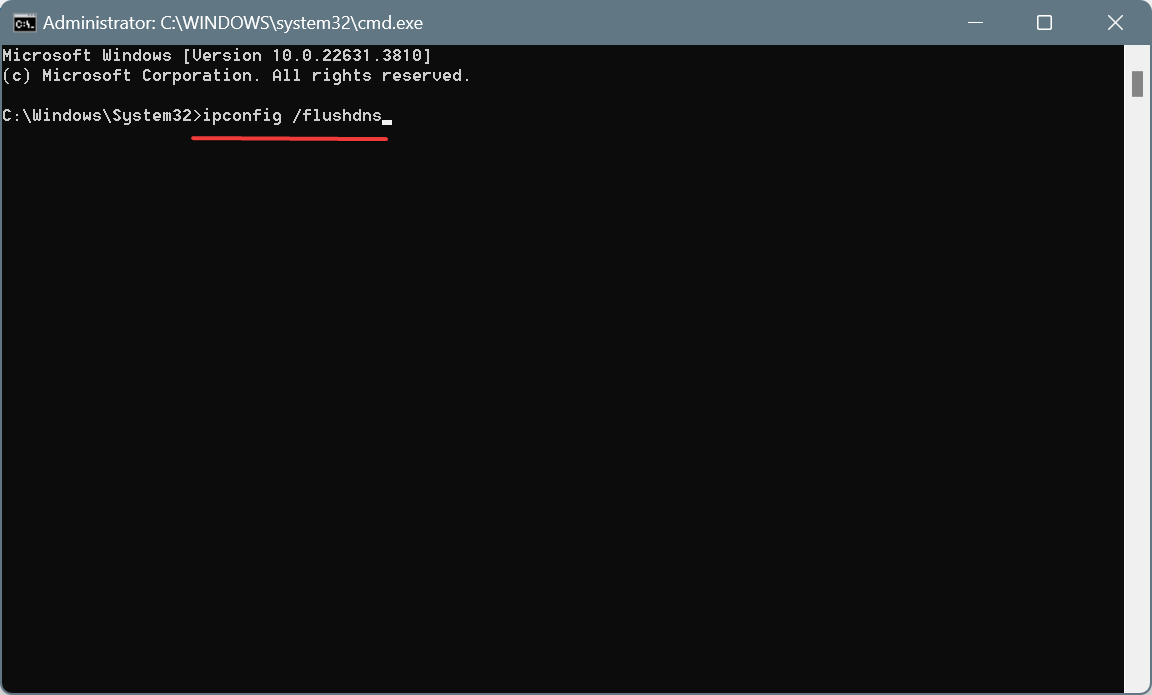
- Press Windows + S to open Search, type Command Prompt in the text field, right-click on the relevant result, and select Run as administrator.
- Click Yes in the UAC prompt.
- Paste the following command and hit Enter:
ipconfig /flushdns - Once done, reboot the computer and check for improvements.
4. Switch to Google’s DNS
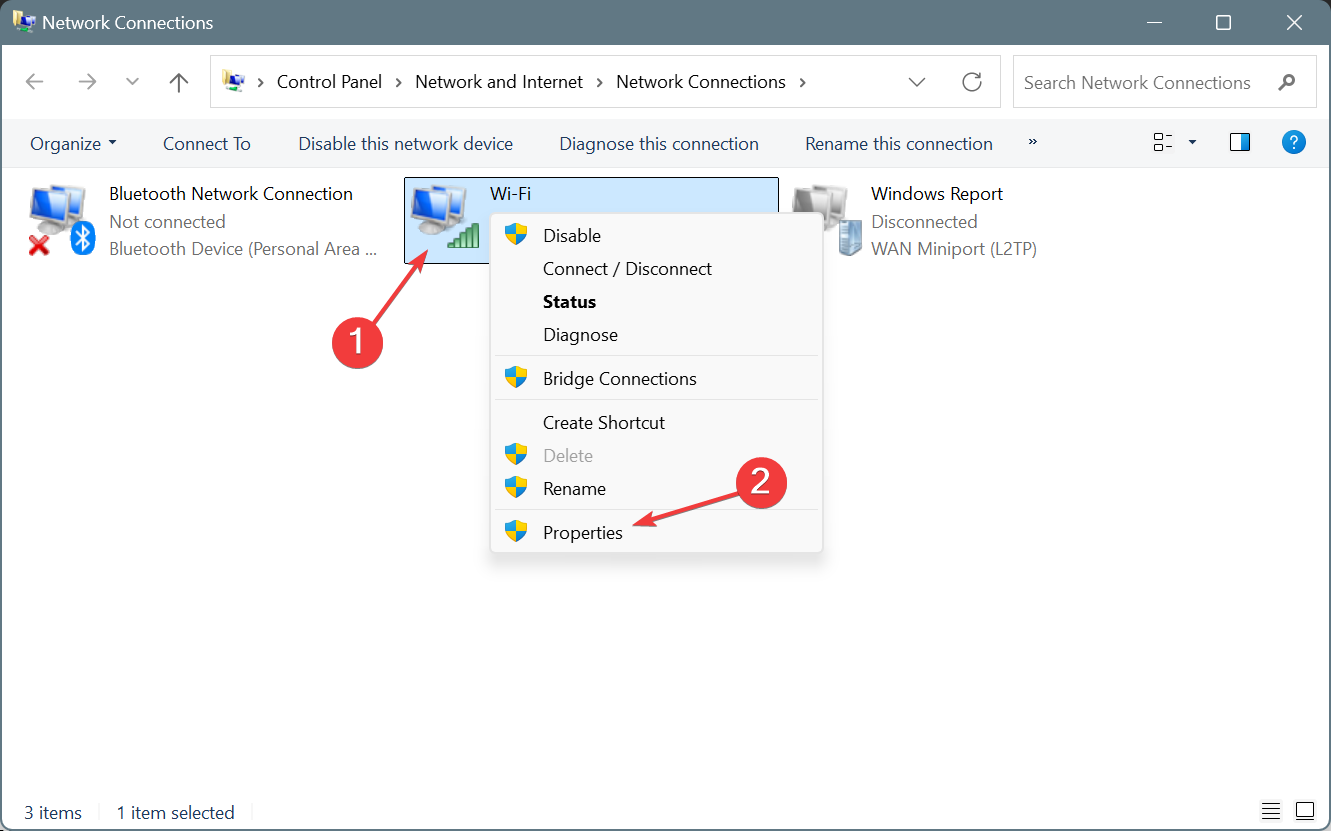
- Press Windows + R to open Run, type ncpa.cpl in the text field, and hit Enter.
- Right-click on the active network adapter, whether Wi-Fi or Ethernet, and select Properties.
- Choose Internet Protocol Version 4 (TCP/IPv4) from the list, and click on Properties.
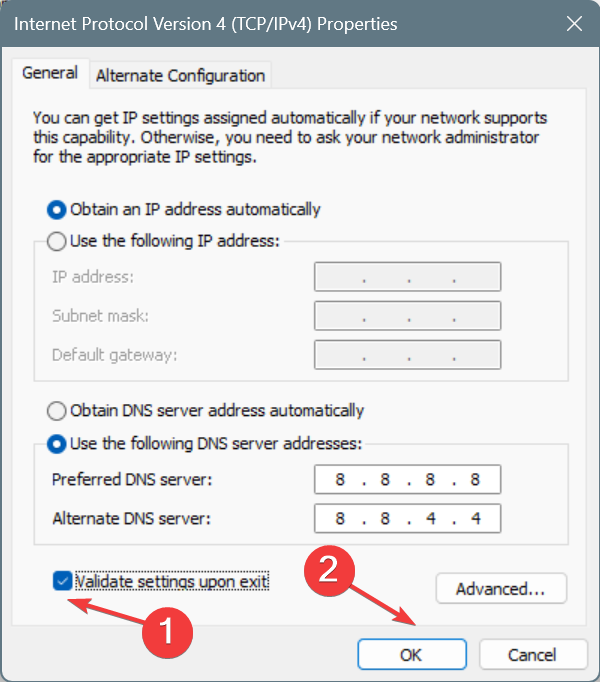
- Select the Use the following DNS server addresses and input the following in the fields underneath:
- Preferred DNS server: 8.8.8.8
- Alternate DNS server: 8.8.4.4
- Tick the Validate settings upon exit checkbox and click OK to save the changes.
If it’s a DNS-related issue, you can switch to Google’s DNS and resolve things in no time. Or you could even choose the fastest DNS server near you and not compromise on the Internet speed!
5. Whitelist Valorant and Riot Client in Windows Firewall
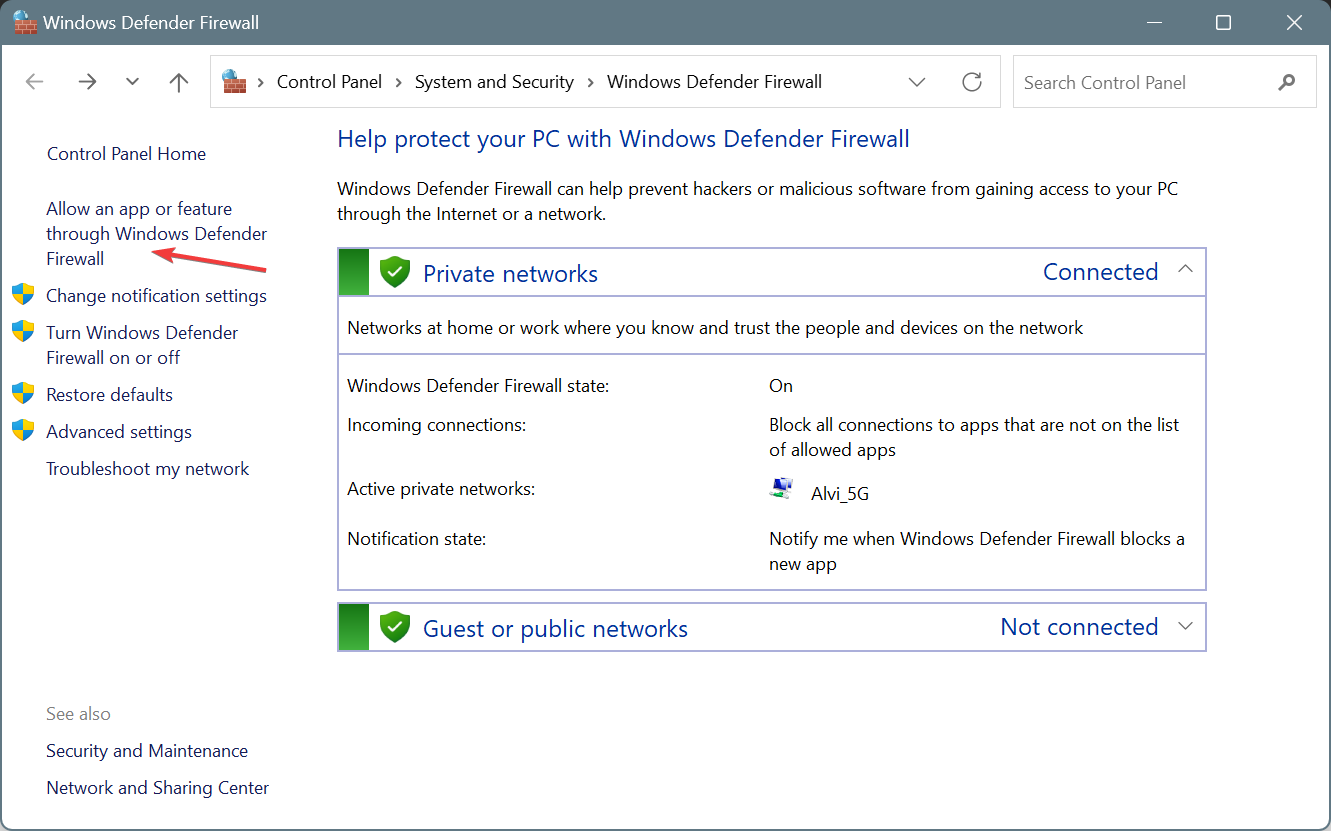
- Press Windows + S to open the Search menu, type Windows Defender Firewall in the text field, and click on the relevant result.
- Choose Allow an app or feature through Windows Defender Firewall from the left pane.
- Click the Change settings button.
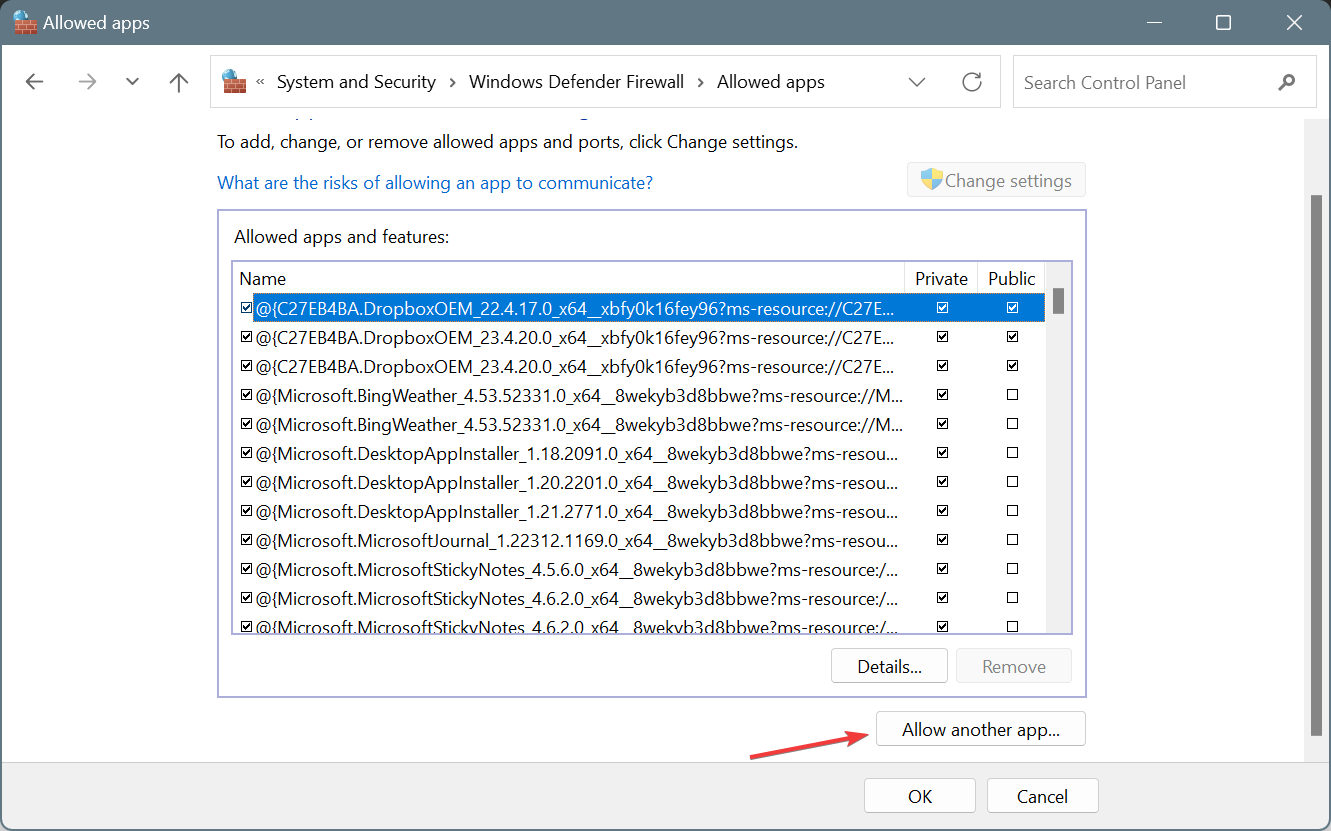
- Now, click on Allow another app at the bottom.
- Click the Browse button.
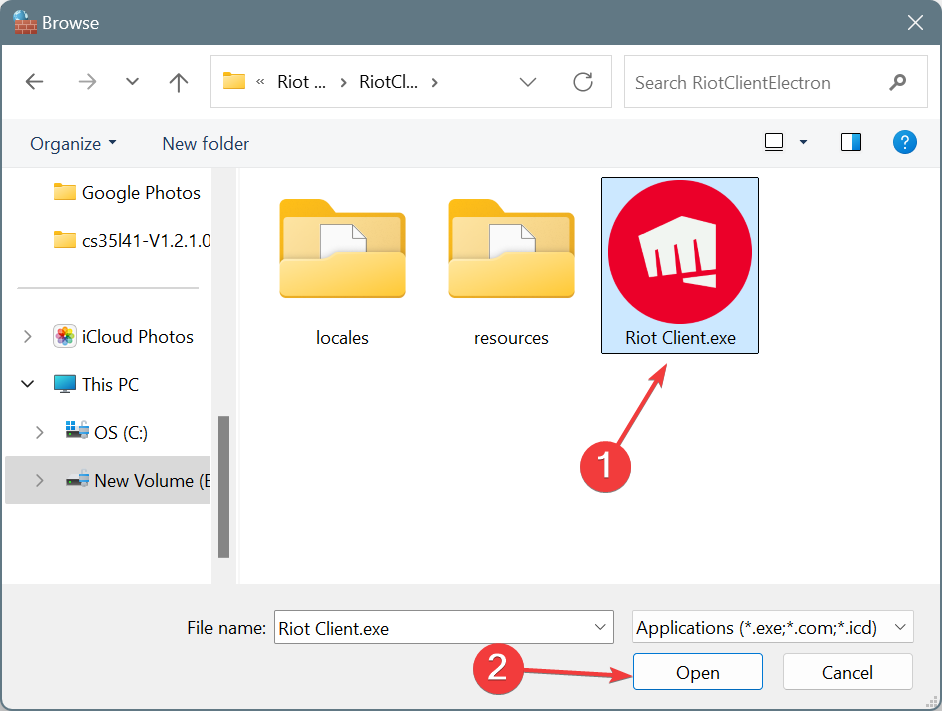
- Go to the location where Riot Client’s launcher is stored, select the Riot Client.exe file, and click on Open.
- Click on Add.
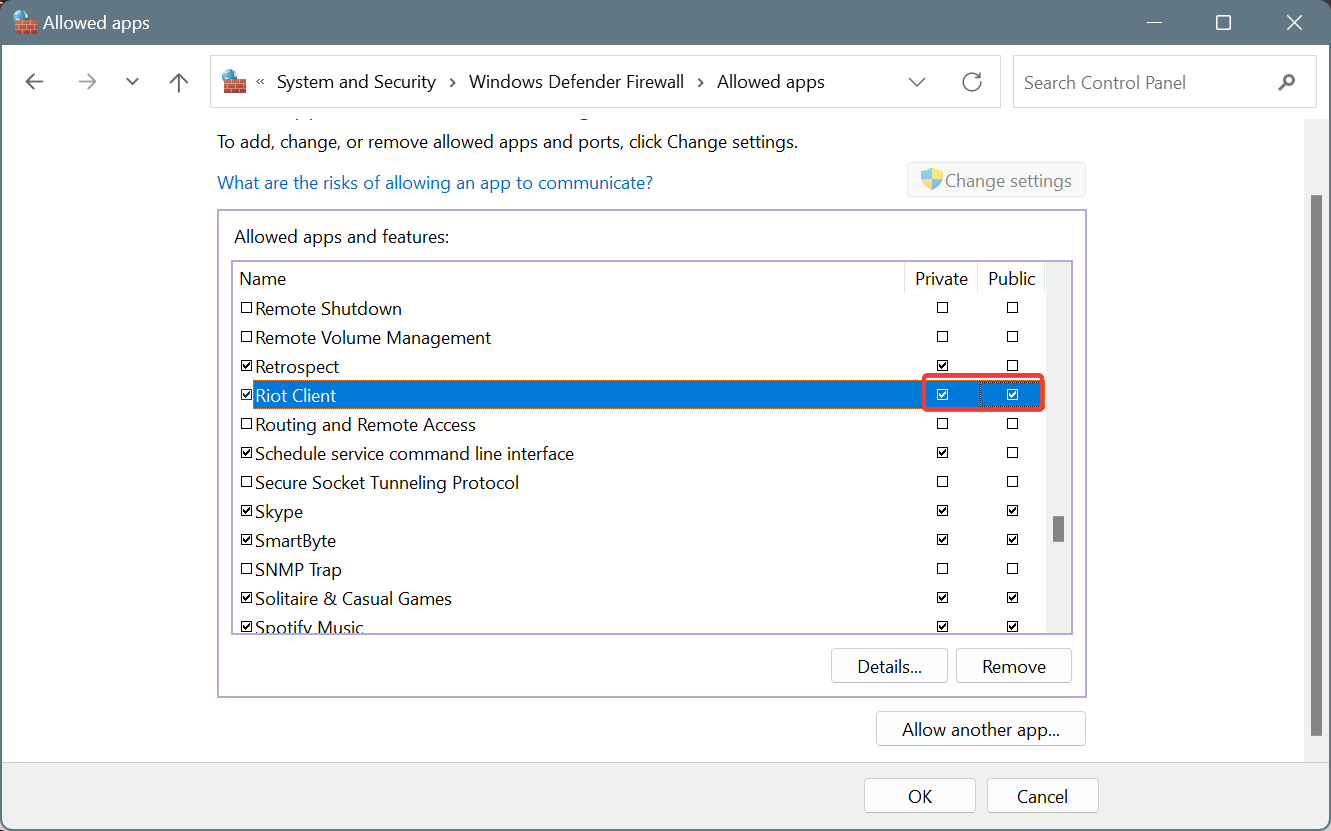
- Make sure both the Private and Public checkboxes are ticked for Riot Client.
- Similarly, whitelist Valorant in the Windows Defender Firewall.
- Finally, click OK to save the changes, reboot the PC, and launch Valorant again.
Many who faced Valorant error code 62 found out that their firewall blocked the app, Riot Client, from establishing a connection to the game server. It could be due to the strict firewall configuration.
While I don’t recommend disabling the firewall, you can always whitelist Riot Client and Valorant to get rid of all such issues!
6. Reinstall Riot Vanguard and the VGC service
- Press Windows + R to open Run, type cmd and hit Ctrl + Shift + Enter.
- Click Yes in the UAC prompt.
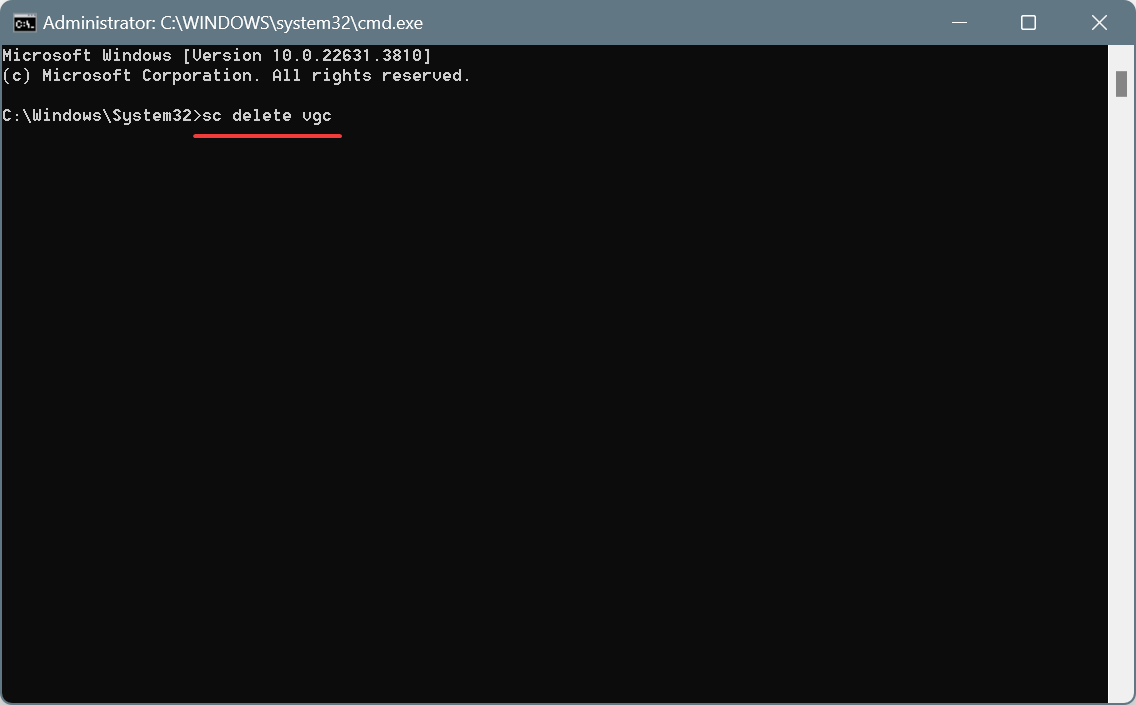
- Now, paste the following commands individually and hit Enter after each:
sc delete vgcsc delete vgk - Next, press Windows + R to open Run, type appwiz.cpl and hit Enter.
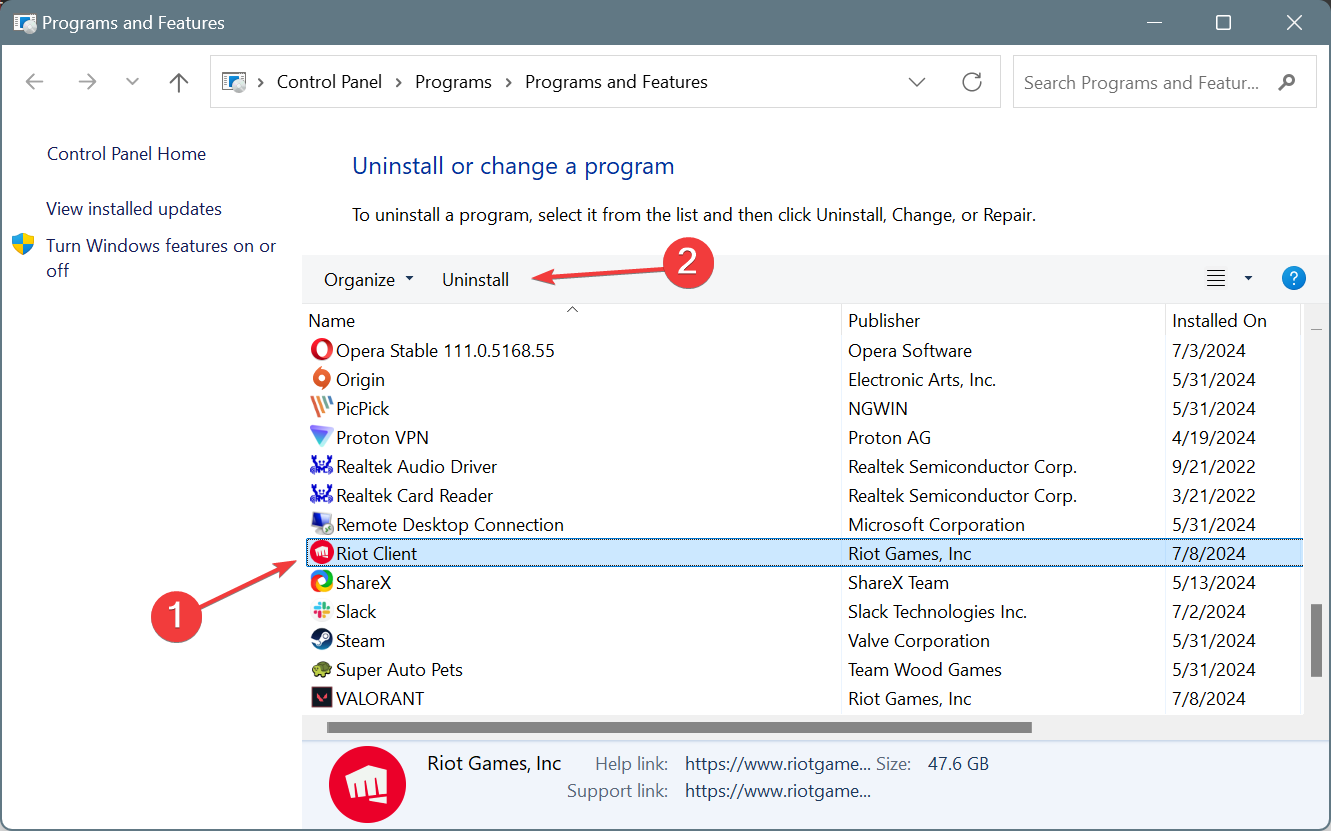
- Select Riot Client from the list of applications, and click Uninstall.
- Follow the on-screen instructions to complete the uninstall process, and then restart the PC.
- Finally, reinstall Riot Client from the official website, download Valorant and verify whether Error Code 62 is fixed.
If things don’t work out after a reinstall, I recommend using an effective uninstaller software to get rid of any leftover files or Registry entries that might be triggering issues.
7. Use Cloudflare’s Warp app
 NOTE
NOTE
Though not the most ideal solution, countless users have reported that downloading the WARP app, developed by Cloudflare, and then securing your connection fixes Valorant error 62 on both Windows and macOS.
All you have to do is download the WARP installer from Cloudflare’s official website > run the setup to install the app > then launch Cloudflare WARP from the system tray > enable the toggle > launch Valorant, and it should now run without throwing any errors.
One of these solutions should have helped you with Error Code: VAL 62 on Valorant. If the error persists, I recommend contacting Valorant support, as they will be able to better identify and eliminate the underlying cause.
Also, while you are here, find out some quick tips to optimize your PC for gaming and get the best performance!
Which fix worked for you? Share with our readers in the comments section.



User forum
0 messages