What is Avastvboxsvc.exe & Should I Remove it?
Important but non-essential processes can be replaced
![]() 5 min. read
5 min. read
![]() Published on
Published on
Share this article
Improve this guide
Read our disclosure page to find out how can you help Windows Report sustain the editorial team. Read more
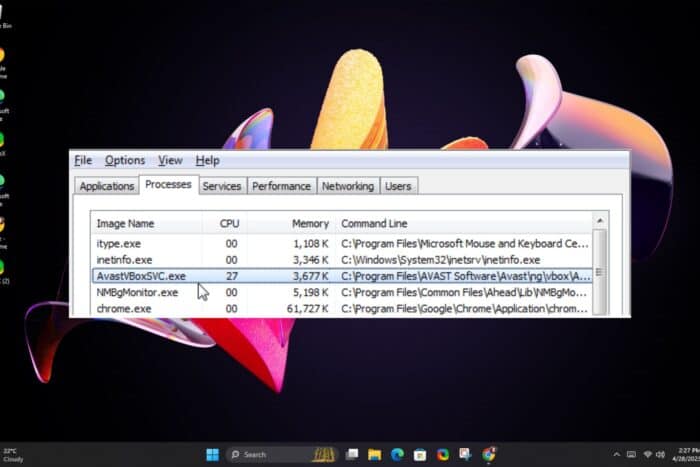
From the name, avastvboxsvc.exe belongs to the Avast family so it has to do with the security of your device.
Windows has built-in antivirus but might not be as thorough as other third-party security software. On the downside, these additional antiviruses consume a chunk of your system resources and can significantly slow down your PC.
For instance, the avastvboxsvc.exe works in the background to monitor apps’ behaviour and quarantines them if they’re found of suspicious activities. While this is great, on the downside, it uses a lot of memory and can interfere with other tasks.
So yes, an overzealous antivirus is good for your device’s protection but not so forgiving on the memory footprint among other system resources. Nevertheless, while it is an important file, it is not essential for running Windows so you can remove it.
How do I remove avastvboxsvc.exe?
1. Limit CPU usage
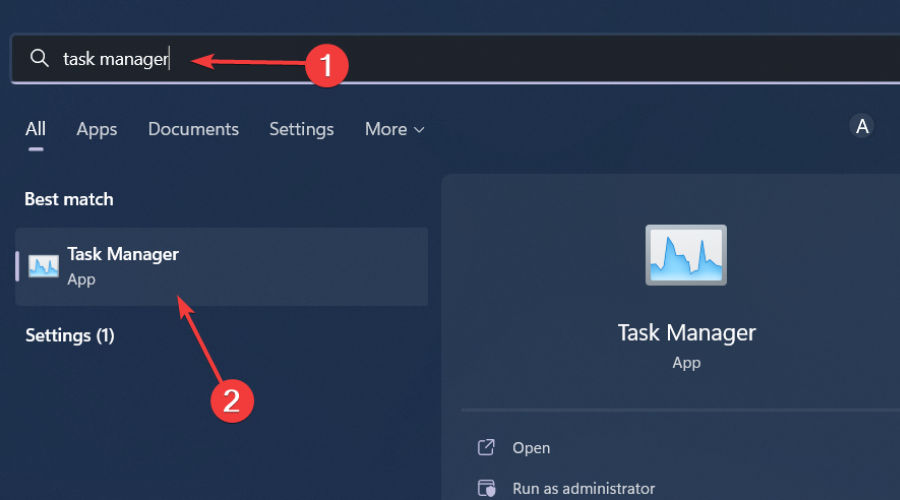
- Click on the Start Menu icon, type Task Manager in the search bar, and click Open.

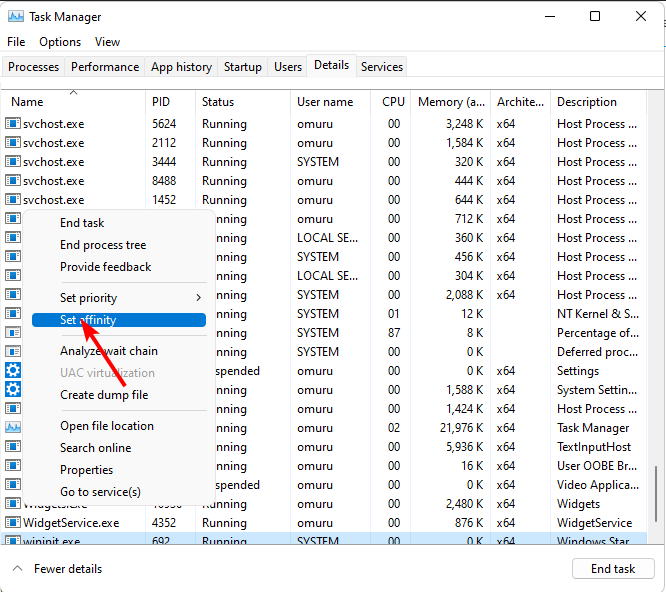
- Navigate to the Details tab.
- Right-click avastvboxsvc.exe, and select Set affinity.

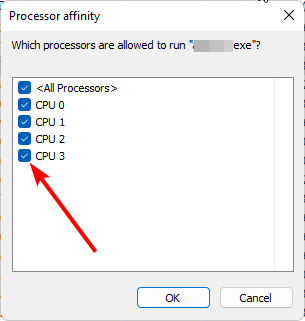
- Now uncheck all CPUs if you don’t want the avastvboxsvc.exe using any processor.

Limiting CPU usage may help address the resource usage issue but on the downside, there may be a system instability issue.
2. Turn off self protection
- Open the Avast Antivirus window and click Menu at the top right of Avast Antivirus.
- Select General on the left of Avast Antivirus.
- Click Troubleshooting, and scroll down to the bottom of that tab.

- Next, click Open old settings.
- Select the Troubleshooting tab shown directly below.

- Finally, deselect the Enable Avast self-defense module option if it’s selected.
- Click the Yes option to confirm further.


Disabling the self defense option exposes your device to security vulnerabilities now that this function won’t be performing its duties.
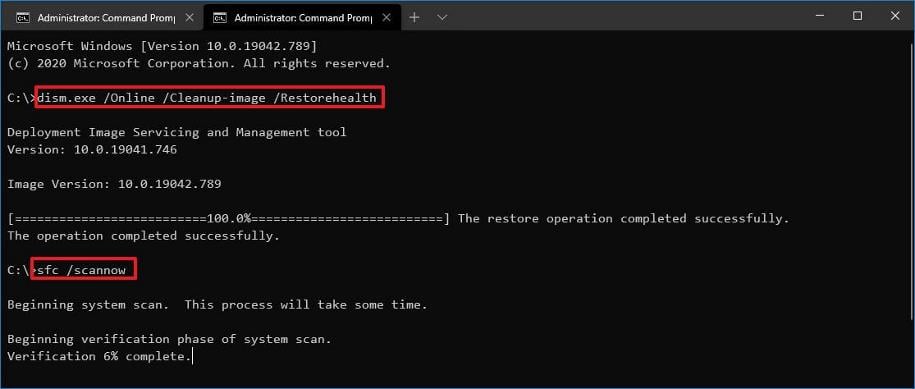
3. Run DISM and SFC scans
- Hit the Start Menu icon, type cmd in the search bar, and click Run as administrator.

- Type the following commands and press Enter after each one:
DISM.exe /Online /Cleanup-Image /Restorehealthsfc /scannow
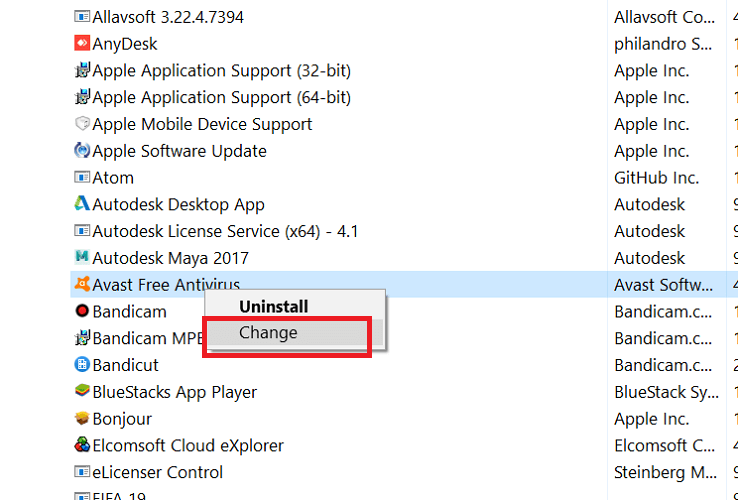
4. Repair the Avast program
- Type control panel in Windows search and open Control Panel from the results.

- Switch to the Category view of Control Panel by selecting it from the top right-hand corner, and then select Uninstall a Program in the Programs category.
- Scroll down this list and locate Avast. Right-click on the Avast program and hit Change.

- Next, you will see the Avast uninstallation wizard screen showing three options – Update, Repair, and Modify. Select Repair and hit Next.
- Follow through with the wizard, and at the end, Avast will restart with the Avast high CPU usage fixed.

Repairing the program may address the issues of high system resource usage.
5. Uninstall Avast
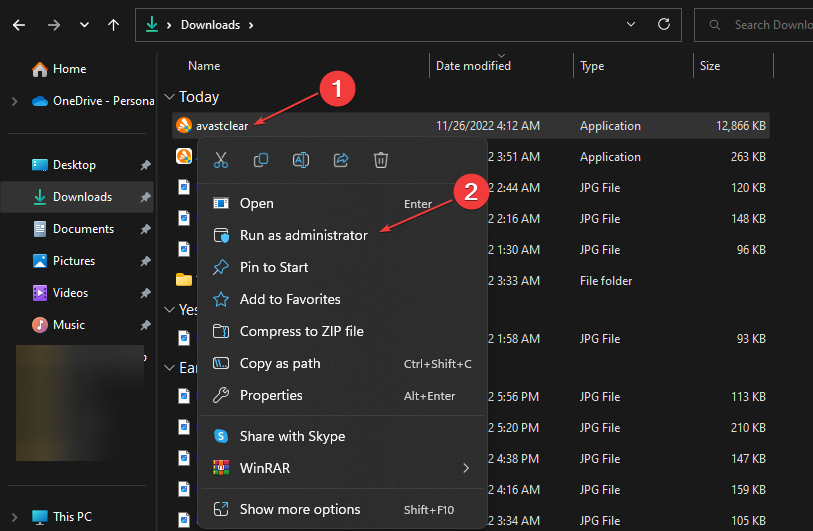
- Download the Avast Uninstall tool.
- Launch the program by right-clicking and selecting Run as administrator.

- Click Yes to restart the window in Safe Mode.
- Again click Yes to immediately restart your Windows 11 PC into Safe Mode.
- When the system boots up in Safe Mode, select the location where you have installed Avast antivirus software. If you selected the default installation location during setup, then the tool will pick up the location automatically.
- Run the avastclear.exe utility tool, and fill in the prompts that follow.
- Click Uninstall at the bottom of the screen to uninstall Avast and clear all files.

- The tool will remove Avast from your PC.

- You can download the latest version of Avast and check if the problem persists.
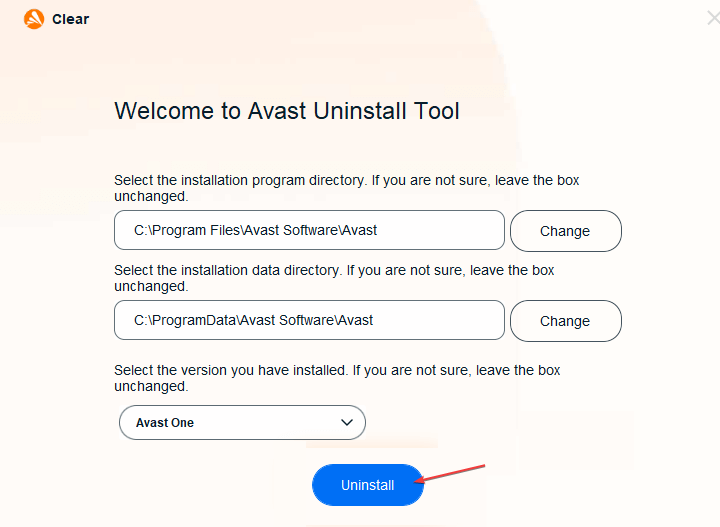


Using the dedicated uninstall tool from Avast ensures all traces of the software are removed from your device. If you use the normal methods of uninstalling an app, add an extra step of removing software remnants.
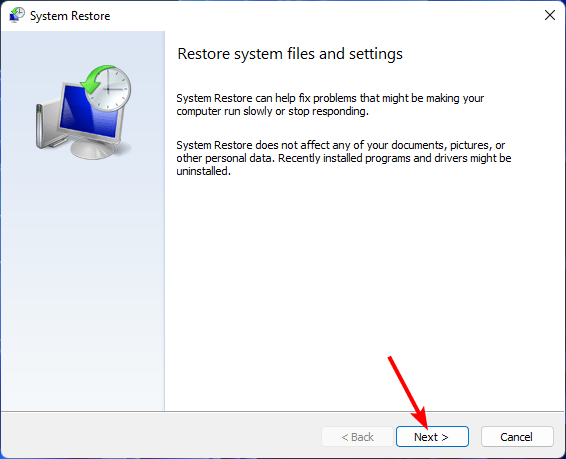
6. Perform a System Restore
- Press the Windows + R keys, type rstui, and hit Enter.

- The System Restore window will open. Click on Next.

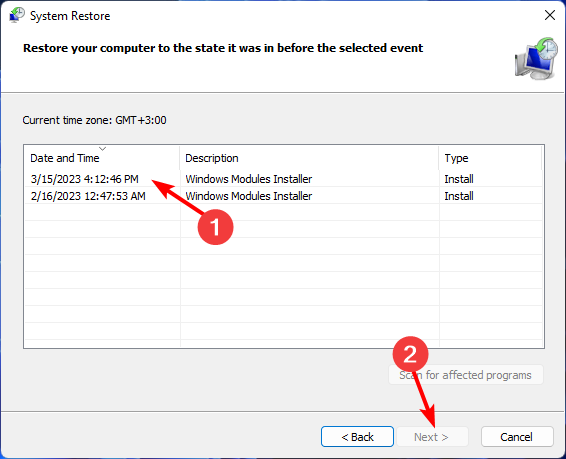
- Select the restore point you wish to revert to and click on Next.
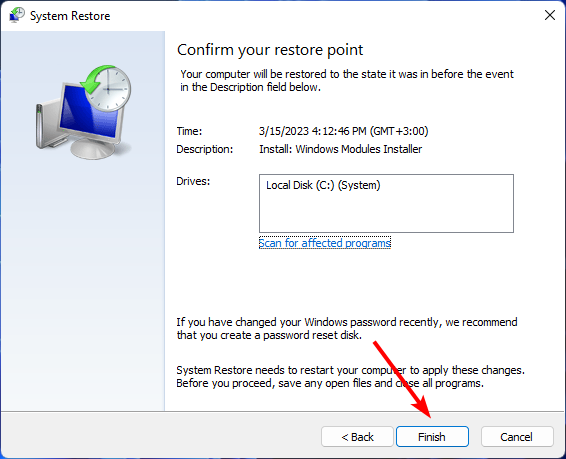
- Now click on Finish.

From the options above, it appears each solution has its own downside if you’re trying to get rid of avastvboxsvc.exe from your system.
The only viable option seems to be uninstalling the parent program. If Avast has been your dedicated antivirus program, you’ll have to look into other antivirus programs.
Offline antiviruses are a good alternative as they are known to consume less system resources compared to their counterparts. They also have reduced background activity unlike those that run in the background and are continuously scanning for threats.
After all, Avast has been known to have some issues. Avast is a CPU hogger and sometimes, it can keep detecting your network as a new one each time.
Other times, Avast can slow down your internet so in light of all these problems, it may be time to consider another reliable and comprehensive security software.
Have you encountered the avastvboxsvc.exe process or file on your device? What are other behavioural anomalies you picked up? Let us know in the comment section below.


User forum
0 messages